
Apply effects and appearance
An object in VectorCraft can have more than one fill and stroke, and live effects such as shadows, rounded corners and warps. This guide shows how to build that stack in the Appearance panel, apply and edit effects from the Effect menu, and save the result as a graphic style that you can apply to other objects with one click.
Build a look in the Appearance panel
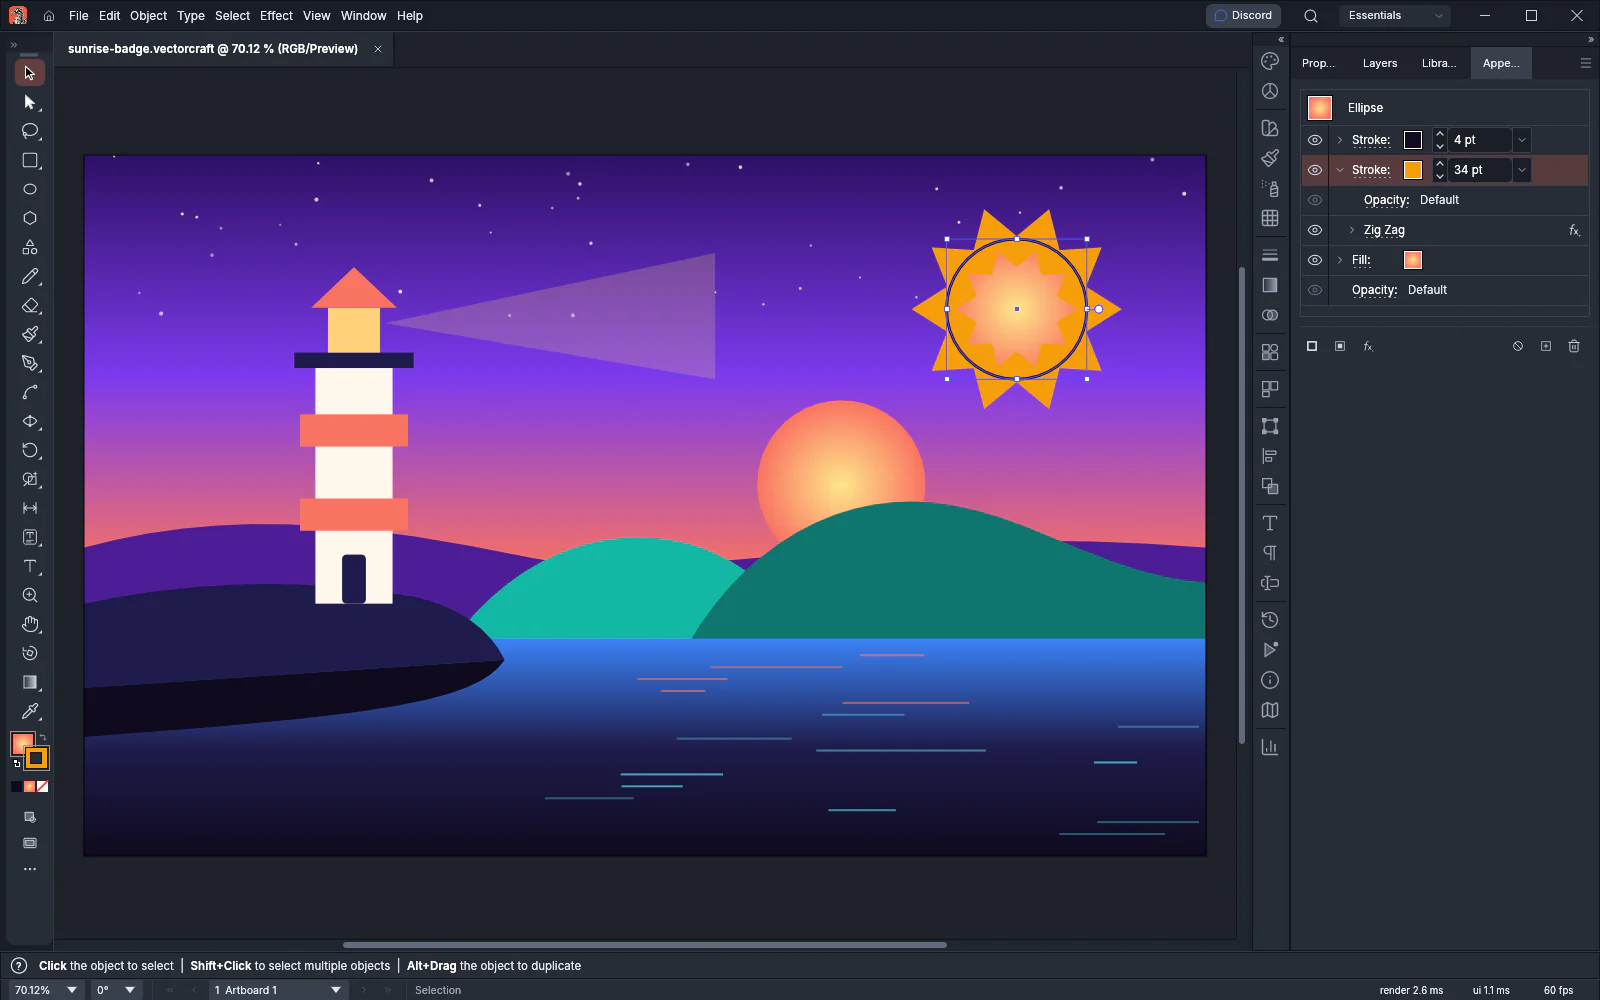
Section titled “Build a look in the Appearance panel”Window → Appearance (Shift+F6) lists everything that paints the selected object: its strokes and fills, the effects on each of them and on the whole object, and its opacity. The top row in the panel paints last, in front of the rows below it.
- Select an object and press Shift+F6 to open the Appearance panel.
- Press Ctrl+/ (Cmd+/ on macOS) to add a new fill, or Ctrl+Alt+/ (Cmd+Option+/ on macOS) to add a new stroke. The buttons at the bottom of the panel do the same: Add New Stroke and Add New Fill.
- Click the swatch in a row to pick one of the document’s swatches, or Shift-click it to mix a color in the Color panel. A stroke row also has a Weight field.
- Drag a row up or down to change the order. Hold Alt (Option on macOS) while you drag to copy the row instead of moving it.
- Click the eye at the left of a row to hide that row without deleting it. Click it again to show the row.
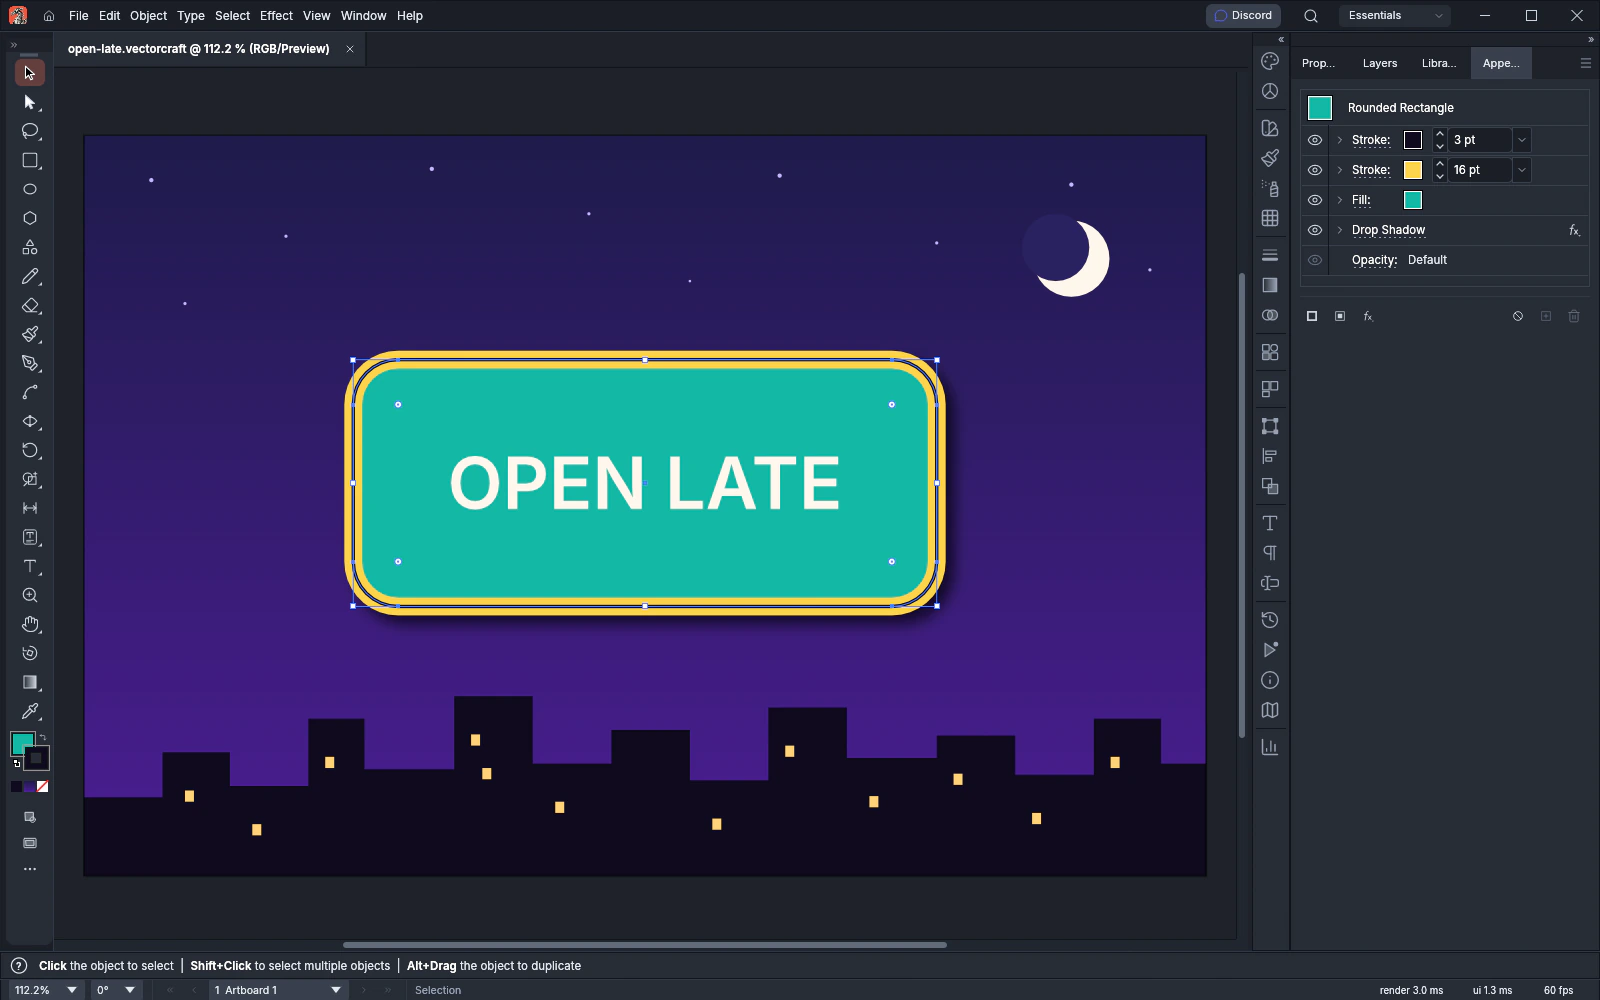
The following screenshot shows a teal badge with a thin dark stroke, a wide yellow stroke behind it and a drop shadow, as the Appearance panel lists them.
The buttons at the bottom of the panel act on the selected object or row:
| Button | What it does |
|---|---|
| Add New Stroke | Adds a stroke on top of the object’s stack |
| Add New Fill | Adds a fill on top of the object’s stack |
| Add New Effect | Opens a menu of effects to apply |
| Clear Appearance | Leaves the object one fill and one stroke, both set to None, and resets its opacity |
| Duplicate Selected Item | Copies the selected fill or stroke row with its effects, or the selected effect row |
| Delete Selected Item | Removes the selected fill, stroke or effect row |
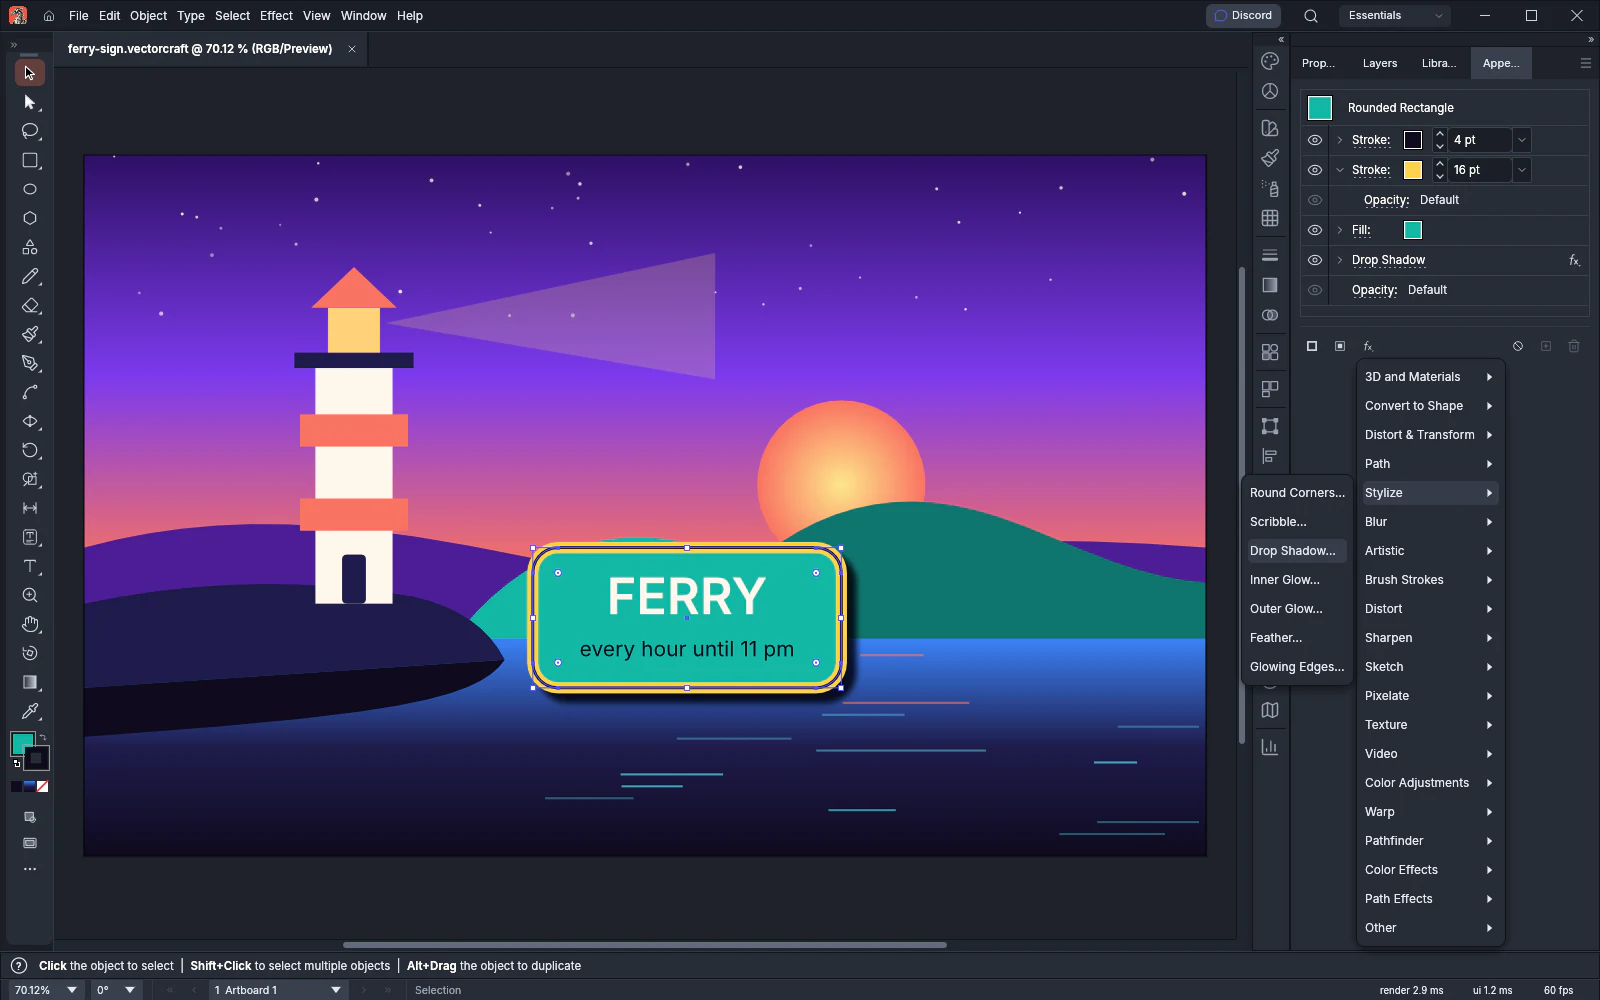
The panel menu has Reduce to Basic Appearance, which keeps one fill and one stroke and removes every effect.
Apply a live effect
Section titled “Apply a live effect”Effects in VectorCraft stay live. The object keeps its original path, and VectorCraft draws the effect from that path each time the canvas redraws. You can change or remove an effect at any time.
- Select an object.
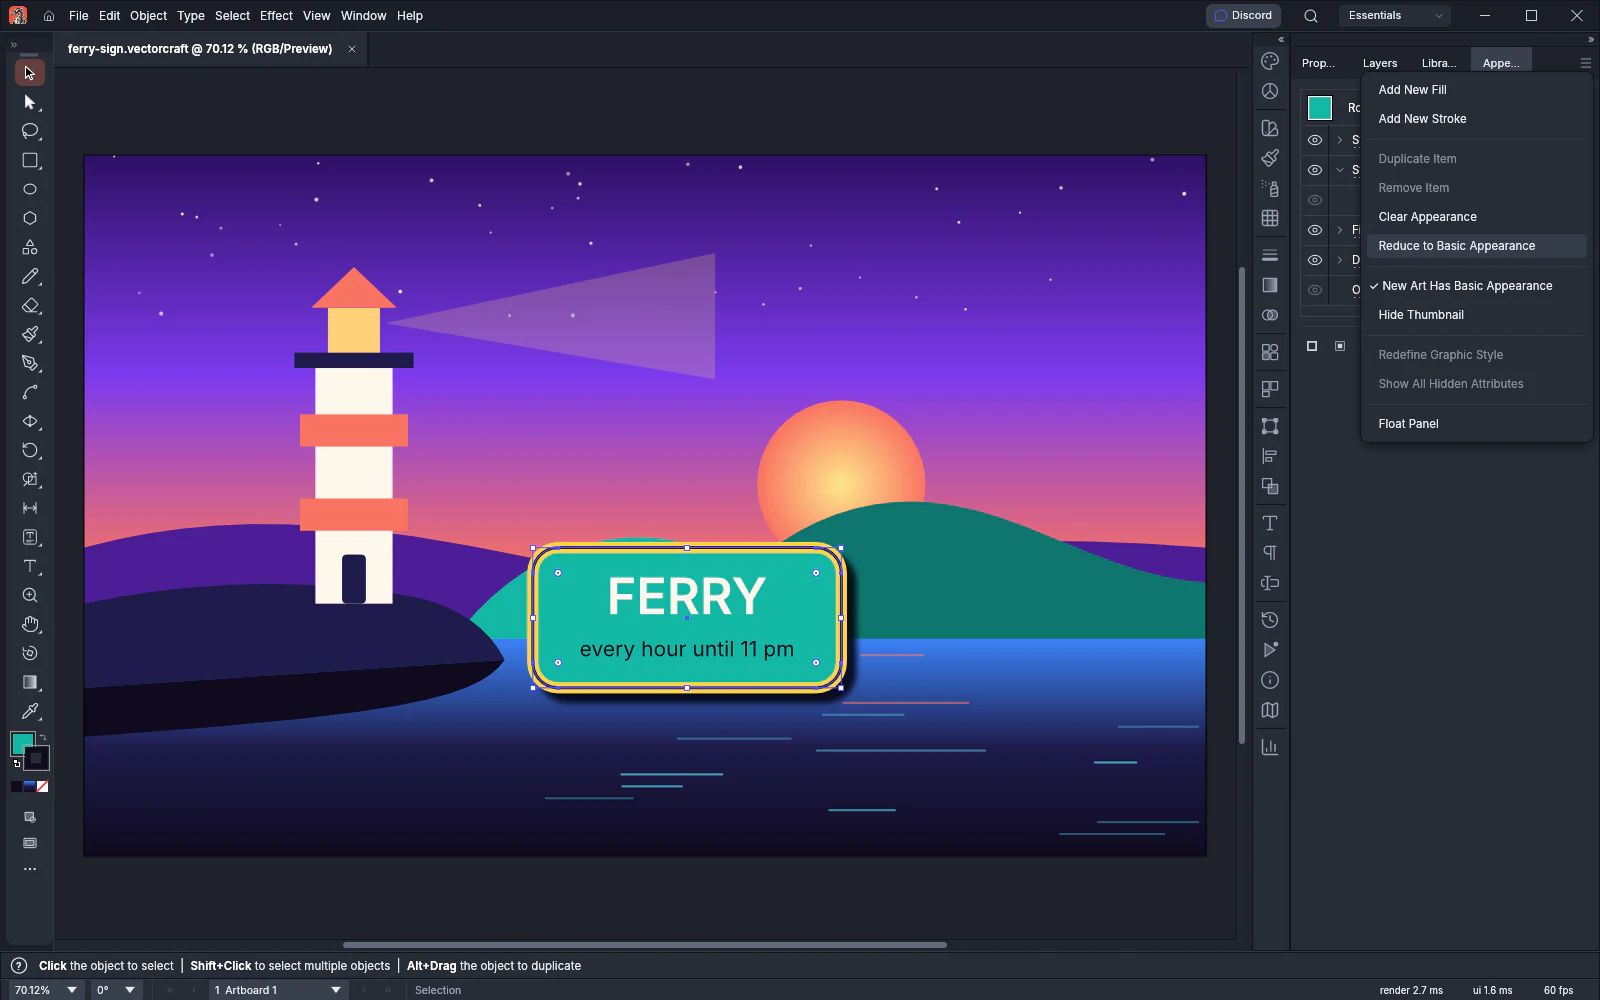
- Choose an effect from the Effect menu, for example Effect → Stylize → Drop Shadow….
- Change the settings in the dialog. Preview is on when the dialog opens, so the canvas shows the result while you change the values.
- Press OK.
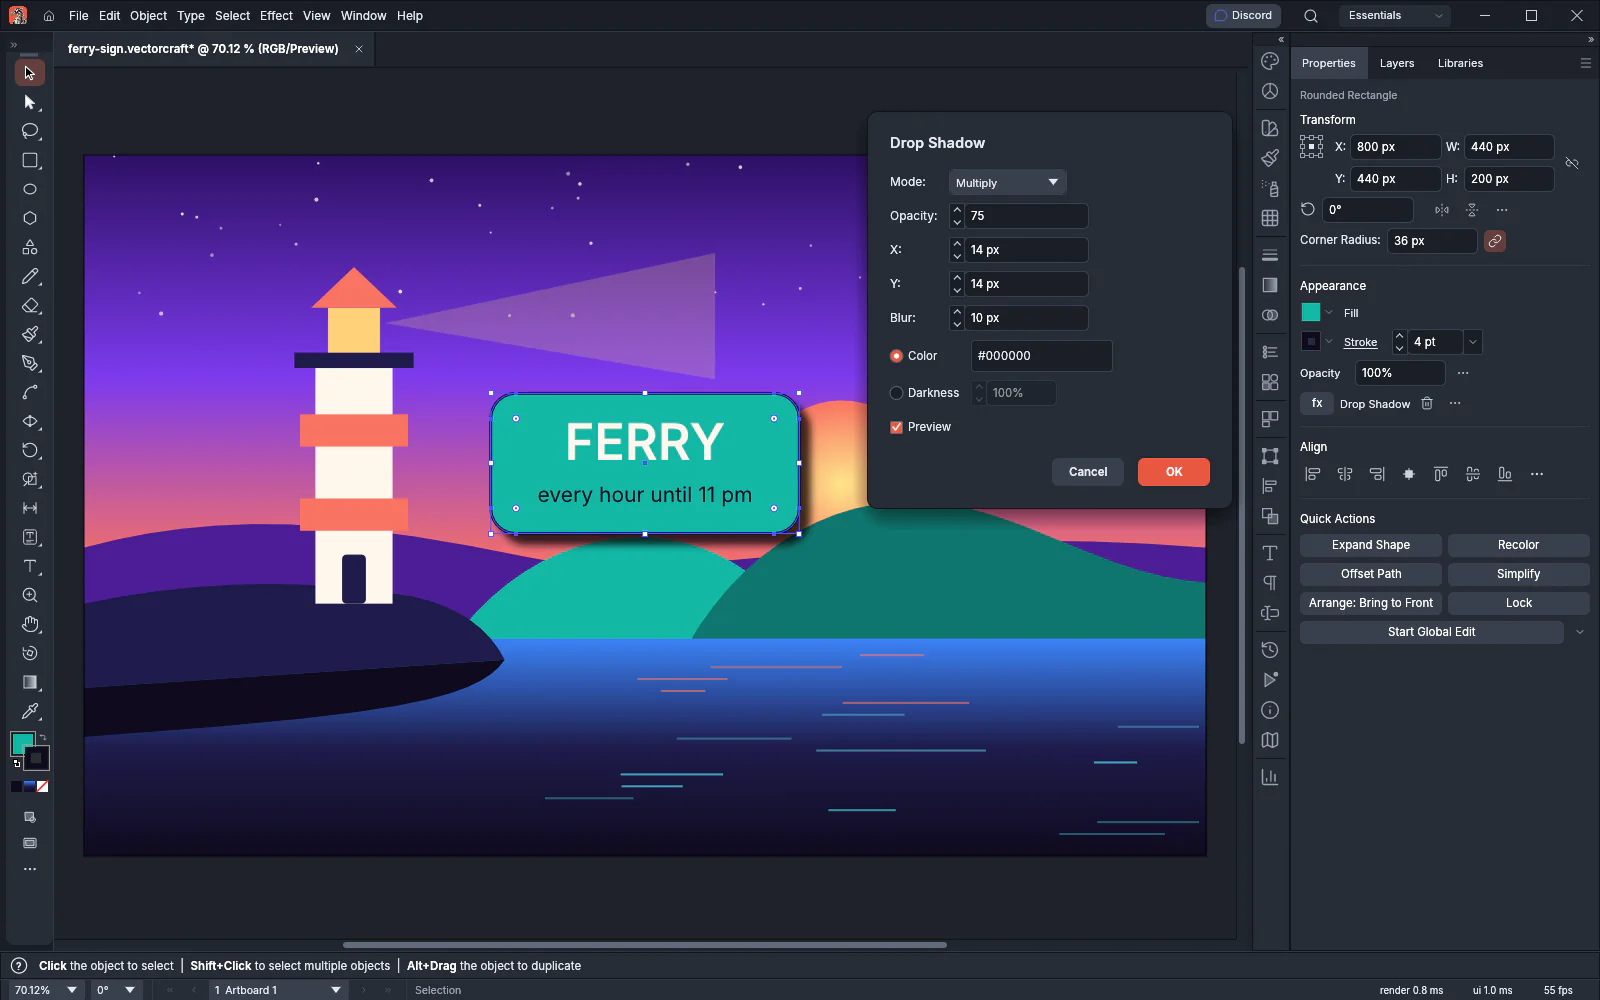
To change an effect later, select the object and double-click the effect’s row in the Appearance panel, or click its name. The dialog opens with the current values.
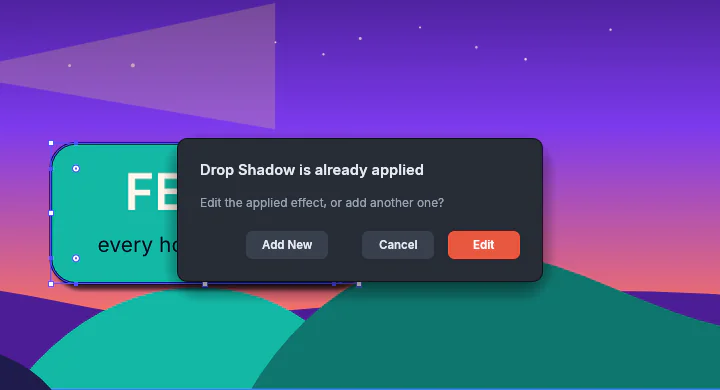
To apply an effect to one fill or stroke only, click that row in the Appearance panel first, then choose the effect. Without a selected row, the effect applies to the whole object.
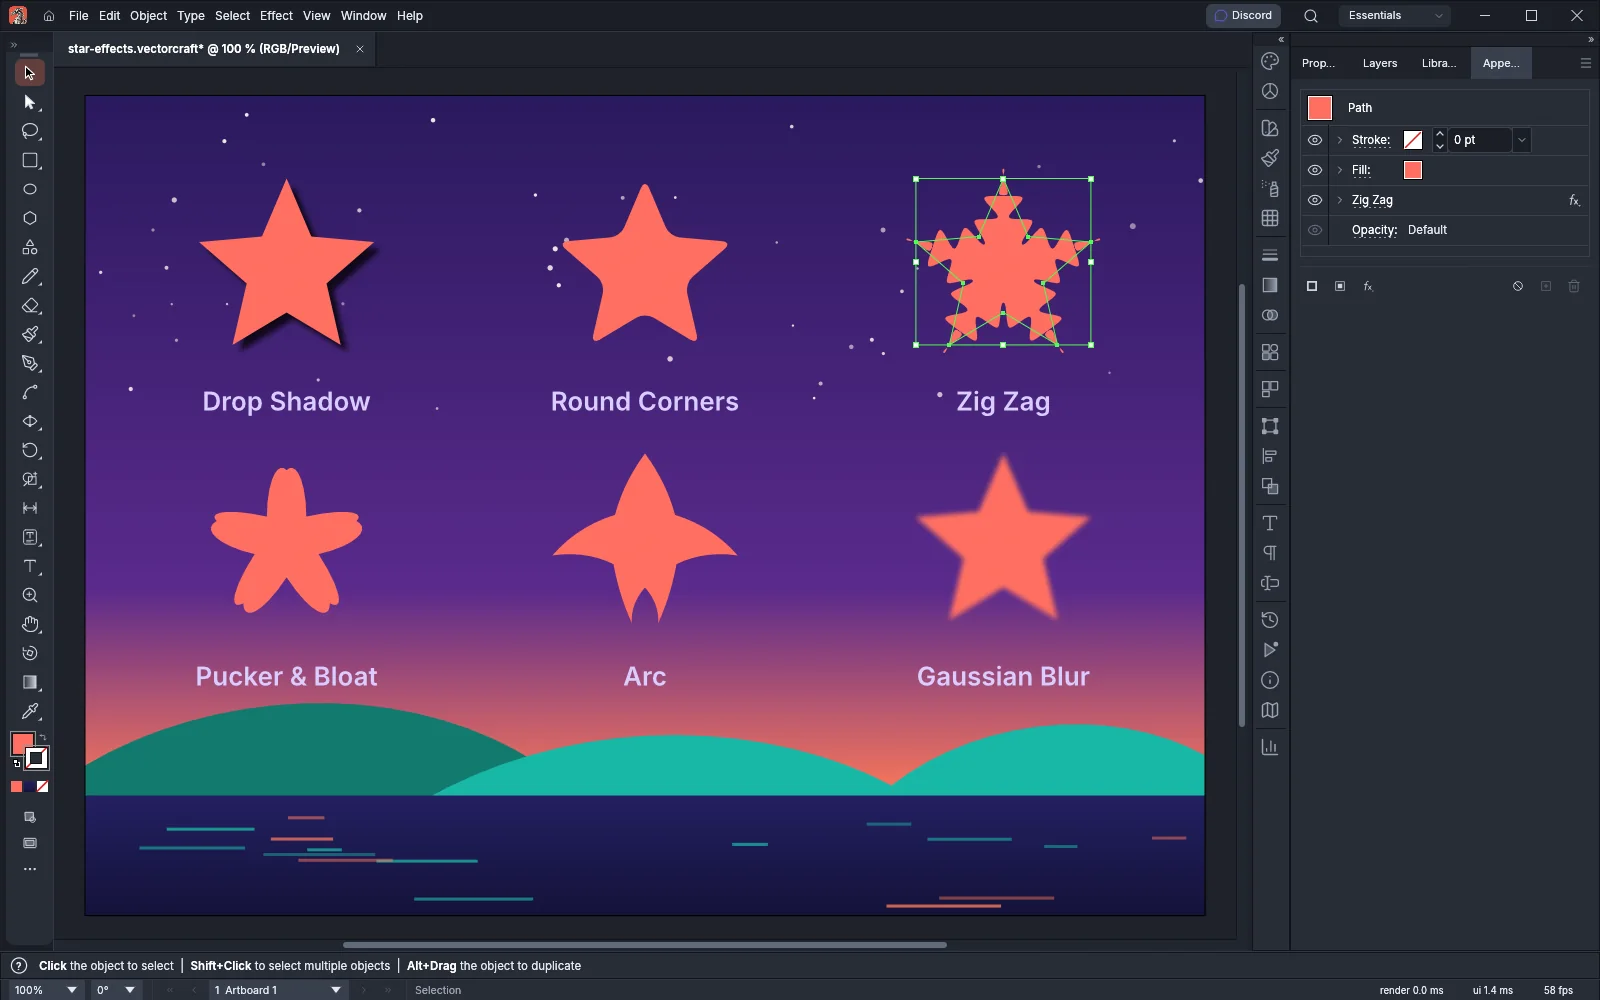
The following image shows the same star with six different live effects. Each star still has its original five-point path.
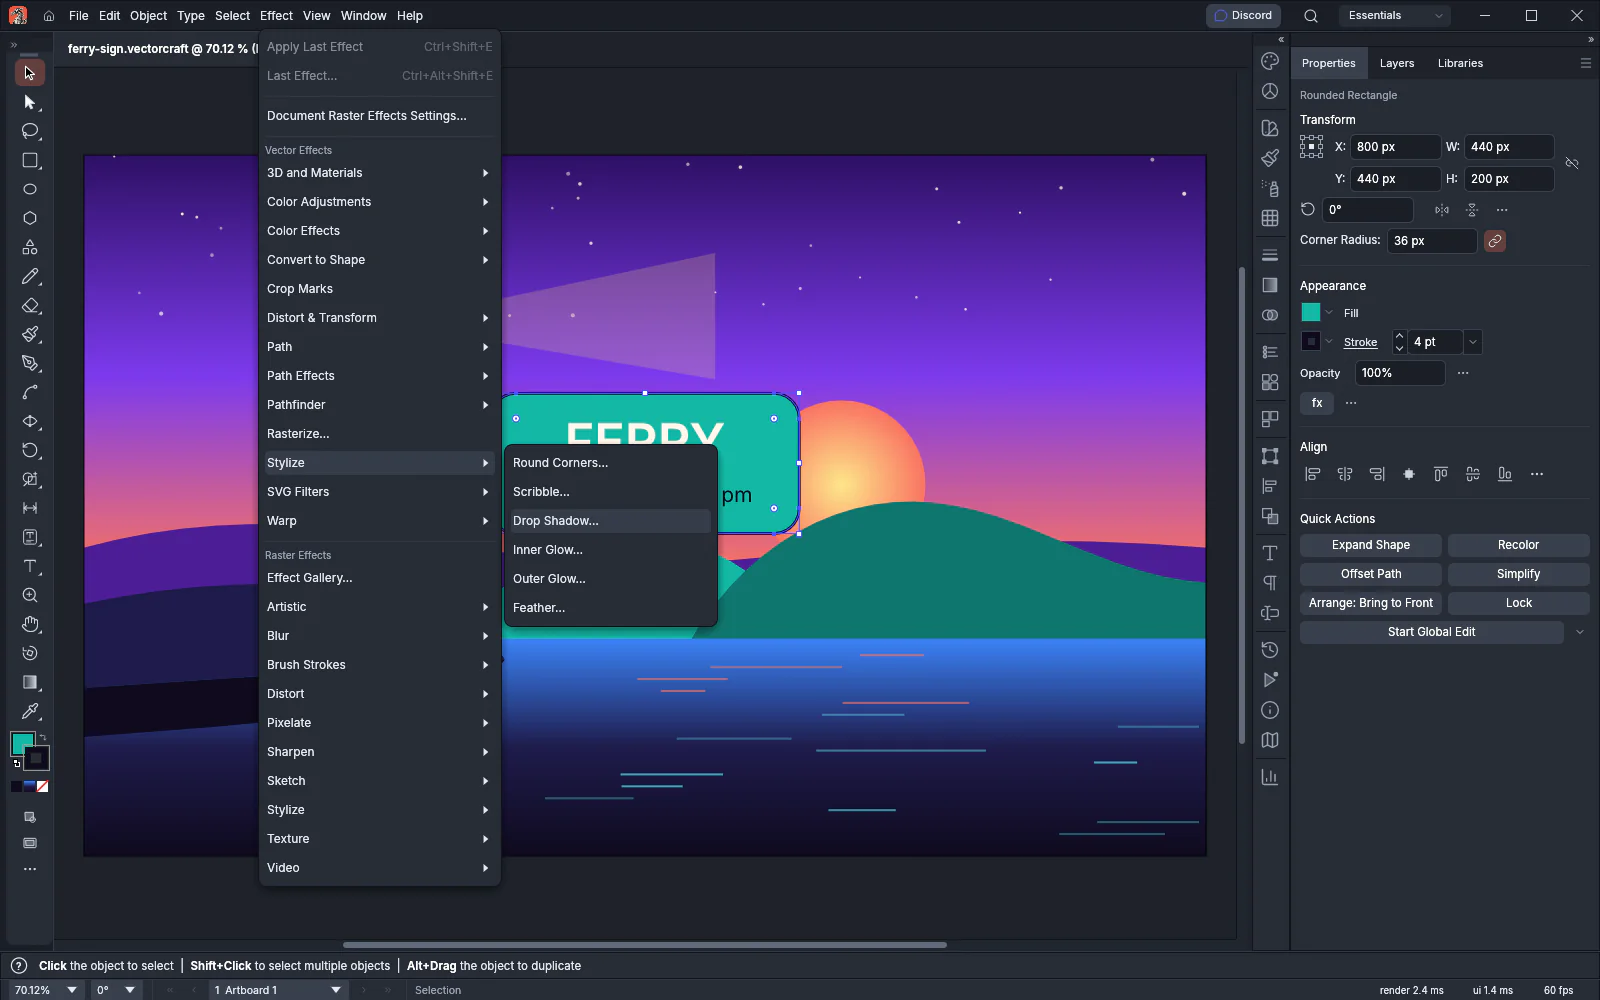
The Effect menu
Section titled “The Effect menu”The top of the Effect menu has three commands:
- Apply Last Effect applies the last effect again with the same settings.
- Last Effect… opens the dialog of the last effect, where you can change the settings before you apply it.
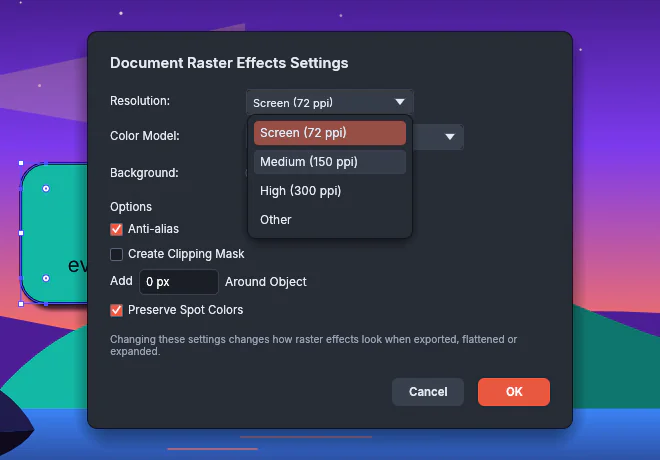
- Document Raster Effects Settings… sets the resolution and other options for raster effects.
Under the Vector Effects heading, the menu lists 3D and Materials, Color Adjustments, Color Effects, Convert to Shape, Crop Marks, Distort & Transform, Path, Path Effects, Pathfinder, Rasterize…, Stylize, SVG Filters and Warp. Under the Raster Effects heading, it lists the Effect Gallery… and pixel-based groups such as Artistic, Blur and Sketch.
The Stylize group under Vector Effects holds Round Corners…, Scribble…, Drop Shadow…, Inner Glow…, Outer Glow… and Feather….
Vector effects at a glance
Section titled “Vector effects at a glance”The following table lists every group under the Vector Effects heading and the effects in it. A command whose name ends in “…” opens a dialog. A command without “…” applies the effect at once.
| Group | Effects |
|---|---|
| 3D and Materials | Extrude & Bevel…, Revolve…, Inflate…, Rotate…; Materials… is listed but dimmed |
| Color Adjustments | Brightness/Contrast…, Curves…, Hue/Saturation…, Levels…, Shift to Color…, Temperature/Tint… |
| Color Effects | Desaturate, Duotone…, Exposure…, Invert Colors, Vector Halftone… |
| Convert to Shape | Rectangle…, Rounded Rectangle…, Ellipse… |
| Crop Marks | A single command that adds trim marks around the object’s bounds |
| Distort & Transform | Free Distort…, Pucker & Bloat…, Roughen…, Transform…, Tweak…, Twist…, Zig Zag… |
| Path | Offset Path…, Outline Object, Outline Stroke |
| Path Effects | Dashes to Geometry…, Add Anchors…, Extend Path…, Close Path…, Smooth Anchors…, Retract Handles…, Reverse Direction, Simplify Anchors…, Split at Anchors… |
| Pathfinder | Add, Intersect, Exclude, Subtract, Minus Back, Divide, Trim, Merge, Crop, Outline, Hard Mix, Soft Mix, Trap… |
| Rasterize… | A single command that draws the object as an image, with its own resolution and background settings |
| Stylize | Round Corners…, Scribble…, Drop Shadow…, Inner Glow…, Outer Glow…, Feather… |
| SVG Filters | Apply SVG Filter… is listed but dimmed |
| Warp | Arc…, Arc Lower…, Arc Upper…, Arch…, Bulge…, Shell Lower…, Shell Upper…, Flag…, Wave…, Fish…, Rise…, Fisheye…, Inflate…, Squeeze…, Twist… |
Common effects
Section titled “Common effects”When you add one of these effects, its dialog opens with these values. After you confirm a warp once, the Arc dialog opens with the warp settings you last confirmed.
| Effect | Menu path | Defaults |
|---|---|---|
| Drop Shadow | Effect → Stylize → Drop Shadow… | Multiply mode, 75% opacity, X and Y offset 7 pt, blur 5 pt, black |
| Round Corners | Effect → Stylize → Round Corners… | Radius 10 pt |
| Outer Glow | Effect → Stylize → Outer Glow… | Screen mode, 75% opacity, blur 5 pt, yellow |
| Feather | Effect → Stylize → Feather… | Radius 5 pt |
| Offset Path | Effect → Path → Offset Path… | Offset 10 pt, miter joins, miter limit 4 |
| Zig Zag | Effect → Distort & Transform → Zig Zag… | Size 10 pt, 4 ridges per segment, smooth points |
| Pucker & Bloat | Effect → Distort & Transform → Pucker & Bloat… | 0%; negative values pucker and positive values bloat, from -200% to 200% |
| Arc | Effect → Warp → Arc… | Bend 50%, horizontal |
| Gaussian Blur | Effect → Blur → Gaussian Blur… (under Raster Effects) | Radius 5 pt |
Apply raster effects with the Effect Gallery
Section titled “Apply raster effects with the Effect Gallery”Raster effects work on the pixels of the object’s image at the resolution that Document Raster Effects Settings… sets. They stay live in the same way as vector effects. The Raster Effects part of the Effect menu has ten groups:
| Group | Effects |
|---|---|
| Artistic | Colored Pencil…, Cutout…, Dry Brush…, Film Grain…, Fresco…, Neon Glow…, Paint Daubs…, Palette Knife…, Plastic Wrap…, Poster Edges…, Rough Pastels…, Smudge Stick…, Sponge…, Underpainting…, Watercolor… |
| Blur | Gaussian Blur…, Radial Blur…, Smart Blur… |
| Brush Strokes | Accented Edges…, Angled Strokes…, Crosshatch…, Dark Strokes…, Ink Outlines…, Spatter…, Sprayed Strokes…, Sumi-e… |
| Distort | Diffuse Glow…, Glass…, Ocean Ripple… |
| Pixelate | Color Halftone…, Crystallize…, Mezzotint…, Pointillize… |
| Sharpen | Unsharp Mask… |
| Sketch | Bas Relief…, Chalk & Charcoal…, Charcoal…, Chrome…, Conté Crayon…, Graphic Pen…, Halftone Pattern…, Note Paper…, Photocopy…, Plaster…, Reticulation…, Stamp…, Torn Edges…, Water Paper… |
| Stylize | Glowing Edges… |
| Texture | Craquelure…, Grain…, Mosaic Tiles…, Patchwork…, Stained Glass…, Texturizer… |
| Video | De-Interlace…, NTSC Colors |
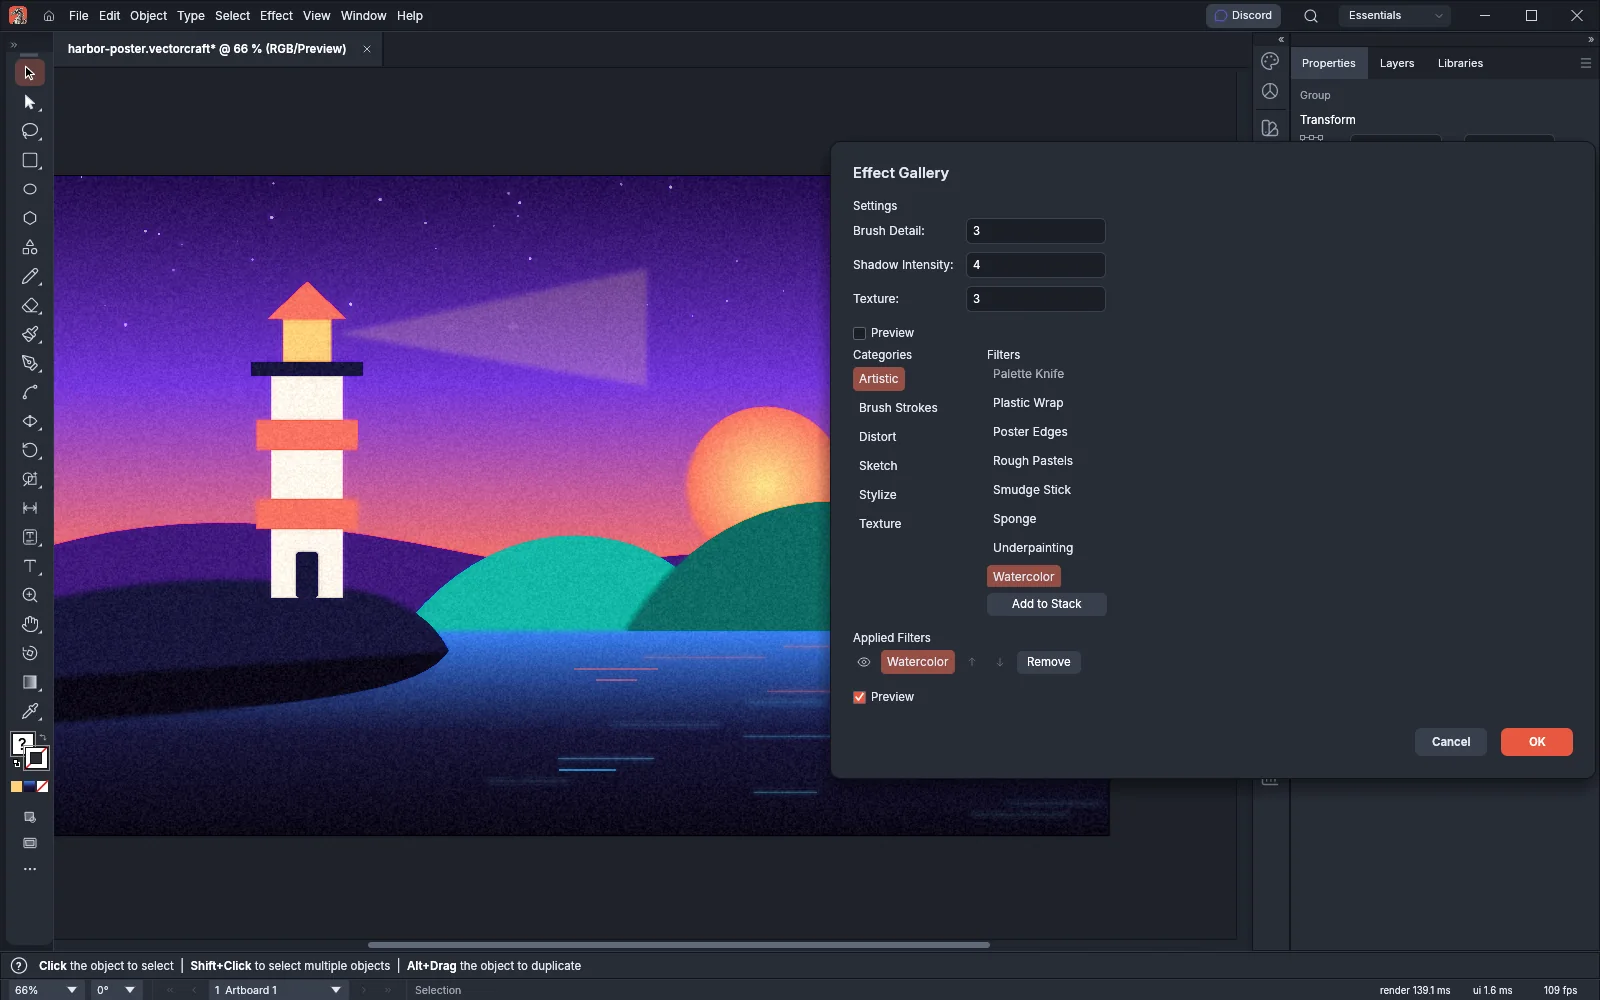
You can choose any of these from its group in the menu. To try several filters together and stack them, use the Effect Gallery, which holds the Artistic, Brush Strokes, Distort, Sketch, Stylize and Texture groups:
- Select the artwork. With nothing selected, VectorCraft shows “Select artwork to apply effects” and the gallery does not open.
- Choose Effect → Effect Gallery….
- Click a group under Categories, then click a filter under Filters. The filters in each group are listed in alphabetical order.
- Click Add to Stack, or double-click the filter. It appears under Applied Filters, and its values appear under Settings at the top of the dialog.
- Change the values under Settings. To change another filter in the stack, click its name under Applied Filters.
- Add more filters in the same way. In each Applied Filters row, click the eye to hide the filter, the arrows to move it up or down, or Remove to take it out.
- Leave Preview, at the bottom of the dialog, turned on to see the stack on the canvas, then press OK.
OK adds each filter in the stack to the object as a separate effect, in the stack’s order, and you can undo the whole stack in one step. A filter that you hid in the stack is added hidden. After that, each filter has its own row in the Appearance panel, where you can change it like any other effect.
The following screenshot shows the Effect Gallery beside a harbor illustration, with Watercolor added to the stack and previewed on the art.
To paint strokes with brushes instead of a filter, see Paint with brushes.
Blend, repeat and distort objects
Section titled “Blend, repeat and distort objects”Blends, repeats and envelopes stay live in the same way as effects: you can change the original objects at any time and the result updates.
- Object → Blend → Make (Ctrl+Alt+B, or Cmd+Option+B on macOS) fills the space between two selected objects with steps that change smoothly from one to the other. Object → Blend → Blend Options… sets the Spacing: Smooth Color, Specified Steps or Specified Distance.
- Object → Repeat repeats the selection in a Radial, Grid or Mirror pattern that updates as you edit the original.
- Object → Envelope Distort bends artwork, type included, with Make with Warp…, Make with Mesh… or Make with Top Object, which uses the shape on top.
Make patterns, blends and repeats covers blends and repeats in full, and Reshape with the warp tools covers Envelope Distort and the tools that push and twist paths.
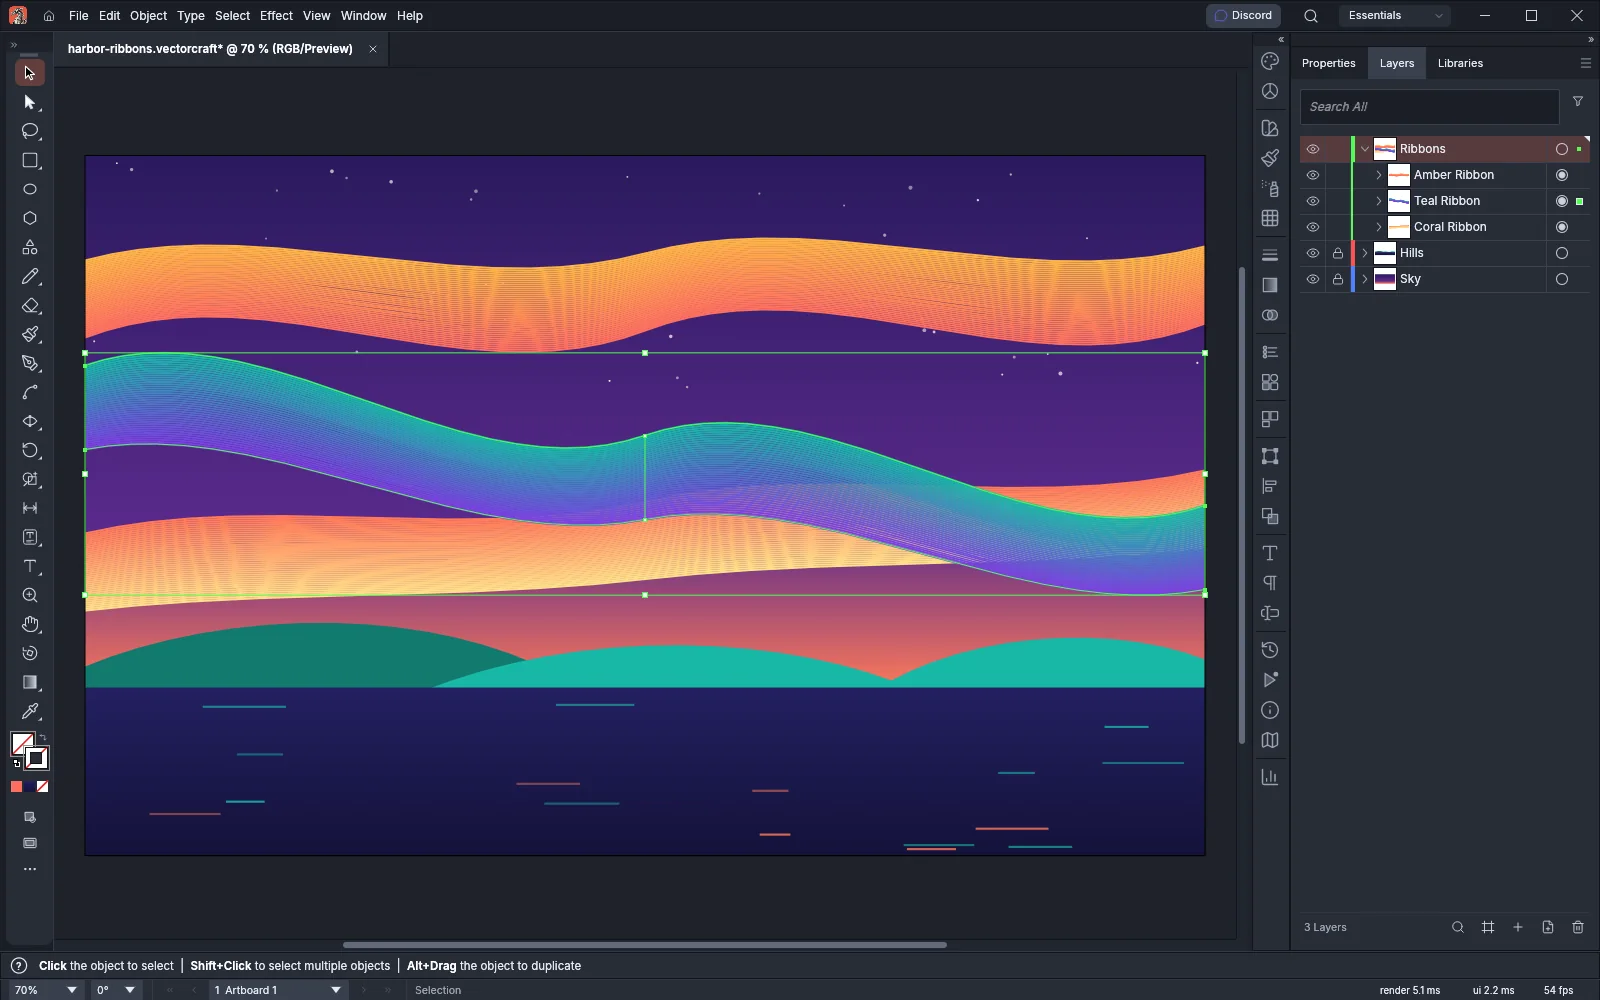
The following screenshot shows three ribbons made with blends. One blend is selected with its two key paths showing.
Add 3D
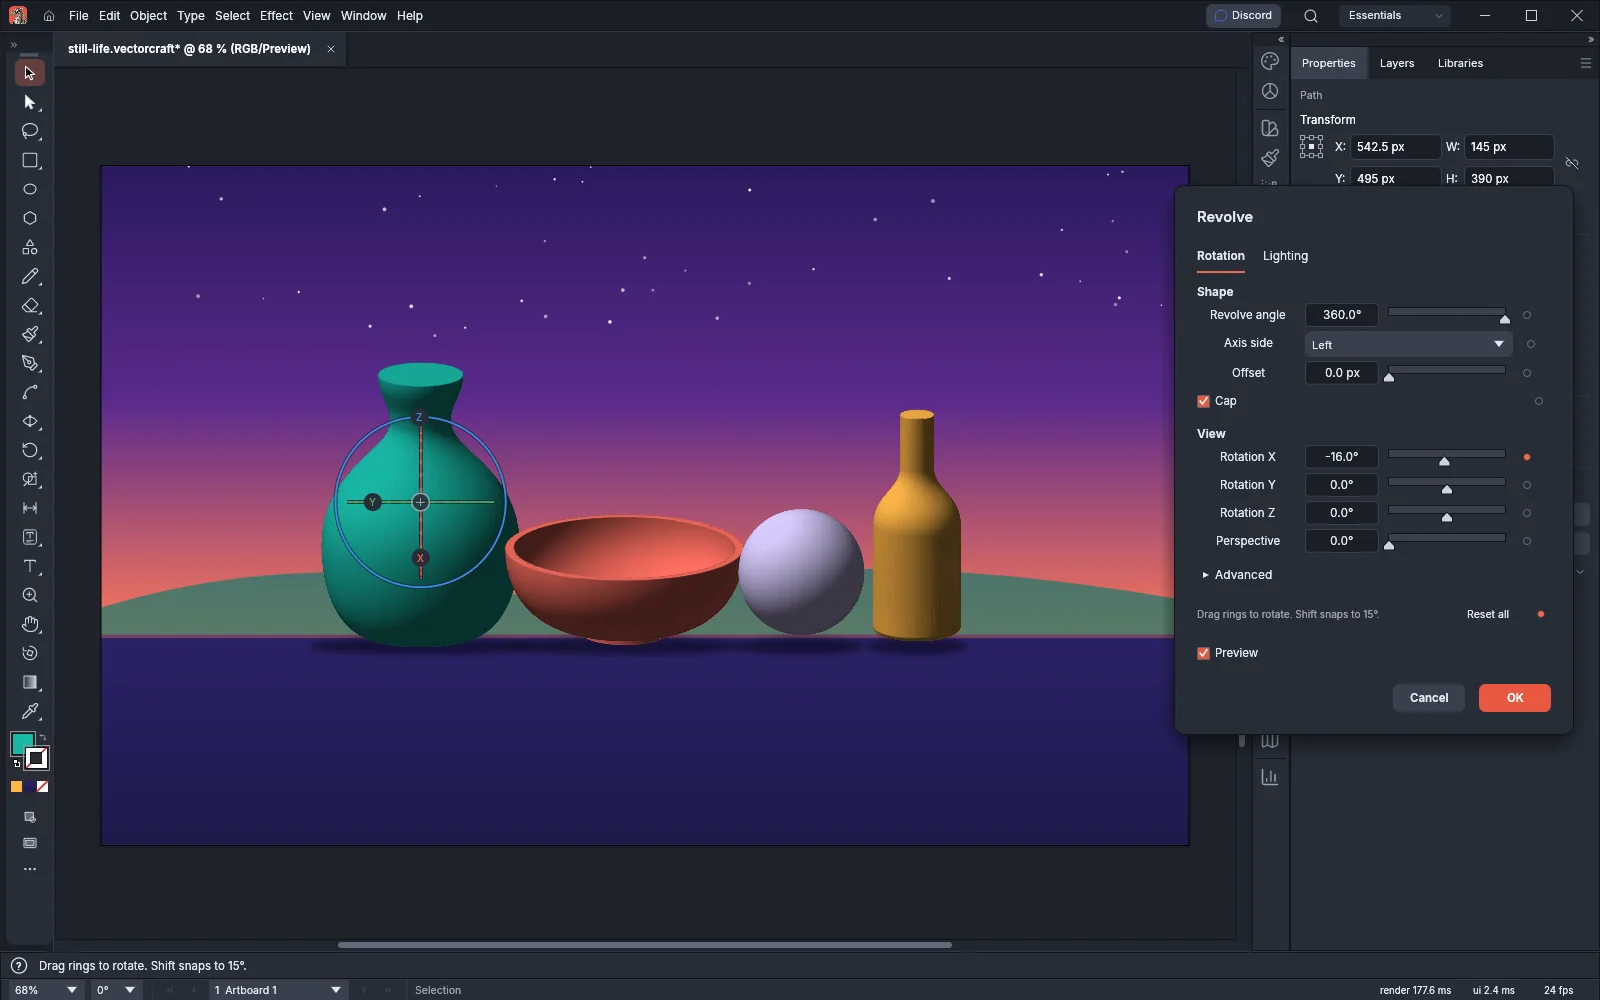
Section titled “Add 3D”Effect → 3D and Materials has Extrude & Bevel…, Revolve…, Inflate… and Rotate…. Revolve… spins a profile around an axis, so the outline of half a vase becomes a whole vase. While the dialog is open, drag the rings on the canvas to turn the object, and use the Lighting tab to light it.
The other three commands work on the object’s own outline:
- Extrude & Bevel… uses the art as the front face and extrudes it backward, so a word or a flat shape becomes a solid block. A bevel shapes its front edges.
- Inflate… rounds the shape outward, so its edges curve like the edges of a cushion.
- Rotate… turns the flat art in 3D without adding depth. Every fill and stroke keeps its paint.
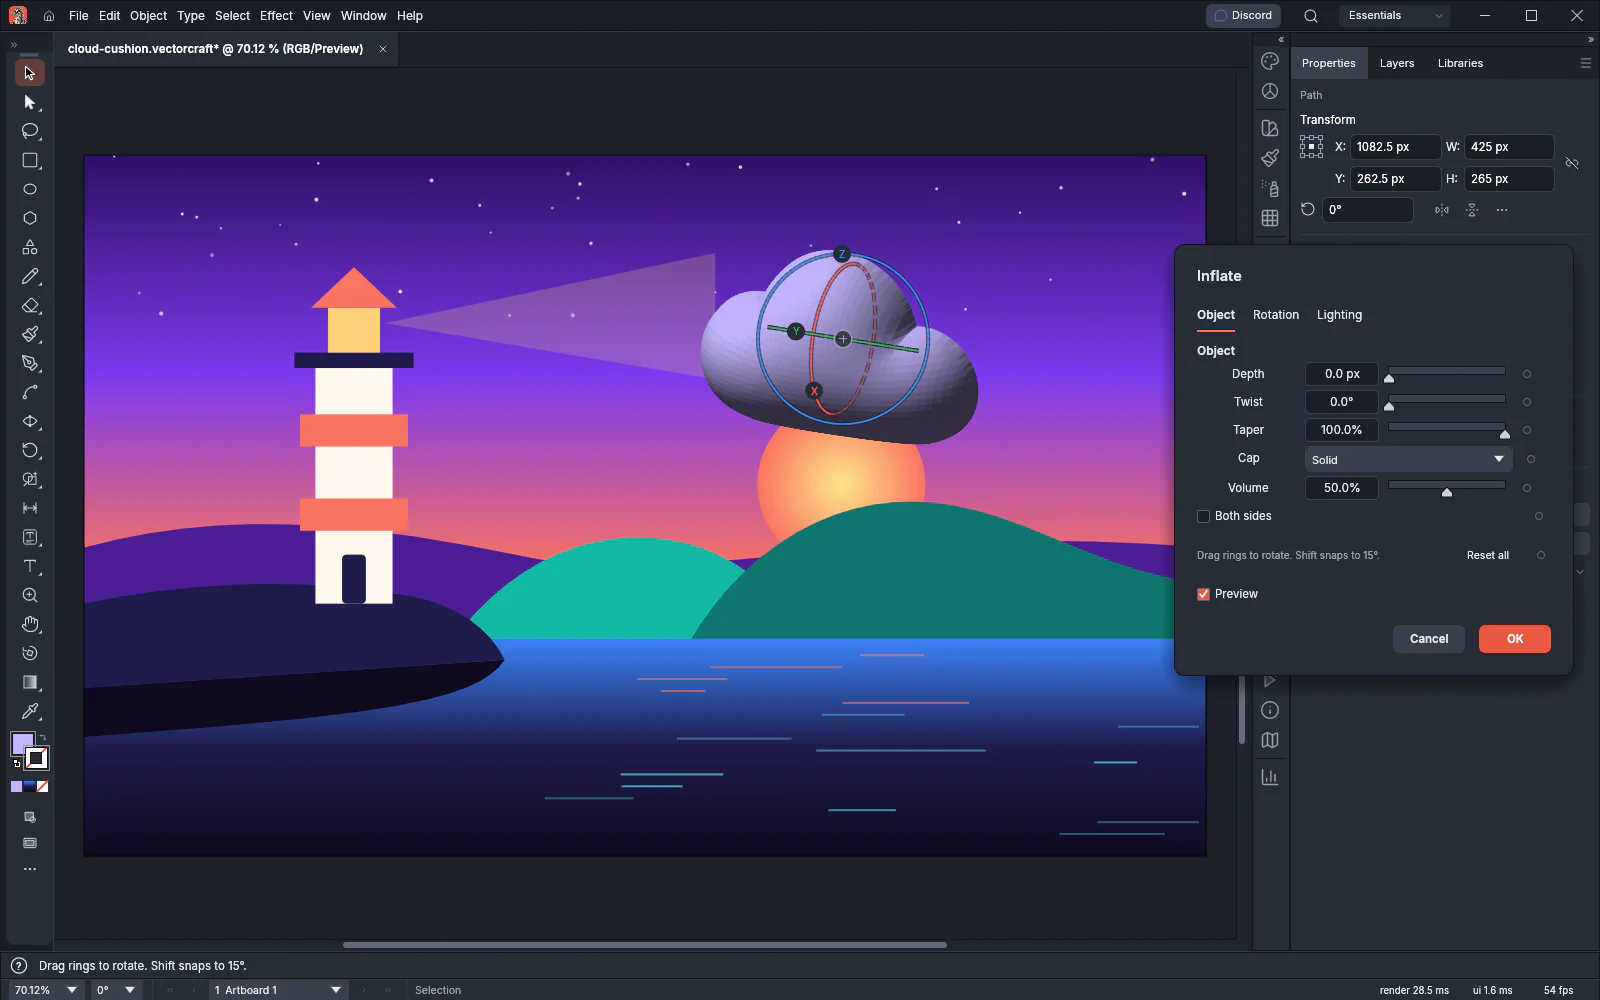
To extrude an object:
- Select the object, for example a line of type.
- Choose Effect → 3D and Materials → Extrude & Bevel…. The dialog opens on its Object tab, and rings appear over the object on the canvas.
- Set the Depth, and pick a Bevel Shape if you want a beveled edge.
- Drag the rings to turn the object. Hold Shift while you drag to turn it in steps of 15°. You can also pick a position from Presets on the Rotation tab.
- On the Lighting tab, choose a lighting preset or change the light.
- Press OK.
The following screenshot shows the word LANTERN extruded 50 px deep with a Classic bevel, over a night skyline.
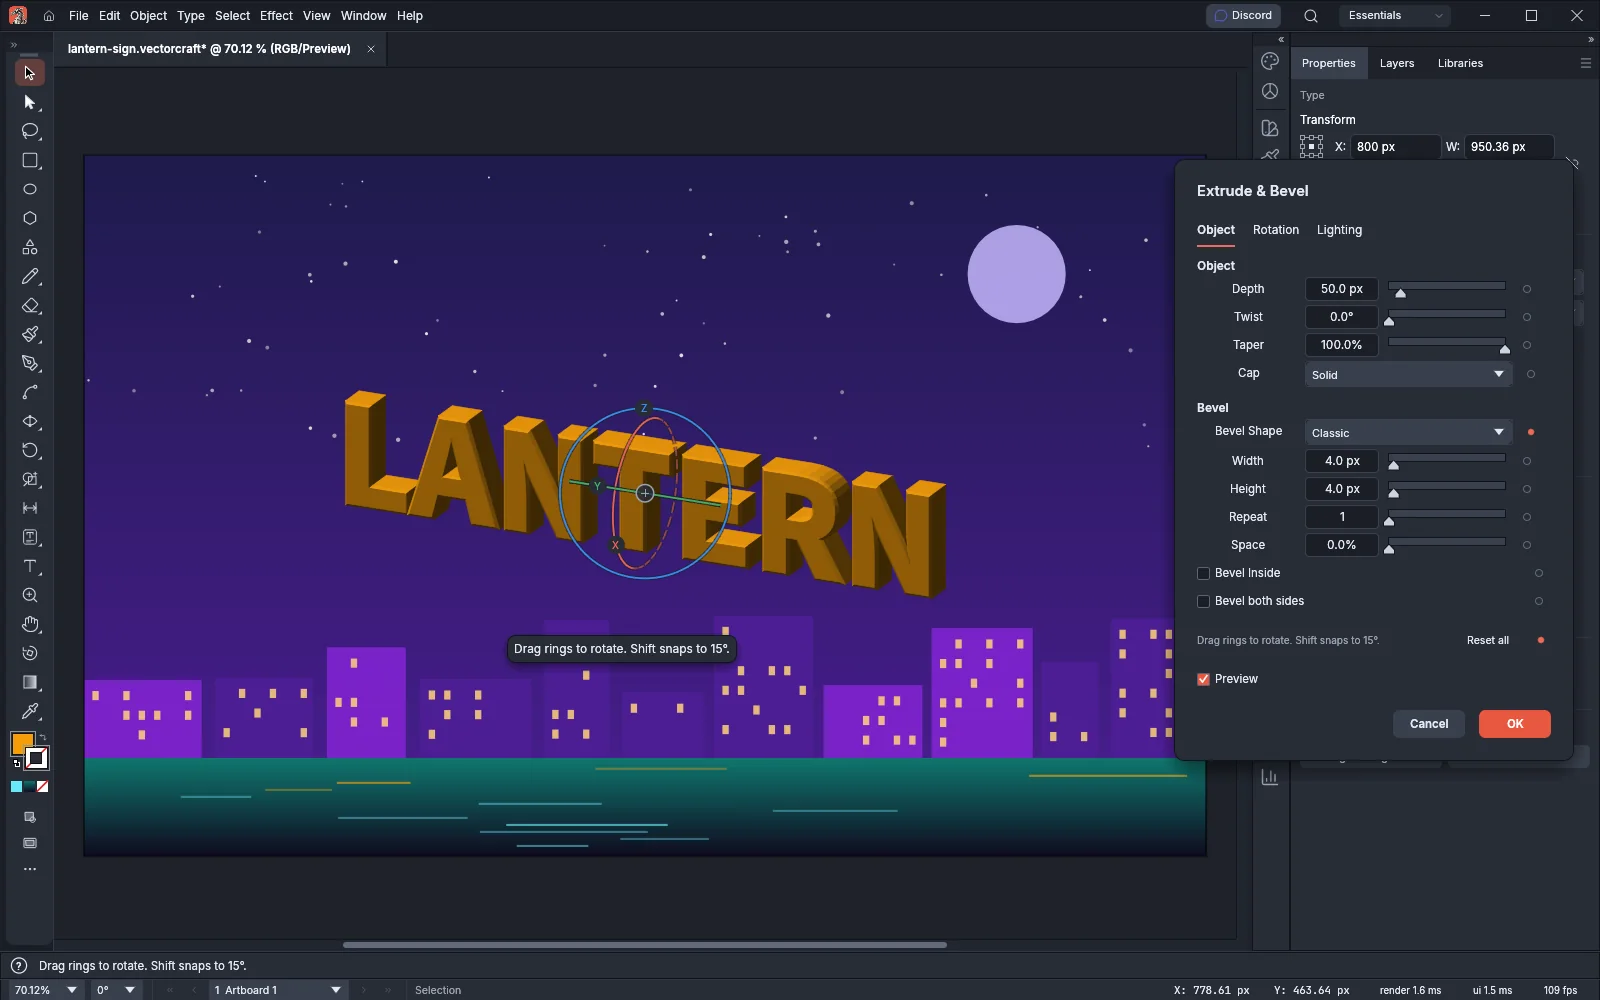
Extrude & Bevel and Inflate have three tabs: Object, Rotation and Lighting. Rotate has only Rotation and Lighting. Reset all, at the bottom of the dialog, puts every setting back to its default.
| Setting | Tab | Default | What it does |
|---|---|---|---|
| Depth | Object | 50 pt (Extrude & Bevel), 0 pt (Inflate) | How far the object extends back, from 0 to 2000 pt |
| Twist | Object | 0° | Turns the back against the front, from 0° to 360° |
| Taper | Object | 100% | The size of the back compared with the front, from 1% to 100% |
| Cap | Object | Solid | Solid closes the object; Hollow leaves it open |
| Bevel Shape | Object (Extrude & Bevel) | None | None, Classic, Rounded, Cove, Step or Ogee |
| Width, Height | Object (Extrude & Bevel) | 4 pt | The size of the bevel, from 0 to 1000 pt |
| Repeat, Space | Object (Extrude & Bevel) | 1, 0% | How many times the bevel repeats (1 to 32), and the flat space between repeats (0% to 90%) |
| Bevel Inside, Bevel both sides | Object (Extrude & Bevel) | Off | Cuts the bevel into the shape instead of adding it around the shape, and bevels the back as well as the front |
| Volume | Object (Inflate) | 50% | How round the edge is, from 0% to 100%; 50% rounds it like half a sphere |
| Both sides | Object (Inflate) | Off | Inflates the back as well; off leaves the back flat |
| Presets | Rotation | Off-Axis Front | Sixteen positions, from Front to Isometric Bottom |
| Rotation X, Y, Z | Rotation | -21.88°, -23.4°, 9.06° | The angle around each axis, from -180° to 180° |
| Perspective | Rotation | 0° | 0° shows no perspective; a wider angle brings the eye nearer, up to 160° |
| Shading | Lighting | On | Shades the surfaces by the lights |
| Presets | Lighting | Standard | Standard, Diffuse, Top Left or Right |
| Add Light, Delete Light | Lighting | One light | Up to 10 lights; each has its own Color, Intensity (80%), Rotation, Height (30°) and Softness (0%) |
| Ambient Light | Lighting | 25% | Light that reaches every surface, from 0% to 200% |
| Light behind the object | Lighting | Off | Lights the object from behind |
Width, Height, Repeat, Space, Bevel Inside and Bevel both sides are dimmed while Bevel Shape is None. The Depth, Width and Height fields show their values in the document’s unit, so a document set to pixels shows the default depth as 50.0 px.
Make the appearance permanent
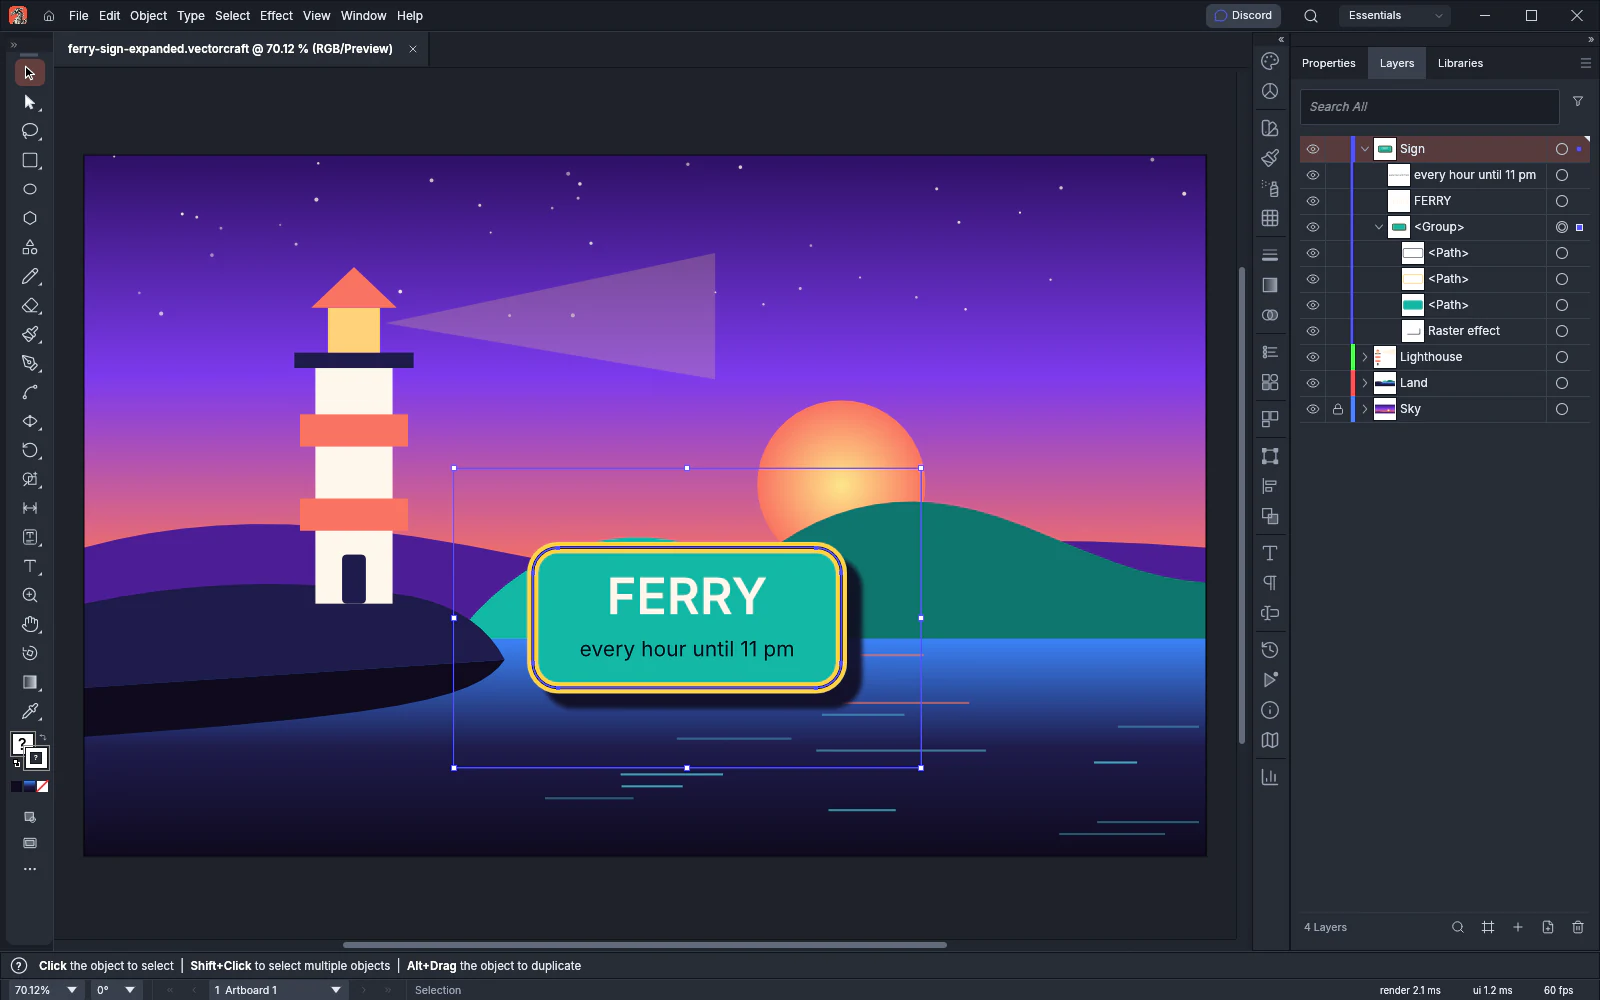
Section titled “Make the appearance permanent”Object → Expand Appearance turns the selected object’s appearance into ordinary objects:
- Each fill and stroke becomes an object of its own, grouped in paint order.
- Effects that change the shape, such as Zig Zag or Round Corners, are applied to the paths.
- Raster effects such as shadows, glows and blurs become embedded images.
- Hidden fills, strokes and effects are dropped.
Save and reuse a graphic style
Section titled “Save and reuse a graphic style”A graphic style stores an object’s whole appearance: its fills, strokes, effects, opacity and blend mode. Window → Graphic Styles (Shift+F5) lists the styles in the document.
- Select an object that has the look you want to keep.
- In the Graphic Styles panel, press New Graphic Style. Alt-click the button (Option-click on macOS) to name the style as you make it.
- Select another object and click the style in the panel to apply it.
An object that you apply a style to stays linked to that style. Alt-click a style (Option-click on macOS) to add its fills, strokes and effects on top of the object’s existing appearance instead; this unlinks the object. Double-click a style to open Graphic Style Options….
The following image shows a style saved from one rectangle and applied to the other two.
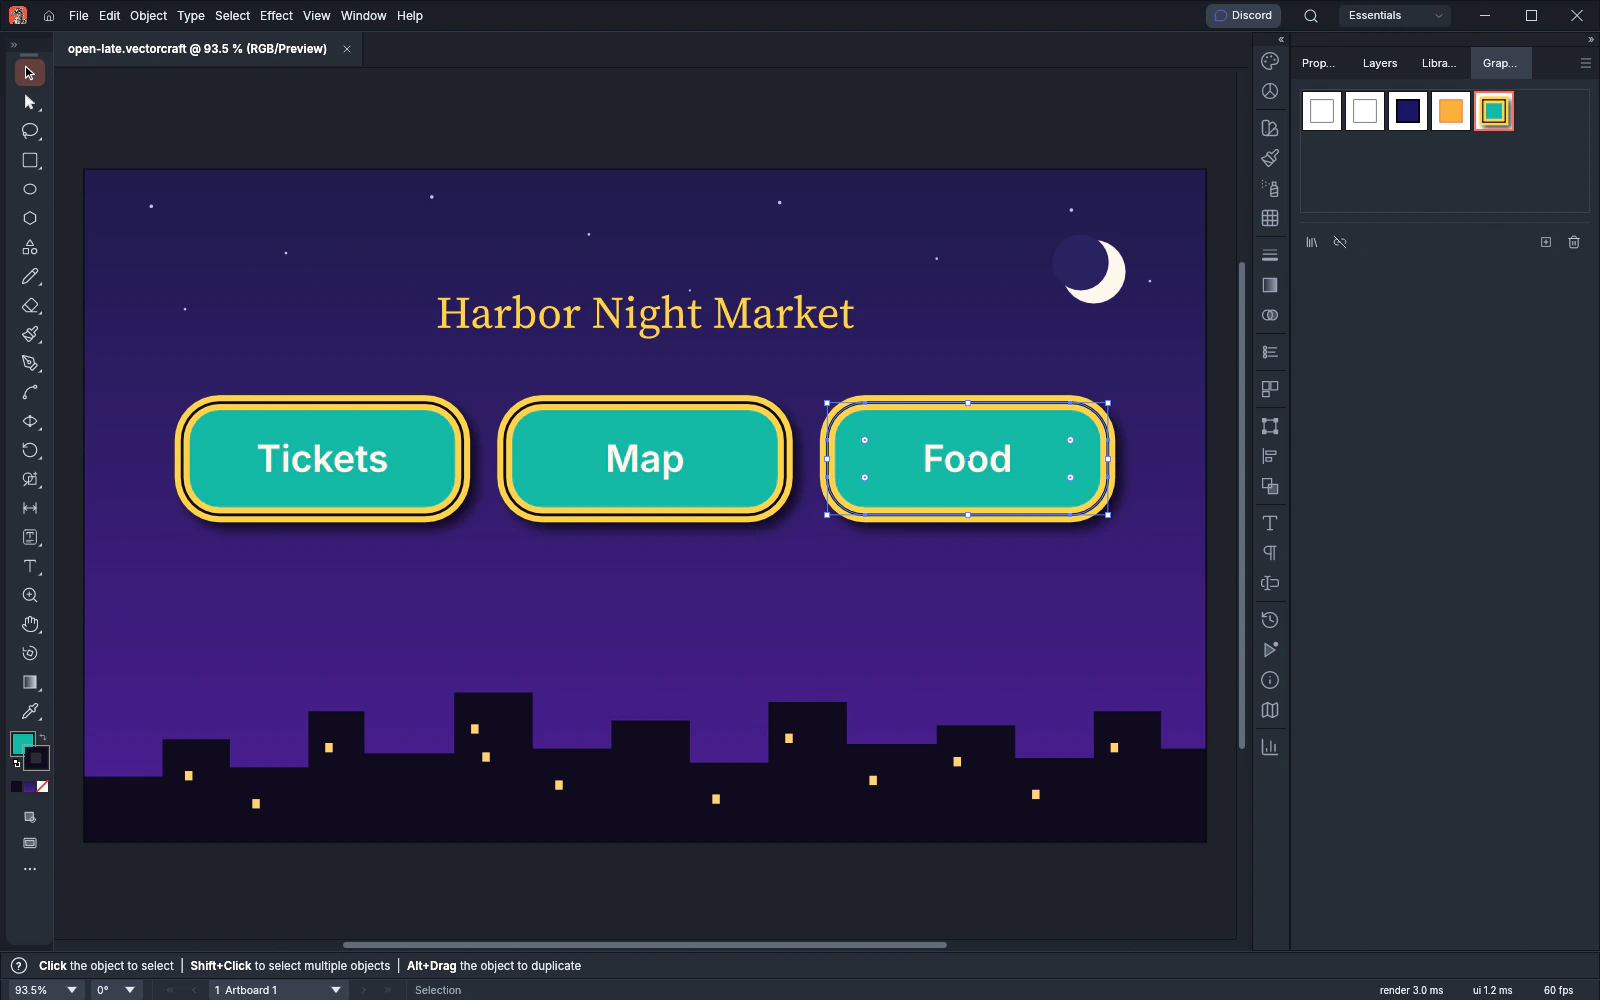
Window → Graphic Style Libraries opens the bundled sets of styles. The panel menu also has Open Graphic Style Library and Save Graphic Style Library….
Keyboard shortcuts
Section titled “Keyboard shortcuts”| Command | Windows and Linux | macOS |
|---|---|---|
| Appearance panel | Shift+F6 | Shift+F6 |
| Add New Fill | Ctrl+/ | Cmd+/ |
| Add New Stroke | Ctrl+Alt+/ | Cmd+Option+/ |
| Apply Last Effect | Ctrl+Shift+E | Cmd+Shift+E |
| Last Effect… | Ctrl+Alt+Shift+E | Cmd+Option+Shift+E |
| Graphic Styles panel | Shift+F5 | Shift+F5 |
| Blend → Make | Ctrl+Alt+B | Cmd+Option+B |
Edit → Keyboard Shortcuts… changes them.