Cut, join and refine paths
This guide covers the tools that cut and join paths beyond the Pen, Scissors and Knife: the Eraser, the Join tool, Mirror & Cut, Line Cut, Rectangle Cut and the Shaper tool. It also covers the path plug-ins under Object → Plug-ins: Path Precision Tools, Smart Pen and Contour.
| Tool | Key | Place in the Tools panel |
|---|---|---|
| Eraser | Shift+E | Its own group, with Scissors, Knife, Mirror & Cut, Line Cut and Rectangle Cut |
| Shaper | Shift+N | Its own place under the shape tools |
| Join | none | The Pencil tool’s group, with Smooth and Path Eraser |
| Mirror & Cut, Line Cut, Rectangle Cut | none | The Eraser tool’s group |
To give a tool a key, or to change one, use Edit → Keyboard Shortcuts…. The plug-in tools have no keys and are not in the Tools panel until you add them (see Add the path plug-in tools to the Tools panel).
Erase parts of shapes with the Eraser
Section titled “Erase parts of shapes with the Eraser”- Select the shapes you want to erase from. With nothing selected, the Eraser works on every path it passes over.
- Press Shift+E to choose the Eraser tool.
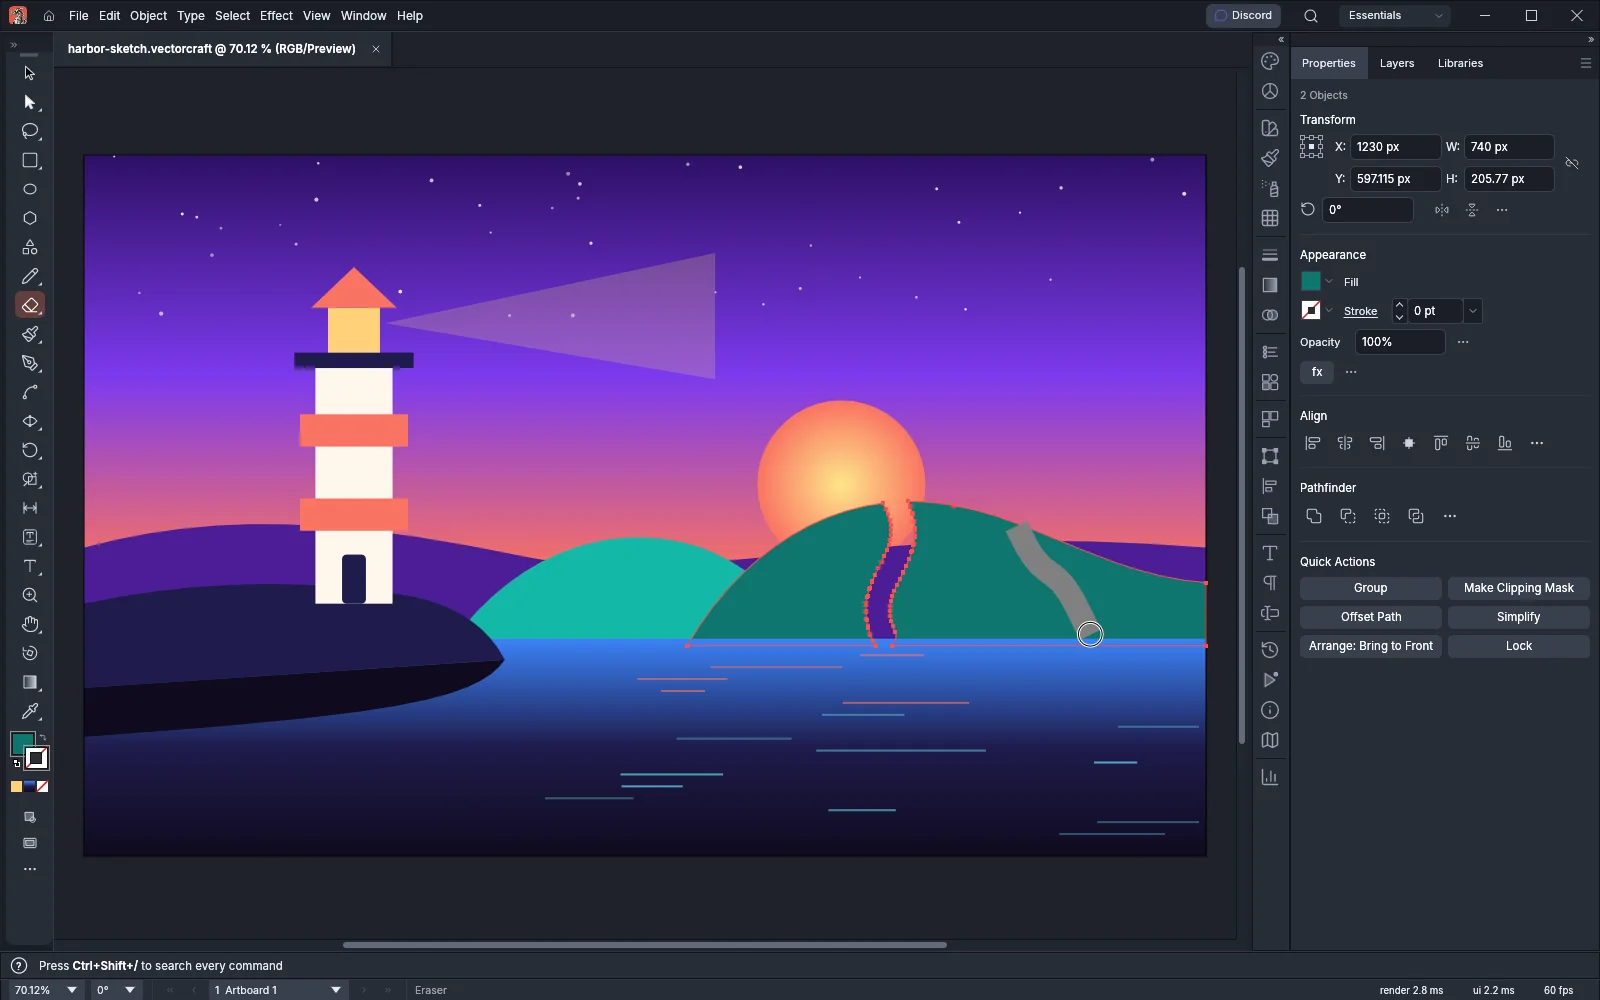
- Drag across the artwork. A gray band shows where the tip has been, and the tip’s outline follows the pointer.
- Release the mouse button. VectorCraft removes the area under the band. A filled shape that the band cuts in two becomes two separate shapes, and an open path splits where the band crosses it. The pieces stay selected.
Press [ or ] to make the tip 1 pt smaller or larger, from 1 pt to 1000 pt.
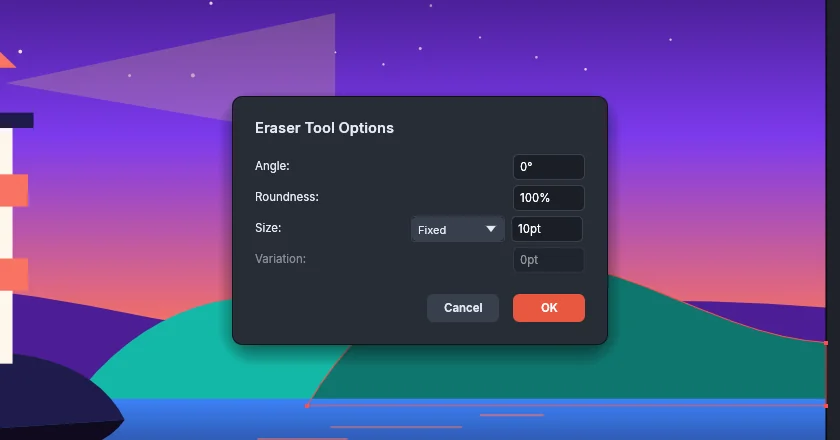
Double-click the Eraser tool in the Tools panel to open Eraser Tool Options:
| Option | Default | What it does |
|---|---|---|
| Angle | 0° | Turns the tip’s long axis, from −180° to 180° |
| Roundness | 100% | Sets the tip’s short axis as a percentage of its long axis, from 1% to 100%. 100% is a round tip |
| Size | Fixed, 10 pt | Sets the tip’s width, from 0.1 pt to 1000 pt. Choose Pressure to let pen pressure change it |
| Variation | 0 pt | With Pressure, the tip is Size minus Variation wide at the lightest pressure and Size plus Variation at the heaviest |
Cut with Mirror & Cut, Line Cut and Rectangle Cut
Section titled “Cut with Mirror & Cut, Line Cut and Rectangle Cut”The three cutting tools share the Eraser tool’s group. Each one cuts the selected paths and compound paths, including paths inside groups, and does nothing when nothing is selected. The cut shows while you drag and becomes one undo step when you release. Press Esc during the drag to cancel it.
| Tool | Drag | Result |
|---|---|---|
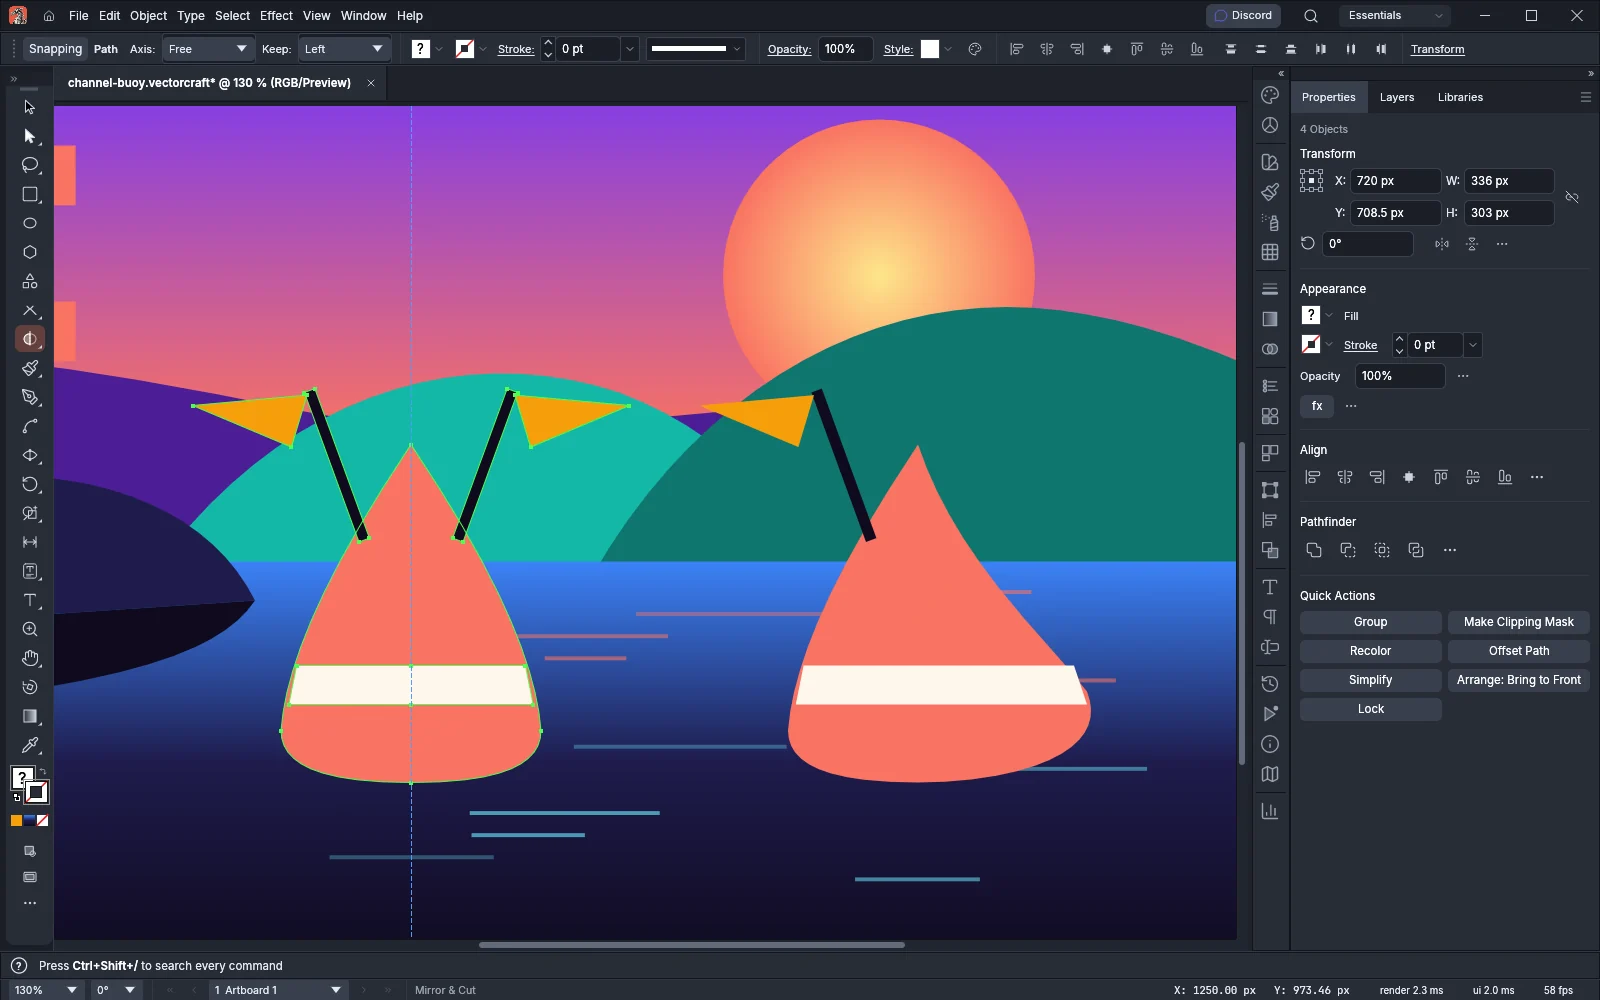
| Mirror & Cut | Draws the mirror axis. Hold Shift for 45° steps | Cuts the paths at the axis, reflects the half you keep across it and joins both halves into one shape. Art wholly on the other side is deleted |
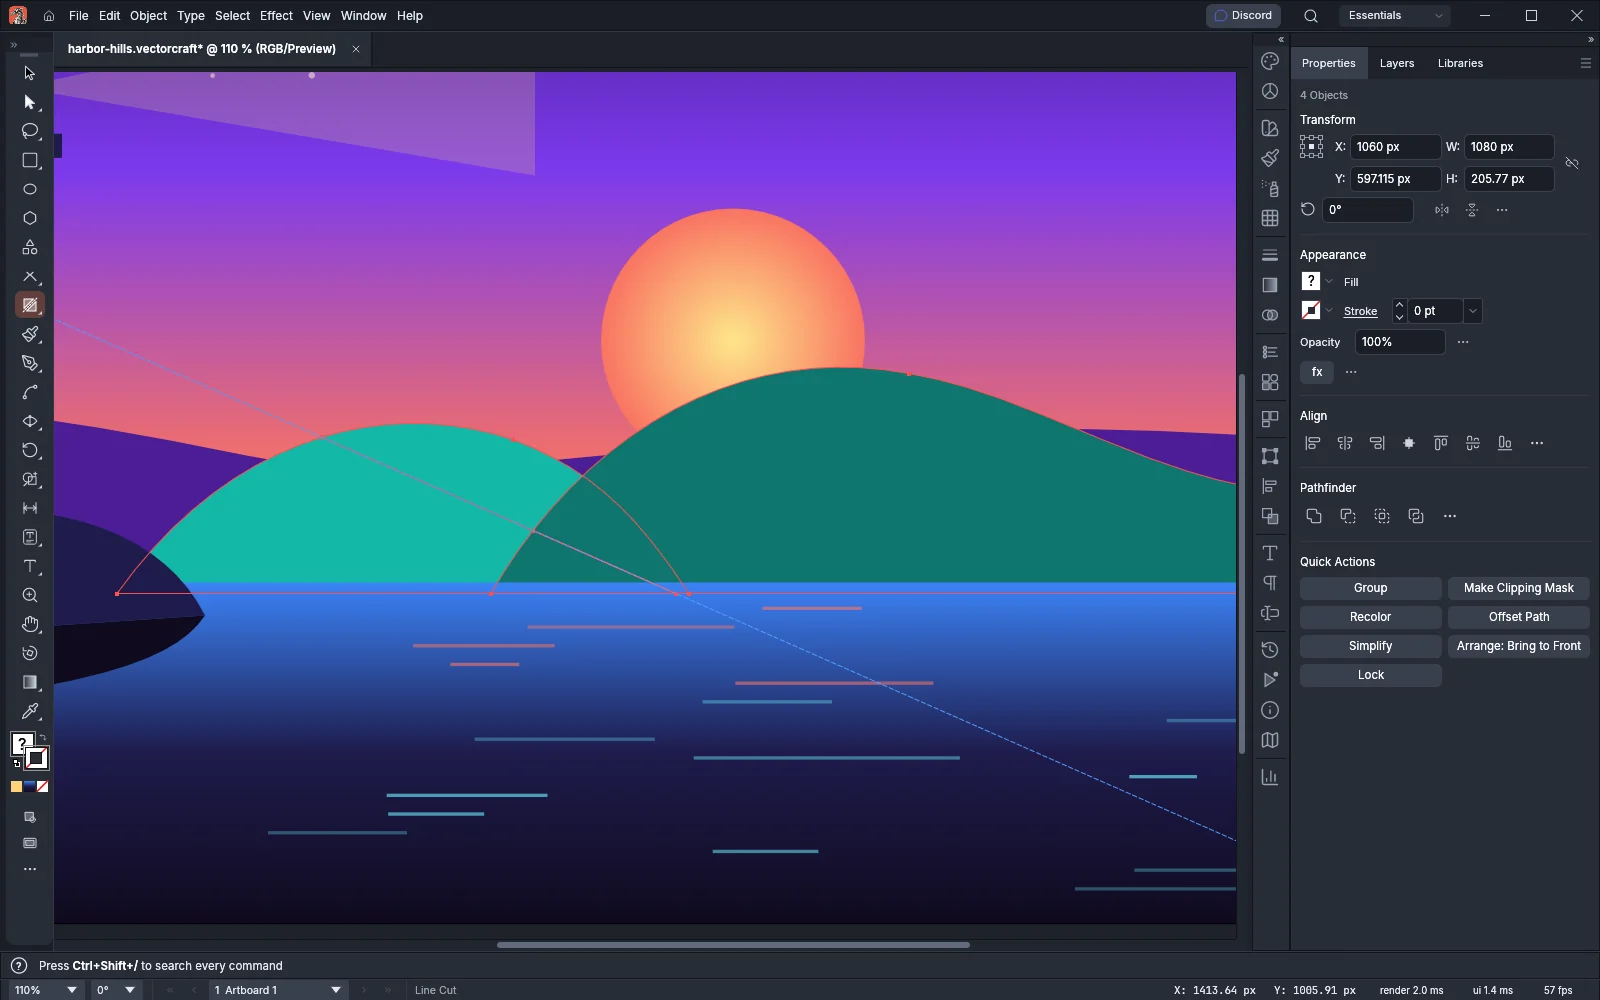
| Line Cut | Draws the cut line. Hold Shift for 45° steps | Splits the paths along the line, extended across the art. A filled shape becomes a piece on each side, with its holes kept, and an open path splits where it crosses the line |
| Rectangle Cut | Draws a rectangle. Hold Shift for a square, or Alt (Option on macOS) to draw from the center | Cuts the paths to the rectangle’s outline. It does not make a clipping mask. Art wholly outside the rectangle is deleted |
Mirror & Cut has two options in the Control bar (Window → Control):
- Axis: Free, the default, draws the axis with the drag. With Vertical or Horizontal, the axis follows the pointer, and a click places it.
- Keep: Left, Right, Top or Bottom names the side that is kept. Left is the default. When the axis runs across, Left means Top and Right means Bottom. Hold Alt (Option on macOS) as you release to keep the other side.
Join open ends with the Join tool
Section titled “Join open ends with the Join tool”- Choose the Join tool from the Pencil tool’s group.
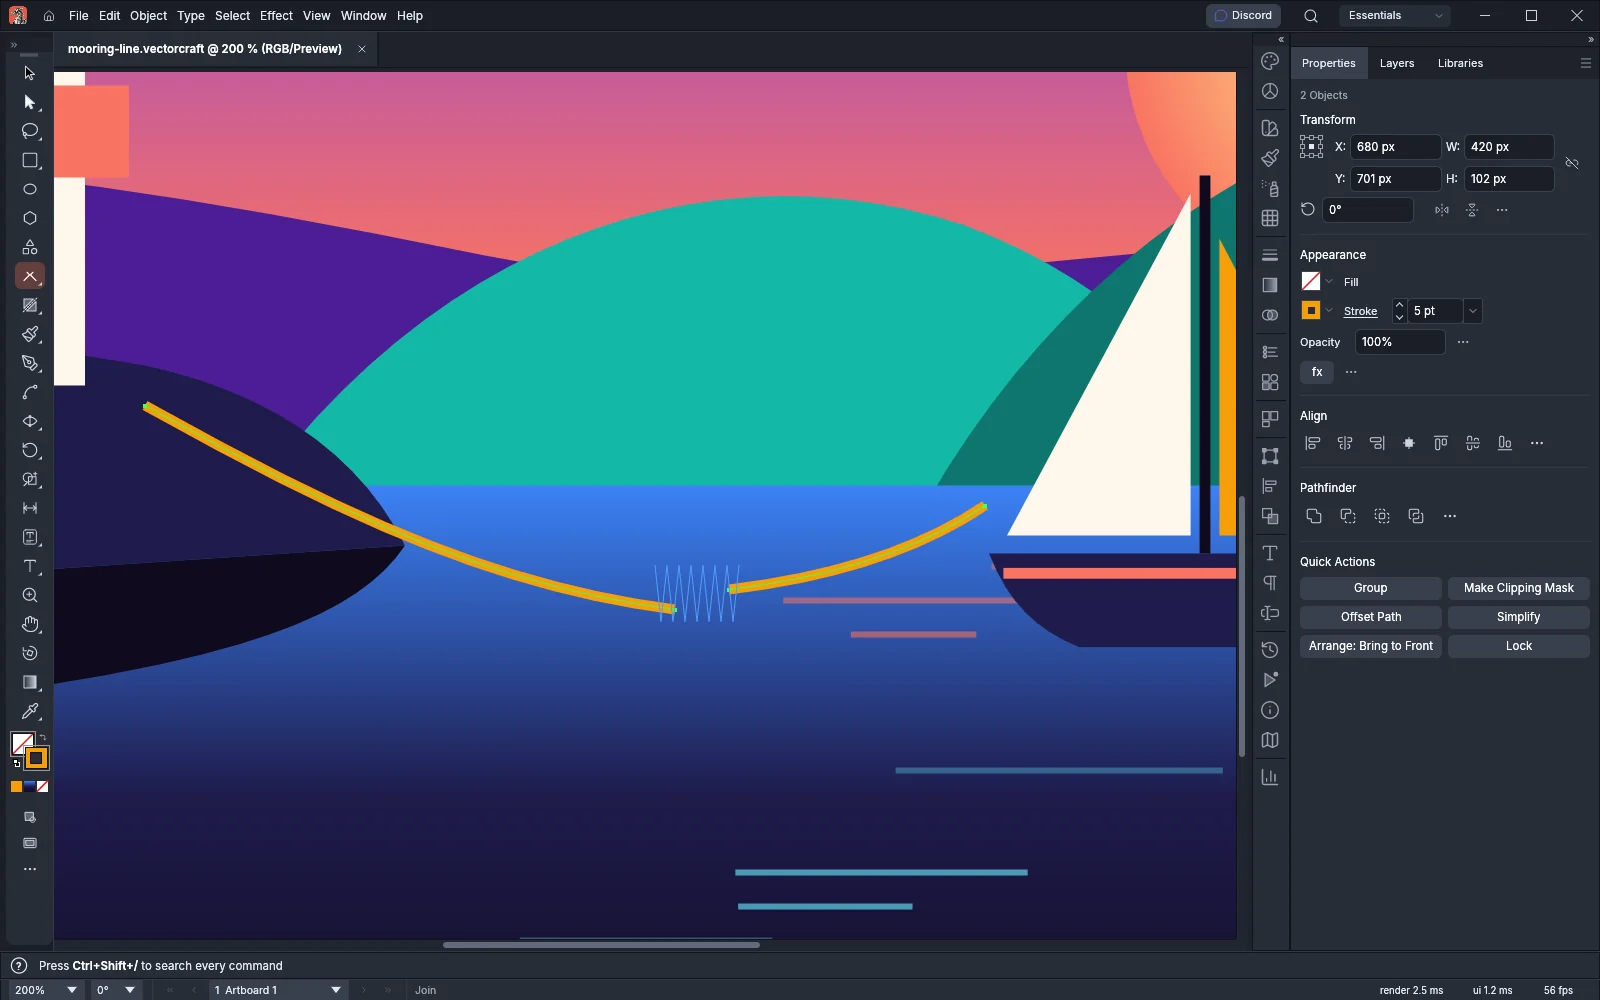
- Drag across the open ends you want to join. A drag across both ends of one path closes it. A drag across the ends of two paths joins them into one path.
- When two open paths cross and their ends stick out past the crossing, drag over those ends. The Join tool trims them and joins the paths where they cross.
The Join tool works on the selected paths, or on every path near the drag when nothing is selected. To join selected ends without dragging, use Object → Path → Join.
Sketch shapes with the Shaper tool
Section titled “Sketch shapes with the Shaper tool”- Press Shift+N to choose the Shaper tool.
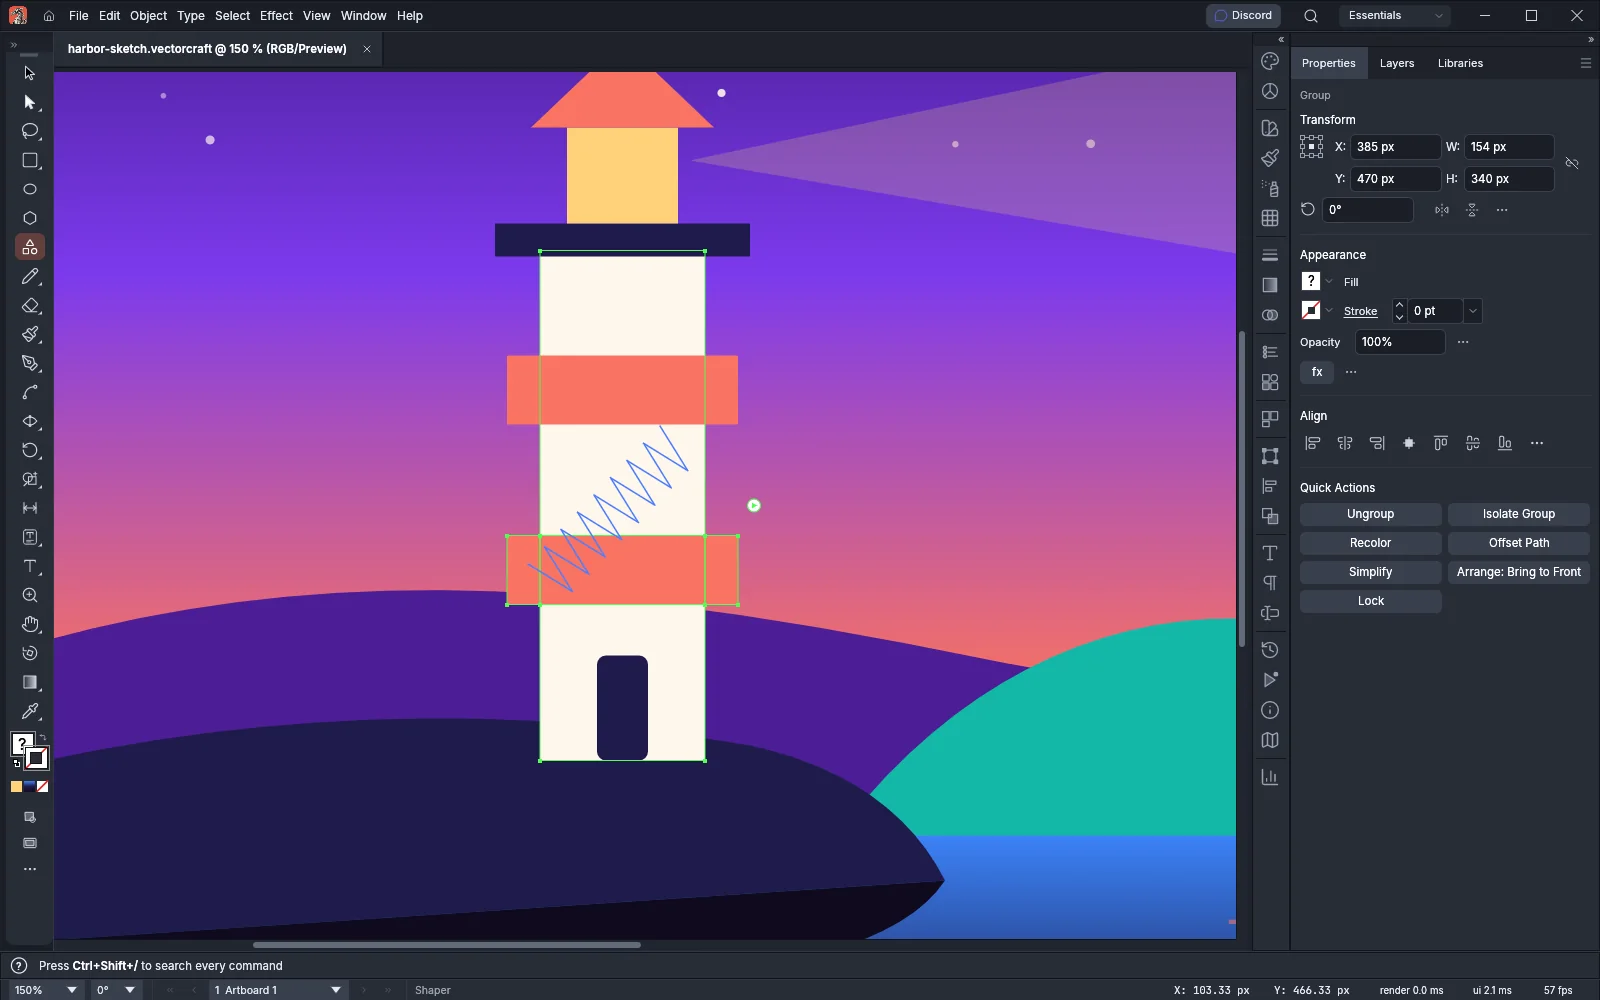
- Draw a rough rectangle, ellipse, triangle or other polygon, or a straight line. When you release, VectorCraft replaces the stroke with a clean shape.
- To combine or cut overlapping shapes, scribble over them:
- A scribble inside one area removes that area’s fill.
- A scribble that runs through several areas merges them, with the fill of the area where it started.
- A scribble that ends outside the shapes removes the fills and outlines it passed through.
- A scribble outside the shapes erases the stroke pieces it crosses.
The result of a scribble is a Shaper Group. The original shapes stay in the group, so you can still change them:
- Click the group to select it, and click again to select one face of it.
- Double-click a face to switch to Construction mode. It selects the original shape and switches to the Selection tool, so you can move or reshape it.
- Click the small arrow beside the group’s right side to switch between Face Selection mode and Construction mode.
- In Construction mode, drag an original shape wholly outside the group to take it out of the group.
Add the path plug-in tools to the Tools panel
Section titled “Add the path plug-in tools to the Tools panel”The plug-in tools are not in the Tools panel at first. You can choose each one from its submenu under Object → Plug-ins, or add it to the Tools panel:
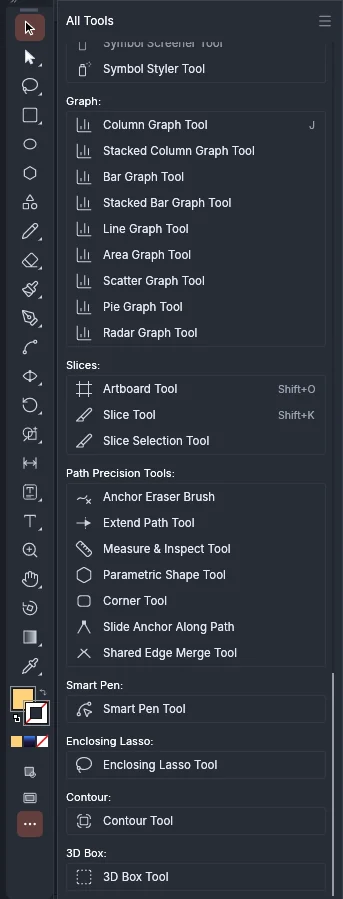
- Click the ••• button at the bottom of the Tools panel. The All Tools drawer opens beside it.
- Scroll down to the plug-in headings: Path Precision Tools, Smart Pen, Enclosing Lasso, Contour and 3D Box. Tools that are already in the Tools panel are dimmed.
- Drag a tool onto the Tools panel. Drop it between two tools to give it its own place, or onto a tool to add it to that tool’s group.
- Press Esc or click outside the drawer to close it.
To remove a tool, open the drawer and drag the tool from the Tools panel into the drawer. Clicking a tool in the drawer chooses it without adding it.
Object → Plug-ins → Path Precision Tools also opens two panels, the Anchor Inspector and Parametric Shape, and runs the path commands described below. The Measure & Inspect Tool is described in Measure and dimension.
Draw with the Smart Pen
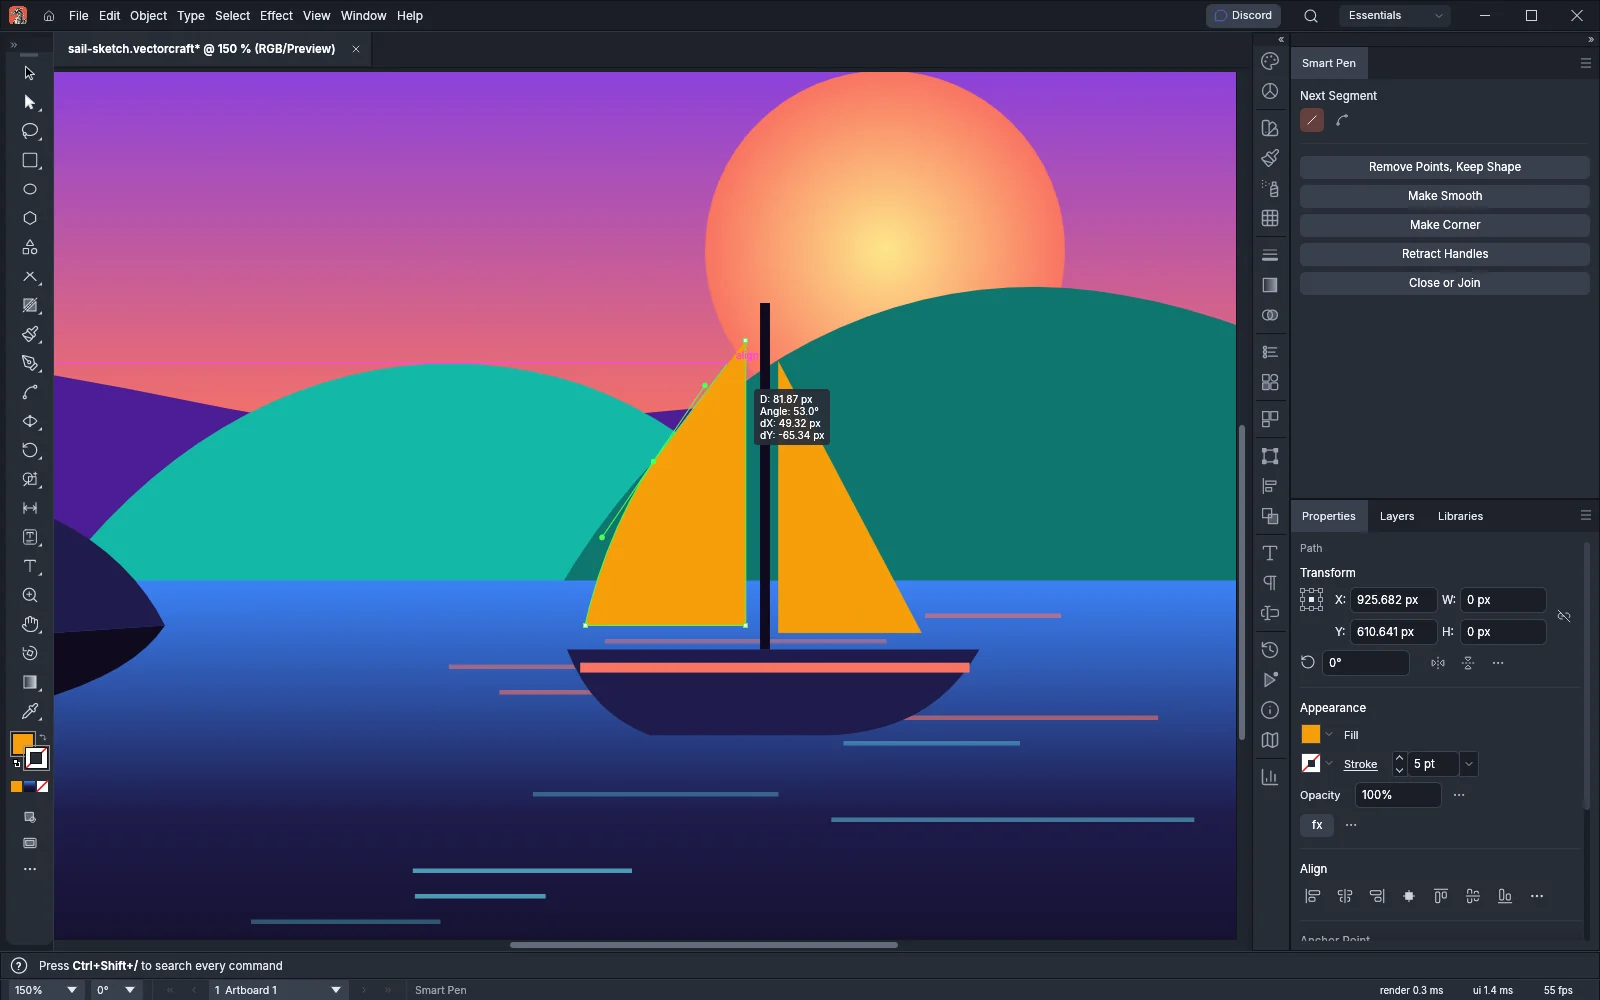
Section titled “Draw with the Smart Pen”The Smart Pen tool draws paths and edits their points without switching tools. Choose it from Object → Plug-ins → Smart Pen → Smart Pen Tool, and open its panel from Object → Plug-ins → Smart Pen → Smart Pen Panel.
To draw:
- Click to place each anchor point. The segment into it is straight or curved, as you set with Next Segment in the Smart Pen panel. Next Segment is set to Straight at first.
- Drag to place a smooth anchor point. Hold Alt (Option on macOS) to break off the outgoing handle, Shift for 45° steps, or Space to move the point.
- Press Tab to switch the segment into the point you are placing, or the last one you drew, between straight and curved.
- Click the first point to close the path, or click an end of another open path to join the two. Press Enter or Esc to leave the path open.
To edit a path with the same tool:
| Action | Result |
|---|---|
| Click a point | Selects it. Shift-click adds it to the selection or takes it out |
| Drag a point | Moves it. Hold Shift for 45° steps |
| Alt-drag a point (Option-drag on macOS) | Pulls out its outgoing handle |
| Alt-click a point (Option-click on macOS) | Removes it and keeps the shape |
| Shift+Alt-click a point (Shift+Option-click on macOS) | Deletes it and leaves the handles beside it |
| Double-click a point | Switches it between smooth and corner |
| Drag a segment | Reshapes it |
| Alt-click a segment (Option-click on macOS) | Adds a point |
The Smart Pen panel also has Remove Points, Keep Shape, Make Smooth, Make Corner, Retract Handles and Close or Join for the selected points.
Extend, slide and round anchor points
Section titled “Extend, slide and round anchor points”Choose these tools from Object → Plug-ins → Path Precision Tools, or add them to the Tools panel. The Extend Path Tool, Slide Anchor Along Path and the Corner Tool work on paths whether or not they are selected. The Anchor Eraser Brush works on selected paths only.
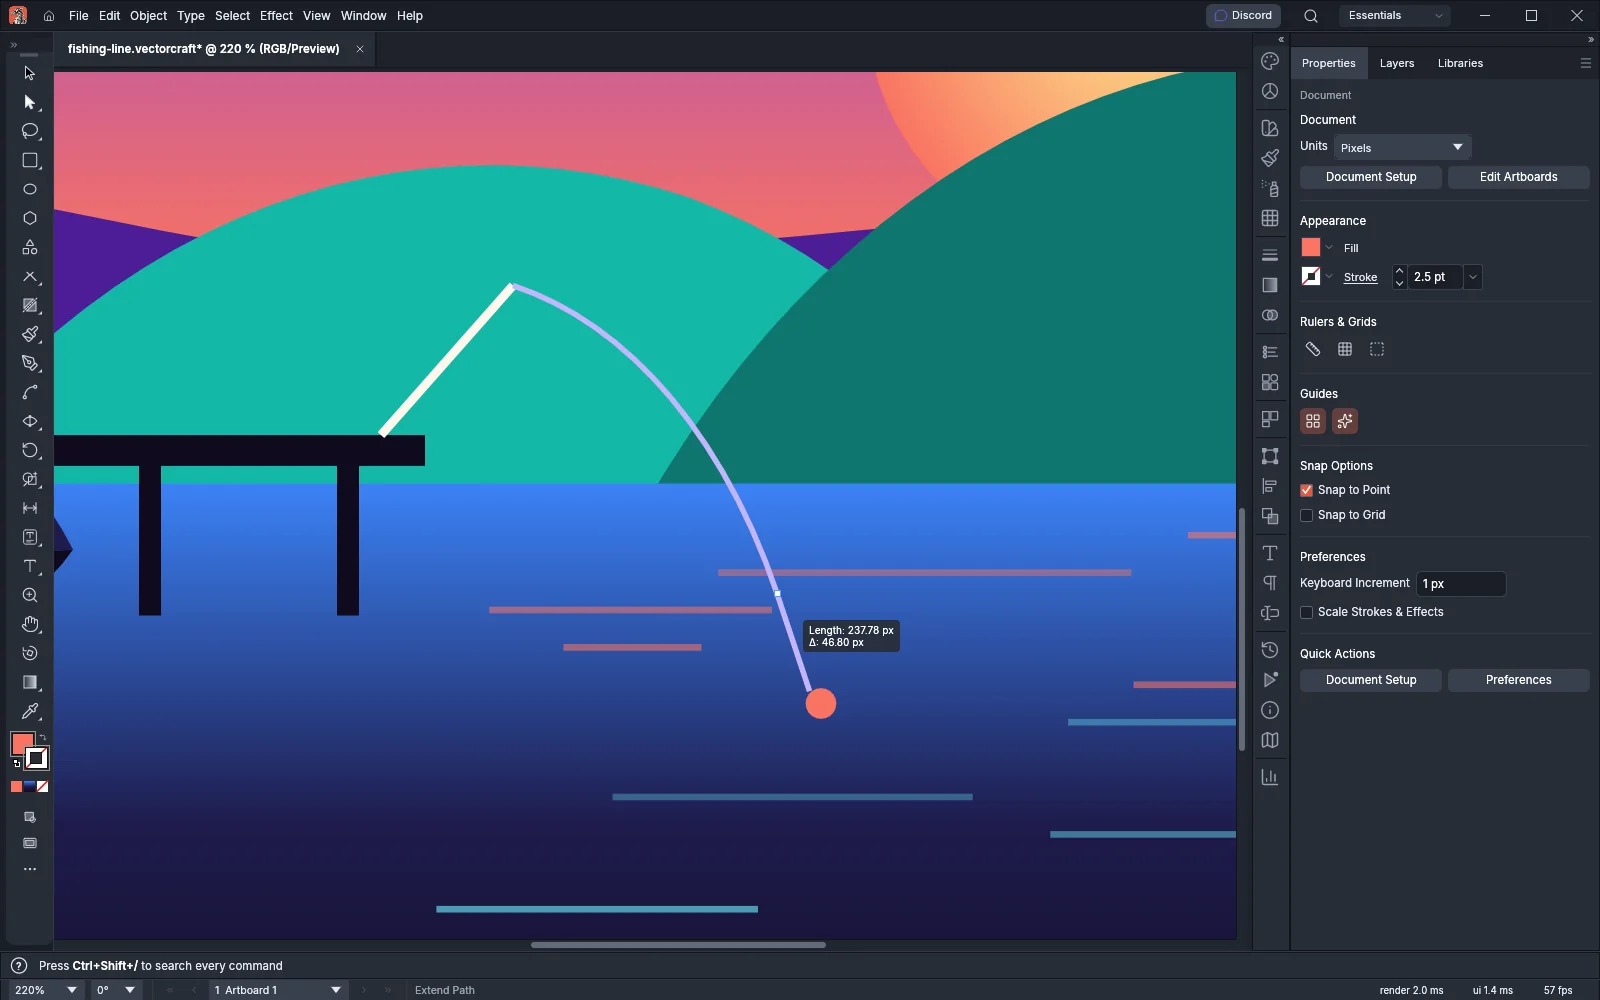
- Extend Path Tool: drag an end of an open path to carry the path on in the direction it runs, or drag back along it to shorten it. A dashed line over an end shows how it would continue. Press E to cycle the mode, and hold Shift to change the length in steps of the keyboard increment. Double-click the tool to set its Mode: Straight (the default), Stretch Curve or Arc.
- Slide Anchor Along Path: drag an anchor point to move it along the curve it sits on. VectorCraft refits the two segments beside it to the outline they had before. Hold Shift to stop where the path’s direction is a multiple of 45°. The ends of an open path do not slide.
- Anchor Eraser Brush: paint over selected paths to remove the anchor points under the brush that can go without changing the outline by more than the Tolerance. VectorCraft refits the handles of the anchor points beside them. Hold Alt (Option on macOS) to remove every anchor point under the brush that can go, whatever the Tolerance, or Ctrl (Cmd on macOS) to delete them without refitting the curve. Press [ or ] to resize the brush. Double-click the tool to set Size (1 to 2500 px, default 20), Tolerance (1 to 100, default 10) and Pressure.
Round corners with the Corner Tool
Section titled “Round corners with the Corner Tool”The Corner Tool menu item chooses the tool and opens the Anchor Inspector panel, whose Corners section has the tool’s Radius (10 pt to start) and Corner kind. With a path or some of its anchor points selected, Apply to Selected Anchors rounds the selected corners with that radius and kind, and Set Corners… opens the dialog described below. Both buttons are dimmed when the selection has no corners.
- Point at an anchor point that can take a corner, and click to round it with the tool’s radius and kind. Drag instead to size the corner. Hold Shift to keep the radius to whole units.
- To change a corner, click the marker at its center to select it, then drag the marker. Drag it to 0, or double-click it, to remove the corner.
- To round every anchor point in an area, hold Alt (Option on macOS) and drag a marquee around them.
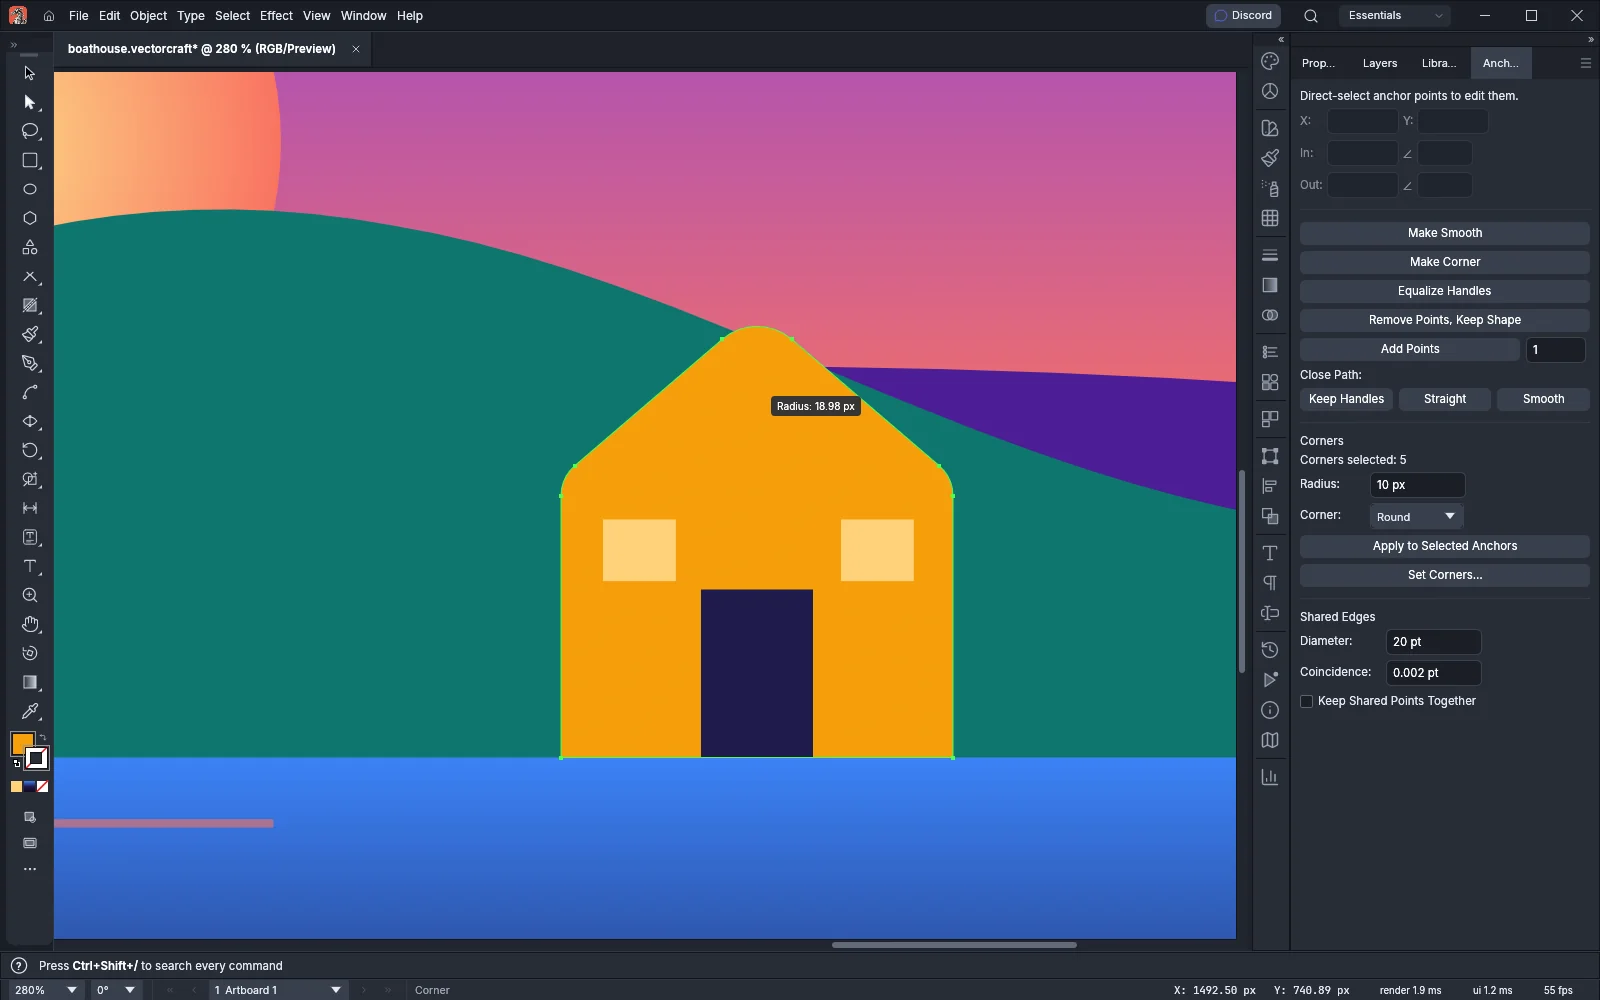
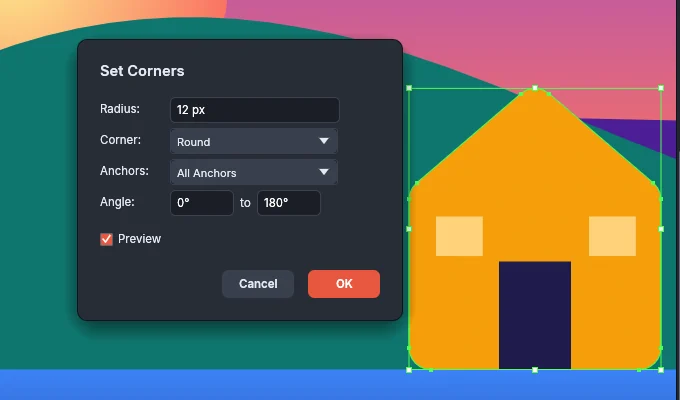
To round many anchor points at once, select a path or its anchor points and choose Object → Plug-ins → Path Precision Tools → Set Corners…:
| Option | What it does |
|---|---|
| Radius | Sets the size of each corner |
| Corner | Round, Inverted Round or Chamfer |
| Anchors | All Anchors, Odd-Numbered Anchors or Even-Numbered Anchors |
| Angle | Rounds only the corners whose angle is within this range, from 0° to 180° |
The canvas previews the corners while the dialog is open.
Edit points in the Anchor Inspector
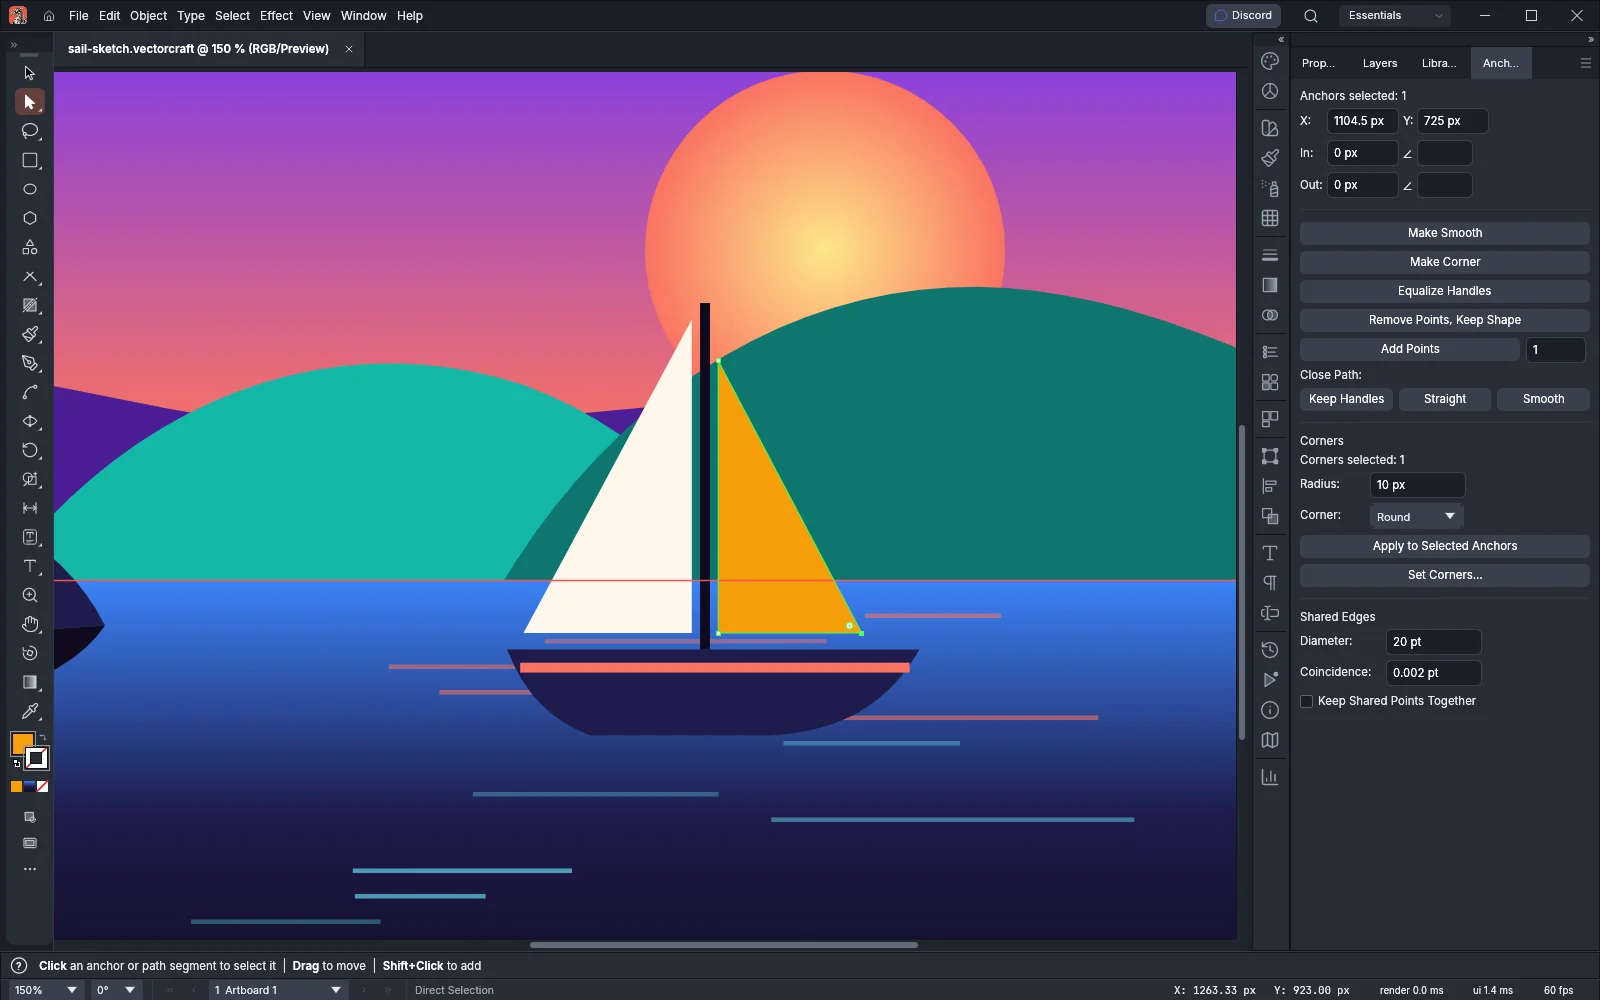
Section titled “Edit points in the Anchor Inspector”Open the panel from Object → Plug-ins → Path Precision Tools → Anchor Inspector, and direct-select anchor points to edit them:
- X and Y move the first selected anchor point. In and Out set the length and angle of its handles.
- Make Smooth, Make Corner, Equalize Handles and Remove Points, Keep Shape change the selected points.
- Add Points adds the number of points you set (1 to 100) to each selected segment.
- Close Path closes an open path with Keep Handles, Straight or Smooth.
Split paths where they cross, and divide them into dashes
Section titled “Split paths where they cross, and divide them into dashes”Select the paths, then choose a command from Object → Plug-ins → Path Precision Tools:
| Command | What it does |
|---|---|
| Add Points at Crossings | Adds an anchor point wherever the selected paths cross one another |
| Split at Crossings | Adds the anchor points and cuts the paths there |
| Divide into Dashes… | Cuts each path into separate open paths of equal length along its curve |
| Expand Dashes into Paths | Turns each dash of a dashed stroke into its own open path, with empty space where the gaps were. Paths without a dashed stroke do not change |
Divide into Dashes… previews the pieces on the canvas and has these options:
| Option | Default | What it does |
|---|---|---|
| Dash | 10 pt | Sets the length of each piece |
| Gap | 0 pt | Sets the space between pieces. At 0 the pieces touch |
| Fit to Corners and Ends | Off | Stretches or squeezes the pieces so each run between corners and ends starts and ends on a whole dash |
| Remove Gaps | On | Leaves the gaps empty. When it is off, the gaps become pieces too. Available when Gap is more than 0 |
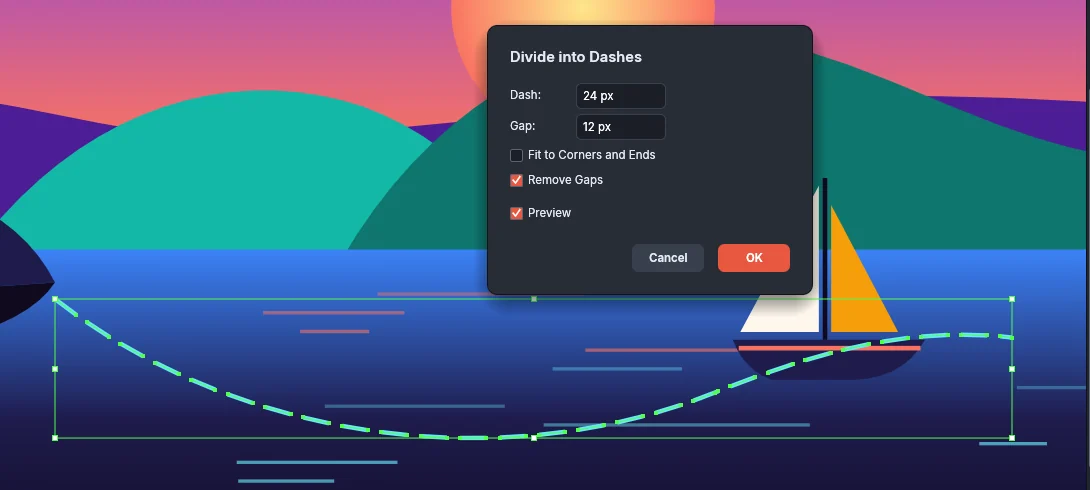
The pieces keep the path’s appearance and stay selected. When you have direct-selected some segments, only those segments are divided.
Merge shared edges
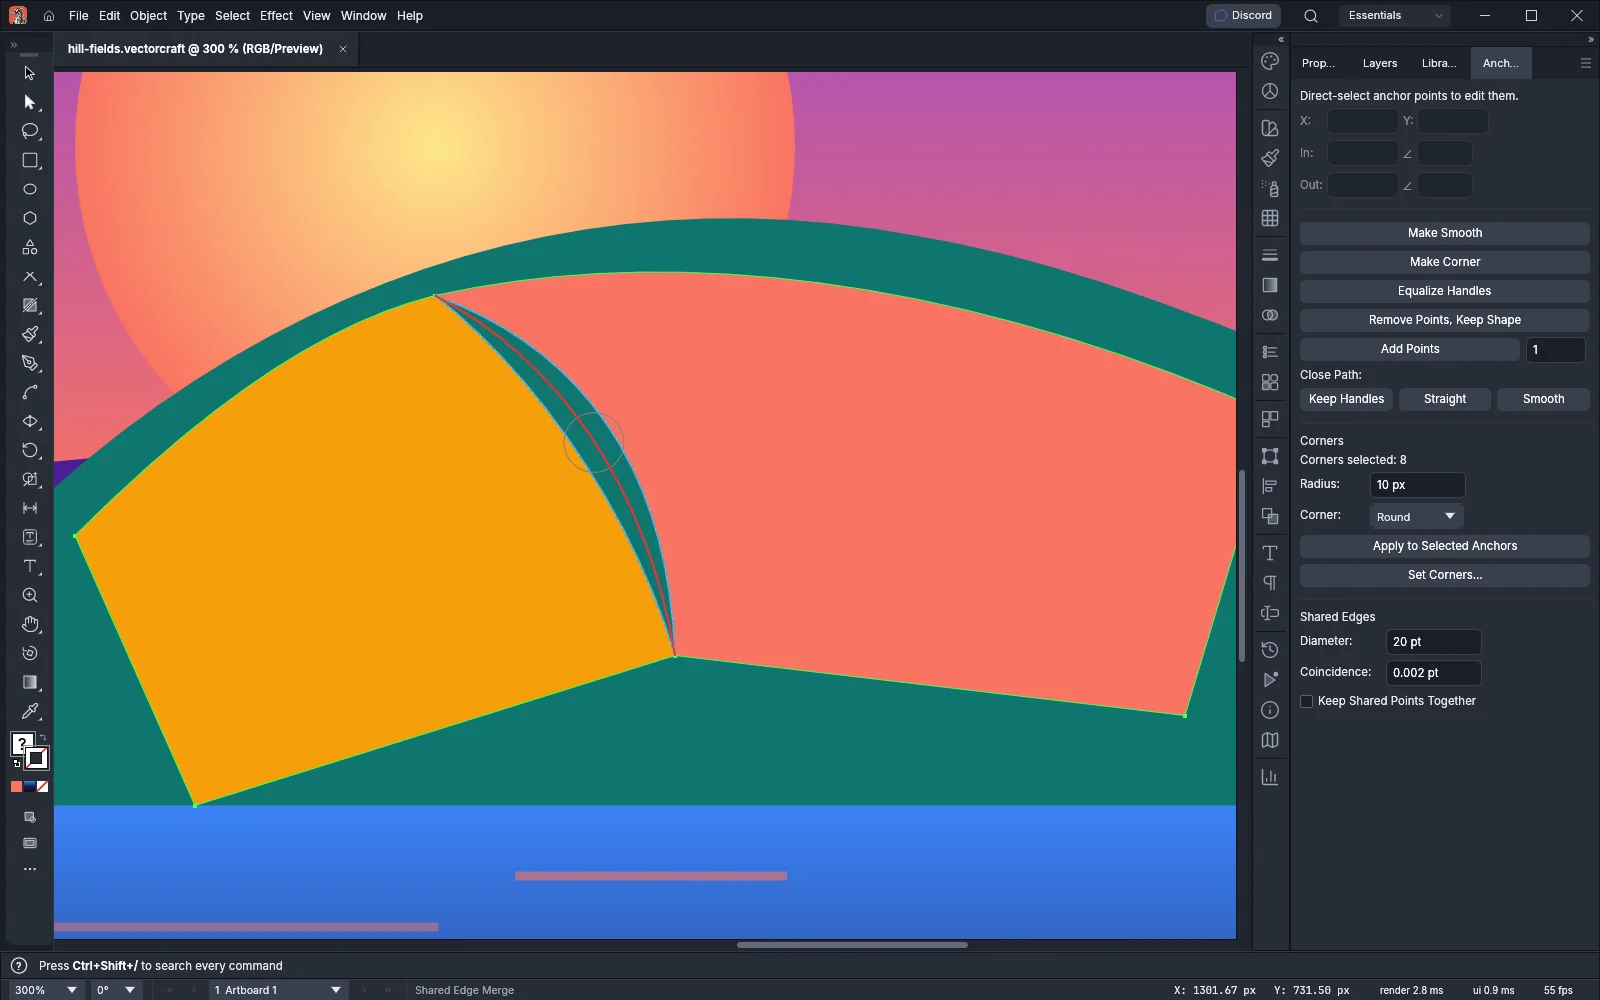
Section titled “Merge shared edges”The Shared Edge Merge Tool cleans up the edge between two shapes that touch, such as two neighboring areas of a map.
- Choose Object → Plug-ins → Path Precision Tools → Shared Edge Merge Tool. The Anchor Inspector panel opens with the Shared Edges section.
- Point at the place where the two paths meet. The two stretches of outline show as dashed lines, and the merged edge shows as a solid line, green when the edge is already merged.
- Click to replace both stretches with one edge, halfway between them. Hold Shift to follow the upper path, or Alt (Option on macOS) to follow the lower one.
Where the two paths do not yet share anchor points at the ends of the edge, a click makes one: nearby anchor points meet halfway, and a path that lacks one gets an anchor point to match. In the Shared Edges section, Diameter sets the brush size (0.25 pt to 200 pt, default 20 pt) and Coincidence sets how close two anchor points must be to count as shared (0 pt to 3 pt, default 0.002 pt). Keep Shared Points Together moves shared points together when you slide one.
Draw parametric shapes
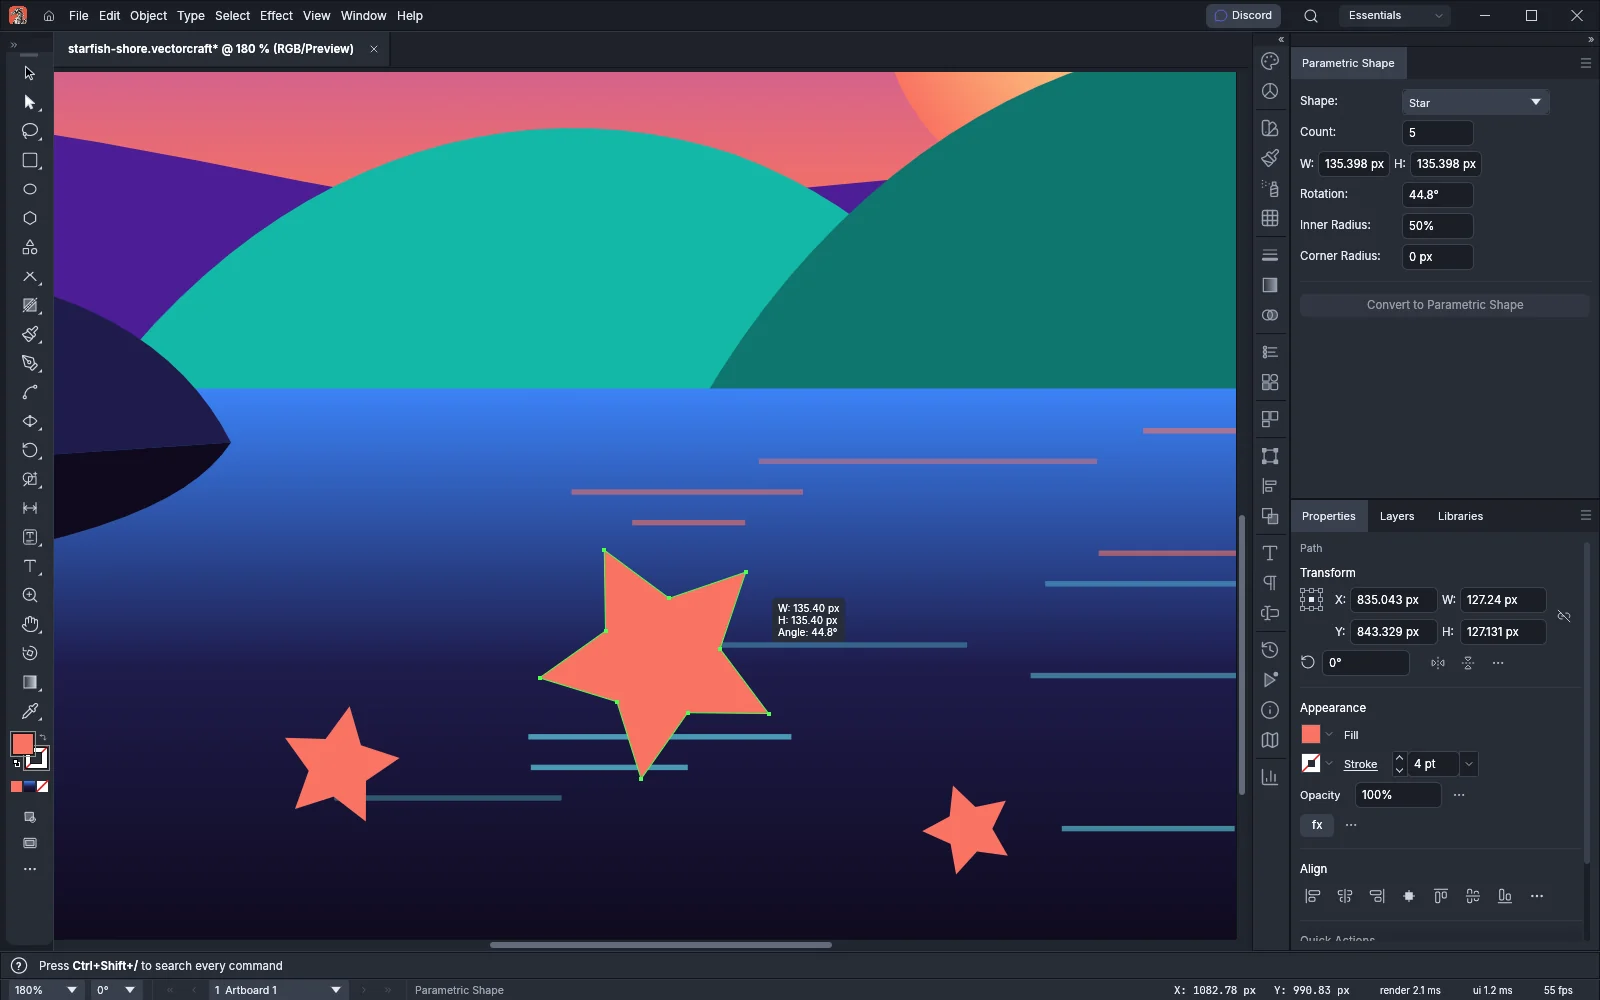
Section titled “Draw parametric shapes”A parametric shape keeps its size, count and other values as numbers that you can change later. It stays editable when you move, rotate or scale it. Once you edit its anchor points, it becomes an ordinary path.
- Choose Object → Plug-ins → Path Precision Tools → Parametric Shape Tool.
- Drag from the center outward. The length of the drag sets the size, and its direction sets the rotation. Hold Shift for 45° steps.
- While you drag, press ↑ or ↓ to change the count or the first value of the shape, and ← or → to change its second value or corner radius.
- To place another shape with the last settings, double-click the canvas.
Click a parametric shape with the tool to show its handles for the center, size, rotation, corner radius and the kind’s own value, and drag them. The Parametric Shape panel (Object → Plug-ins → Path Precision Tools → Parametric Shape) shows the same values as fields. With no parametric shape selected, the fields set the next shape the tool draws.
| Field | What it sets |
|---|---|
| Shape | Rectangle, Ellipse, Polygon, Star, Ring, Arrow, Cross, Heart, Gear or Speech Bubble |
| Count | Sides, points or teeth, from 3 to 1000. Polygon, Star and Gear only |
| W and H | Width and height |
| Rotation | Angle of the shape |
| Values of the kind | For example Inner Radius for a star or a ring, Head and Shaft for an arrow, Tail and Tip for a speech bubble, as percentages |
| Corner Radius | Rounds the corners. Not for Ellipse or Ring |
To turn existing shapes into parametric ones, select plain closed rectangles, ellipses or regular polygons and choose Convert to Parametric Shape from the same submenu, or click the button at the bottom of the panel.
Outline areas with the Contour tool
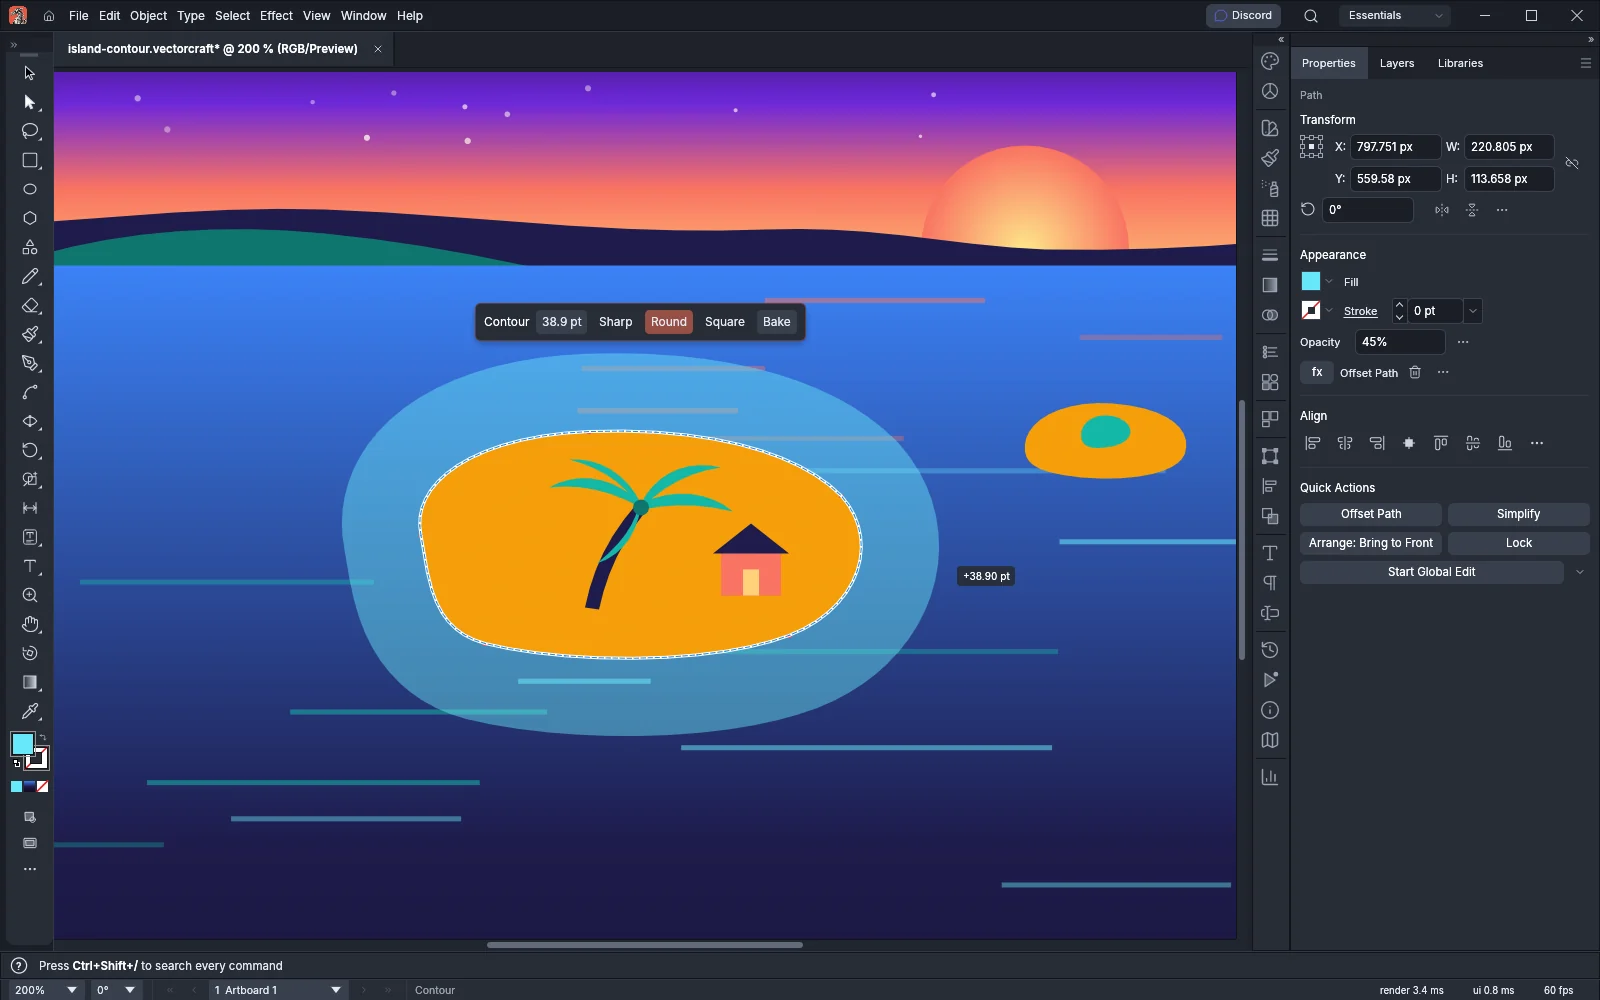
Section titled “Outline areas with the Contour tool”The Contour tool grows or shrinks a live outline copy of a shape.
- Select a shape and choose Object → Plug-ins → Contour → Contour Tool.
- Drag away from the shape’s edge to grow a copy around it, or toward the inside to shrink it. The distance is how far the pointer has moved since you pressed. Hold Shift to round it to whole points.
- Drag again on a selected contour to change its distance. The tool shows the shape’s earlier outline as a dashed guide.
While the tool is active, a Contour bar above the selection shows the distance, the corner style (Sharp, Round or Square) and Bake. The contour is a live Offset Path effect. Bake, or Object → Expand Appearance, turns it into plain paths.