
Print a large poster
Tiled printing spreads a drawing that is bigger than your paper across several sheets of A4, Letter or any other size. VectorCraft divides the drawing into numbered tiles at the scale you choose. An overlap repeats a strip of the drawing on neighboring sheets, so you can line them up when you stick them together.
Print a poster on several sheets
Section titled “Print a poster on several sheets”- Open your drawing. For a full-size pattern, check that the drawing is the size you want before you print.
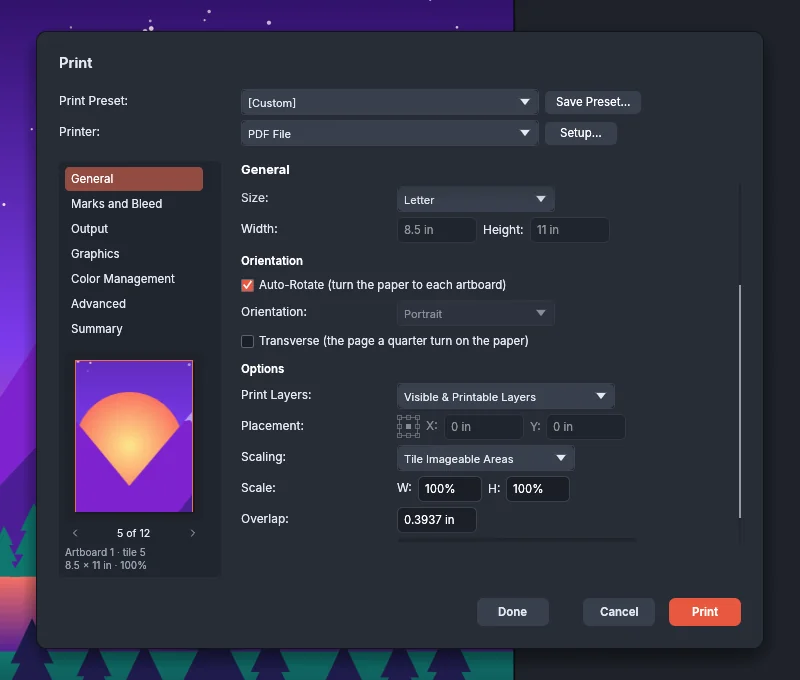
- Choose File → Print… (Ctrl+P, or Cmd+P on macOS). In Printer, choose your printer, or PDF File to save the tiled pages as a PDF.
- In General, under Artboards, choose All, or Range to pick the artboards to print.
- Under Media, set Size to the paper in your printer, or choose Custom and enter its width and height.
- In Advanced, set Unprintable margin to allow for the edges your printer can’t print on. VectorCraft uses one value for all four edges, and doesn’t read it from the printer.
- Back in General, under Options, set Scaling to Tile Imageable Areas or Tile Full Pages (see below). Set Scale to
100%in both boxes to keep the drawing’s real size. - Set Overlap, for example
10 mm, to give yourself room to line the sheets up. - Use the arrows under the preview to look through the sheets. Check Summary for warnings.
- Leave Tile Range empty to print every tile, or enter a range such as
1-3, 5. - Choose Print. Done keeps the settings with the document without printing.
Check the size first
Section titled “Check the size first”At a Scale of 100%, each inch of the artboard prints as an inch on paper. Check the artboard’s size before you print.
- Choose File → Document Setup… and check Units. The Print dialog shows Overlap and Unprintable margin in these units.
- Open Artboard Options for the artboard: with the Artboard tool, double-click an empty part of the artboard, or choose Artboard Options… in the Window → Artboards panel menu.
- Check Width and Height. For example, a 24 × 36 in poster prints on 12 Letter sheets with Tile Imageable Areas, a Scale of
100%, a10 mmoverlap and no unprintable margin.
Set up a document and artboards covers units and artboard sizes in full.
Choose a tiling mode
Section titled “Choose a tiling mode”| Scaling | How it divides the drawing | Use it when |
|---|---|---|
| Tile Imageable Areas | Each tile is the part of the paper inside the Unprintable margin | Your printer can’t print to the edge of the paper. This is the safer choice |
| Tile Full Pages | Each tile is the whole sheet | Your printer prints borderless. Otherwise, art near the edges of each sheet may be lost unless the overlap covers it |
With Unprintable margin set to zero, both modes make the same tiles. Fit to Page shrinks the whole artboard onto one sheet instead.
Tiling options
Section titled “Tiling options”The tiling options are in the General section of the Print dialog, under Options, except Unprintable margin, which is in the Advanced section under Printer. Overlap and Tile Range can be set only while Scaling is a tile mode.
| Option | Section | What it sets | Default | Range |
|---|---|---|---|---|
| Scaling | General | How the art is sized on the paper: Do Not Scale, Fit to Page, Custom Scale, Tile Full Pages or Tile Imageable Areas | Do Not Scale | One of the five choices |
| Scale (W and H) | General | The printed width and height as a percentage of the art’s size, with Custom Scale and the tile modes | 100% | 1% to 1000% |
| Overlap | General | How much art neighboring tiles repeat | 0 | 0 to 720 pt (10 in), and less than half the shorter side of a tile |
| Tile Range | General | The tiles that print, for example 1-3, 5 |
Empty (every tile) | Tile numbers from 1 to the number of tiles |
| Unprintable margin | Advanced | The edge of the paper the printer can’t reach, the same on all four sides. The preview shows it as a dashed line | 0 | 0 to 144 pt (2 in) |
Overlap and Unprintable margin show lengths in the document’s units. You can type another unit, for example 10 mm, and VectorCraft converts it. One artboard can print on at most 1,000 tiles, and one job on at most 2,000 pages.
See the tiles on the canvas
Section titled “See the tiles on the canvas”View → Show Print Tiling shows each sheet’s edges and numbers on the canvas, and the Print Tiling Tool moves the grid of sheets.
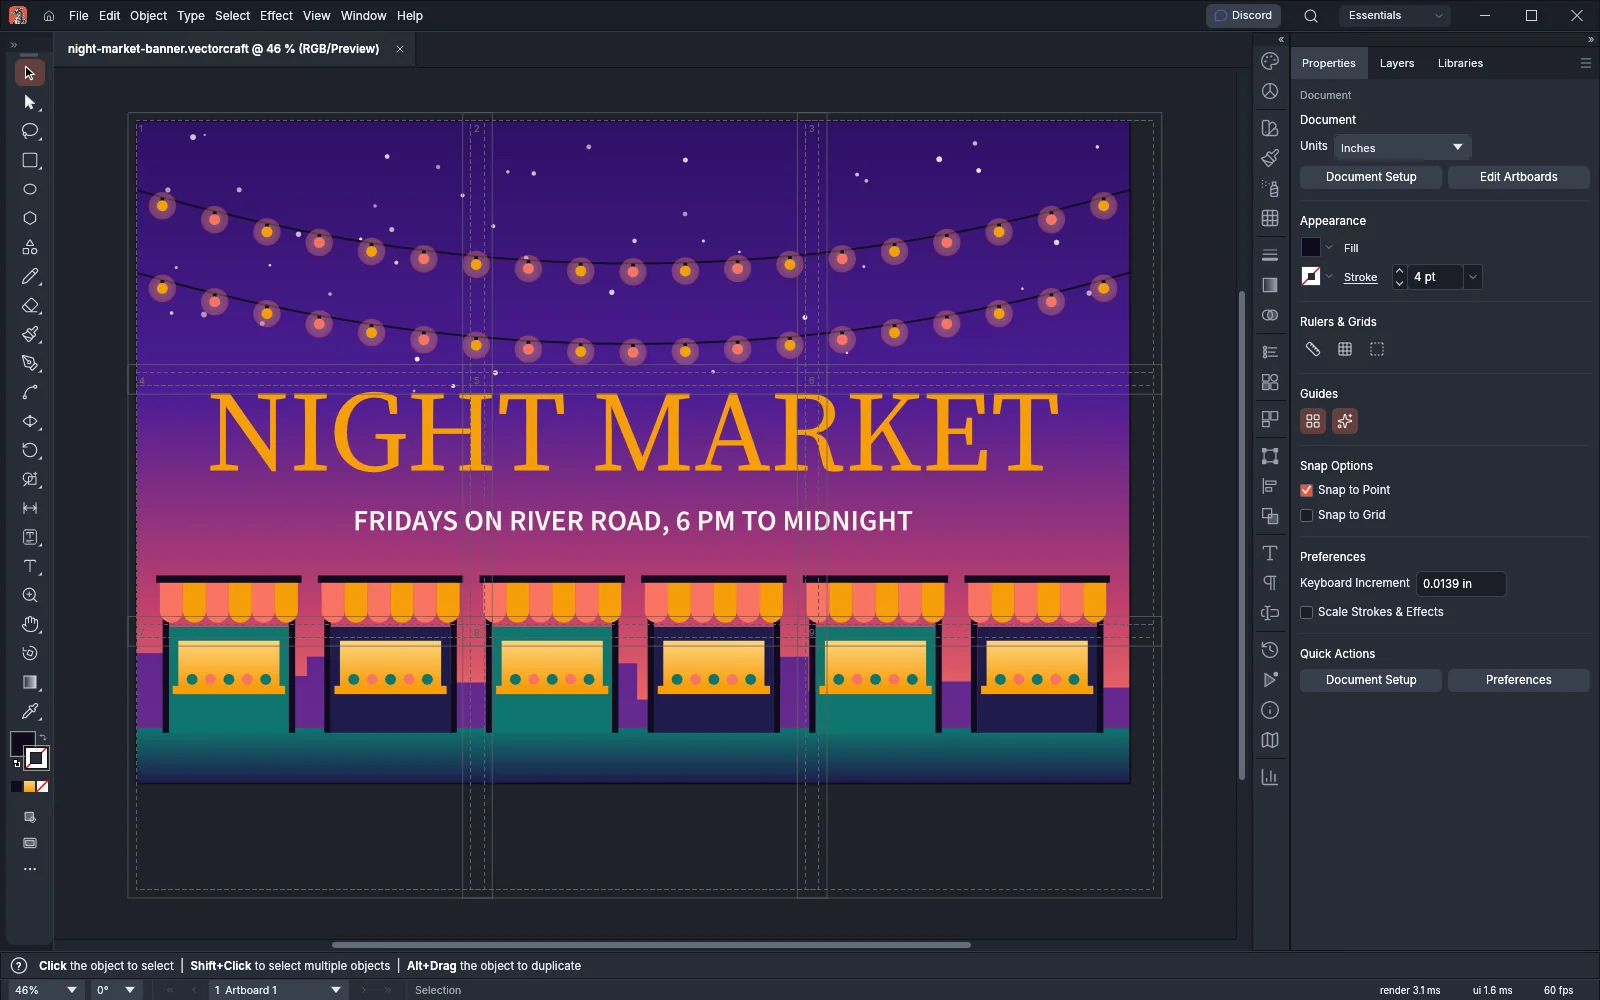
- Choose View → Show Print Tiling. Each sheet shows the edge of the paper as a line, its printable area as a dashed line, and its tile number in the top-left corner. Tiles outside Tile Range are dimmer. The menu item changes to View → Hide Print Tiling while the tiles show.
- Choose the Print Tiling Tool. To find it, press and hold the Hand Tool button in the toolbar. The tiles show while the tool is active, even with Show Print Tiling off.
- Drag on the canvas. The pointer sets the top-left corner of the first sheet’s printable area, and it snaps to the edges of the artboard. When Measurement Labels is on in the Smart Guides preferences, a readout shows how far that corner is from the artboard’s top-left corner. Measurement Labels is on by default.
- Release the mouse button to place the grid. To cancel the drag, press Esc before you release.
- To put the grid back at the top-left corner of the artboard, outside any bleed and marks, double-click on the canvas with the tool, or double-click the tool’s button in the toolbar.
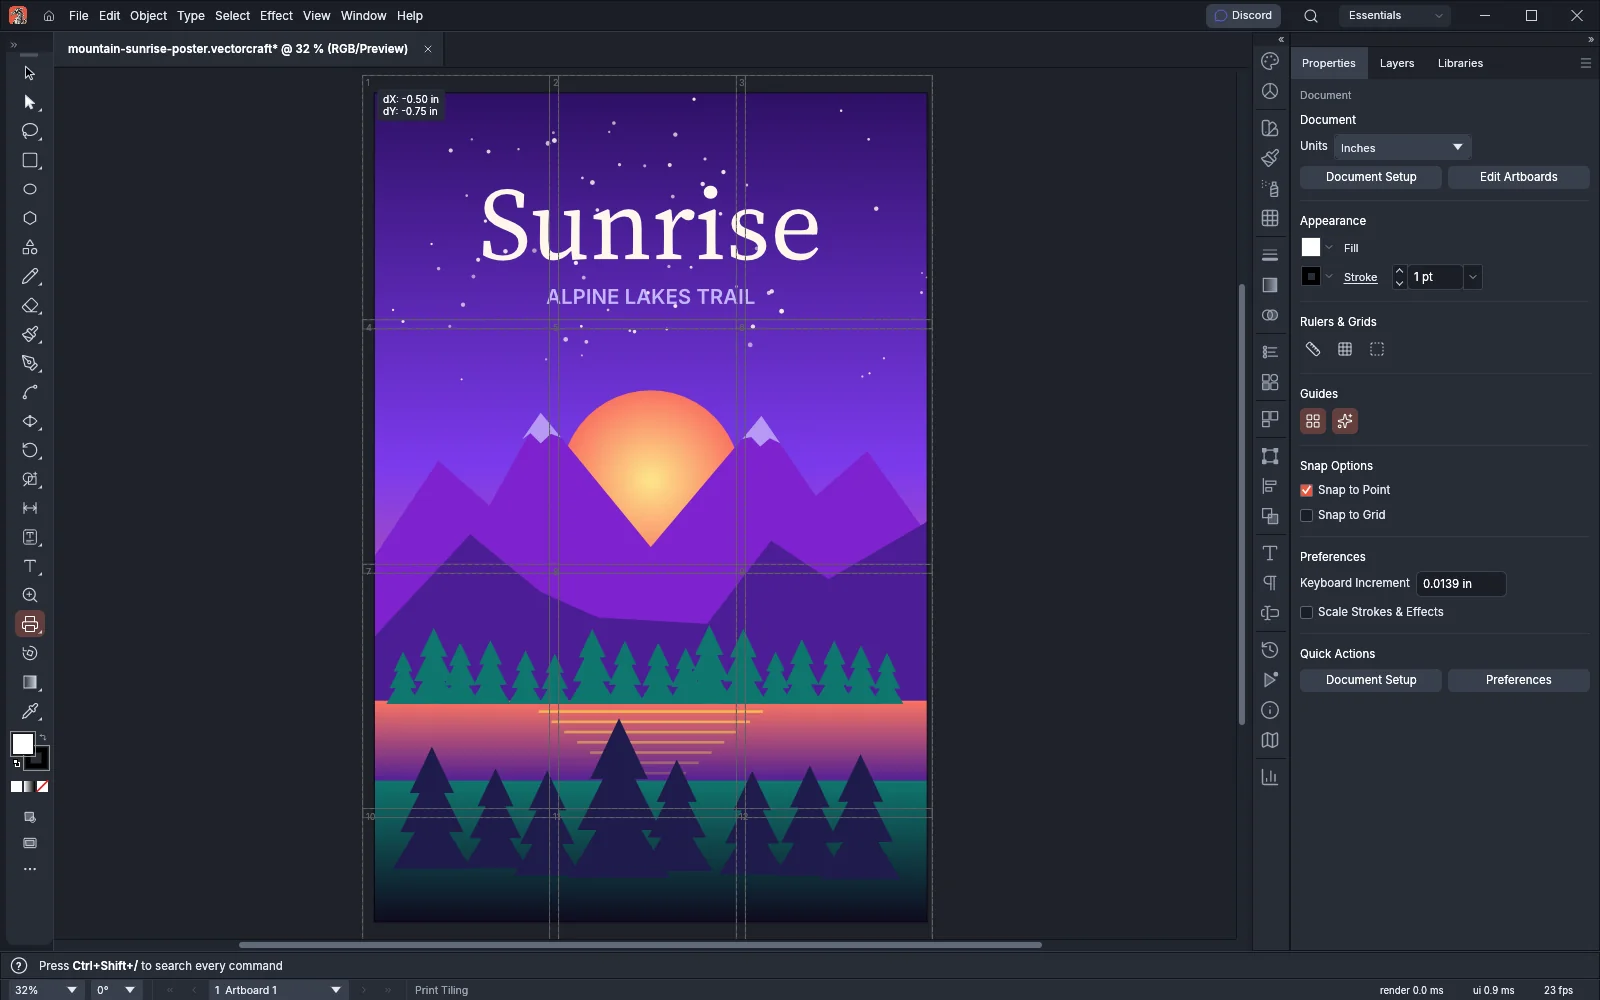
The grid position is saved with the print settings. While Scaling is a tile mode, Placement in the Print dialog is grayed out. After the tool places the sheets, the General section shows the note “The Print Tiling tool placed the pages.” with a Reset button. Reset puts the grid back at the top-left corner of the artboard, outside any bleed and marks. When Scaling is not a tile mode, Reset also makes Placement available again.
Add trim marks to line up the sheets
Section titled “Add trim marks to line up the sheets”- In the Print dialog, open the Marks and Bleed section.
- Turn on Trim marks. The marks print outside the corners of the artboard, on the corner sheets, and show where to cut the joined poster.
- To number the sheets, also turn on Page information. It prints the file name, the artboard and the date below the artboard and adds the tile number, for example
tile 11 of 12. It appears on the sheets along the bottom of the poster.
The tiles cover the artboard together with its bleed and marks, so turning on marks can add a row or column of sheets. Check the page count under the preview. Print your artwork describes the mark types, weights and offsets.
Reprint one sheet
Section titled “Reprint one sheet”Tiles are numbered from 1, across each row from left to right, then down. In a grid of three columns and two rows, the top row is 1, 2, 3 and the bottom row is 4, 5, 6. To reprint a damaged sheet, enter its number in Tile Range. Numbering starts again on each artboard.
Changing the paper, scale, margin, overlap or grid position can change the numbering, so check the preview again before you reprint.
Put the sheets together
Section titled “Put the sheets together”Lay the sheets out in order. Line up the repeated artwork in the overlaps, trim the unprinted edges if you need to, and tape or glue the sheets together. Print two neighboring tiles first to check the scale and overlap before you print a large job.
Save the setup for next time
Section titled “Save the setup for next time”- Choose Done to keep the settings with the document without printing. When you save the document, the settings and the grid position are saved in the file, and the Print dialog opens with them next time.
- To use the same tiling for other documents, choose Save Preset… next to Print Preset, type a name in Save as preset and choose Save. Pick the preset in Print Preset the next time you print.
- To add, change, delete, import or export presets without opening the Print dialog, choose Edit → Print Presets….
If something goes wrong
Section titled “If something goes wrong”- The drawing shrinks onto one sheet: Scaling is set to Fit to Page. Choose a tile mode, and check both Scale boxes.
- Art is missing along the edges of sheets: use Tile Imageable Areas with a larger Unprintable margin, or a bigger Overlap.
- No tiles show on the canvas: choose Done in the Print dialog to keep the settings, then turn on View → Show Print Tiling. If the settings aren’t valid, no tiles show; check Summary in the Print dialog.
- Summary reports an error about the overlap: Overlap must be less than half the shorter side of a tile. Enter a smaller value.
- Too many or too few pages: check Artboards, Tile Range and Copies. Under Output, use Composite for an ordinary poster.
In the web version, printing goes through the browser’s print dialog, and PDF File downloads the PDF.