Draw and transform shapes
This guide covers the shape, line, arc, spiral, grid and flare tools, live corners and live shapes, selecting, copying and pasting, and moving, rotating, reflecting, scaling and shearing objects with the tools, the Transform panel and the Object → Transform commands, including Transform Each and Transform Again.
Shortcuts are written for Windows and Linux first, then macOS. Edit → Keyboard Shortcuts… changes them.
Draw a shape
Section titled “Draw a shape”- Pick a shape tool in the toolbar, or press its key from the following table.
- Drag on the artboard. The shape follows the pointer until you release the mouse button.
- While you drag, use these keys to change the shape:
- Hold Shift to draw a square, a circle, or a line at a 45° step. With the Polygon or Star tool, Shift keeps the shape upright.
- Hold Alt (Option on macOS) to draw a rectangle, ellipse or line from the center outward. The Polygon and Star tools always draw from the center.
- Hold Space to move the shape you are drawing.
- With the Polygon or Star tool, press Up Arrow or Down Arrow to add or remove sides or points.
- To draw a shape at an exact size, click once without dragging. The tool’s dialog opens. Type the values and click OK.
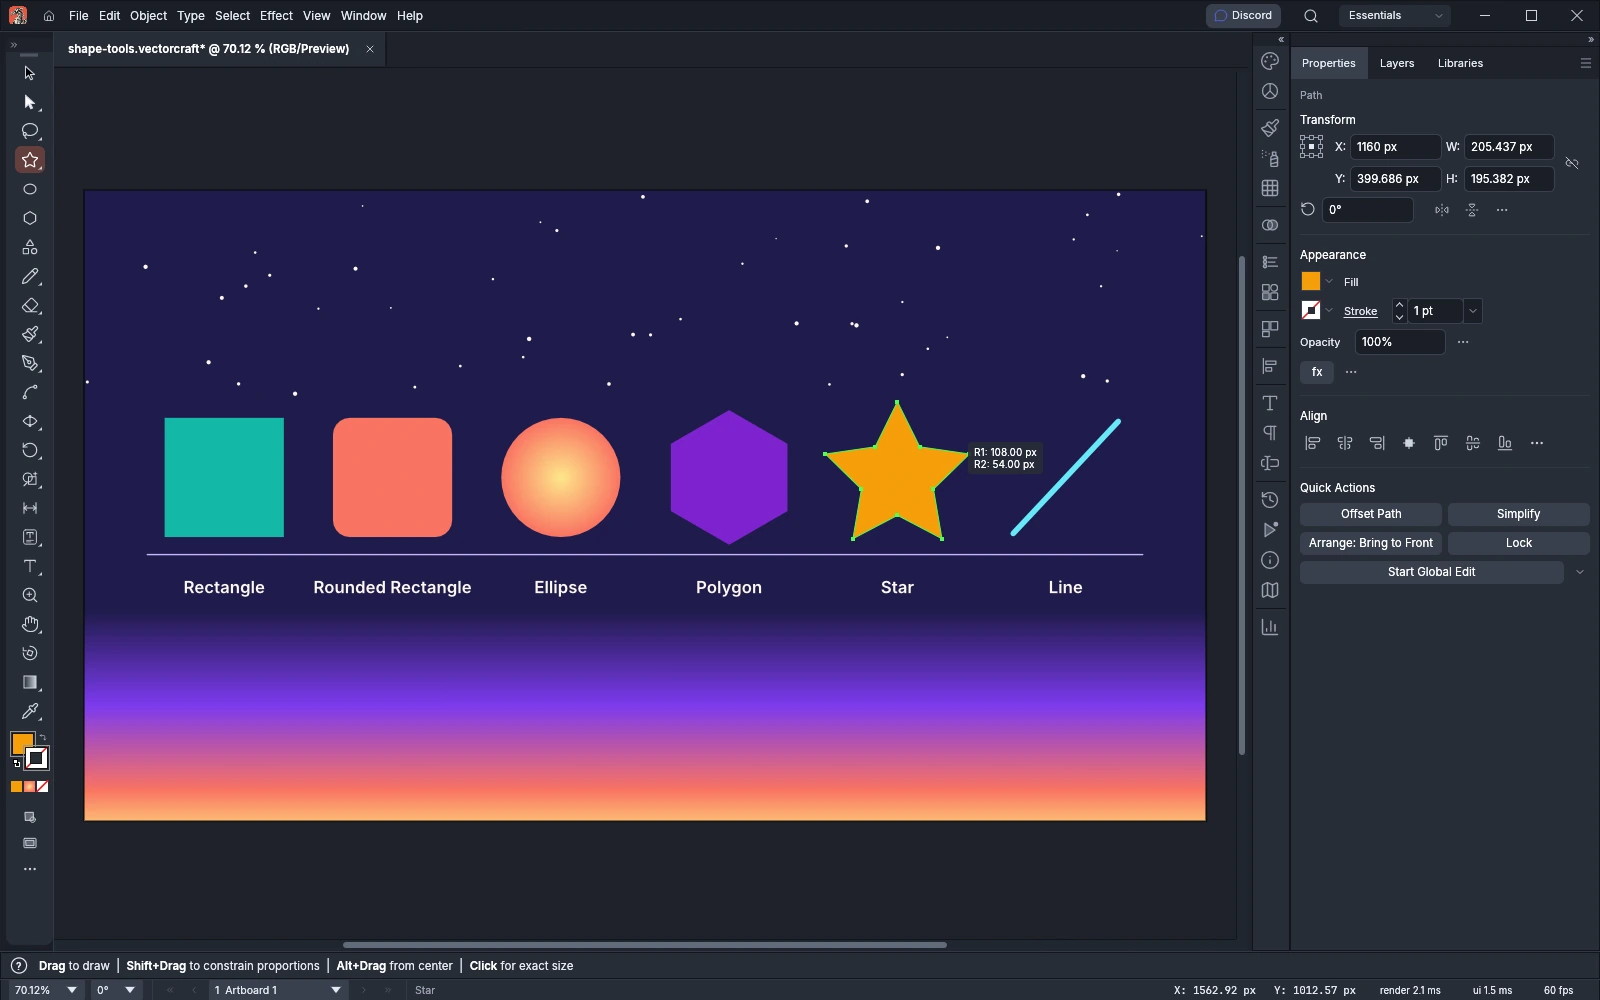
| Tool | Key | A drag draws | Keys while dragging |
|---|---|---|---|
| Rectangle Tool | M | A rectangle | Shift draws a square |
| Rounded Rectangle Tool | A rectangle with rounded corners | Shift draws a square, and Up Arrow and Down Arrow change the corner radius | |
| Ellipse Tool | L | An ellipse | Shift draws a circle |
| Polygon Tool | A regular polygon, with 6 sides by default | Up Arrow and Down Arrow change the number of sides | |
| Star Tool | A star, with 5 points by default | Up Arrow and Down Arrow change the number of points | |
| Line Segment Tool | \ | A straight line | Shift keeps the line at 45° steps |
The Arc, Spiral, Rectangular Grid, Polar Grid and Flare tools are in the same toolbar groups as the Line Segment and Rectangle tools. A click with the Arc, Spiral, grid or Flare tools also opens a dialog for exact values.
Type an exact size
Section titled “Type an exact size”- Pick the Rectangle, Rounded Rectangle, Ellipse, Polygon or Star tool.
- Click once on the artboard without dragging. A dialog named after the shape opens.
- Type the values from the following table and click OK. The shape is drawn at those values.
The dialogs place and size the shape as follows:
- The Rectangle, Rounded Rectangle and Ellipse tools put the top-left corner of the shape where you clicked. Alt-click (Option-click on macOS) to center the shape on the click instead.
- The Polygon and Star tools center the shape on the click.
- In the Rectangle, Rounded Rectangle and Ellipse dialogs, the Constrain Width and Height Proportions link sits beside Width and Height. While the link is on, typing one side changes the other so the shape keeps its proportions. The next of these dialogs opens with the link as you left it.
| Dialog | Field | Default | Range |
|---|---|---|---|
| Rectangle, Ellipse | Width, Height | 100 pt | Any size |
| Rounded Rectangle | Width, Height | 100 pt | Any size |
| Rounded Rectangle | Radius | 12 pt | Any size |
| Polygon | Radius | 50 pt | Any size |
| Polygon | Sides | 6 | 3 to 1000 |
| Star | Radius 1 (outer) | 50 pt | Any size |
| Star | Radius 2 (inner) | 25 pt | Any size |
| Star | Points | 5 | 2 to 1000 |
The Polygon and Star dialogs open with the number of sides or points the tool last used, and OK keeps the number you typed for the next shape.
Draw lines, arcs and spirals
Section titled “Draw lines, arcs and spirals”The Line Segment, Arc and Spiral tools share a toolbar group.
- Pick the tool in the toolbar. The Line Segment tool’s key is \.
- Drag on the artboard. The keys in the following table change the shape while you drag.
- To type exact values, click once without dragging. To set the values the tool uses next without drawing, double-click the Line Segment or Arc tool in the toolbar.
| Tool | Keys while dragging |
|---|---|
| Line Segment Tool | Shift keeps the line at 45° steps. Alt (Option on macOS) draws from the center. Space moves the line. |
| Arc Tool | Shift makes both axes the same length. Alt (Option on macOS) draws from the center. Up Arrow and Down Arrow change the slope by 10. C switches the arc between open and closed. F switches the base between the X and Y axes. Space moves the arc. |
| Spiral Tool | Up Arrow and Down Arrow add or remove segments. Hold Alt (Option on macOS) to keep the inner end in place and add or remove whole winds of four segments as you drag. Hold Ctrl (Cmd on macOS) to keep the inner end in place and change the decay instead. Space moves the spiral. |
The Line Segment, Arc, Spiral, grid and Flare tools show no hints in the status bar. The status bar names the shortcut that opens Help → Search Commands… instead.
Line Segment Tool Options draws a line from the point you clicked:
| Option | Default | What it does |
|---|---|---|
| Length | 100 pt | The length of the line. A negative length draws the line in the opposite direction. |
| Angle | 0° | The direction of the line, counterclockwise from the right |
| Fill Line | Off | Gives the line the current fill |
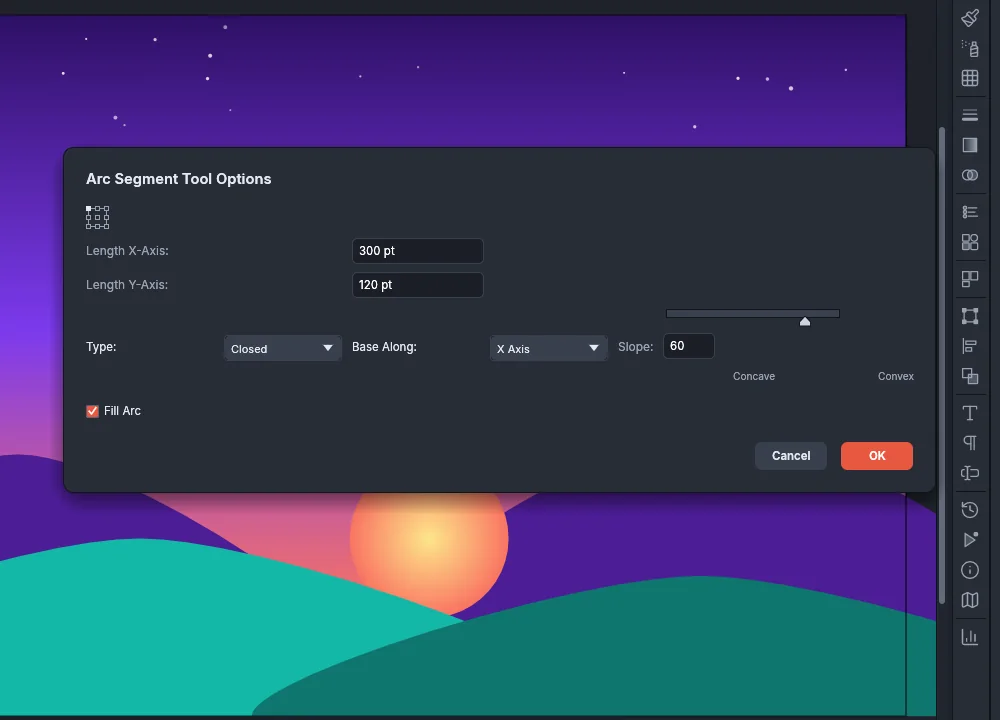
Arc Segment Tool Options places the arc with its reference point locator, at the top of the dialog, on the point you clicked:
| Option | Default | What it does |
|---|---|---|
| Reference point | Top left | The corner or side of the arc’s box that goes on the click |
| Length X-Axis | 100 pt | The width of the arc |
| Length Y-Axis | 100 pt | The height of the arc |
| Type | Open | Open draws the curve only. Closed adds the two straight sides that close it. |
| Base Along | X Axis | X Axis or Y Axis, the axis the arc starts from |
| Slope | 50 | From −100 (Concave) to 100 (Convex) |
| Fill Arc | Off | Gives the arc the current fill |
The Spiral dialog draws a spiral centered on the click:
| Option | Default | What it does |
|---|---|---|
| Radius | 50 pt | The distance from the center to the outer end of the spiral. It takes any size. |
| Decay | 80% | The radius of each segment, a quarter turn, as a percentage of the one before it, from 5% to 150% |
| Segments | 10 | The number of segments in the spiral, from 2 to 1000 |
| Clockwise | On | On winds the spiral clockwise, off winds it counterclockwise |
OK in each of these dialogs also keeps its values for the next line, arc or spiral the tool draws.
Draw rectangular and polar grids
Section titled “Draw rectangular and polar grids”- Pick the Rectangular Grid Tool or the Polar Grid Tool. They are in the Line Segment tool’s group.
- Drag on the artboard. Shift draws a square grid, Alt (Option on macOS) draws it from the center, and Space moves it.
- While you drag, change the dividers with these keys:
- Up Arrow and Down Arrow add and remove horizontal dividers (rectangular grid) or concentric dividers (polar grid).
- Right Arrow and Left Arrow add and remove vertical dividers (rectangular grid) or radial dividers (polar grid).
- F and V lower and raise the skew of the horizontal dividers (rectangular grid) or the radial dividers (polar grid) by 10%.
- X and C lower and raise the skew of the vertical dividers (rectangular grid) or the concentric dividers (polar grid) by 10%.
- Release the mouse button. The next grid you drag uses the same dividers and skews.
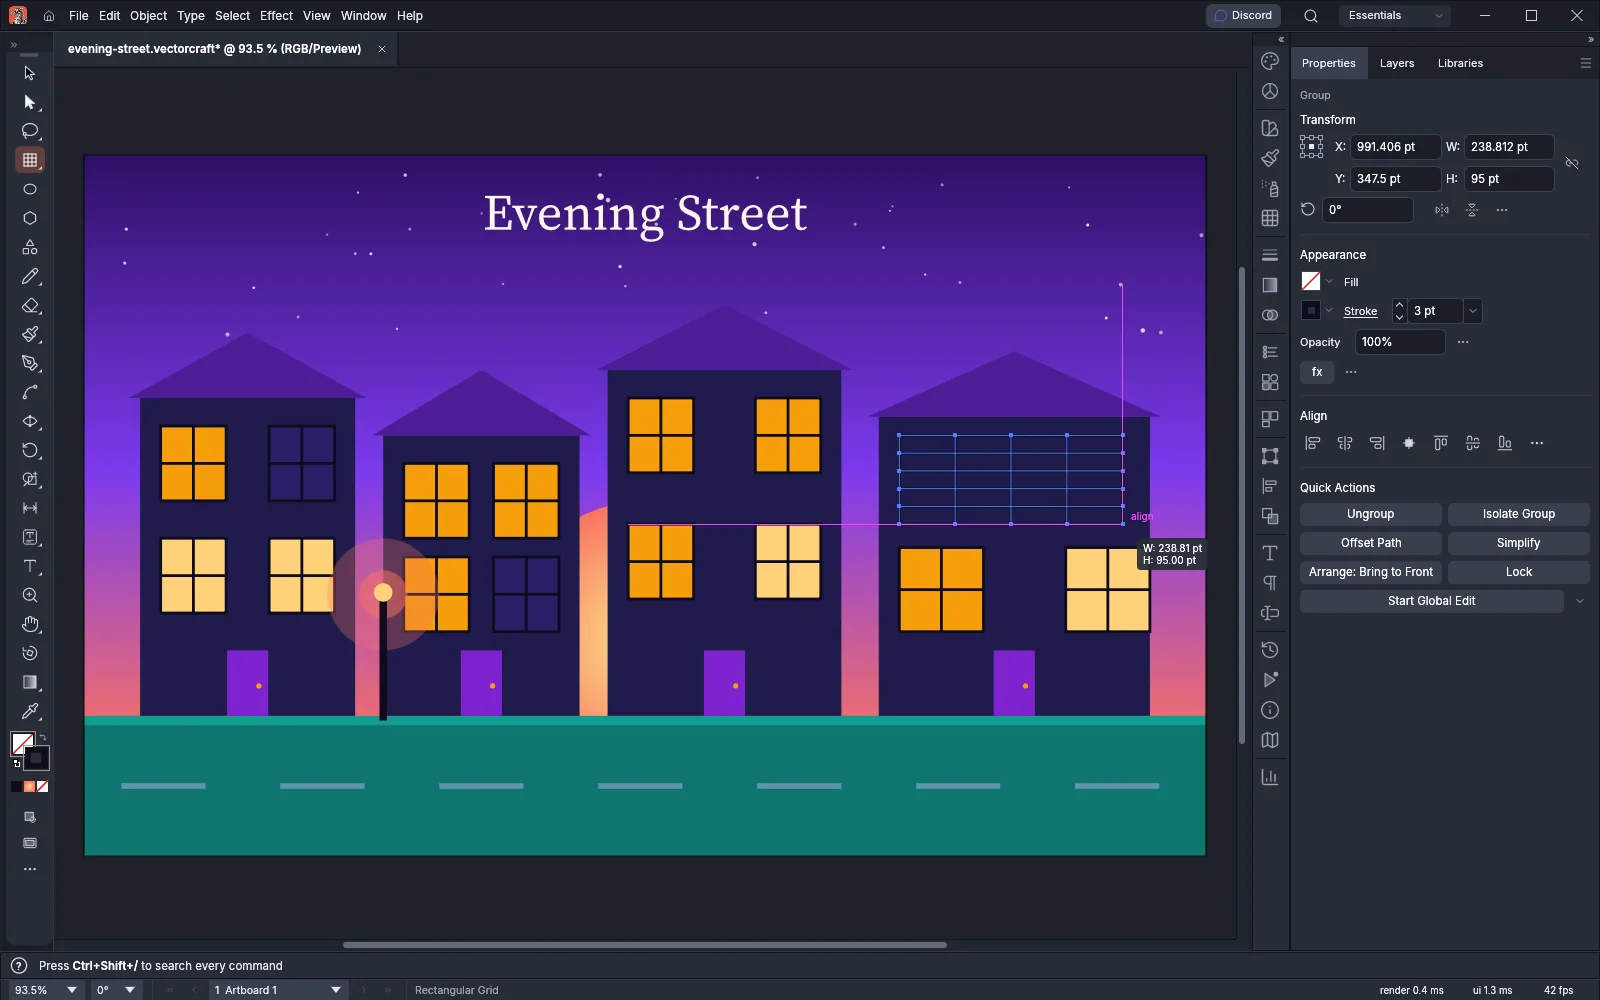
Click once with a grid tool to open the Rectangular Grid or Polar Grid dialog, which draws a grid at the point you clicked. Double-click the tool in the toolbar to open Rectangular Grid Tool Options or Polar Grid Tool Options, which sets the values the tool uses next without drawing. Both dialogs start with a reference point locator that chooses which point of the grid goes on the click.
Rectangular Grid Tool Options:
| Option | Default | What it does |
|---|---|---|
| Width, Height | 100 pt | The size of the grid. It takes any size. |
| Horizontal Dividers | 5 | The number of horizontal lines inside the grid, from 0 to 999 |
| Skew (Bottom to Top) | 0% | Spaces the horizontal dividers unevenly, from −500% to 500%. A positive skew crowds them toward the top. |
| Vertical Dividers | 5 | The number of vertical lines inside the grid, from 0 to 999 |
| Skew (Left to Right) | 0% | Spaces the vertical dividers unevenly, from −500% to 500%. A positive skew crowds them toward the right. |
| Use Outside Rectangle As Frame | On | On draws the outside as one rectangle, off draws its four sides as separate lines |
| Fill Grid | Off | Gives the grid the current fill |
Polar Grid Tool Options:
| Option | Default | What it does |
|---|---|---|
| Width, Height | 100 pt | The size of the grid. It takes any size. |
| Concentric Dividers | 5 | The number of ellipses inside the outer one, from 0 to 999 |
| Skew (Inside to Outside) | 0% | Spaces the ellipses unevenly, from −500% to 500%. A positive skew crowds them toward the outside. |
| Radial Dividers | 5 | The number of lines from the center to the edge, from 0 to 999 |
| Skew (Left to Right) | 0% | Spaces the radial dividers unevenly, from −500% to 500%. A positive skew crowds them clockwise of the top one. |
| Create Compound Path From Ellipses | Off | Pairs the ellipses into compound paths, which draw as rings |
| Fill Grid | Off | Gives the grid the current fill |
Draw a flare
Section titled “Draw a flare”The Flare tool draws a lens flare: a bright center, a halo, rays and rings.
- Pick the Flare Tool. It is in the Rectangle tool’s group.
- Drag from where the center of the flare goes. The drag sets the size of the center, and moving the pointer up or down turns the rays. Hold Shift to keep the rays at their current angle, and press Up Arrow or Down Arrow to add or remove rays.
- Release the mouse button, then click where the rings end. The rings run from the center toward that point.
- Hold Space during either drag to move the flare.
To type the settings, click once without dragging, or double-click the tool in the toolbar. Flare Tool Options opens. Opened by a click, it has Preview on and draws the flare at the click when you click OK. Hold Alt (Option on macOS) to turn Cancel into Reset, which puts every option back to its default. The tool keeps the values for the next flare.
| Group | Option | Default | Range |
|---|---|---|---|
| Center | Diameter | 100 pt | 0 to 1000 pt |
| Center | Opacity | 50% | 0% to 100% |
| Center | Brightness | 30% | 0% to 100% |
| Halo | Growth | 20% | 0% to 300% |
| Halo | Fuzziness | 50% | 0% to 100% |
| Rays (on by default) | Number | 15 | 0 to 50 |
| Rays | Longest | 300% | 0% to 1000% |
| Rays | Fuzziness | 100% | 0% to 100% |
| Rings (on by default) | Path | 300 pt | 0 to 1000 pt |
| Rings | Number | 10 | 0 to 50 |
| Rings | Largest | 50% | 0% to 250% |
| Rings | Direction | 45° | 0° to 360° |
Clear the Rays or Rings checkbox to draw the flare without them.
Round corners with the live widgets
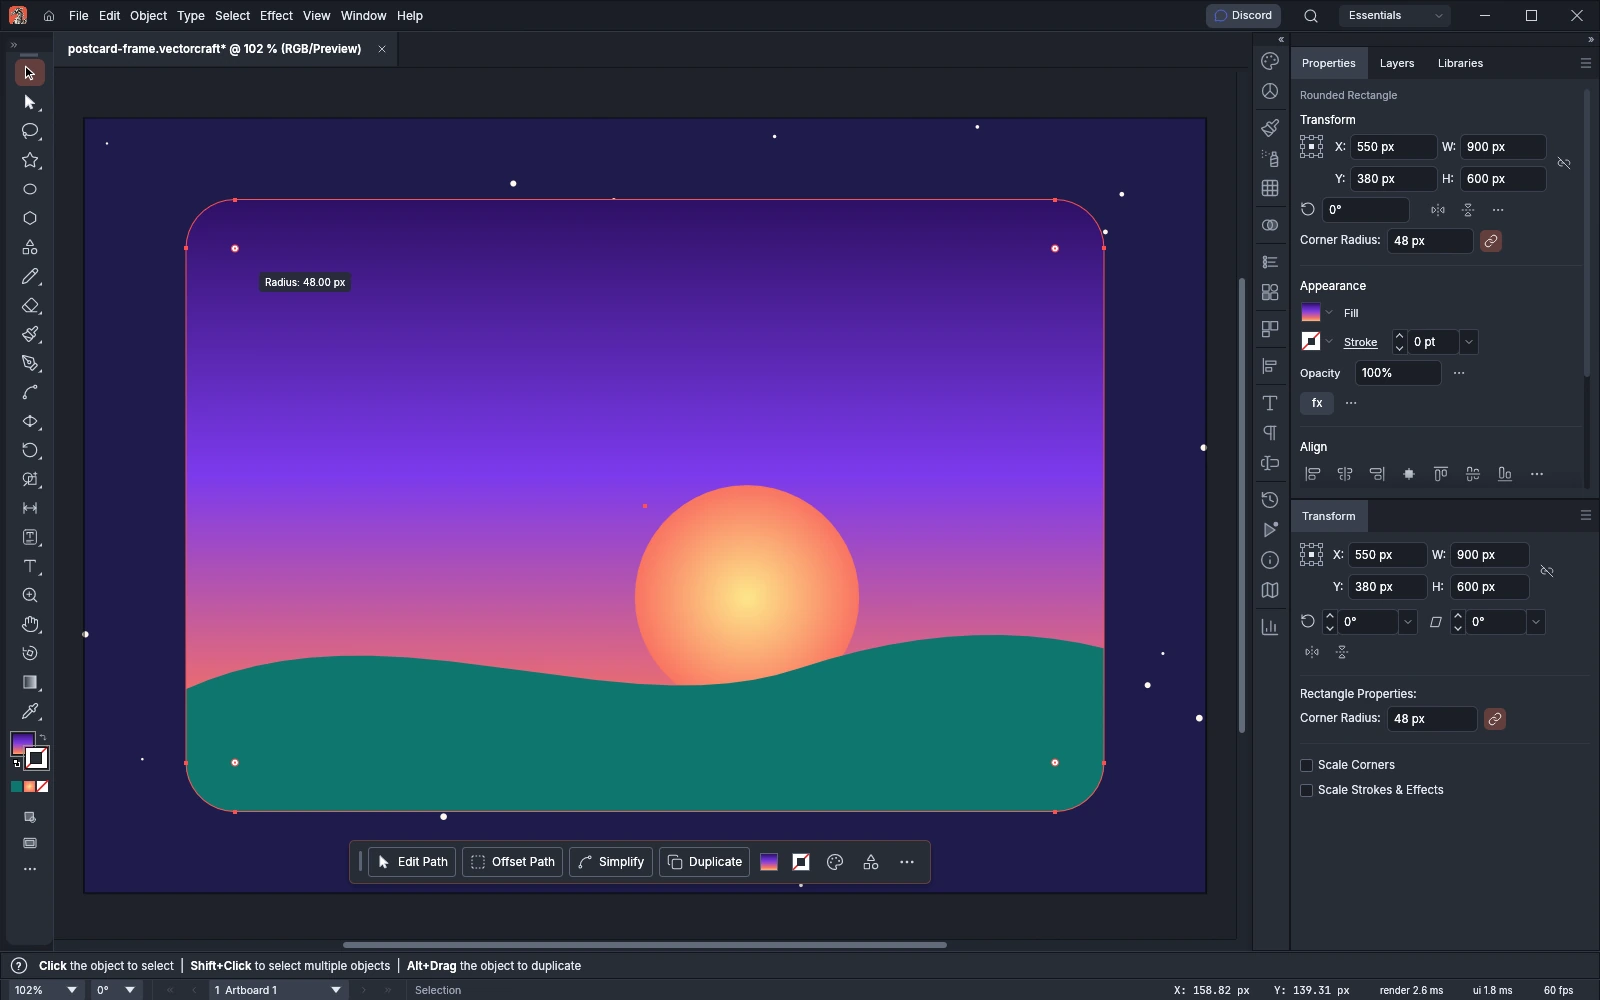
Section titled “Round corners with the live widgets”Rectangles, rounded rectangles, ellipses and polygons stay live shapes after you draw them. While the Selection tool or the Rectangle, Rounded Rectangle, Ellipse, Polygon or Star tool is active, a selected live shape shows its widgets.
- Select a rectangle or polygon. A widget appears inside each corner.
- Drag any corner widget to round all of the shape’s corners together, or to make them sharper again.
- Alt-click (Option-click on macOS) a corner widget to switch the corner kind between round, inverted round and chamfer.
- Double-click a corner widget to open the Corners dialog and type an exact radius.
- A selected ellipse shows two pie widgets just outside its outline. Drag one to cut a wedge out of the ellipse. Double-click either pie widget to make the ellipse whole again.
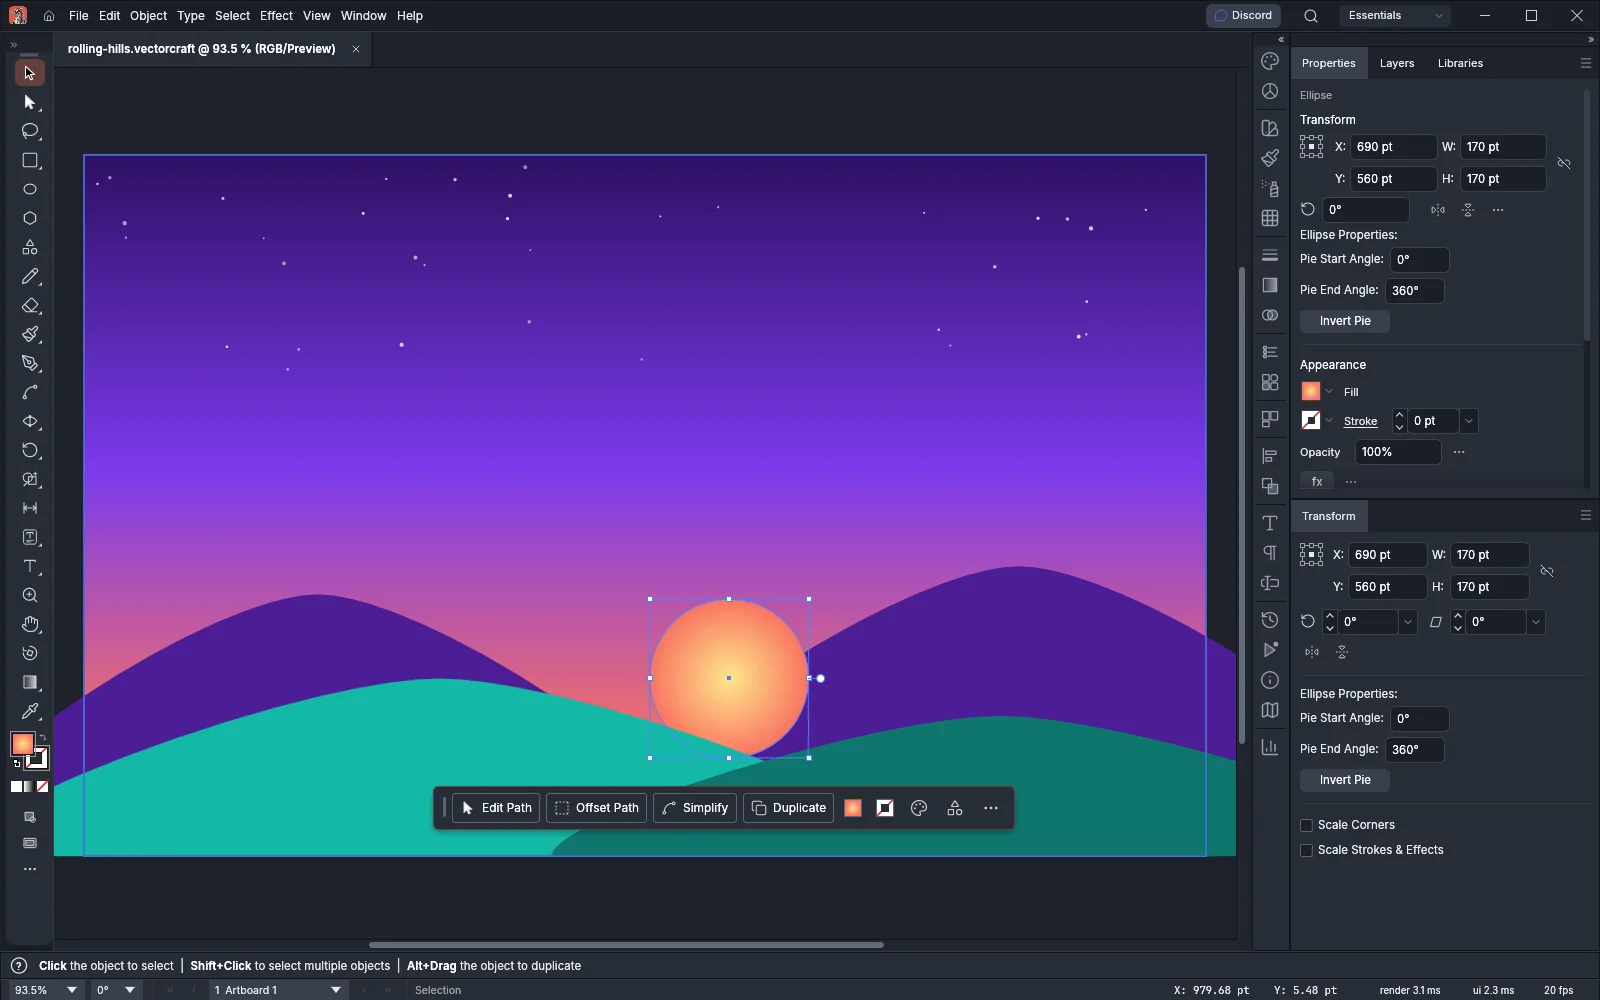
The Transform panel (Window → Transform, or Shift+F8) shows the properties of the selected live shape:
| Shape | Panel section | Fields |
|---|---|---|
| Rectangle | Rectangle Properties | Corner Radius |
| Ellipse | Ellipse Properties | Pie Start Angle, Pie End Angle and the Invert Pie button |
| Polygon | Polygon Properties | Sides, Angle, Corner, Corner Radius, Radius, Side Length and the Make Sides Equal button |
Turn a path into a live shape
Section titled “Turn a path into a live shape”Object → Shape holds two commands:
- Convert to Shape turns selected paths that are rectangles, at any rotation, or ellipses that are not rotated into live shapes. They then show the live widgets and their section in the Transform panel.
- Expand Shape turns selected live shapes into plain paths. The widgets and the shape’s properties no longer appear, and you edit the anchor points with the Direct Selection tool.
Select objects
Section titled “Select objects”Press V for the Selection tool.
- Click an object to select it. Shift-click another object to add it to the selection, or Shift-click a selected object to remove it.
- Drag across empty canvas to draw a marquee. Every object the marquee touches is selected.
- Drag a handle of the bounding box to scale the selection. Hold Shift to keep its proportions, and hold Alt (Option on macOS) to scale from the center.
- Drag from just outside a corner handle to rotate the selection. Hold Shift to rotate in 45° steps.
- Ctrl-click (Cmd-click on macOS) an object to select the object behind it.
- Double-click a group or an object to enter isolation mode, where you edit it without touching the rest of the artwork. To leave, right-click the canvas and choose Exit Isolation Mode.
Move and copy
Section titled “Move and copy”- Drag a selected object to move it. Hold Shift while dragging to constrain the direction of the move.
- Hold Alt (Option on macOS) while dragging to move a copy and leave the original in place.
- To move by small steps, press the arrow keys. Each press moves the selection by the Keyboard Increment preference, which is 1 pt by default.
- Shift+Arrow moves the selection 10 times as far.
- Alt+Arrow (Option+Arrow on macOS) moves a copy.
- To move by an exact distance, press Enter with the Selection tool active, or choose Object → Transform → Move…. Type the distances and click OK. Select Copy (make a transformed copy) first to move a copy instead. The Move dialog opens with the distance of your last move, so pressing Enter twice repeats a move at the same spacing.
Copy and paste
Section titled “Copy and paste”The Edit menu holds the clipboard commands:
| Command | Windows and Linux | macOS | What it does |
|---|---|---|---|
| Cut | Ctrl+X | Cmd+X | Removes the selection and puts it on the clipboard |
| Copy | Ctrl+C | Cmd+C | Puts a copy of the selection on the clipboard |
| Paste | Ctrl+V | Cmd+V | Pastes the objects in the middle of the window |
| Paste in Front | Ctrl+F | Cmd+F | Pastes the objects where they were copied, just above the top selected object, or at the top of the current layer when nothing is selected |
| Paste in Back | Ctrl+B | Cmd+B | Pastes the objects where they were copied, just below the bottom selected object, or at the bottom of the current layer when nothing is selected |
| Paste in Place | Ctrl+Shift+V | Cmd+Shift+V | Pastes the objects where they were copied |
| Paste on All Artboards | Ctrl+Alt+Shift+V | Cmd+Option+Shift+V | Pastes a copy on every artboard, at the same position relative to each artboard |
| Paste without Formatting | Ctrl+Alt+V | Cmd+Option+V | Pastes as Paste does, and pasted text takes the default character style |
| Clear | Delete | Delete | Deletes the selection without putting it on the clipboard |
The Clipboard Handling preferences set the formats VectorCraft copies and how pasted text keeps its formatting. The Paste Offset preference on the General page sets how far pasted and duplicated objects are offset.
Set position and size in the Transform panel
Section titled “Set position and size in the Transform panel”- Select the objects and choose Window → Transform (Shift+F8).
- Click a point of the reference point locator. X and Y show the position of that point of the selection, and the transforms in the panel turn or flip the selection about it.
- Type a value in a field and press Enter. Press Alt+Enter (Option+Return on macOS) to apply the value to a copy instead. Press Ctrl+Enter (Cmd+Return on macOS) in W or H to scale the other side in proportion.
| Control | What it does |
|---|---|
| Reference point locator | Chooses the point of the selection that X and Y show and that the selection turns and flips about |
| X, Y | The position of the reference point. A new value moves the selection. |
| W, H | The width and height of the selection. A new value scales it. |
| Constrain Width and Height Proportions | The link beside W and H. While it is on, a new width or height scales the other side in proportion. |
| Rotate | The angle of the selection. A new value turns the selection to that angle. |
| Shear | Shears the selection horizontally by the angle you type, between −90° and 90°. The field returns to 0° afterward. |
| Flip Horizontal, Flip Vertical | Reflect the selection across the reference point |
| Shape properties | The Rectangle Properties, Ellipse Properties or Polygon Properties of a selected live shape. See Round corners with the live widgets. |
| Scale Corners | Scales corner radii with the shape. Off by default. |
| Scale Strokes & Effects | Scales stroke weights and effects with the object. Off by default. |
The panel menu holds these commands:
- Hide Options hides Scale Corners and Scale Strokes & Effects. Show Options brings them back.
- Flip Horizontal, Flip Vertical and Scale Strokes & Effects do the same as the panel’s buttons and checkbox.
- Transform Object Only, Transform Pattern Only and Transform Both choose whether the panel transforms the objects, their pattern fills and strokes, or both. Until you choose one, the panel follows the Transform Pattern Tiles preference: Transform Both when it is on, Transform Object Only when it is off.
- Use Registration Point for Symbol makes X and Y of a selected symbol instance show its registration point. Off by default.
Rotate, reflect, scale and shear
Section titled “Rotate, reflect, scale and shear”The Rotate, Reflect, Scale and Shear tools transform the selection about a reference point. The point starts at the center of the selection.
- Select the objects and pick a transform tool.
- Click on the canvas to move the reference point, for example onto a corner. When Smart Guides or Snap to Point is on, a clicked point snaps to the nearest anchor or center.
- Drag to transform about that point. Hold Shift to rotate in 45° steps or to scale uniformly.
- To keep the original and transform a copy, hold Alt (Option on macOS) as you release the mouse button.
- To type exact values instead, Alt-click (Option-click on macOS) where the reference point should go. The tool’s dialog opens. Pressing Enter or double-clicking with the tool active also opens the dialog.
The Shear Tool and the Reshape Tool are in the Scale tool’s group.
- With the Shear tool, the direction you drag chooses the axis: a mostly horizontal drag shears horizontally, and a mostly vertical drag shears vertically. Hold Shift to keep the drag on that axis and keep the height (horizontal shear) or width (vertical shear) of the selection.
- With the Reshape tool, drag a point on a selected path. VectorCraft adds an anchor point there when the path has none, and the path around the point moves smoothly with it.
The Free Transform Tool (E) shows the bounding box. Drag a handle to scale, drag outside a corner to rotate, and drag inside the box to move.
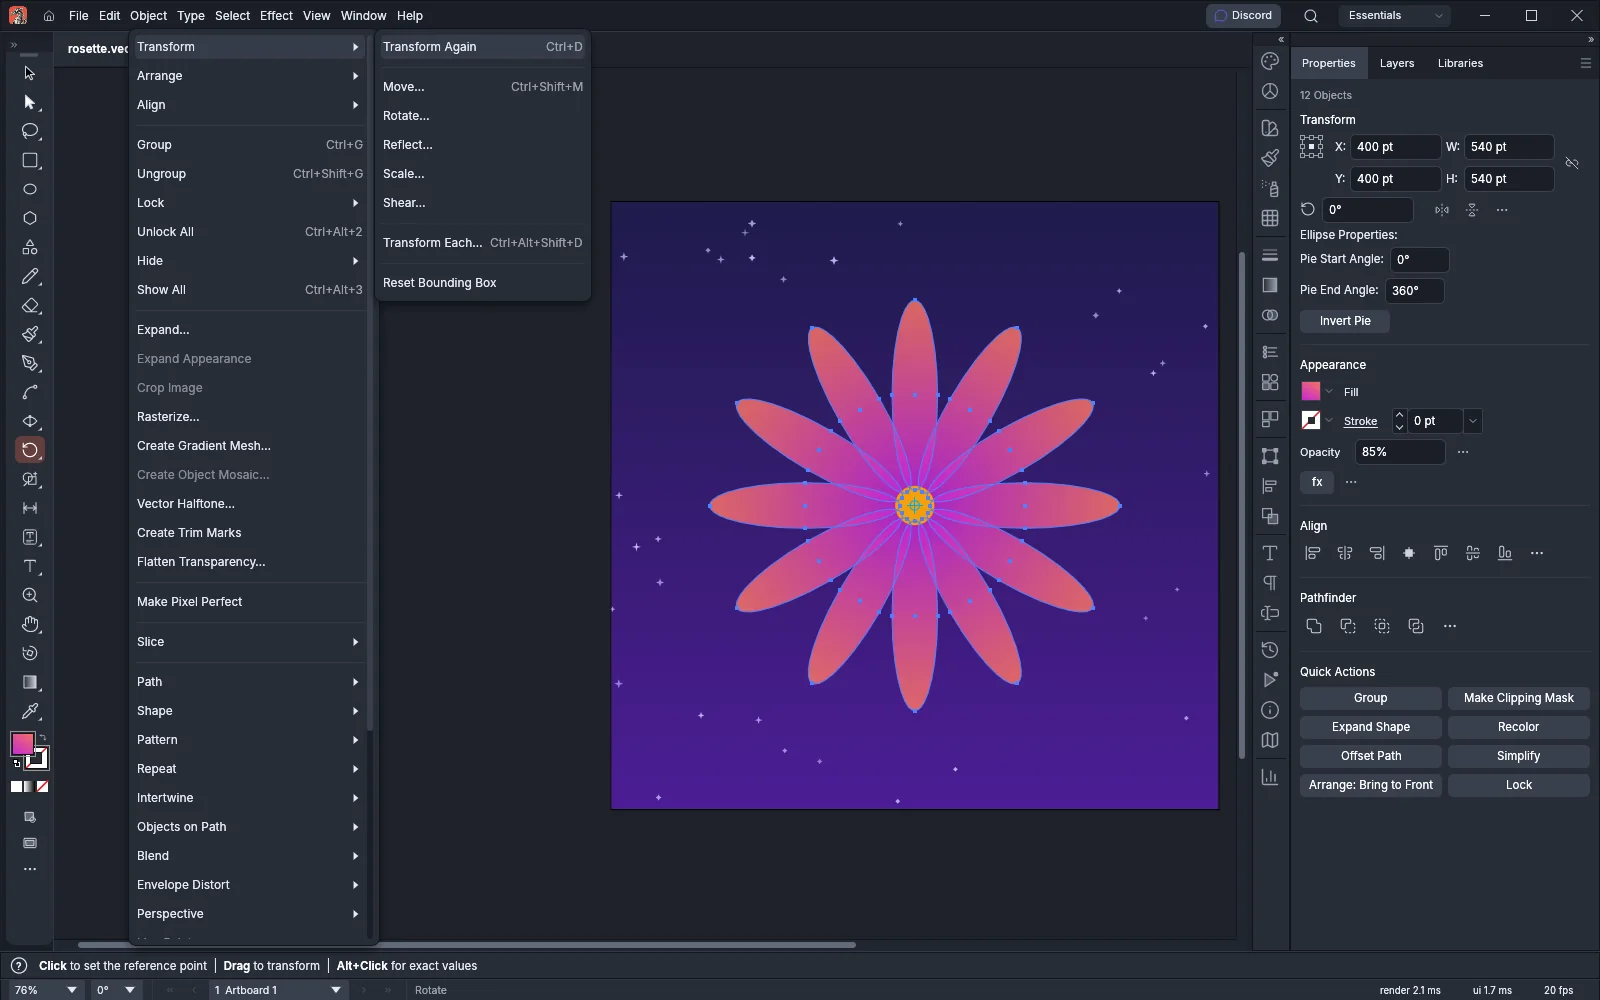
Object → Transform holds the same transforms as dialogs: Transform Again, Move…, Rotate…, Reflect…, Scale…, Shear…, Transform Each… and Reset Bounding Box. Transform Each… transforms every selected object about the reference point of its own bounding box. The same submenu appears when you right-click the canvas with objects selected.
| Dialog | Fields | Defaults |
|---|---|---|
| Move | Horizontal, Vertical, Distance, Angle | The offset of your last move. Distance and Angle are the same offset as Horizontal and Vertical, and changing one pair updates the other. An angle of 90° moves up. |
| Rotate | Angle | 0°, counterclockwise |
| Reflect | Angle, Axis (Horizontal, Vertical or Angle) | Vertical, 90° |
| Scale | Horizontal %, Vertical %, Uniform, Scale Corners, Scale Strokes & Effects | 100%, Uniform on. With Uniform on, Horizontal % scales both directions. The two scale options start from the preferences, and OK saves them back. |
| Shear | Angle, Axis (Horizontal or Vertical) | 0°, Horizontal |
Every one of these dialogs also has these options:
- Transform Objects transforms the objects. It is on by default. Turn it off to transform only the pattern tiles with Transform Patterns.
- Transform Patterns transforms pattern fills and strokes with the objects. It starts from the Transform Pattern Tiles preference.
- Copy (make a transformed copy) transforms a copy and leaves the original in place.
- Preview shows the result on the canvas as you change the values. The Rotate, Reflect, Scale and Shear dialogs open with Preview off. The Move dialog opens with the checkboxes as you last confirmed it.
In an angle field, Up Arrow and Down Arrow change the value by 1°, and Shift+Up Arrow and Shift+Down Arrow change it by 10°.
Object → Transform → Reset Bounding Box squares the bounding box of rotated objects with the page again. The objects themselves do not move or change shape.
| Command or tool | Windows and Linux | macOS |
|---|---|---|
| Move… | Ctrl+Shift+M | Cmd+Shift+M |
| Transform Again | Ctrl+D | Cmd+D |
| Transform Each… | Ctrl+Alt+Shift+D | Cmd+Option+Shift+D |
| Rotate Tool | R | R |
| Reflect Tool | O | O |
| Scale Tool | S | S |
| Free Transform Tool | E | E |
| Transform panel | Shift+F8 | Shift+F8 |
Transform several objects at once
Section titled “Transform several objects at once”Transform Each scales, moves and rotates every selected object about a reference point of its own bounding box, instead of about one point for the whole selection.
- Select the objects.
- Choose Object → Transform → Transform Each… (Ctrl+Alt+Shift+D, or Cmd+Option+Shift+D on macOS).
- Set the values. Select Preview, at the left of the buttons, to see the result on the canvas.
- Click OK to transform the objects, or Copy to transform a copy of each and leave the originals in place.
The dialog opens with the values you last confirmed, except Copy.
| Option | Default | What it does |
|---|---|---|
| Scale Horizontal, Scale Vertical | 100% | Scales each object. The sliders run from 0% to 200%, and the fields take values from −100000% to 100000%, except 0. The link at the right keeps the two scales in proportion. |
| Relative, Absolute | Relative | Relative scales by a percentage of each object’s size. Absolute sets the width and height each object becomes. When the objects do not share a size, the field reads Mixed and that side keeps its size. |
| Move Horizontal, Move Vertical | 0 pt | Moves each object. The sliders run from −1000 pt to 1000 pt, and the fields take larger values. |
| Rotate Angle | 0° | Rotates each object counterclockwise. Drag the dial or type the angle. |
| Transform Objects, Transform Patterns | On, and the Transform Pattern Tiles preference | As in the other transform dialogs |
| Scale Strokes & Effects, Scale Corners | The preferences | Scale stroke weights, effects and corner radii with each object. OK saves them to the preferences. |
| Reflect X | Off | Flips each object left to right |
| Reflect Y | Off | Flips each object top to bottom |
| Random | Off | Gives each object its own random values: a scale between 100% and the scale you set, and a move and rotation between the negative and the positive of the values you set |
| Reference Point | Center | The point of each object’s bounding box that it transforms about |
Repeat a transform
Section titled “Repeat a transform”Object → Transform → Transform Again (Ctrl+D, or Cmd+D on macOS) applies the last transform to the current selection again. When the last transform made a copy, Transform Again makes another copy.
To make a rosette from one shape:
- Draw a tall ellipse above the center of the artboard, and keep it selected.
- Press R for the Rotate tool, then Alt-click (Option-click on macOS) the center of the artboard. The Rotate dialog opens with that point as the reference point.
- Set the angle to 30°, select Copy (make a transformed copy), and click OK. A rotated copy appears and is selected.
- Press Ctrl+D (Cmd+D on macOS) ten times. Each press adds one more rotated copy. After the tenth press, the rosette has twelve petals.