
Slice artwork for the web
This page shows how to cut a design into slices, set the name, link and alt text of each slice, save the slices as web images with an HTML page that places them, and use Export Selection…, the CSS Properties panel and the SVG Interactivity panel. For Export for Screens, Export As and the other settings of Save for Web (Legacy), see Export for screens and the web.
A document can hold three kinds of slices:
| Kind | How you make it | What it covers |
|---|---|---|
| User slice | The Slice tool, Create from Selection, Create from Guides, or a command that copies or cuts slices | A rectangle of its own. It stays where it is when the art moves. |
| Object slice | Object → Slice → Make | The bounds of one object. It moves and resizes with the object. |
| Auto slice | VectorCraft adds it | The rest of the area that no user or object slice covers |
VectorCraft numbers the slices by their top edges from the top down, and from left to right among slices whose top edges are level. Auto slices are numbered too, and the numbers change when you add, move or remove a slice.
Draw slices with the Slice tool
Section titled “Draw slices with the Slice tool”- Press Shift+K, or click ••• at the bottom of the toolbar and choose Slice under Slices. On the Advanced toolbar (Window → Toolbars → Advanced), the Slice tool is in the Artboard tool’s group.
- Drag a rectangle over the part of the design that should become one image. Hold Shift to draw a square, or Alt (Option on macOS) to draw from the center. The edges snap to ruler guides and to the art.
- Release the mouse button. The new user slice gets a number at its top left corner, and VectorCraft adds auto slices around it. Press Esc before you release to cancel the drag.
Each new slice is one undo step. A click without a drag does not make a slice.
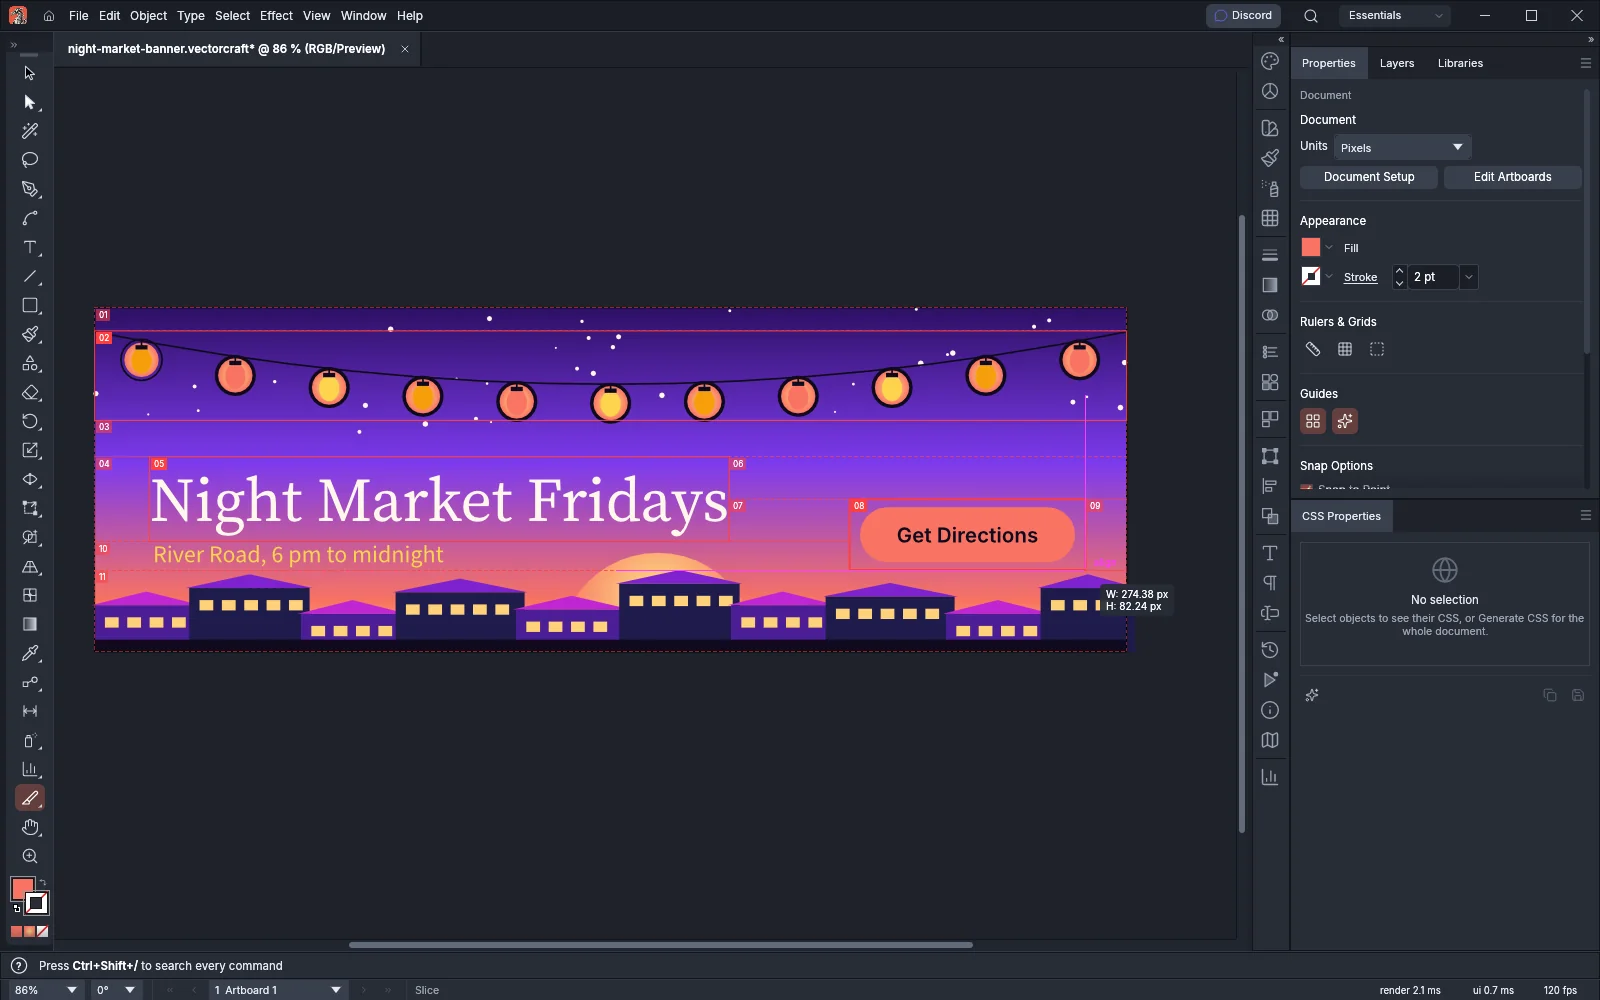
To change slices after you draw them, select the Slice Selection tool. It has no shortcut: click ••• at the bottom of the toolbar and choose Slice Selection under Slices, or pick it from the Artboard tool’s group on the Advanced toolbar. Then:
- Click a slice to select it, and Shift-click to add or remove one. Where slices overlap, a click selects the smallest one. Click outside every slice to deselect them.
- Drag a selected slice to move it. Moving an object slice moves its object.
- Drag a handle of a selected user slice to resize it. Hold Shift to keep its proportions, or Alt (Option on macOS) to resize it about its center. Object slices have no handles.
- Double-click a slice to open Slice Options.
- Press Delete to remove the selected slices. A user slice is deleted. An object slice is released, and its object stays.
Make slices from objects or guides
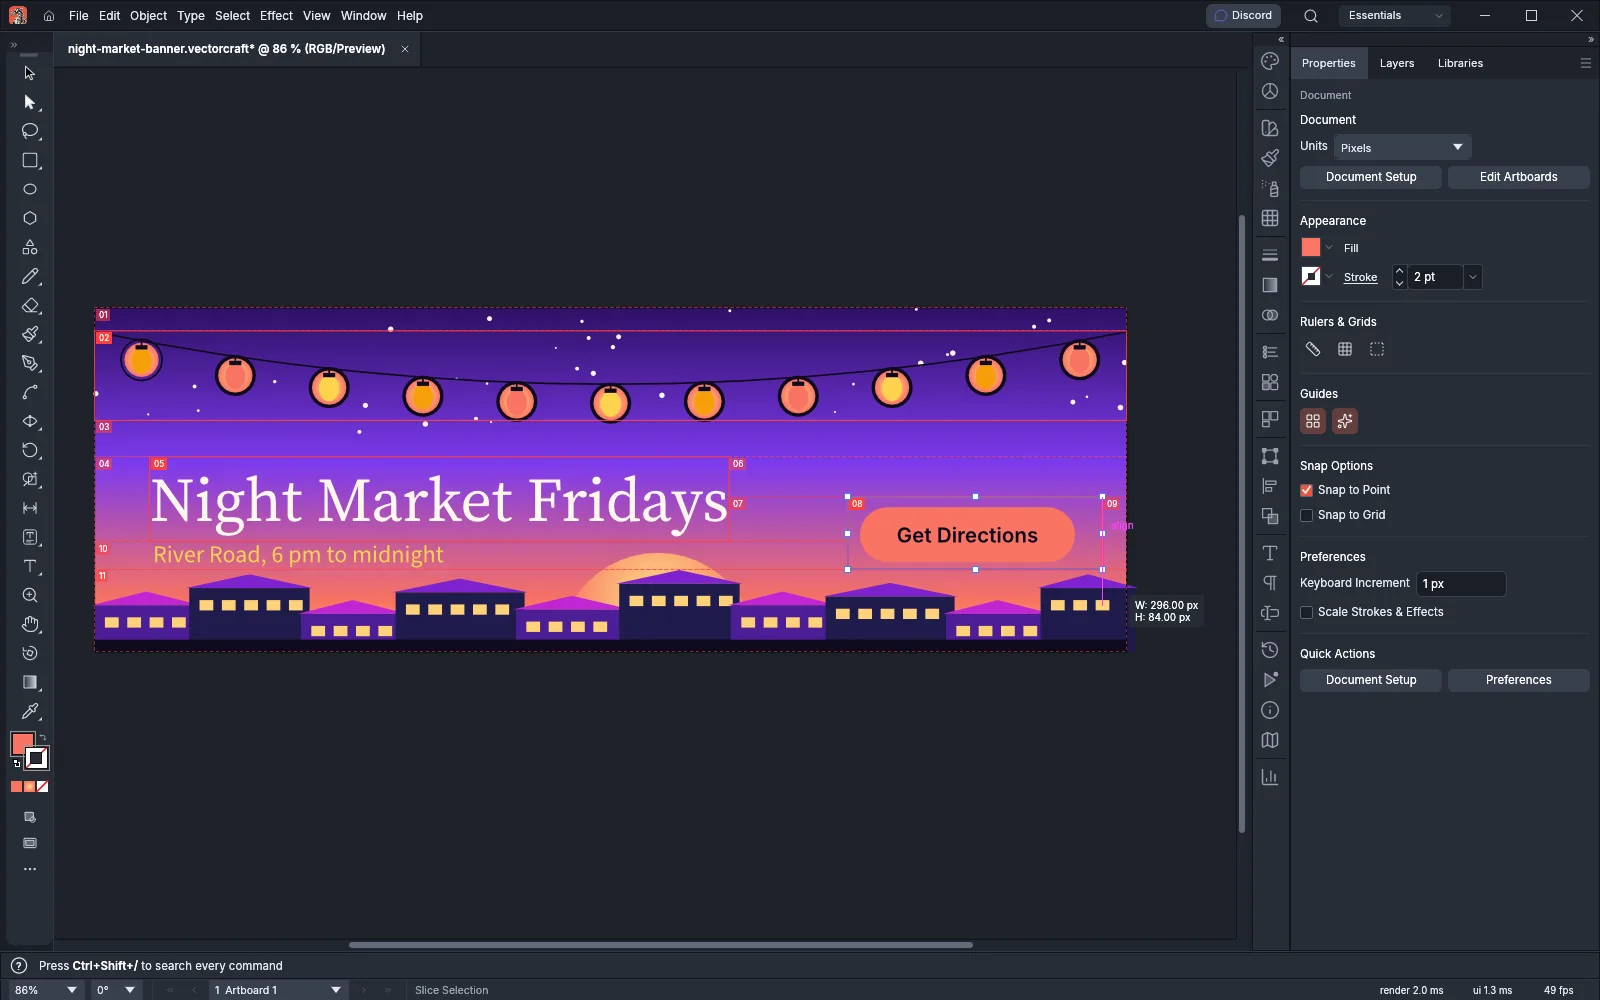
Section titled “Make slices from objects or guides”- To slice one object, select it and choose Object → Slice → Make. Each selected object becomes an object slice that follows the object’s bounds.
- To slice a group of objects with one fixed rectangle, select them and choose Object → Slice → Create from Selection. VectorCraft makes one user slice over the visible bounds of the selection and selects it.
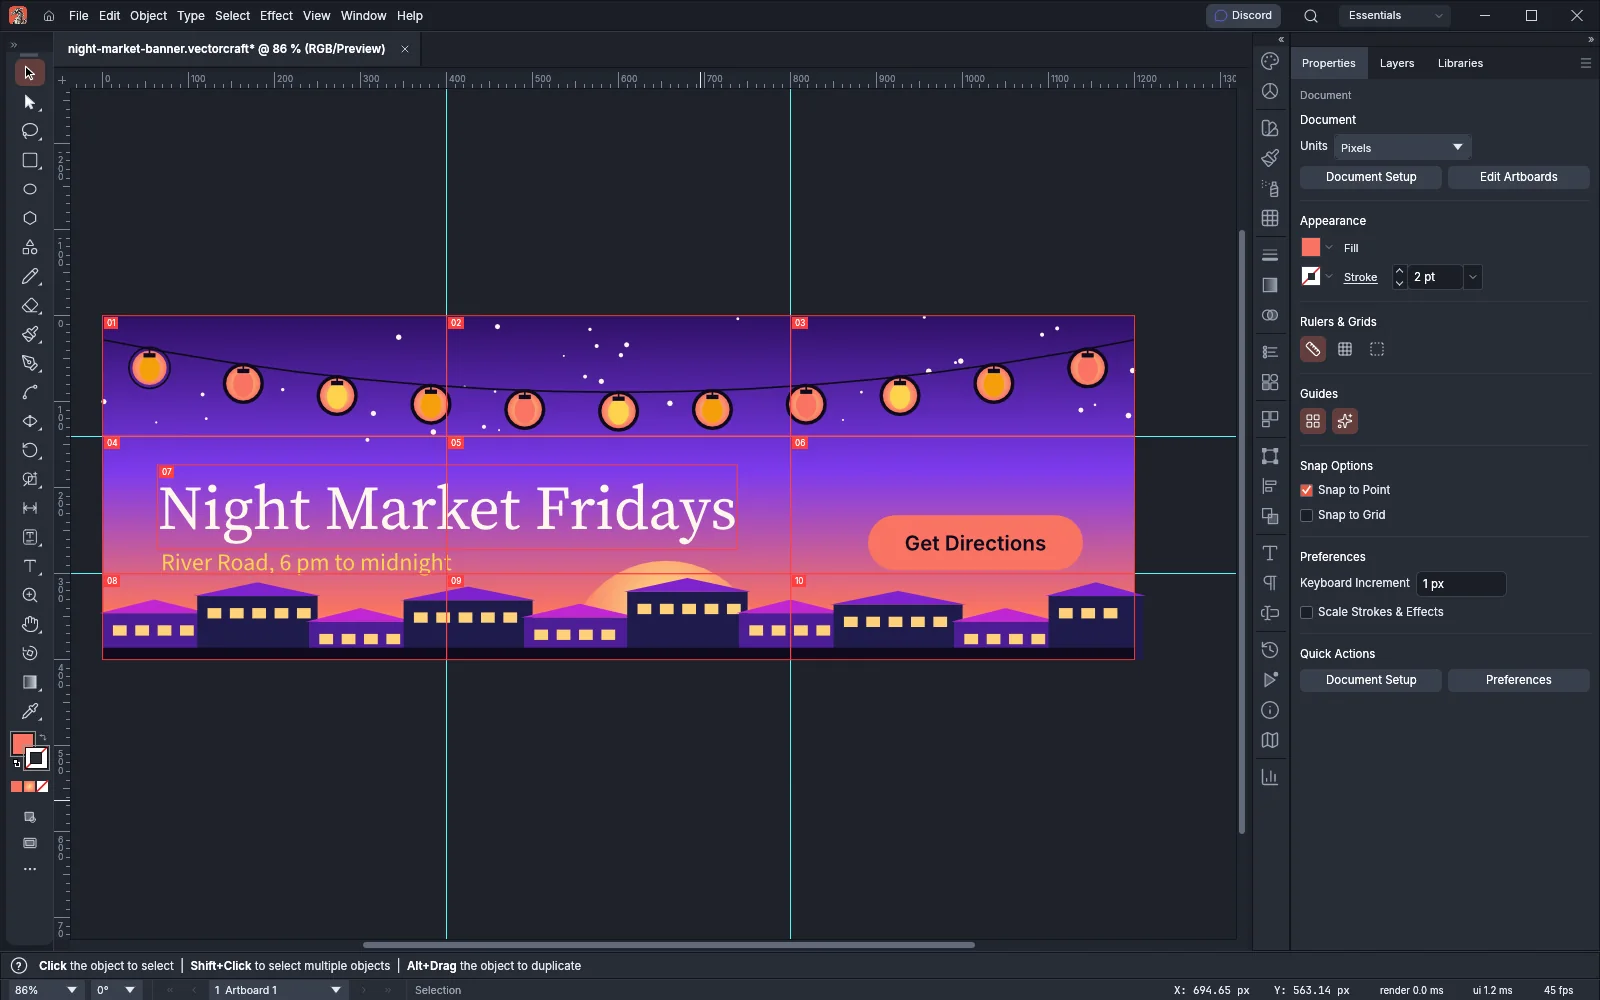
- To slice a layout along a grid, drag ruler guides where the cuts should be, then choose Object → Slice → Create from Guides. The guides cut the artboards into a grid of user slices: two vertical and two horizontal guides make nine slices. Create from Guides replaces the user slices that the document already has, and it stops with an error if the guides would make more than 1000 slices.
Choose Select → Object → Slices to select every user and object slice in the document.
Object → Slice commands
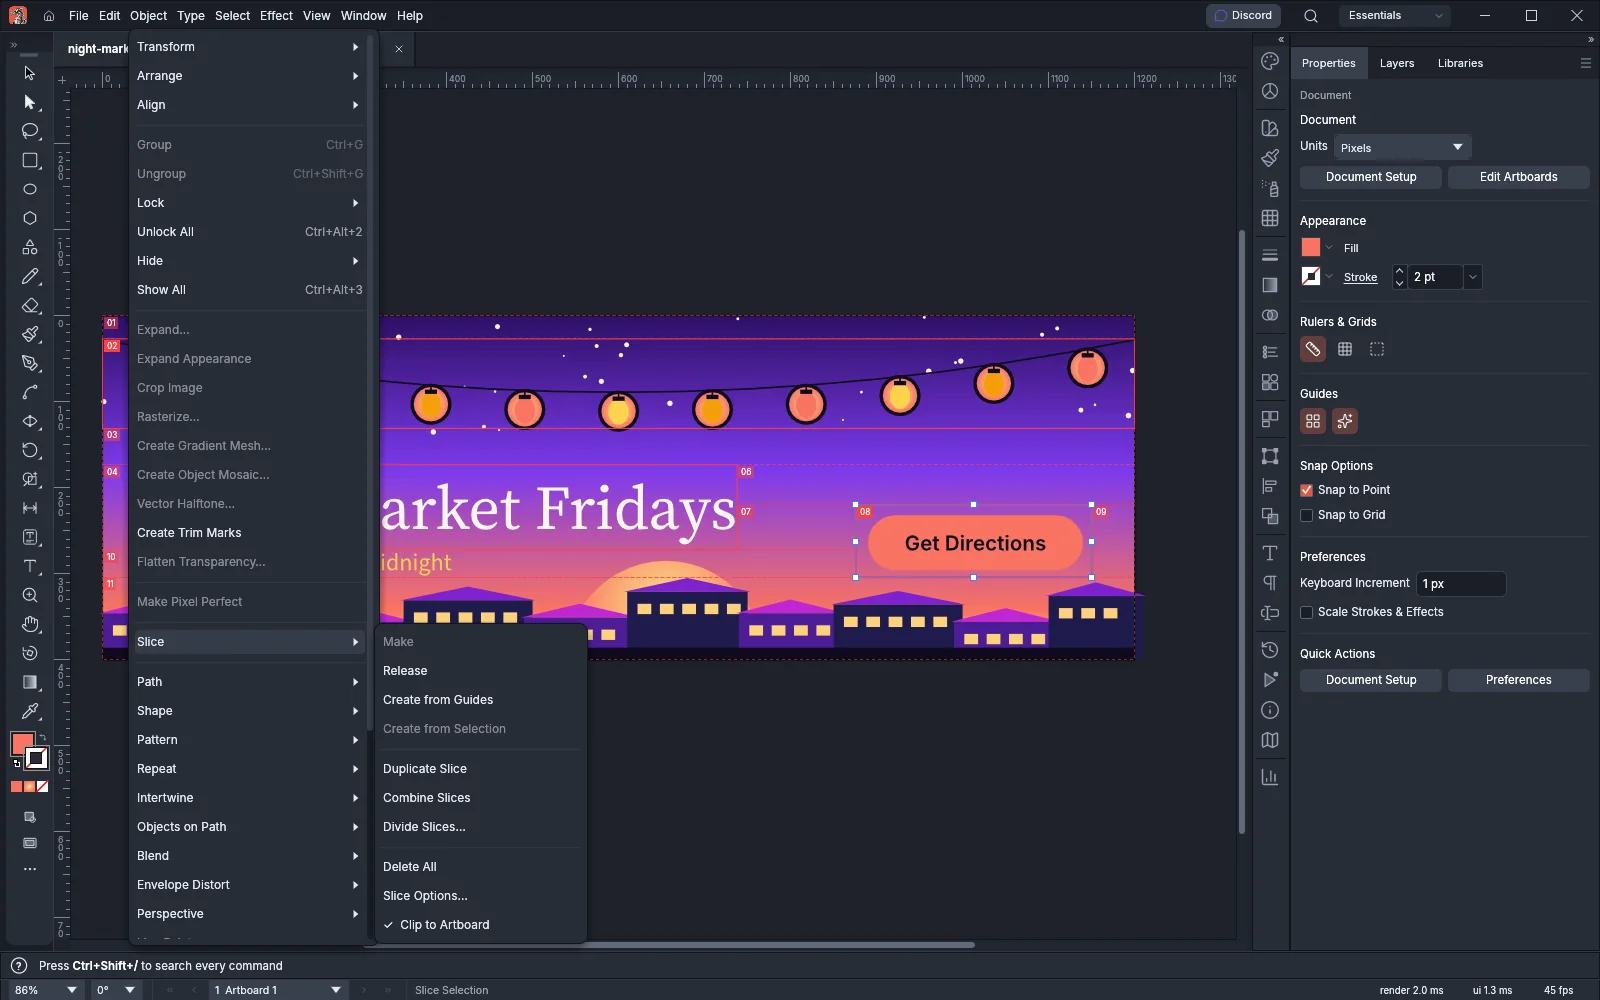
Section titled “Object → Slice commands”The Object → Slice commands act on the slices selected with the Slice Selection tool and on selected objects that are object slices.
| Command | What it does |
|---|---|
| Make | Makes each selected object an object slice. |
| Release | Removes the selected slices. An object slice leaves its object as it was. A user slice becomes a rectangle with no fill and no stroke. The results stay selected. |
| Create from Guides | Replaces the user slices with the grid that the ruler guides cut the artboards into. |
| Create from Selection | Makes one user slice over the visible bounds of the selected objects. |
| Duplicate Slice | Copies the selected slices as user slices with their options, 10 pt to the right and 10 pt down, and selects the copies. |
| Combine Slices | Replaces two or more selected slices with one user slice over their bounds. The new slice takes the options of the first slice, and object slices are released. |
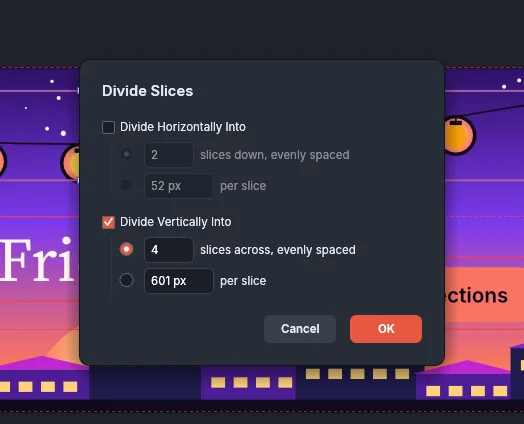
| Divide Slices… | Cuts each selected slice into a grid of user slices. The pieces keep the options, and only the first piece keeps the name. An object slice is released. |
| Delete All | Deletes every user slice and releases every object slice in the document. |
| Slice Options… | Opens the options of the selected slices. See Set a slice’s options. |
| Clip to Artboard | When it is checked, slices are clipped to the artboards and auto slices fill the artboards. When it is unchecked, auto slices cover the art and the slices, including art outside the artboards. It is checked in a new document. |
Divide Slices… opens with both directions checked, at 2 slices down and 2 slices across:
- Divide Horizontally Into cuts the slice into rows. Type how many slices down, evenly spaced you want, or choose per slice and type a row height.
- Divide Vertically Into cuts the slice into columns. Type how many slices across, evenly spaced you want, or choose per slice and type a column width.
When you divide by size, the last row or column is smaller if the slice does not divide evenly. The size fields start at half the size of the first selected slice. One divide makes at most 1000 slices.
Hide and lock slices
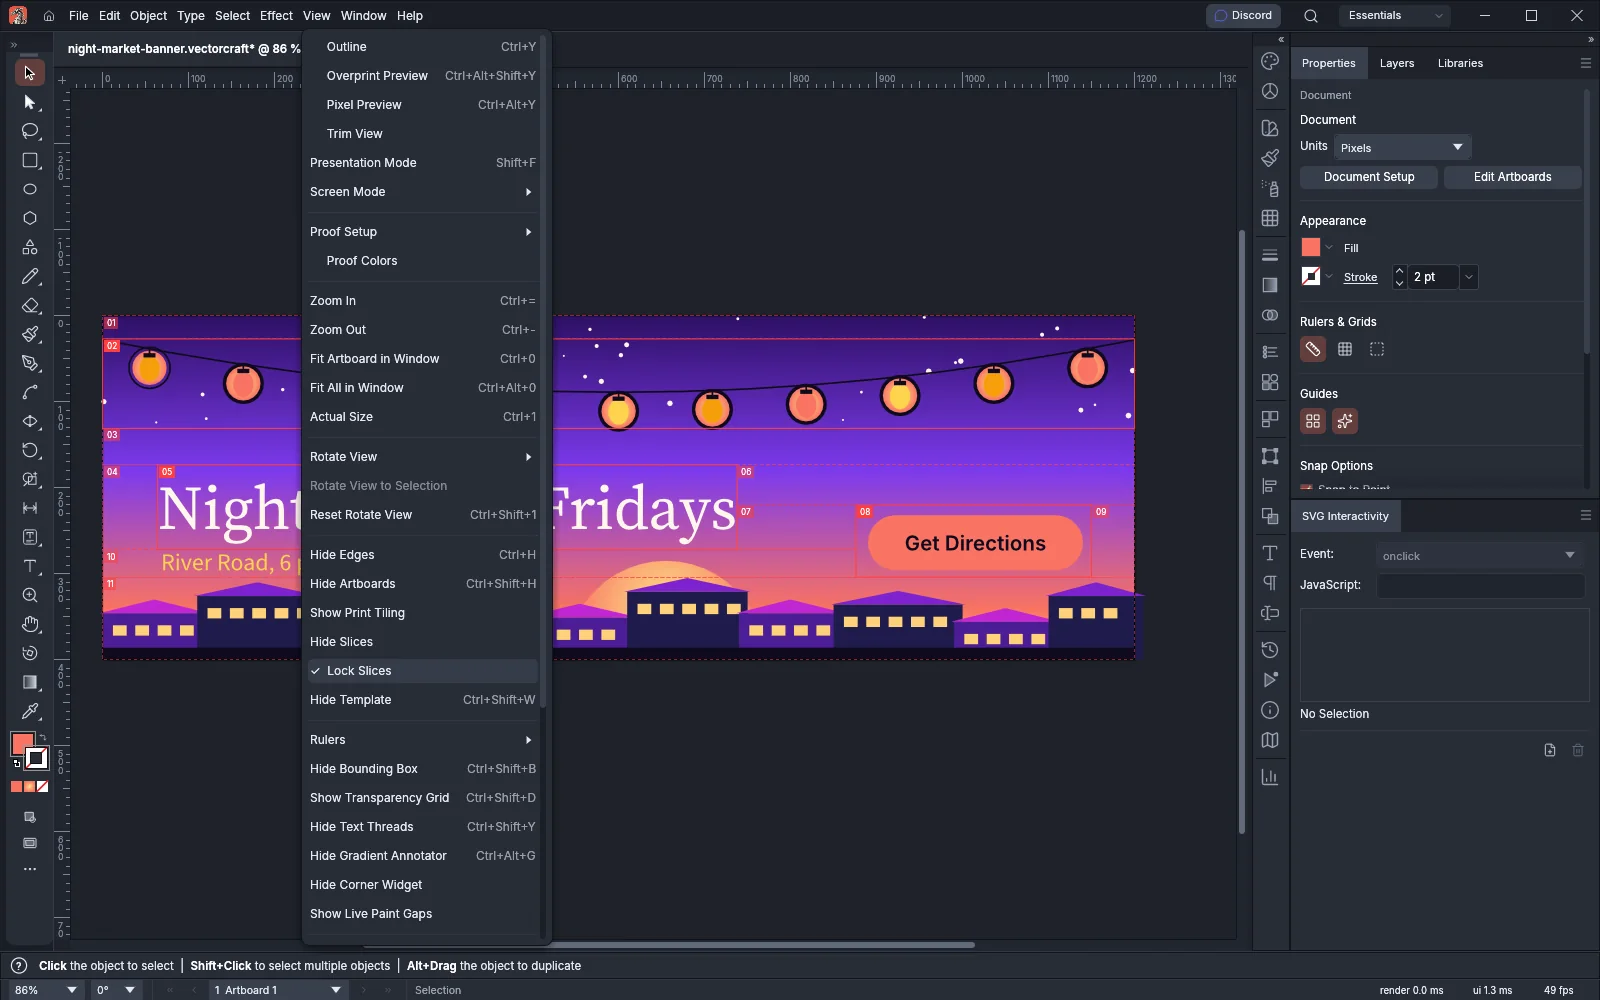
Section titled “Hide and lock slices”- View → Hide Slices hides the slice outlines and numbers on the canvas, and the command then reads Show Slices.
- View → Lock Slices keeps the Slice Selection tool from selecting, moving or resizing slices. The menu shows a check mark while it is on.
Both commands deselect the slices in every open document, and turning them off does not select the slices again. While slices are hidden or locked, no command selects a slice, but you can still select the object of an object slice as ordinary art. Both settings last for the current session and are not saved with the document.
Slices preferences
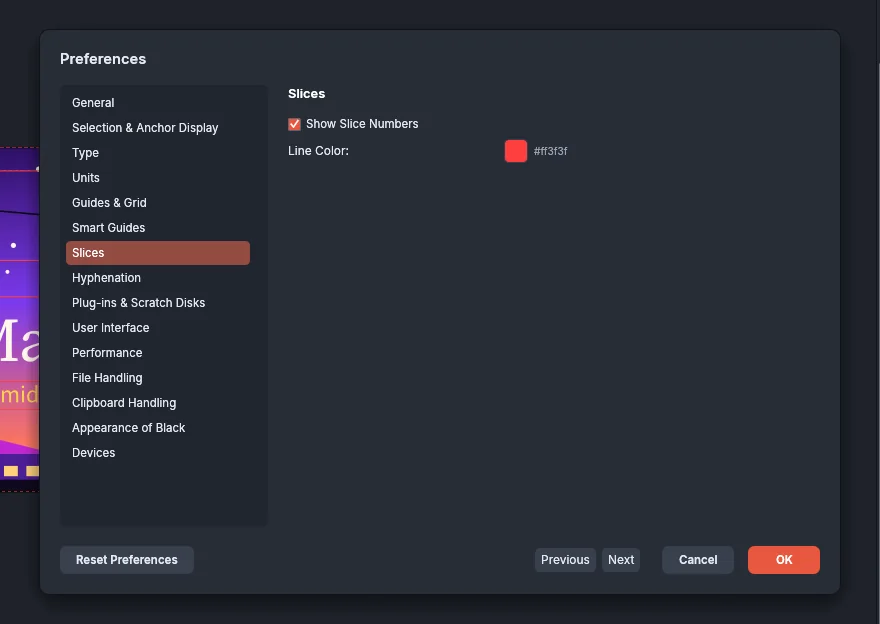
Section titled “Slices preferences”The Slices page of Edit → Preferences… (VectorCraft → Settings → Slices… on macOS) has two settings. See Preferences for the other pages.
| Setting | What it sets | Default |
|---|---|---|
| Show Slice Numbers | Shows each slice’s number at its top left corner | On |
| Line Color | The color of the slice outlines and number badges | Red (#ff3f3f) |
User and object slices are outlined in the line color. Auto slices are drawn with a dimmer dashed line, and selected slices with a thicker line.
Set a slice’s options
Section titled “Set a slice’s options”- Select one or more slices with the Slice Selection tool.
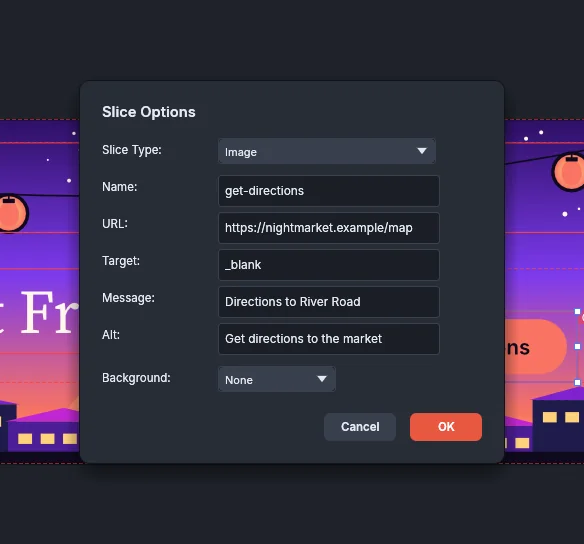
- Choose Object → Slice → Slice Options…, or double-click a slice with the Slice Selection tool. The dialog shows the options of the first selected slice.
- Choose a Slice Type and fill in its fields.
- Click OK. The options apply to every selected slice, as one undo step.
| Option | Slice type | What it sets |
|---|---|---|
| Slice Type | All | Image saves the slice as an image. No Image saves an empty cell that shows the text you type. HTML Text shows the text of a type object as HTML. HTML Text is listed only for object slices of type objects. |
| Name | Image | The file name of the slice’s image, without the extension. An empty name gives <document>_<number>, for example night-market-banner_08. |
| URL | Image | The address the image links to in the HTML page |
| Target | Image | The window or frame the link opens in: _blank, _self, _parent, _top or a frame name |
| Message | Image | Text written as the link’s title attribute. It is used only when the slice has a URL. |
| Alt | Image | The image’s alternative text, written as its alt attribute |
| Text Displayed in Cell | No Image | The text of the cell. HTML tags are allowed. |
| Horizontal | No Image, HTML Text | Default, Left, Center or Right |
| Vertical | No Image, HTML Text | Default, Top, Middle, Baseline or Bottom |
| Background | All | None, Matte, White, Black or Other, which adds a color button. The color fills the cell of a No Image or HTML Text slice. Matte uses the matte color set in Save for Web. |
Export the slices
Section titled “Export the slices”Save for Web (Legacy) saves one image for each slice, and it can write an HTML page that places the images.
- Choose File → Export → Save for Web (Legacy)… (Ctrl+Alt+Shift+S, or Cmd+Option+Shift+S on macOS).
- Set the format and its settings. Export for screens and the web describes them.
- Under Image Size, leave Clip to Artboard on to save the artboard. Turn it off to save the area of the visible art and the slices. When the document has more than one artboard, choose the one to save from Artboard.
- Choose which slices to save from Slices. The list appears only when the document has slices.
- Choose an Output.
- Click Preview in Browser to open the HTML page in your web browser, or Save… to write the files.
| Setting | Choices |
|---|---|
| Slices | All Slices (the default) saves every slice, auto slices included. Selected Slices saves the slices you selected before you opened the dialog, and No Slices saves one image of the whole area. |
| Output | Images Only (the default) writes the images. HTML and Images also writes an HTML page, named after the file you save, that places each image at its position. |
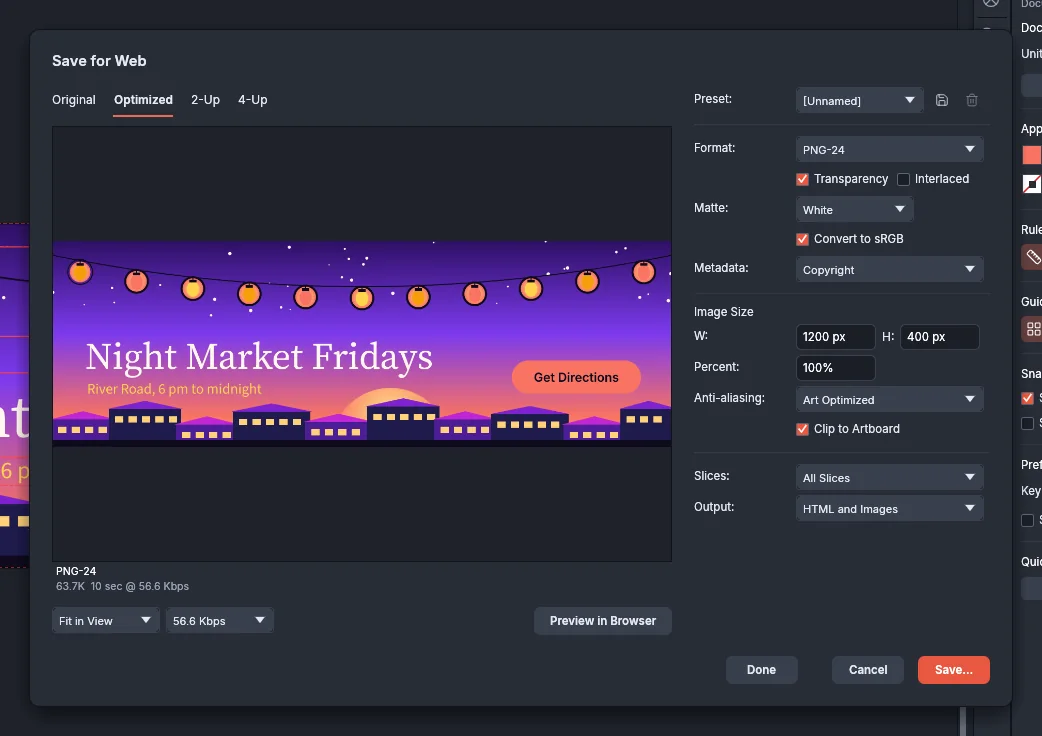
Sliced output puts the images in an images folder next to the file you save. Each image is named after its slice. Characters other than letters, digits, -, _ and . in a name become -. No Image and HTML Text slices do not get an image. In the HTML page, their cells hold the text instead. Each image in the page carries its slice’s alt text, and an Image slice with a URL becomes a link with its target and message.
To export one element of a design on its own instead of slicing it, select it and choose File → Export Selection…, which is also on the canvas right-click menu. VectorCraft collects the selection as one asset and opens Export for Screens on the Assets tab with that asset checked. Set the format rows and export it as Export for screens and the web describes.
Copy CSS for an object
Section titled “Copy CSS for an object”The CSS Properties panel shows the CSS that styles the selected objects in a web page.
- Choose Window → CSS Properties.
- Select the objects. The panel shows one rule for each object, from back to front. Each rule’s class is the object’s name. An unnamed object is named after its kind, for example
.rectangle. - Click the copy button at the bottom right of the panel (its tooltip reads Copy Selected Style) to put the CSS on the clipboard, or the save button to its right (Export Selected CSS…) to save it as a
.cssfile.
The rules can set width and height, a fill as background-color or a gradient, a stroke as border, rounded corners as border-radius, the font, color, spacing and alignment of type, opacity, mix-blend-mode, shadows and glows, and blur. One point is written as one pixel.
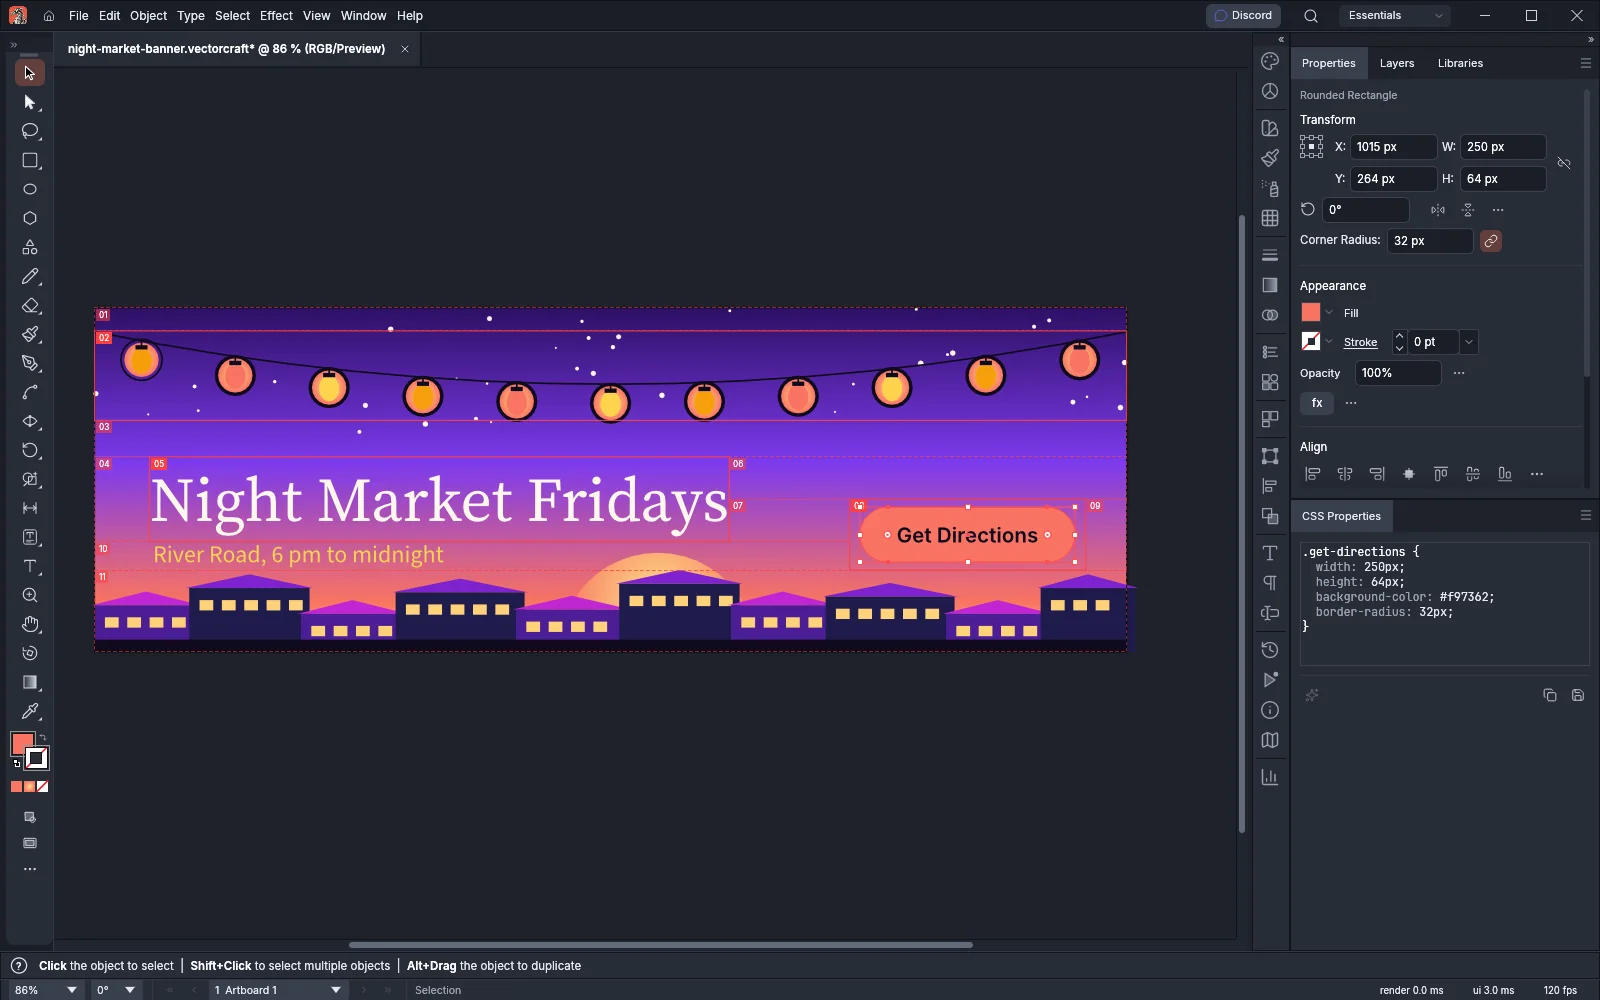
With nothing selected, click the sparkles button at the bottom left of the panel (Generate CSS) to show the CSS of the whole document. The tooltips of the copy and save buttons then read Copy All Styles and Export All…. Click Generate CSS again to return the panel to the CSS of the selected objects. The button can be clicked only while nothing is selected. The panel shows the first 300 rules, and the export writes all of them.
The panel menu holds the copy and export commands, Generate CSS, and these export options:
| Option | What it does | Default |
|---|---|---|
| Units | The unit of lengths: px, pt, mm, cm or in | px |
| Absolute Position | Adds position: absolute with left and top measured from the top left corner of the object’s artboard |
Off |
| Width and Height | Adds width and height |
On |
| Unnamed Objects | Writes rules for unnamed objects. When it is off, the panel lists only named objects and says how many it left out. | On |
| Rasterize Unsupported Art | Writes art that CSS cannot describe as a background-image of its own PNG picture, which the export saves next to the .css file. When it is off, such art is written as the box it sits in. |
Off |
Add SVG interactivity
Section titled “Add SVG interactivity”The SVG Interactivity panel sets the JavaScript that an object runs on an event when its SVG file is open in a web browser. SVG export writes each event as an attribute of the object, for example an onclick attribute that holds the code.
- Select the objects.
- Choose Window → SVG Interactivity.
- Choose an event from Event. The list has onfocusin, onfocusout, onactivate, onmousedown, onmouseup, onclick, onmouseover, onmousemove, onmouseout, onkeydown, onkeypress, onkeyup, onload, onerror, onabort, onunload, onzoom, onresize and onscroll.
- Type the code in JavaScript and press Enter. The event and its code appear in the panel’s list. Each change is one undo step.
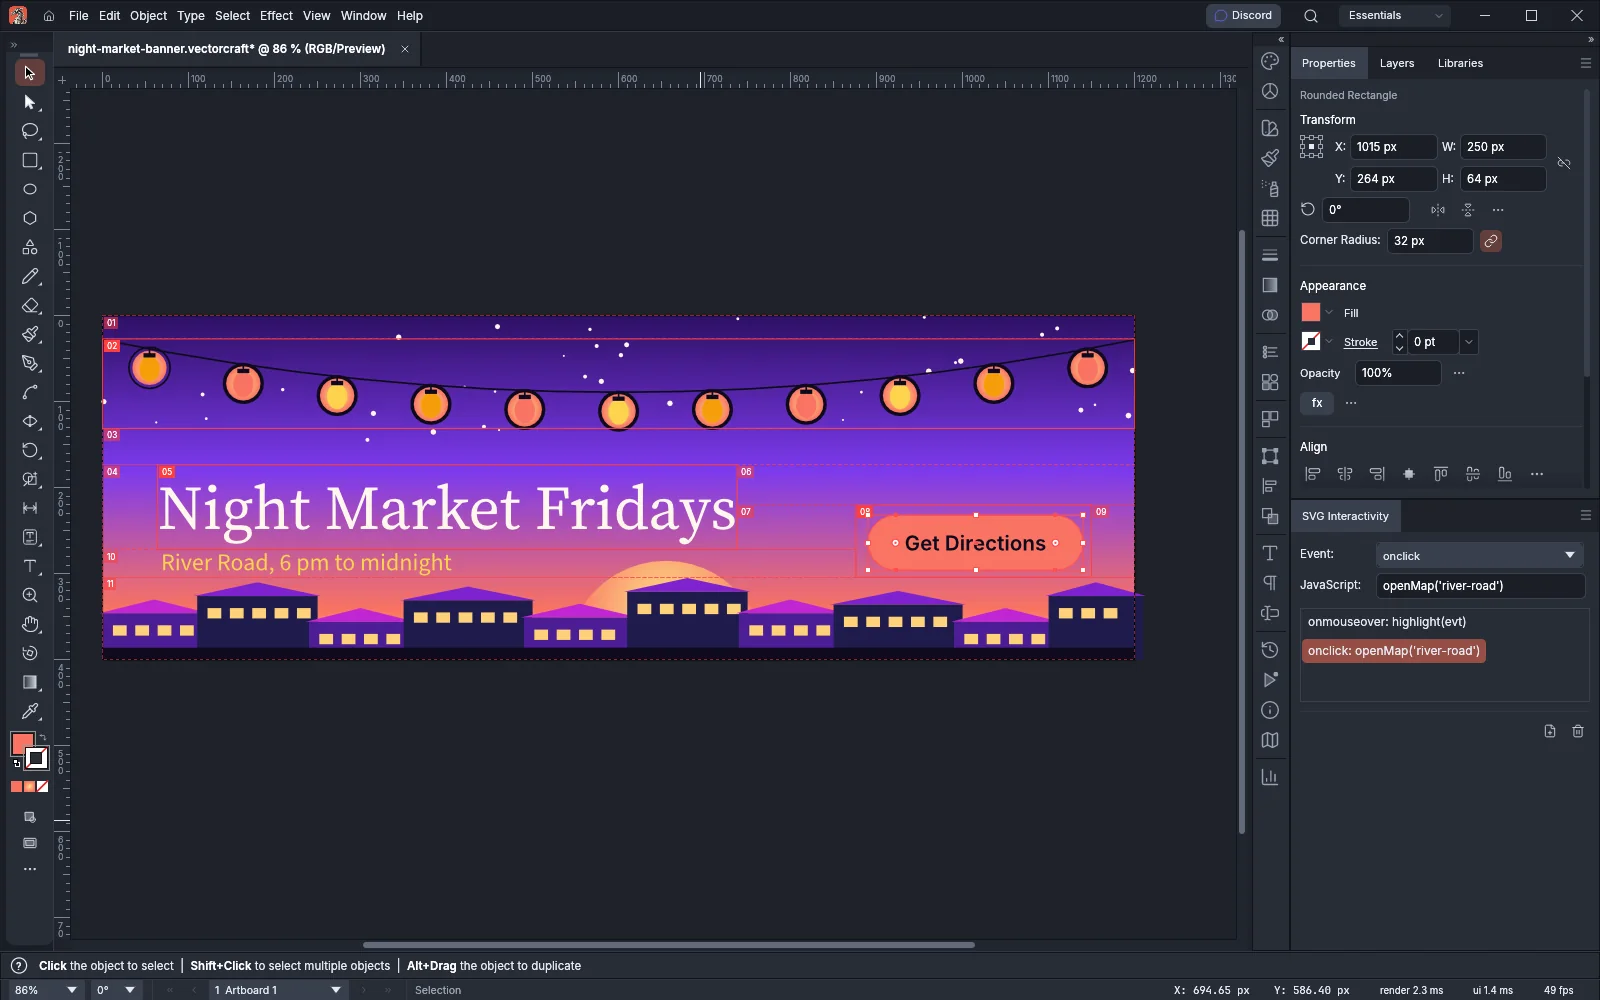
To change an event’s code, click its row in the list, then edit the JavaScript field and press Enter. Clearing the field and pressing Enter removes the event. The trash button at the bottom right of the panel (Remove Selected Entry) removes the event chosen in Event, and Clear Events in the panel menu removes every event from the selected objects. When the selected objects have different events, the list is empty.
To use functions from a script file, click the file-plus button at the bottom right of the panel, left of the trash button (Link JavaScript Files…). In the JavaScript Files dialog, type a path or URL in File or URL, or click Choose… to pick a file, then click Add. Select a file in the list and click Remove to unlink it. Add and Remove take effect at once, and Close closes the dialog. A document can link up to 64 files, and SVG export writes a <script> element for each one.