
Automate VectorCraft
This guide shows you how to find any command by typing part of its name, give tools, commands and panels your own keyboard shortcuts, record a series of steps as an action and play it on one document or on a whole folder of files, and check a script file before you run it. It then covers vectorcraft-cli, which runs the same commands without opening a window, and the Model Context Protocol (MCP) server, which other programs use to control VectorCraft.
Find a command by name
Section titled “Find a command by name”- Choose Help → Search Commands…, or press Ctrl+Shift+/ (Cmd+Shift+/ on macOS).
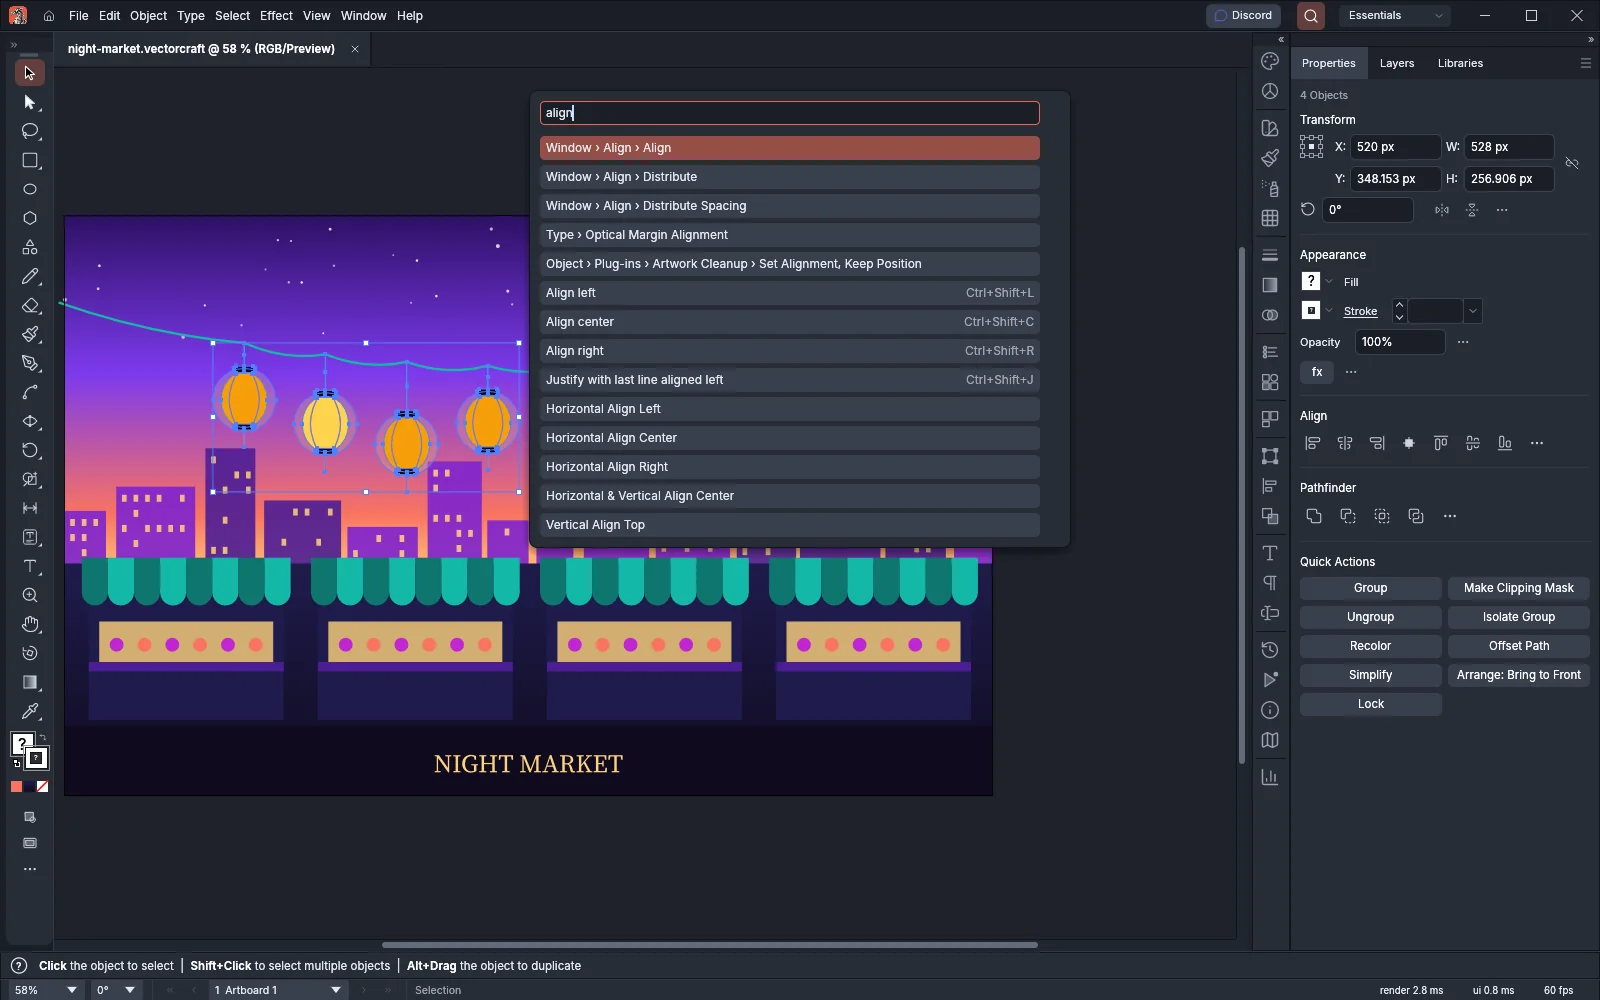
- Type part of the name of a command or a tool, for example
align. - Press the Up and Down arrow keys to highlight a result, then press Enter, or click a result.
The box searches every command and tool, shows up to 14 matches, and shows each match’s keyboard shortcut beside it. Choosing a tool selects it, and choosing a command runs it.
Change keyboard shortcuts
Section titled “Change keyboard shortcuts”- Choose Edit → Keyboard Shortcuts…, or press Ctrl+Alt+Shift+K (Cmd+Option+Shift+K on macOS).
- Under Set, choose VectorCraft Defaults or Classic Defaults.
- Choose the Tools tab or the Menu Commands tab, and type in the Search box to narrow the list. Panels are listed under Window on the Menu Commands tab.
- Click the shortcut next to an entry, then press the new keys. Press Esc to cancel.
- Click OK to keep the changes, or Cancel to discard them.
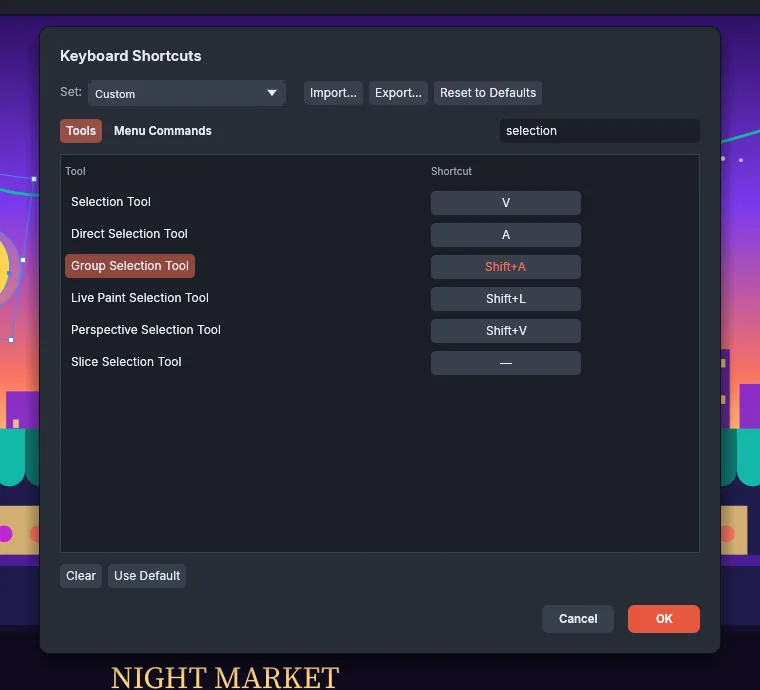
When you change a shortcut, the Set list shows Custom. The dialog also has these buttons:
| Button | What it does |
|---|---|
| Clear | Removes the shortcut from the selected entry |
| Use Default | Gives the selected entry its default shortcut again |
| Go to Conflict | Selects the entry that the keys you pressed were taken from |
| Import… | Reads a saved shortcut set into the dialog; press OK to keep it |
| Export… | Saves the current set as a .json file |
| Export Text… | Saves the current set’s tools and menu commands, with their shortcuts, as a text file |
| Reset to Defaults | Returns every shortcut to the VectorCraft Defaults set |
The keyboard shortcuts reference lists every default shortcut.
Record and play actions
Section titled “Record and play actions”An action is a list of recorded steps. Each step is a VectorCraft command with the settings it ran with.
- Choose Window → Actions.
- Click Create New Set at the bottom of the panel, type a name and click OK.
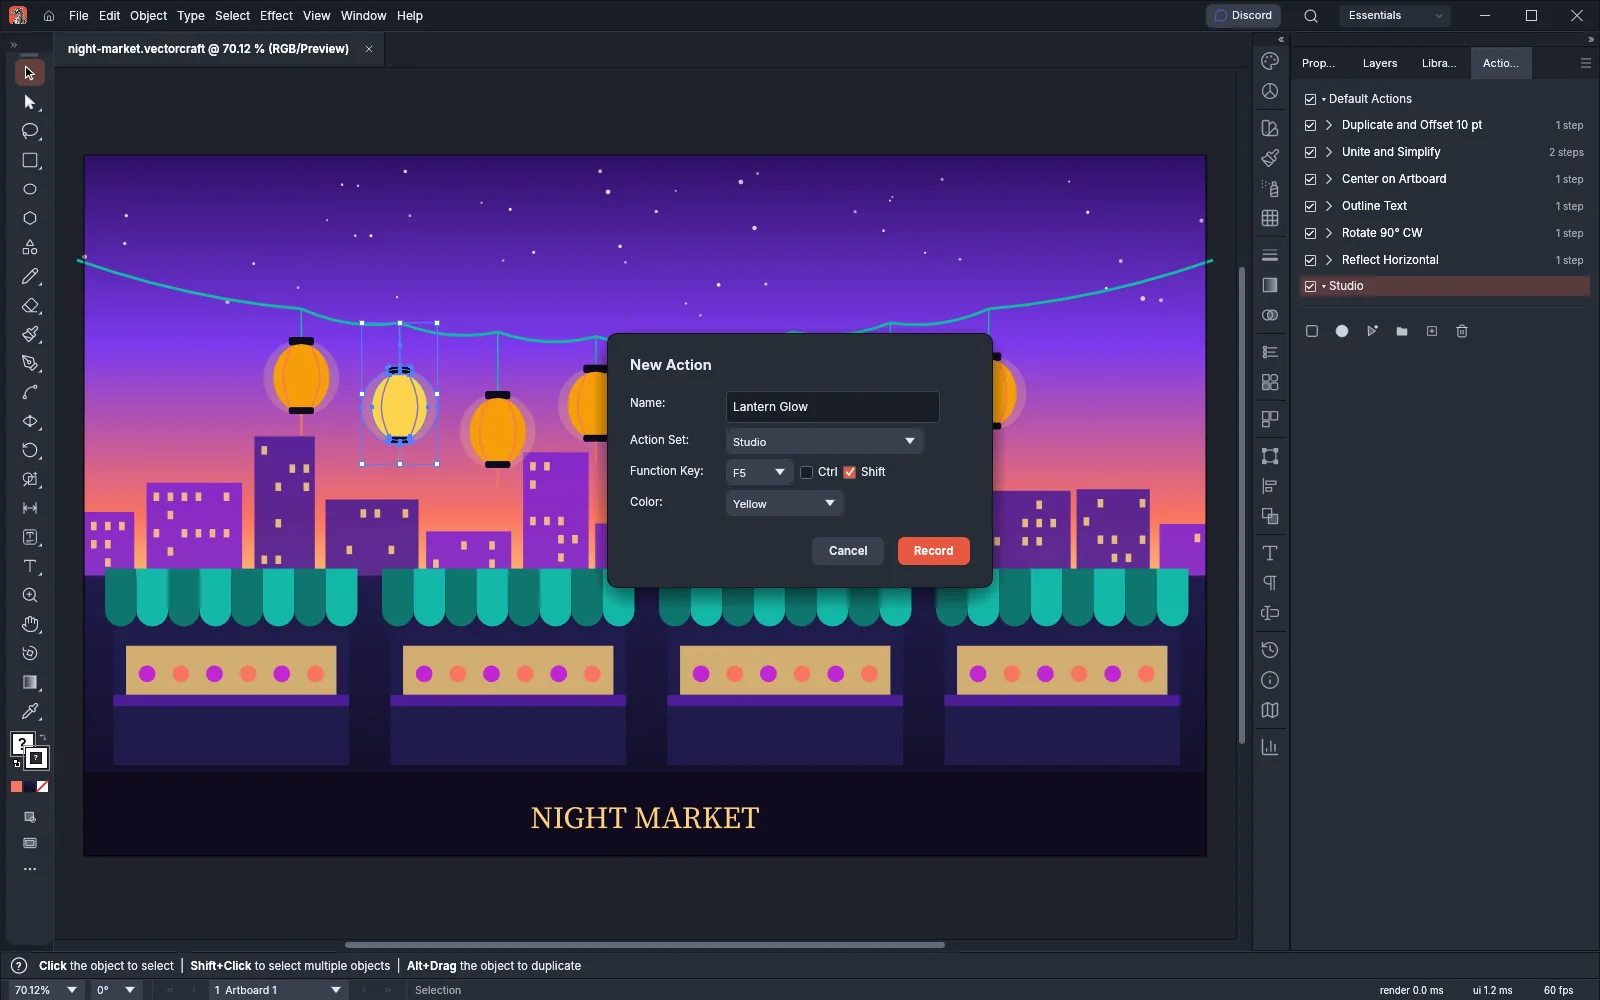
- Click Create New Action. In New Action, type a Name, choose the Action Set, and click Record. The panel shows ● Recording.
- Do the steps you want to record.
- Click Stop Playing/Recording.
- To play the action, select it in the panel and click Play Current Selection.
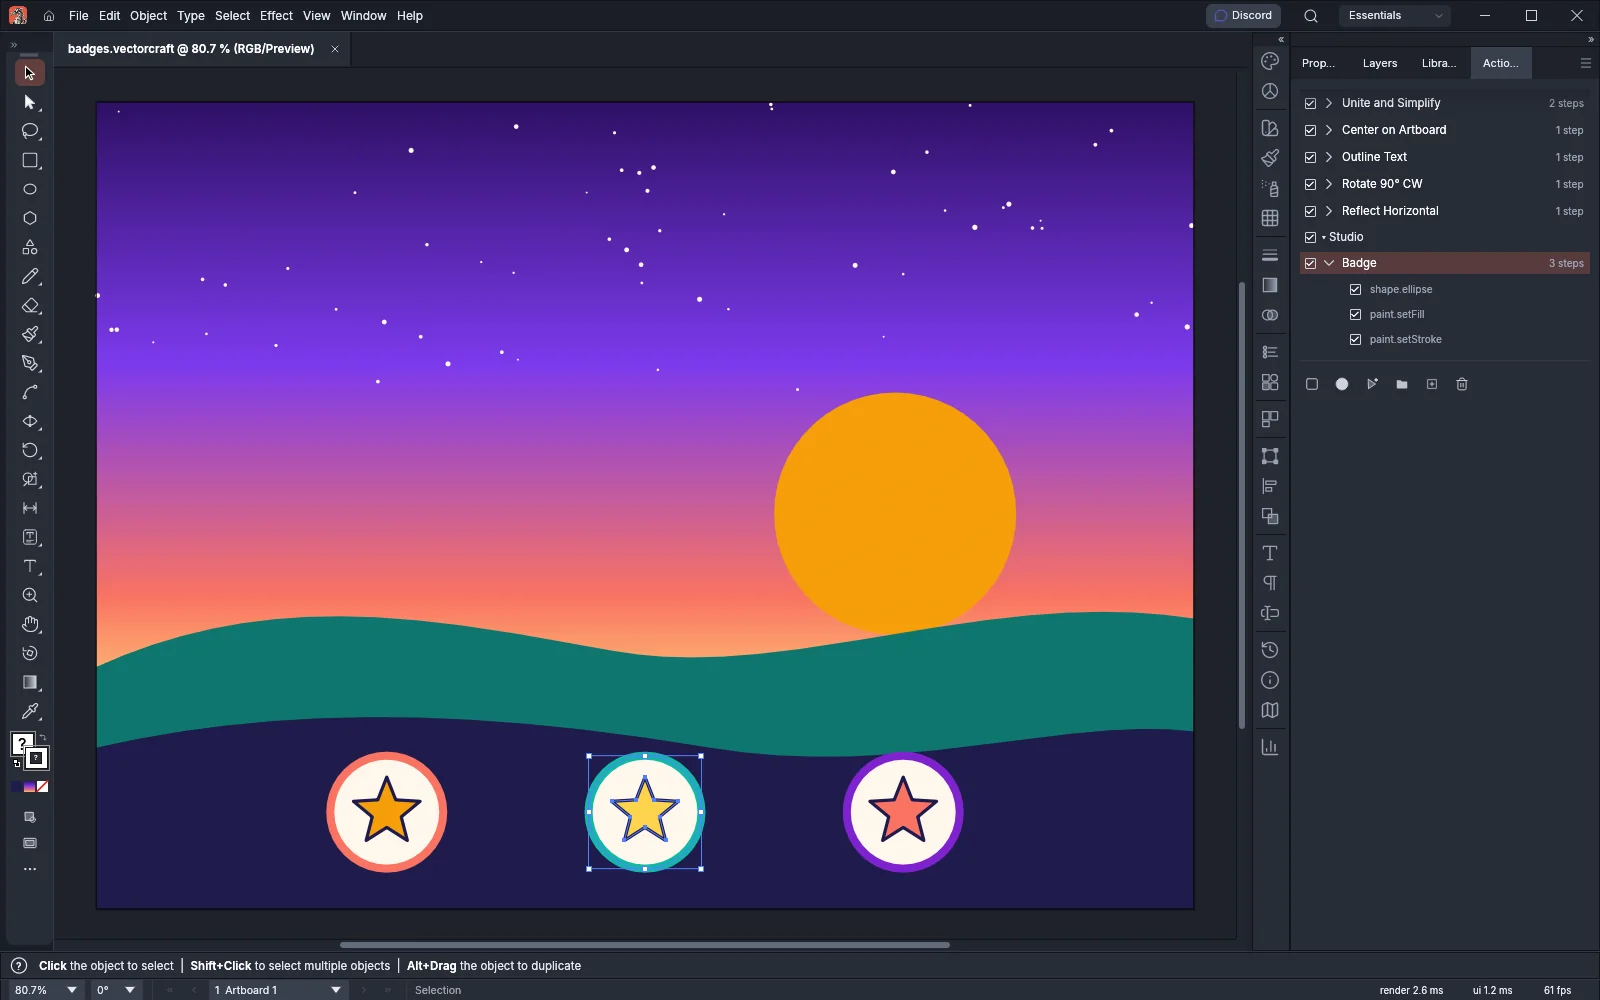
Expand an action to see its steps. Each step has a check box: clear it to leave that step out when the action plays, and select it again to include it.
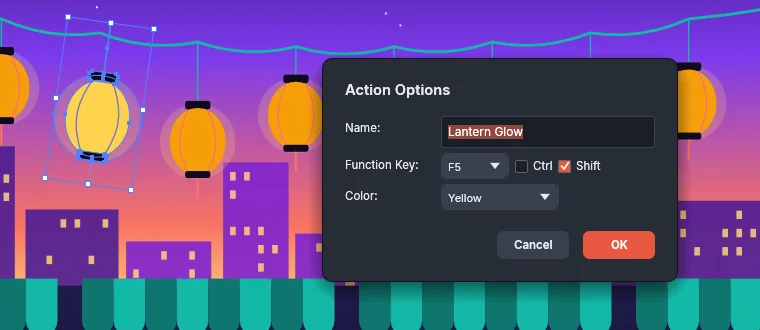
In New Action and Action Options…, the Function Key list assigns a key from F1 to F15 that plays the action. You can add Ctrl (Cmd on macOS) and Shift to the key. On Windows, F1, Ctrl+F4 and Ctrl+F6 cannot be used.
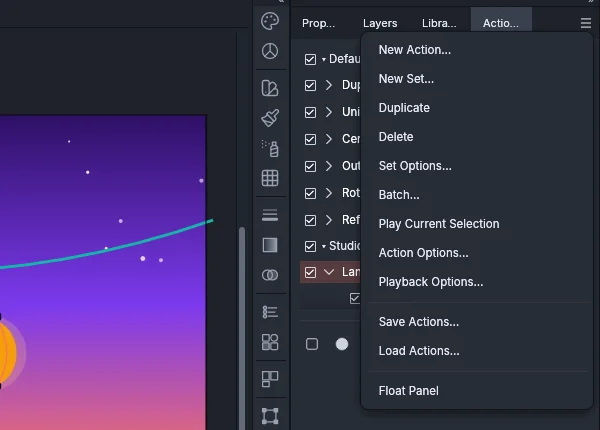
The panel menu holds these commands:
| Command | What it does |
|---|---|
| New Action… | Opens New Action, the same as Create New Action |
| New Set… | Creates a new action set |
| Duplicate | Copies the selected action, or the current set when no action is selected |
| Delete | Deletes the selected actions or sets |
| Set Options… | Renames the current set |
| Batch… | Plays the selected action on every file in a folder, or on every data set of the open document |
| Play Current Selection | Plays the selected action |
| Action Options… | Changes the selected action’s name, function key and color |
| Playback Options… | Sets the playback speed: Accelerated, Step by Step or Pause For |
| Save Actions… | Saves the current set to a .vcactions file |
| Load Actions… | Adds a saved set to the panel |
Run an action on a folder of files
Section titled “Run an action on a folder of files”Batch… plays an action on every file in a folder, or on every data set of the open document, and then saves, exports or closes each result.
- In the Actions panel, select the action. If the action has no steps, or every step is cleared, Batch… shows a message in the status bar and does not open.
- Choose Batch… from the panel menu. The dialog shows the action’s name at the top.
- Set Play to Folder or Data Sets.
- For Folder, type a Source Folder or click Choose…, and select Include All Subdirectories to include its subfolders. For Data Sets, choose how the files are named in File Name.
- Choose one of the Destination options. For Folder, type a Destination Folder or click Choose….
- Select or clear the options under Overrides, and click OK.
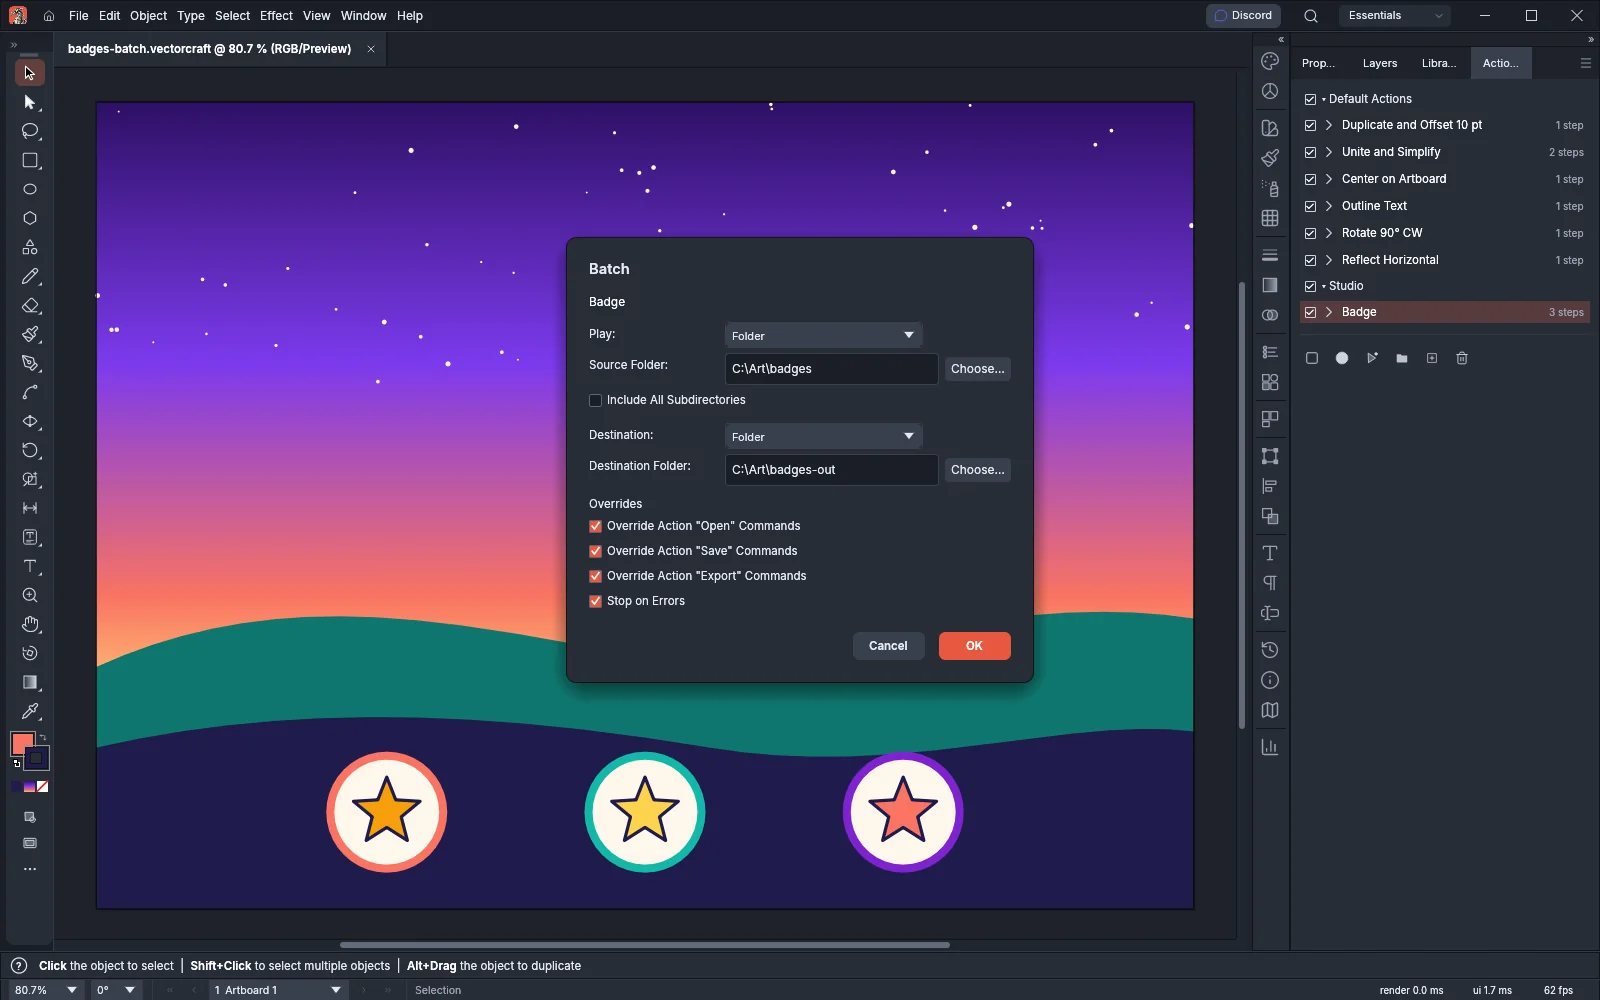
When the batch ends, the status bar shows how many files or data sets were processed, for example “Batch: 3 processed,” and how many failed. If the source holds more than 500 files or data sets, or if Include All Subdirectories finds a folder nested more than 8 levels deep, the batch stops with an error before it processes any file. The batch skips files whose names start with a dot and files VectorCraft cannot open.
If you click OK with no Source Folder or no Destination Folder, or with Data Sets chosen and no document open, the status bar names what is missing and the dialog stays open. The batch also stops with an error, and the dialog stays open, when the folder holds no file VectorCraft can open or the document has no data sets.
| Destination | What happens to each file |
|---|---|
| None | The file stays open |
| Save and Close | The file is saved over the source and closed |
| Folder | The file is saved or exported into the Destination Folder and closed |
With Folder, each file keeps its name and its format. With Data Sets, VectorCraft applies each data set in turn to the open document, and the document stays open. When Destination is Folder, VectorCraft saves one .vectorcraft copy for each data set.
| Option | Default | What it does |
|---|---|---|
| Include All Subdirectories | Off | Also plays the action on the files in the source folder’s subfolders |
| File Name (Data Sets) | File + Number | File + Number names each file after the document with 001, 002 and so on; File + Data Set Name uses the document’s name, an underscore and the data set’s name; Data Set Name uses the data set’s name. A name already used gets -2, -3 and so on. |
| Override Action “Open” Commands | On | Skips the Open steps recorded in the action. The other steps run on the file the batch opened. With Data Sets, Open steps are always skipped. |
| Override Action “Save” Commands | On | The action’s recorded Save steps write their files into the Destination Folder, named after the source file |
| Override Action “Export” Commands | On | The action’s recorded Export steps write their files into the Destination Folder, named after the source file, with the export format’s extension |
| Stop on Errors | On | Stops the batch at the first file or data set that fails |
The Save and Export overrides apply only when Destination is Folder.
Set action and playback options
Section titled “Set action and playback options”To rename the current set, choose Set Options… from the Actions panel menu, type a Name and click OK. New Set… opens the same dialog with the name Set 1, or the next number that no set uses.
To change an action, select it and choose Action Options…:
| Option | What it does |
|---|---|
| Name | Renames the action. OK is unavailable while the name is empty. |
| Function Key | None, or a key from F1 to F15 that plays the action, with Ctrl (Cmd on macOS) and Shift check boxes. The action’s key takes priority over a command shortcut on the same keys. |
| Color | None, Red, Yellow, Green, Blue or Violet. VectorCraft saves the color with the action, and the Actions panel does not display it. |
To set how fast actions play, choose Playback Options… from the panel menu, choose a speed and click OK:
| Speed | What happens |
|---|---|
| Accelerated | The default. Every included step runs at once, as one step in the undo history. |
| Step by Step | One step runs at a time, and the window is redrawn after each step. Each step is its own undo step. |
| Pause For | VectorCraft waits the number of seconds you enter, from 1 to 60, between steps. Each step is its own undo step. The field starts at 1. |
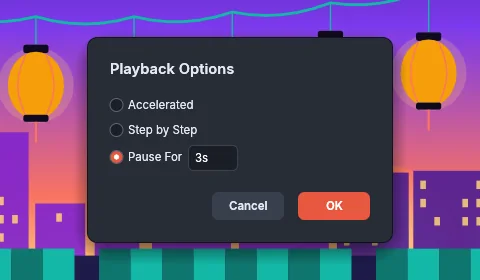
VectorCraft saves the playback speed with its preferences, and the speed stays set after a restart. An action that is already playing keeps the speed it started with, and while an action plays step by step or with pauses, VectorCraft does not start another one.
Check a script before you run it
Section titled “Check a script before you run it”Check Script… reads a script file and reports what it does without running any of it.
- Choose File → Scripts → Check Script….
- Choose a
.jsx,.jsxincor.jsxbinfile. Opening one of these files with File → Open… shows the same report. - Read the report, then click Copy Report to copy it to the clipboard as JSON, or Close.
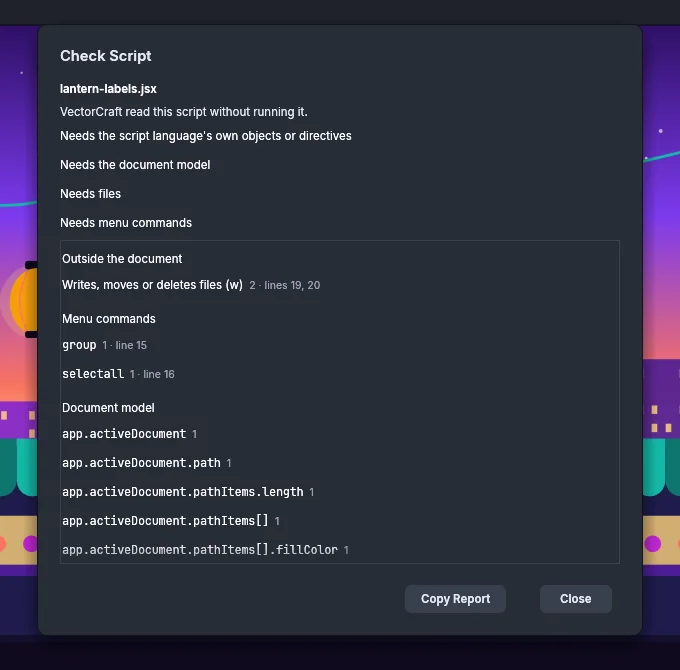
The report lists what the script needs, then these sections. A section appears only when the script has something to list in it.
| Section | What it lists | Beside each entry |
|---|---|---|
| Outside the document | Whether the script writes, moves or deletes files, opens files in other apps, opens network connections, loads native code, sends messages to other apps, reads or sets environment variables, runs code the checker can’t read, or changes the preferences of the app the script was written for | A count and the line numbers |
| Menu commands | The menu commands the script runs, and how many command names the script builds as it runs | A count and the line numbers |
| Document model | The document objects and properties the script uses | A count |
| Directives | The script’s # and //@ directives |
The line, or the file and line |
| Includes | The files the script’s #include lines name, and whether each one was checked |
The line, or the file and line |
| Problems | Strings, comments, regular expressions, template literals, XML literals or brackets left open; a closing bracket with no opening one; syntax newer than ES3; unknown directives; invalid UTF-8; mixed line endings; and nesting too deep to follow | The line, or the file and line |
VectorCraft also checks the files that #include lines name, and reads them only from inside the script’s folder. It checks up to 8 MiB in each file, 32 MiB in all and 64 included files. For a script file larger than 8 MiB, the report shows “Too large to check.” An included file that VectorCraft skips because a limit was reached is listed under Includes as “Not read: a limit was reached.” VectorCraft cannot read a compiled .jsxbin file. For one, the report shows “Compiled script: ask its author for the .jsx file.”
Run commands from the command line
Section titled “Run commands from the command line”vectorcraft-cli runs VectorCraft’s commands without opening a window. It reads a file or starts a new document, runs the commands you list in order, and exports the result.
| Install | Where the CLI is |
|---|---|
| Windows (MSI) | %LOCALAPPDATA%\Programs\ArtCraft\VectorCraft\vectorcraft-cli.exe for the default install. The installer does not add it to PATH. |
| Linux (deb, rpm) | /usr/bin/vectorcraft-cli |
| macOS | The separate vectorcraft-cli-<version>-macos-universal.zip release download. The .app holds only the desktop app. |
| Command | What it does |
|---|---|
vectorcraft-cli commands |
Prints the command catalog as JSON |
vectorcraft-cli run --in in.svg --cmd select.all --cmd paint.setFill --params '{"color":"#ff0000"}' --export out.svg |
Opens a file, selects everything, fills it red and exports the result |
vectorcraft-cli run --cmd file.new --params '{"width":800,"height":600}' --cmd shape.star --params '{"cx":400,"cy":300,"radius1":200,"radius2":90}' --export star.vectorcraft |
Builds a new document from commands and saves it |
vectorcraft-cli run --in sheet.vectorcraft --commands steps.json --export out.pdf |
Runs the steps listed in a JSON file |
Each --params applies to the --cmd just before it. run prints one line of JSON for each step and stops with an error at the first step that fails, naming that step by its number, counted from 0. --export can be given more than once, and the file extension sets the format. For PNG and other image exports, --scale sets the pixels per point and --ppi sets the pixels per inch. When both are given, --ppi is used. Without either, image exports use the document’s raster effects resolution.
The star in the following image was drawn, filled and exported by one vectorcraft-cli run command.

A steps file for --commands holds a JSON array of steps, or one step per line. Each step is an object with command, the command’s id, and optional params. A steps file can hold up to 64 MiB and 100,000 steps.
[ {"command": "select.all"}, {"command": "paint.setFill", "params": {"color": "#2ec4b6"}}]Drive VectorCraft from an MCP client
Section titled “Drive VectorCraft from an MCP client”vectorcraft-cli mcp runs a server for the Model Context Protocol, a standard protocol that automation clients use to call VectorCraft’s commands. The client starts the server and communicates with it over standard input and output.
| Mode | Start it with | What it drives |
|---|---|---|
| Connected | vectorcraft-cli mcp --connect 127.0.0.1:7979, with the app started as vectorcraft --control 7979 |
The open VectorCraft window. You see each change as it happens. |
| Headless | vectorcraft-cli mcp --headless |
Its own session with no window. Tools that work only with the desktop app, such as opening a panel, are not available. |
| Automatic | vectorcraft-cli mcp |
Tries 127.0.0.1:7979 once when it starts, and runs headless when no app answers |
To use the connected mode:
- Quit VectorCraft if it is running.
- Start it with the control port:
- Windows (PowerShell):
& "$env:LOCALAPPDATA\Programs\ArtCraft\VectorCraft\vectorcraft.exe" --control 7979 - macOS:
open -a VectorCraft --args --control 7979 - Linux:
vectorcraft --control 7979
- Windows (PowerShell):
- Wait until the VectorCraft window is open.
- Start your MCP client with
vectorcraft-cli mcp --connect 127.0.0.1:7979as the server command.
Two options limit the files that commands can use:
--automation-read-root <folder>: every file a command reads must be inside this folder.--automation-write-root <folder>: every file a command saves or exports must be inside this folder.
Each option can be given more than once. Read and write access are separate. Give the same folder to both options when the client needs to read and write it. With only --automation-read-root, commands cannot write any file to disk.
On vectorcraft-cli mcp, the root options run the server headless, and the server stops with an error if you also give --connect. To limit a connected session, start the app with the options instead:
vectorcraft --control 7979 --automation-read-root <folder> --automation-write-root <folder>