
Preferences
This page lists every setting in the Preferences dialog, page by page, with its default and its range or choices. It also describes how Reset Preferences works.
Open Preferences
Section titled “Open Preferences”- On Windows and Linux, choose Edit → Preferences… (Ctrl+K). On macOS, choose VectorCraft → Settings → General… (Cmd+K), or another page in the same submenu. Cmd+, also opens Preferences on macOS.
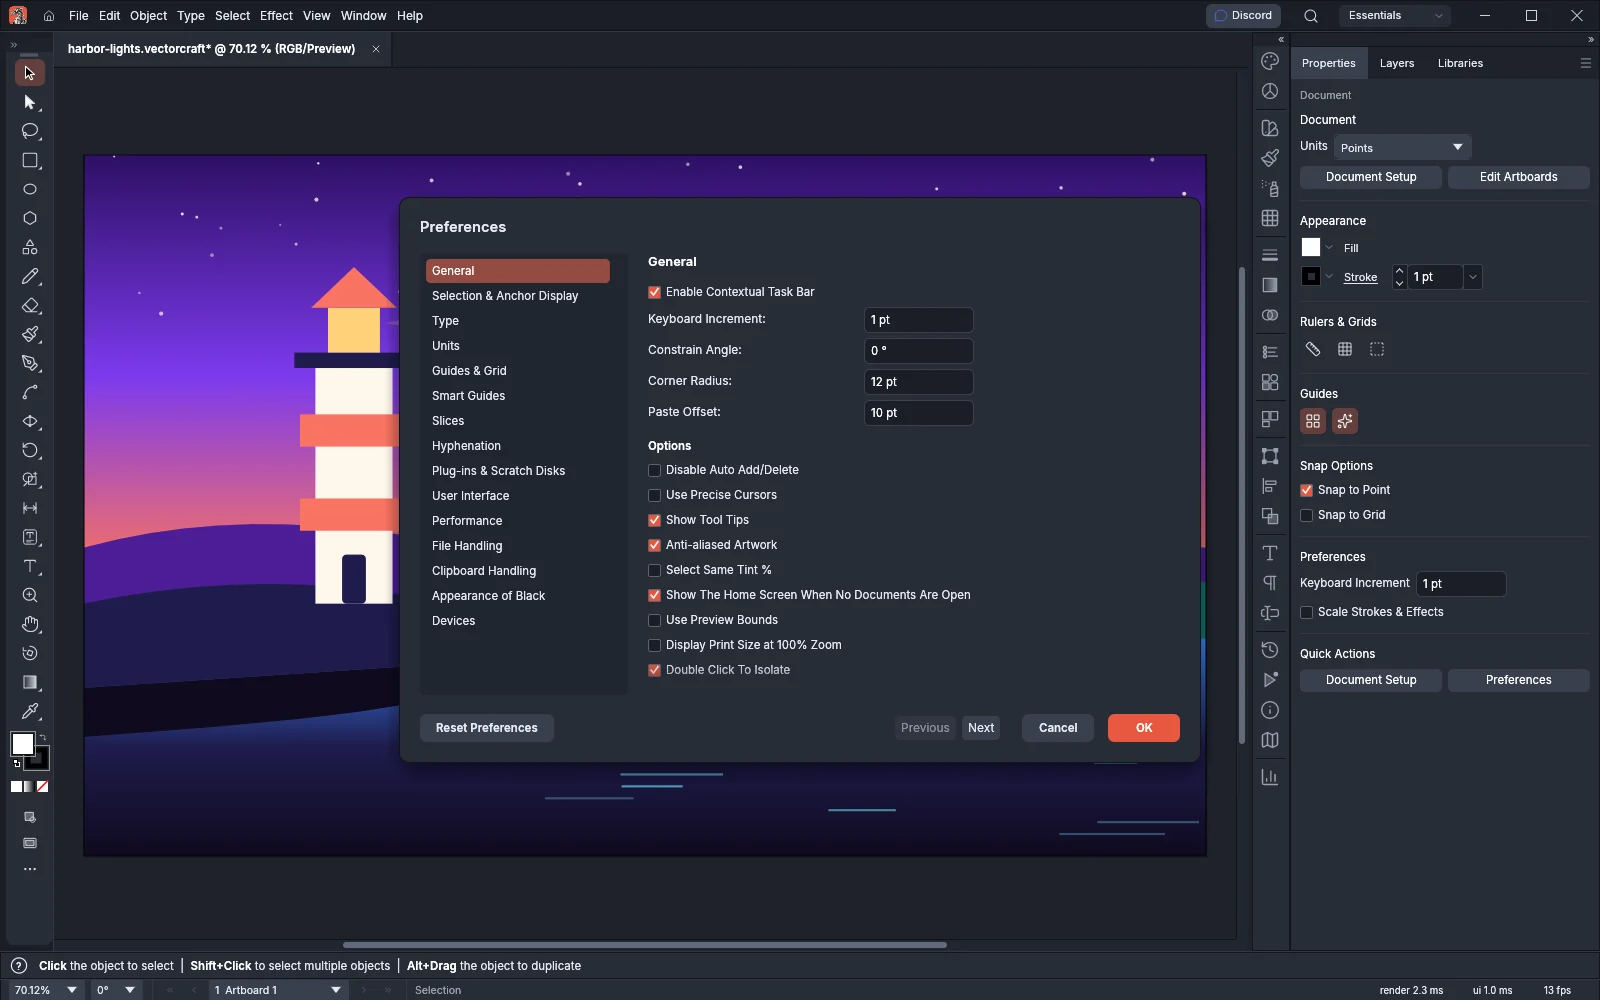
- Click a page in the dialog’s page list, or click Next and Previous to move through the pages. The dialog opens on General, or on macOS on the page you chose.
- Change the settings. Fields that hold a length show it in the unit set on the Units page of the dialog, and they switch to a new unit as soon as you pick it there.
- Click OK to apply the changes, or Cancel to close the dialog without changing anything.
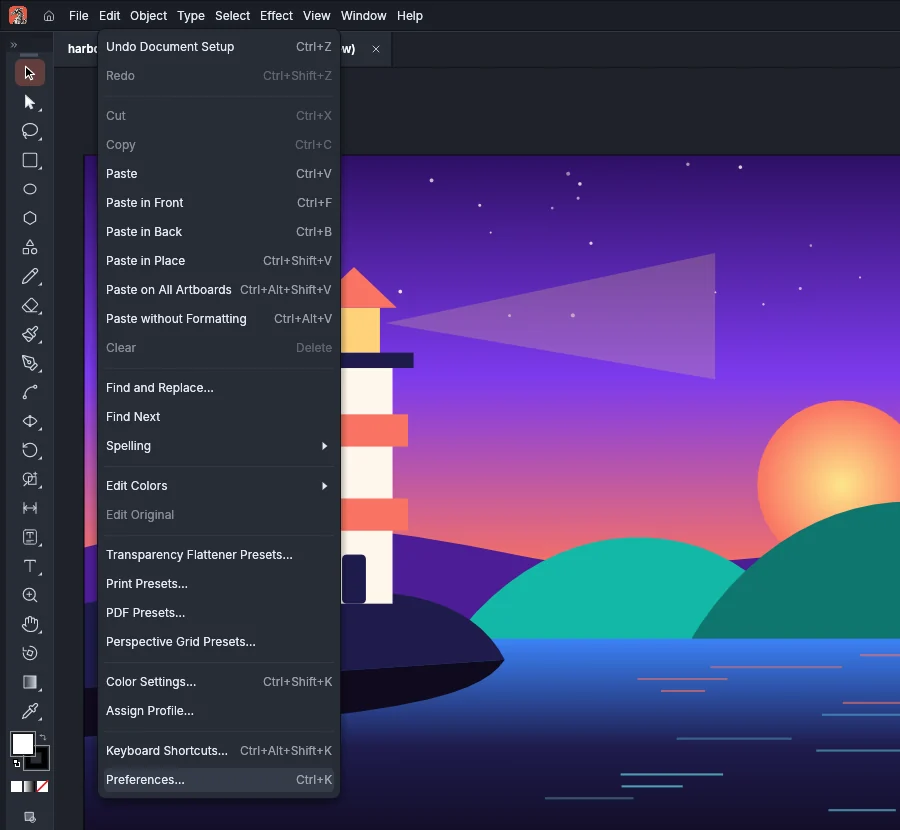
The pages are General, Selection & Anchor Display, Type, Units, Guides & Grid, Smart Guides, Slices, Hyphenation, Plug-ins & Scratch Disks, User Interface, Performance, File Handling, Clipboard Handling, Appearance of Black and Devices.
Some settings depend on others or on the platform:
- Numbers Without Units Are Points is dimmed unless one of the Units settings is Picas.
- Animated Zoom is dimmed while GPU Performance is off.
- Accent Color is dimmed while Color Scheme is Classic.
- System Title Bar appears on Windows and Linux only, and Linux Display Server appears on Linux only.
- System Title Bar, Graphics Processor and Linux Display Server take effect the next time VectorCraft starts.
In the tables, a checkbox shows On or Off as its default. Lengths are listed in points, the default unit.
General
Section titled “General”| Setting | Default | Range or choices |
|---|---|---|
| Enable Contextual Task Bar | On | On or off |
| Keyboard Increment | 1 pt | 0.001 to 1296 pt |
| Constrain Angle | 0° | -360° to 360° |
| Corner Radius | 12 pt | 0 to 1296 pt |
| Paste Offset | 10 pt | 0 to 1296 pt |
Under Options:
| Setting | Default |
|---|---|
| Disable Auto Add/Delete | Off |
| Use Precise Cursors | Off |
| Show Tool Tips | On |
| Anti-aliased Artwork | On |
| Select Same Tint % | Off |
| Show The Home Screen When No Documents Are Open | On |
| Use Preview Bounds | Off |
| Display Print Size at 100% Zoom | Off |
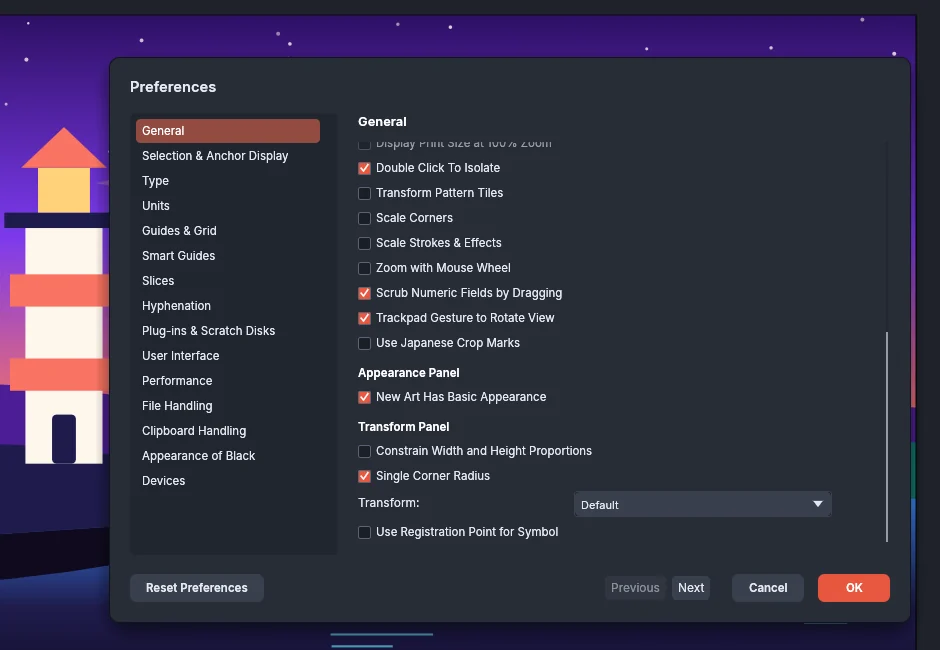
| Double Click To Isolate | On |
| Transform Pattern Tiles | Off |
| Scale Corners | Off |
| Scale Strokes & Effects | Off |
| Zoom with Mouse Wheel | Off |
| Scrub Numeric Fields by Dragging | On |
| Trackpad Gesture to Rotate View | On |
| Use Japanese Crop Marks | Off |
Under Appearance Panel and Transform Panel:
| Setting | Default | Range or choices |
|---|---|---|
| New Art Has Basic Appearance | On | On or off |
| Constrain Width and Height Proportions | Off | On or off |
| Single Corner Radius | On | On or off |
| Transform | Default | Default, Transform Object Only, Transform Pattern Only, Transform Both |
| Use Registration Point for Symbol | Off | On or off |
- Keyboard Increment is the distance an arrow key moves the selection. With Shift, an arrow key moves it ten times as far. The arrow keys move along the axes that Constrain Angle sets.
- Constrain Angle sets the angle that Shift-constrained drags start from. Shift limits a drag to 45° steps from that angle.
- Corner Radius is the corner radius of the Rounded Rectangle tool.
- Paste Offset is how far VectorCraft offsets pasted and duplicated objects.
- While Disable Auto Add/Delete is off, the Pen tool adds an anchor when you click a segment of a selected path, and deletes an anchor when you click one.
- Use Precise Cursors shows the drawing tools’ pointers as crosshairs. Caps Lock does the same while it is on.
- When Show Tool Tips is off, no button or field shows a tool tip.
- Use Preview Bounds makes the bounding box measure the visible bounds of the artwork, strokes included.
- Double Click To Isolate lets a double-click on a group with the Selection tool isolate the group.
- Scrub Numeric Fields by Dragging lets you change a numeric field’s value by dragging left or right on the field or its label.
- Trackpad Gesture to Rotate View turns the view around the pointer when you rotate two fingers on a Mac trackpad. The view starts to turn once the gesture reaches 5°.
- Use Japanese Crop Marks sets the style of the marks that Object → Create Trim Marks and Effect → Crop Marks draw.
- While New Art Has Basic Appearance is on, new art gets one fill and one stroke. While it is off, new art takes the whole appearance of the last selection.
- Constrain Width and Height Proportions is the link between W and H in the Transform panel, the Properties panel and the Control bar.
- While Single Corner Radius is on, one Corner Radius field sets every corner of a live rectangle. While it is off, each corner has its own field.
- Transform sets what the Transform panel transforms: the object, its pattern, or both. Default follows Transform Pattern Tiles.
- Use Registration Point for Symbol makes the Transform panel measure and transform a single selected symbol instance from its symbol’s registration point instead of the reference point.
Selection & Anchor Display
Section titled “Selection & Anchor Display”| Setting | Default | Range or choices |
|---|---|---|
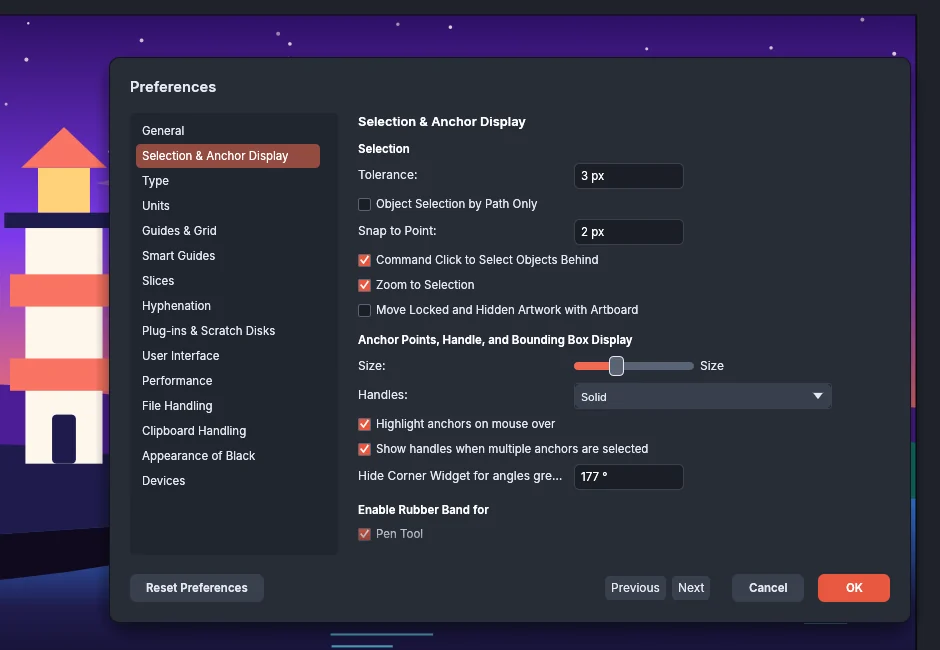
| Tolerance | 3 px | 1 to 8 px |
| Object Selection by Path Only | Off | On or off |
| Snap to Point | 2 px | 1 to 8 px |
| Command Click to Select Objects Behind | On | On or off |
| Zoom to Selection | On | On or off |
| Move Locked and Hidden Artwork with Artboard | Off | On or off |
| Size (anchor points, handles and bounding box) | 3 | 1 to 7, on a slider |
| Handles | Solid | Solid, Hollow, Large |
| Highlight anchors on mouse over | On | On or off |
| Show handles when multiple anchors are selected | On | On or off |
| Hide Corner Widget for angles greater than | 177° | 0° to 180° |
| Enable Rubber Band for → Pen Tool | On | On or off |
| Enable Rubber Band for → Curvature Tool | On | On or off |
- Tolerance is how close, in screen pixels, a click must be to a path or an anchor to select it.
- While Object Selection by Path Only is on, a click inside a filled path does not select it. Only a click on the path does.
- Snap to Point is how close, in screen pixels, an anchor or a guide must be to pull the pointer to it while View → Snap to Point is on.
- Command Click to Select Objects Behind lets a Ctrl-click (Cmd-click on macOS) with the Selection tool select the object under the selected one. The next click selects the object under that one.
- Size sets how large anchors and handles are drawn.
- Highlight anchors on mouse over marks the anchor under the pointer while you use the Direct Selection tool.
- While Show handles when multiple anchors are selected is off, the Direct Selection tool shows handles only while one anchor is selected.
- A corner whose angle is greater than the Hide Corner Widget for angles greater than value shows no Live Corners widget.
- Enable Rubber Band for → Pen Tool shows a preview of the next segment from the last anchor to the pointer.
| Setting | Default | Range or choices |
|---|---|---|
| Size/Leading | 2 pt | 0.001 to 1296 pt |
| Tracking | 20 /1000 em | 1 to 1000 /1000 em |
| Baseline Shift | 2 pt | 0.001 to 1296 pt |
| Show East Asian Options | Off | On or off |
| Show Indic Options | Off | On or off |
| Type Object Selection by Path Only | Off | On or off |
| Show Font Names in English | On | On or off |
| Auto Size New Area Type | Off | On or off |
| Enable in-menu font previews | On | On or off |
| Font Preview Size | Medium | Small, Medium, Large |
| Number of Recent Fonts | 10 | 1 to 15 |
| Enable Missing Glyph Protection | On | On or off |
| Highlight Alternate Glyphs | Off | On or off |
| Highlight Substituted Fonts | On | On or off |
| Fill New Type Objects With Placeholder Text | On | On or off |
| Additional Fonts Folder | Empty | A folder path |
| Override Character Color (under Graphic Styles) | On | On or off |
| Point Text (under Align to Glyph Bounds) | Off | On or off |
| Area Text (under Align to Glyph Bounds) | Off | On or off |
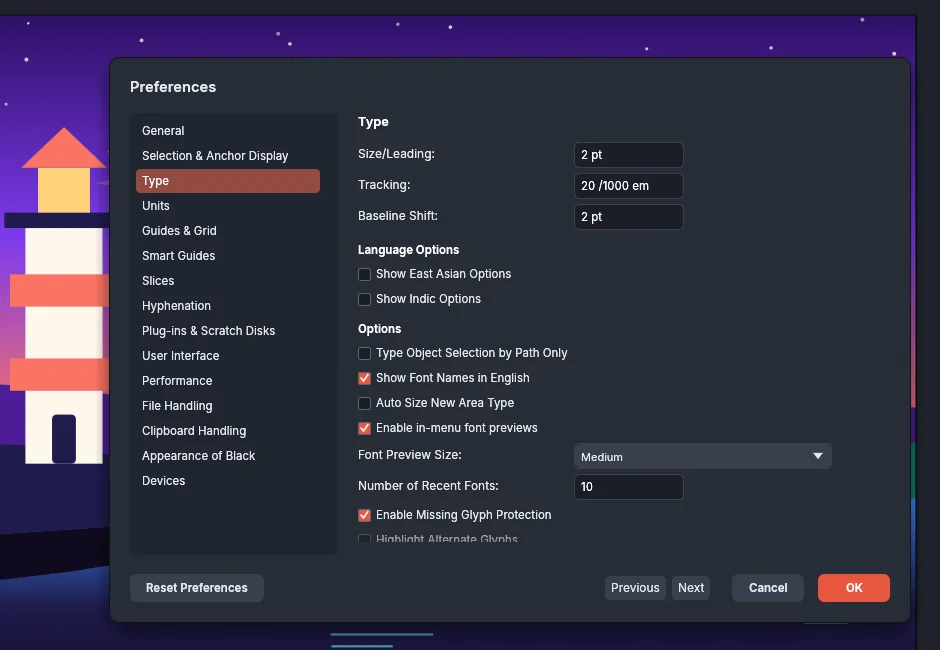
- Size/Leading and Baseline Shift are shown in the unit of the Type setting on the Units page.
- Size/Leading, Tracking and Baseline Shift come first, with no heading. Show East Asian Options and Show Indic Options are under Language Options, and the settings from Type Object Selection by Path Only to Additional Fonts Folder are under Options.
- While Type Object Selection by Path Only is on, you select type only on its type path: the baseline of point type, the frame of area type, or the path of type on a path.
- While Highlight Substituted Fonts is on, text drawn in a substitute for a missing font is highlighted on screen, in every document.
- While Fill New Type Objects With Placeholder Text is on, new type starts with placeholder text, selected.
- VectorCraft lists and uses the fonts in the Additional Fonts Folder and its subfolders as if they were installed. When you change the folder, the font menus update.
- While Override Character Color is on, a graphic style applied to type replaces the fill and stroke of its characters with the style’s fills and strokes.
- The Align to Glyph Bounds settings make Align and Distribute measure point type, or area type, by the ink of its glyphs. Otherwise they measure point type by its em box and area type by its frame.
| Setting | Default | Range or choices |
|---|---|---|
| General | Points | Points, Picas, Inches, Millimeters, Centimeters, Pixels, Feet & Inches, Meters, Yards, Feet |
| Stroke | Points | The same units as General |
| Type | Points | The same units as General |
| East Asian Type | Points | The units of General, plus Q and Ha |
| Numbers Without Units Are Points | On | On or off |
| Identify Objects By | Object Name | Object Name, XML ID |
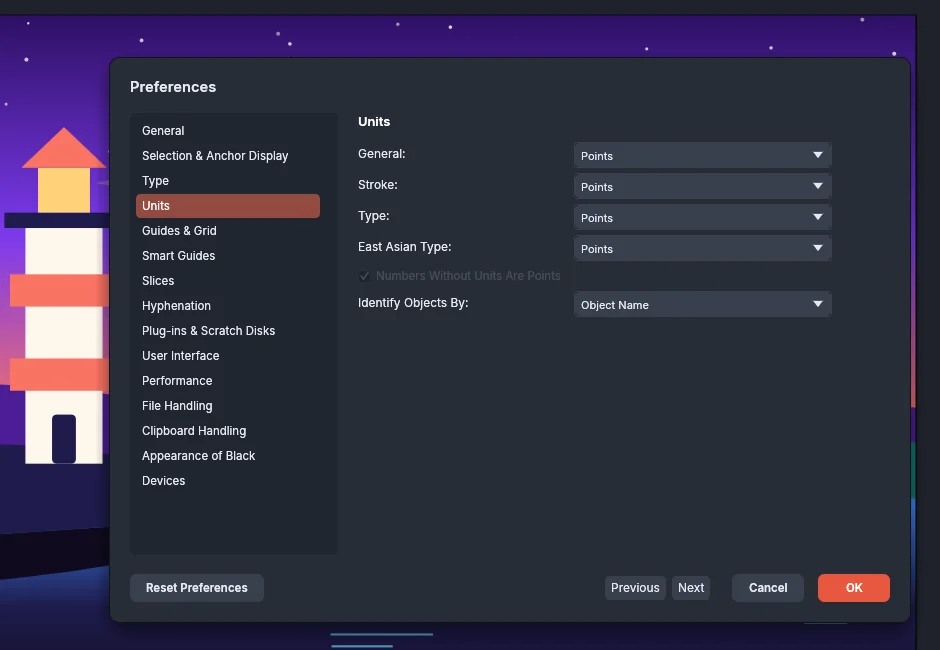
- With a document open, General shows that document’s units, and OK sets the document’s units to the unit you choose.
- Stroke sets the unit of stroke widths.
- While Numbers Without Units Are Points is on, a number typed without a unit into a length field that uses picas is read as points.
Guides & Grid
Section titled “Guides & Grid”| Setting | Default | Range or choices |
|---|---|---|
| Snap to Grid | Off | On or off |
| Guides → Color | #4affff | Any color |
| Guides → Style | Lines | Lines, Dots |
| Grid → Color | #c8c8c8 | Any color |
| Grid → Style | Lines | Lines, Dots |
| Gridline every | 72 pt | 1 to 16383 pt |
| Subdivisions | 8 | 1 to 1000 |
| Grids In Back | On | On or off |
| Show Pixel Grid (Above 600% Zoom) | On | On or off |
| Pattern Editing → Tile Edge Color | #4f80ff | Any color |
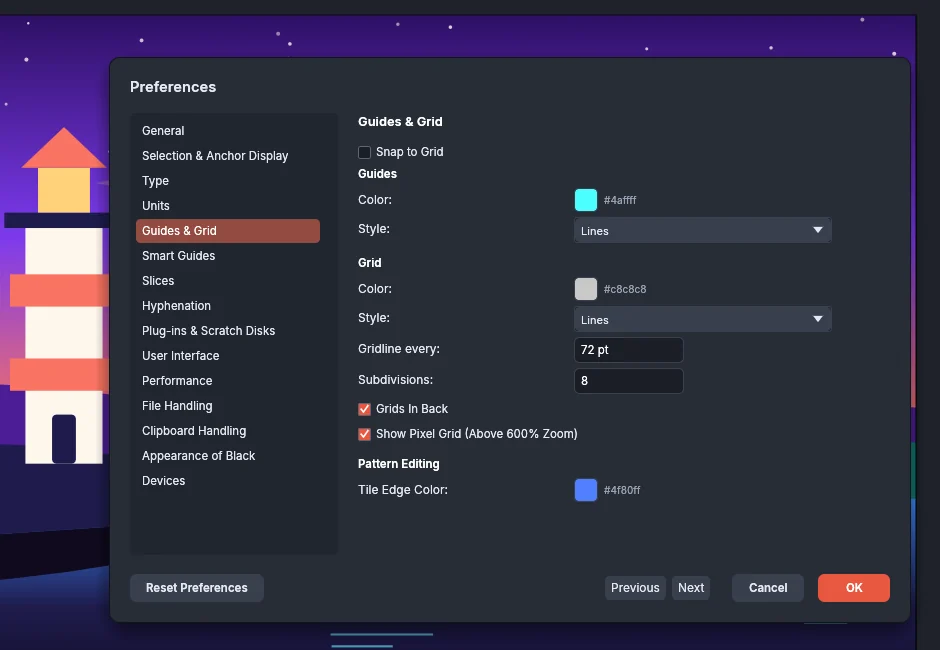
- Each color setting has a color button, with the hex value beside it.
- Gridline every and Subdivisions set the document grid. Open documents update when you click OK.
- Tile Edge Color is the color of the tile edge and the swatch bounds in pattern editing mode.
Smart Guides
Section titled “Smart Guides”| Setting | Default | Range or choices |
|---|---|---|
| Smart Guides (View → Smart Guides) | On | On or off |
| Color | #ff3dfc | Any color |
| Alignment Guides | On | On or off |
| Object Highlighting | On | On or off |
| Transform Tools | On | On or off |
| Construction Guides | On | On or off |
| Angles | 90° & 45° Angles | 90° & 45° Angles, 30° Angles, 45° Angles, 60° Angles, 90° Angles, 90° & 45° & 30° Angles |
| Anchor/Path Labels | On | On or off |
| Measurement Labels | On | On or off |
| Spacing Guides | On | On or off |
| Invoke Distance Guides | On | On or off |
| Snapping Tolerance | 4 pt | 0 to 40 pt |
| Snap to Tangent | On | On or off |
| Snap to Perpendicular | On | On or off |
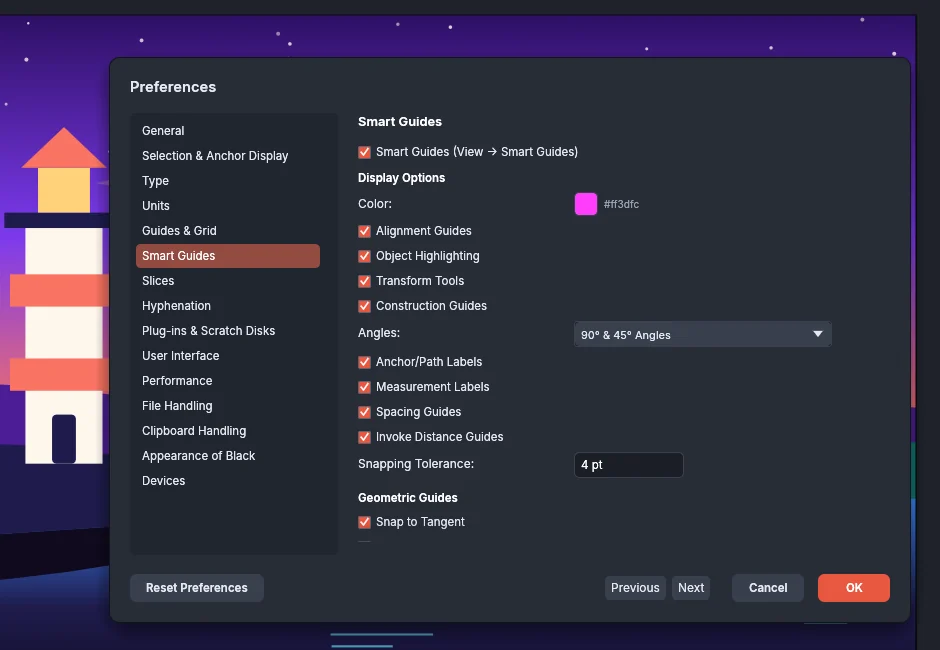
- Alignment Guides shows the lines along the edges and centers that the artwork lines up with. While it is off, the artwork still snaps into line.
- Transform Tools shows readouts while you scale, rotate and shear.
- While Construction Guides is on, guide lines run through the point you draw from at the angles that Angles sets. A point you draw near one of those lines lands on it.
- Anchor/Path Labels shows labels such as “anchor,” “center” and “path.” Measurement Labels shows size and offset readouts while you draw and move.
- While Spacing Guides is on, a moved selection snaps to the same gap as two other objects in its row or column, or to the middle between its two neighbors, and the equal gaps show.
- While Invoke Distance Guides is on, holding Alt (Option on macOS) with the Selection tool over another object shows how far the selection is from it. Over an empty part of an artboard, it shows the distance to the artboard’s edges.
- Snapping Tolerance is how close a smart guide target must be to pull the pointer, a dragged edge or a drawn point to it.
- Snap to Tangent and Snap to Perpendicular are under Geometric Guides.
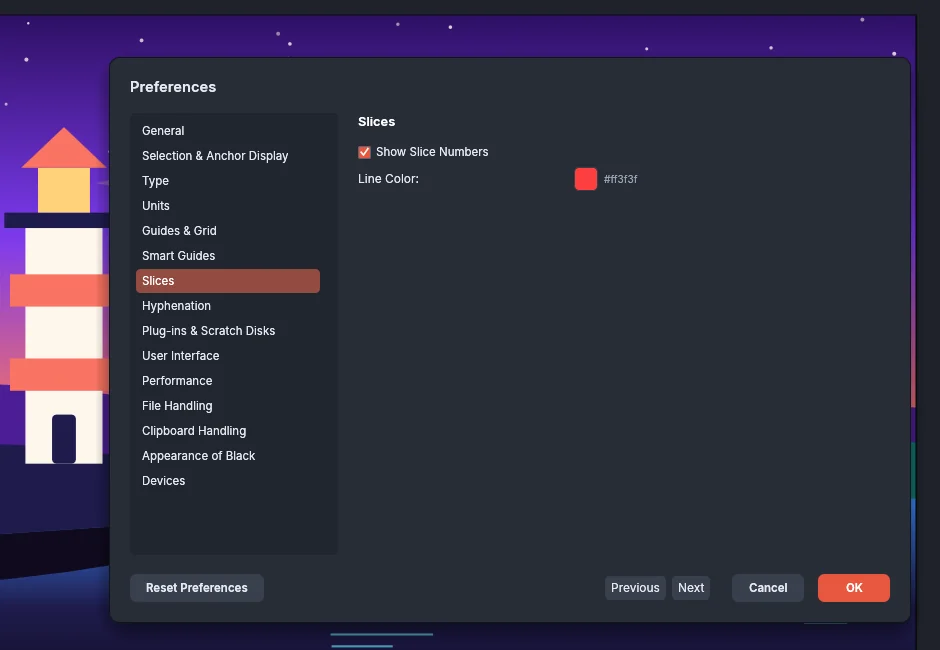
Slices
Section titled “Slices”| Setting | Default | Range or choices |
|---|---|---|
| Show Slice Numbers | On | On or off |
| Line Color | #ff3f3f | Any color |
Hyphenation
Section titled “Hyphenation”| Setting | Default | Range or choices |
|---|---|---|
| Default Language | English: USA | English: USA, English: UK, German, German: Swiss, French, Italian, Spanish, Catalan, Portuguese, Dutch, Danish, Swedish, Finnish, Norwegian, Polish, Czech, Russian, Serbian: Cyrillic, Serbian: Latin, Croatian, Turkish, Japanese, Chinese, Hindi, Marathi, Gujarati, Bengali, Punjabi, Tamil, Telugu, Kannada, Malayalam, Odia, Urdu |
| Exceptions (comma separated) | Empty | Words separated by commas |
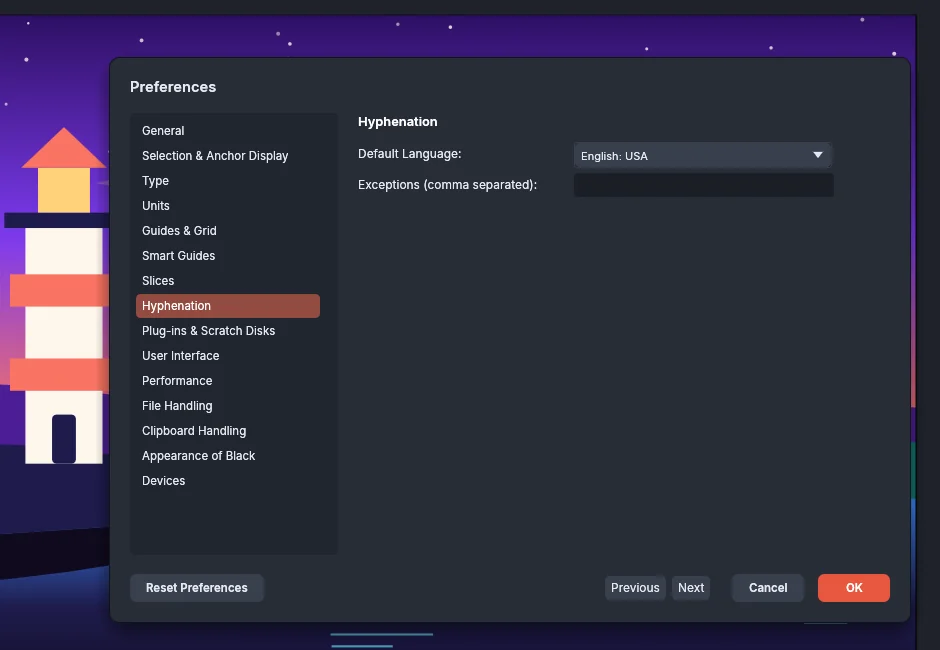
- Default Language is the language that new type uses when its document’s language is set to the default.
- A change to Exceptions changes the line breaks of every text object.
Plug-ins & Scratch Disks
Section titled “Plug-ins & Scratch Disks”| Setting | Default | Range or choices |
|---|---|---|
| Additional Plug-ins Folder | Empty | A folder path |
| Scratch Disks → Primary | Startup | Text |
| Scratch Disks → Secondary | None | Text |
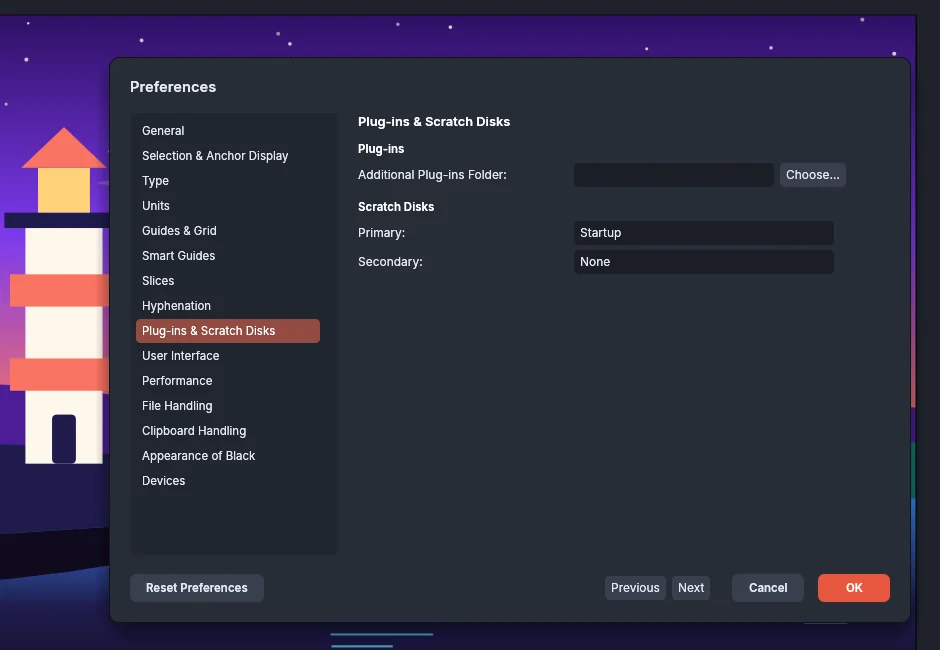
- VectorCraft installs the plug-ins in the Additional Plug-ins Folder. Type the path or click Choose…. The web build has no Choose… button. If you pick a folder that VectorCraft cannot list, the status bar shows the reason and the setting keeps its earlier value.
- When you click OK, VectorCraft checks a folder you typed here or in the Data Recovery Folder field. It does not check an empty field or a folder that the setting already holds. If VectorCraft cannot use the folder, the status bar shows the reason, no setting changes and the dialog stays open.
User Interface
Section titled “User Interface”| Setting | Default | Range or choices |
|---|---|---|
| Brightness | Medium Dark | Dark, Medium Dark, Medium Light, Light |
| Color Scheme | Modern | Modern, Classic |
| Accent Color | Coral | Coral, Blue, Violet, Green, Amber, Pink |
| Canvas Color | Match User Interface Brightness | Match User Interface Brightness, White, Light Gray, Medium Gray, Dark Gray |
| Auto-Collapse Iconic Panels | Off | On or off |
| Show Tool Group Labels | Off | On or off |
| Open Documents As Tabs | On | On or off |
| Large Tabs | Off | On or off |
| System Title Bar | Off | On or off (Windows and Linux) |
| UI Scaling → Scale | 1.0× | 0.75× to 2.0×, on a slider in steps of 0.05 |
| Scale Cursor Proportional to UI | Off | On or off |
| Language | Auto | Auto, English, Bahasa Indonesia, Bosanski, Català, Čeština, Dansk, Deutsch, Español, Français, Italiano, Magyar, Nederlands, Polski, Português (Brasil), Suomi, Svenska, Tiếng Việt, Türkçe, Ελληνικά, Български, Русский, Українська, हिन्दी, ქართული, 日本語, 简体中文, 繁體中文, 한국어 |
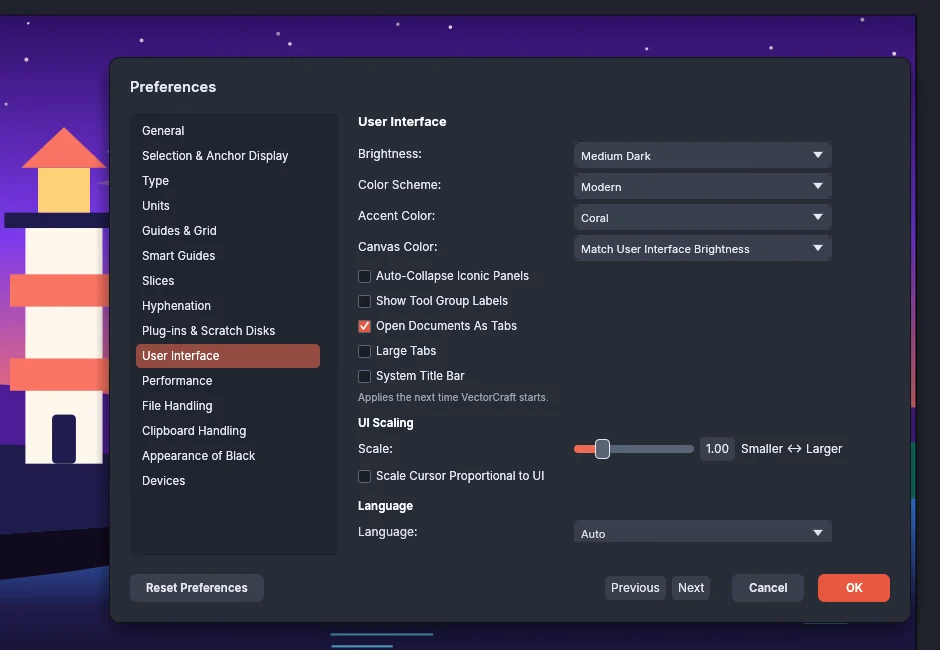
- Accent Color is the color of controls that are on, chosen or focused. The Classic color scheme uses neutral grays and a blue accent.
- Canvas Color is the color of the canvas around the artboards. Match User Interface Brightness uses the color that goes with Brightness.
- Show Tool Group Labels shows the group names in the toolbar.
- System Title Bar uses the system’s title bar and window buttons. macOS always uses the system’s title bar.
- Language set to Auto follows the system language. The list shows English first, then the other languages by their own names.
To change the workspace, panels and toolbars, see Customize the workspace.
Performance
Section titled “Performance”| Setting | Default | Range or choices |
|---|---|---|
| GPU Performance | On | On or off |
| Animated Zoom | On | On or off |
| Graphics Processor | Automatic | Automatic, Power Saving (integrated), High Performance (discrete) |
| History States | 500 | 5 to 1000 |
| Real-time Drawing and Editing | On | On or off |
| Render Threads (-1 = Automatic) | -1 | -1 to 64 |
| Linux Display Server | Automatic | Automatic, X11 (XWayland), X11 (XWayland) When a Pen Is Attached |
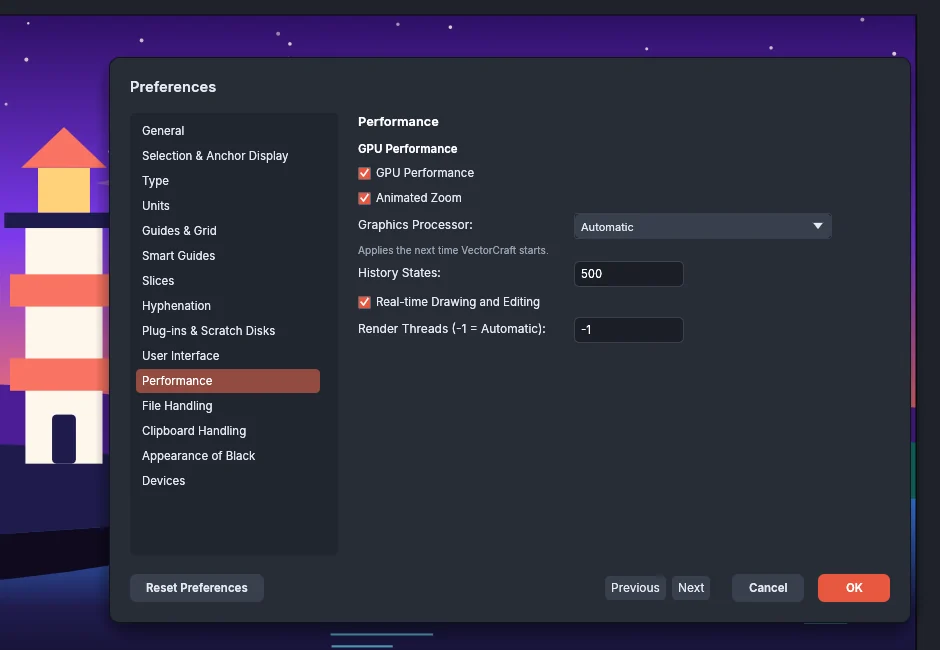
- GPU Performance, Animated Zoom and Graphics Processor are under GPU Performance.
- Graphics Processor chooses the graphics processor VectorCraft uses on a computer that has two. The change takes effect the next time VectorCraft starts.
- History States is the number of undo steps each open document keeps.
- Render Threads is the number of threads that draw the canvas. -1 lets VectorCraft choose.
- On a Wayland session, X11 (XWayland) opens the window through XWayland, which lets you drop files on the window. Automatic and X11 (XWayland) When a Pen Is Attached open the window through XWayland only when a drawing tablet’s pen is attached as VectorCraft starts. If a drawing tablet’s pen does not draw, choose one of the X11 (XWayland) options.
For problems with the window or a drawing tablet, see Troubleshooting.
File Handling
Section titled “File Handling”| Setting | Default | Range or choices |
|---|---|---|
| Enable Background Save | On | On or off |
| Enable Background Export | On | On or off |
| Automatically Save Recovery Data | On | On or off |
| Every (minutes) | 2 | 1 to 60 |
| Folder | Empty | A folder path |
| Turn off Data Recovery for complex documents | Off | On or off |
| Number of Recent Files to Display | 20 | 0 to 30 |
| Use Low Resolution Proxy for Linked EPS | Off | On or off |
| Display Bitmaps as Anti-aliased Images in Pixel Preview | Off | On or off |
| Update Links | Ask When Modified | Automatically, Manually, Ask When Modified |
| Templates Folder | Empty | A folder path |
| Use System Defaults for Edit Original | On | On or off |
| Mark Older Files as [Converted] When Opened | On | On or off |
| Use Compression | Off | On or off |
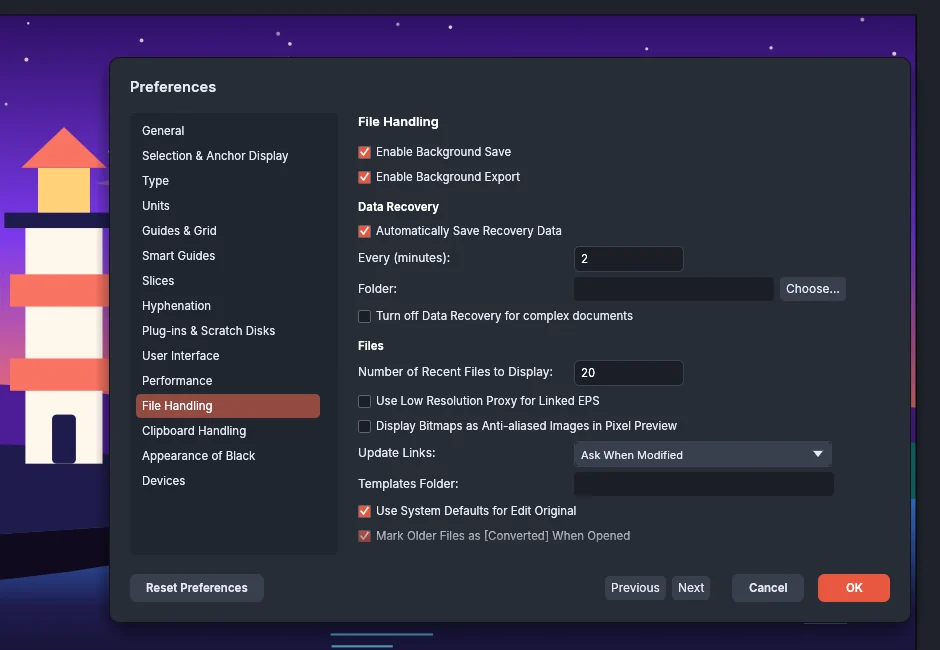
- The four recovery settings are under Data Recovery. For Folder, type a path or click Choose…. VectorCraft accepts only a folder it can list and write to.
- Templates Folder is the folder where File → Save as Template… and File → New from Template… start. When it is empty, they start in
Documents/VectorCraft Templates. - While Use System Defaults for Edit Original is on, Edit Original in the Links panel opens a linked file in the system’s default app for that file. While it is off, Edit Original opens a raster image in PhotoCraft where PhotoCraft is installed, and otherwise in the system’s default app.
- While Mark Older Files as [Converted] When Opened is on, a native file from an older version opens as name [Converted], so Save asks for a new name.
- While Use Compression is on, VectorCraft compresses
.vectorcraftfiles when it saves them.
Clipboard Handling
Section titled “Clipboard Handling”| Setting | Default | Range or choices |
|---|---|---|
| Include SVG Code | On | On or off |
| Off | On or off | |
| Legacy vector clipboard (no transparency) | Off | On or off |
| Legacy vector clipboard | Preserve Appearance and Overprints | Preserve Paths, Preserve Appearance and Overprints |
| When pasting text | Keep Formatting | Keep Formatting, Keep Plain Text |
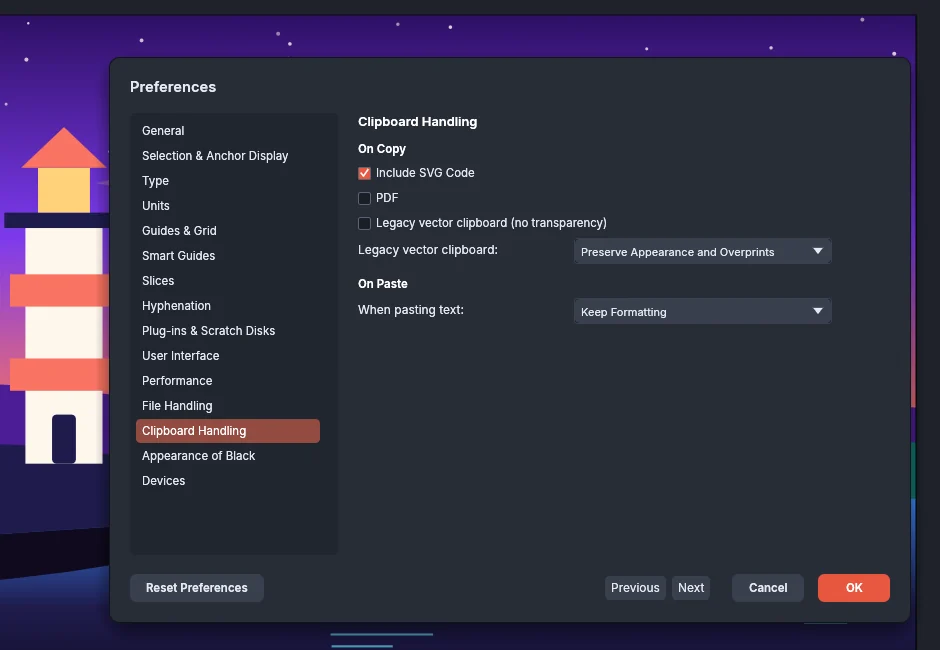
- The first four settings are under On Copy, and When pasting text is under On Paste.
- With Keep Plain Text, text you paste while typing takes the style at the text cursor.
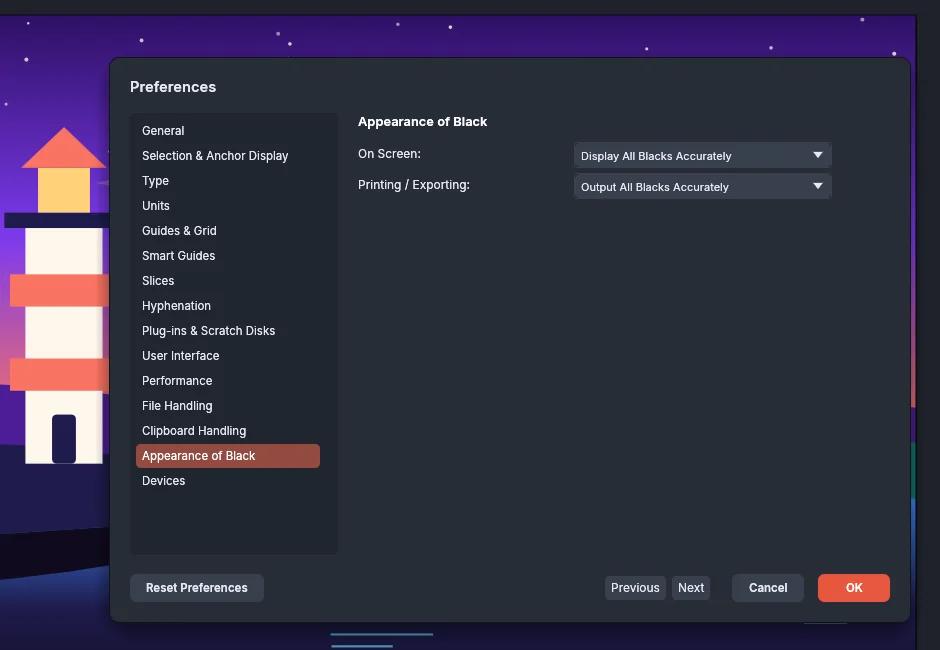
Appearance of Black
Section titled “Appearance of Black”| Setting | Default | Range or choices |
|---|---|---|
| On Screen | Display All Blacks Accurately | Display All Blacks Accurately, Display All Blacks as Rich Black |
| Printing / Exporting | Output All Blacks Accurately | Output All Blacks Accurately, Output All Blacks as Rich Black |
Devices
Section titled “Devices”| Setting | Default | Range or choices |
|---|---|---|
| Enable Touch Workspace | On | On or off |
| Enable Touch Gestures | On | On or off |
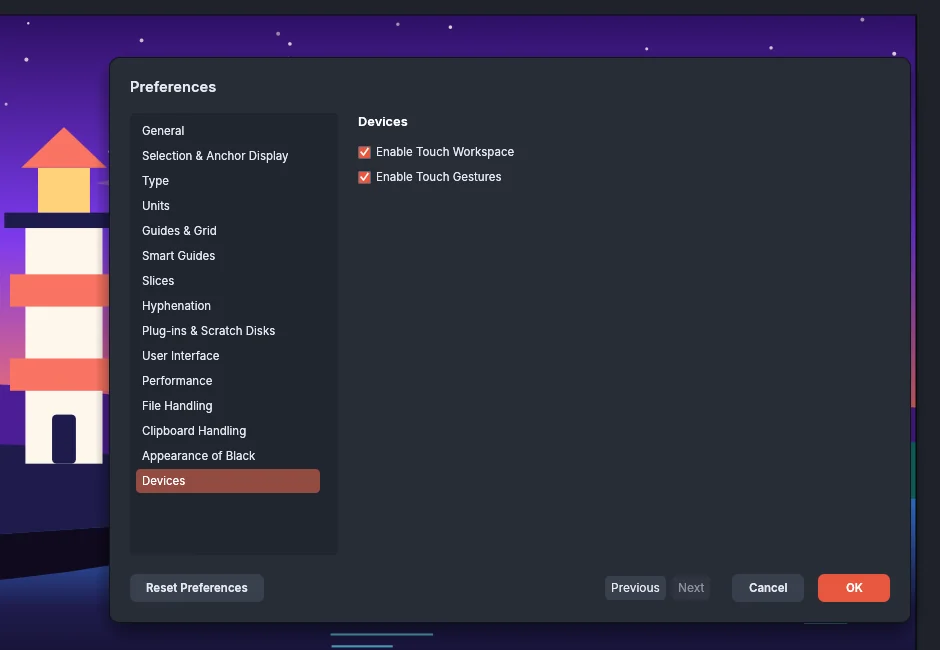
- While Enable Touch Workspace is on, VectorCraft switches to the Touch workspace on a touch screen.
Reset Preferences
Section titled “Reset Preferences”- Open Preferences.
- Click Reset Preferences at the bottom left of the dialog. Every setting on every page returns to its default in the dialog.
- Click OK to apply the defaults, or Cancel to keep your settings.
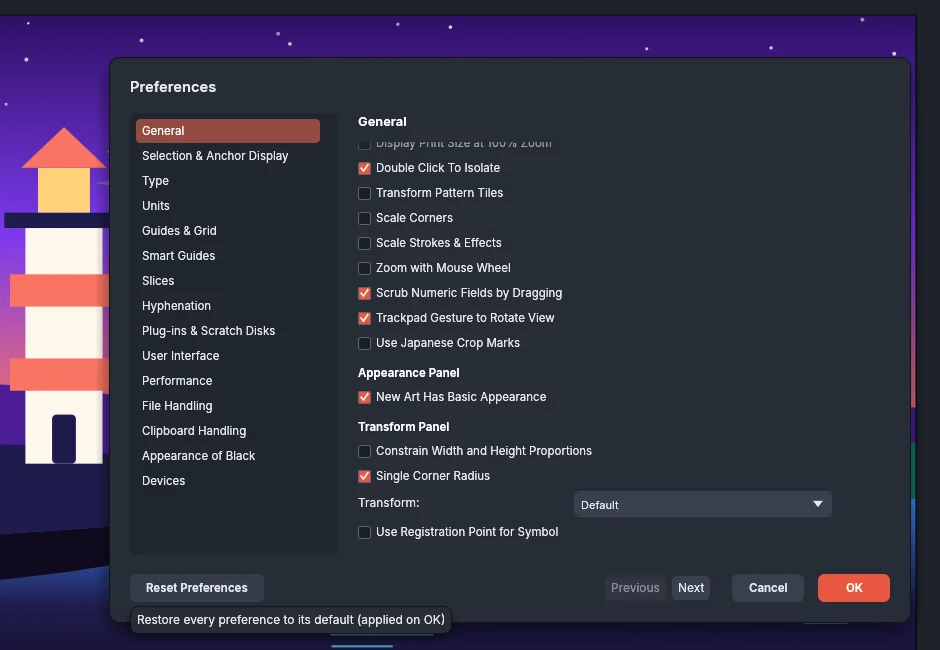
Reset Preferences also resets the Eyedropper Options, the Pathfinder Options, the Snap to Glyph options and the Perspective Grid Options. It does not change Enable Contextual Task Bar, Snap to Grid or Smart Guides. Your saved presets and libraries, such as PDF presets, print presets, gradient presets, saved color themes and document presets, are kept. With a document open, the reset sets the document’s units to points, because General on the Units page returns to Points.