Reshape with the warp tools
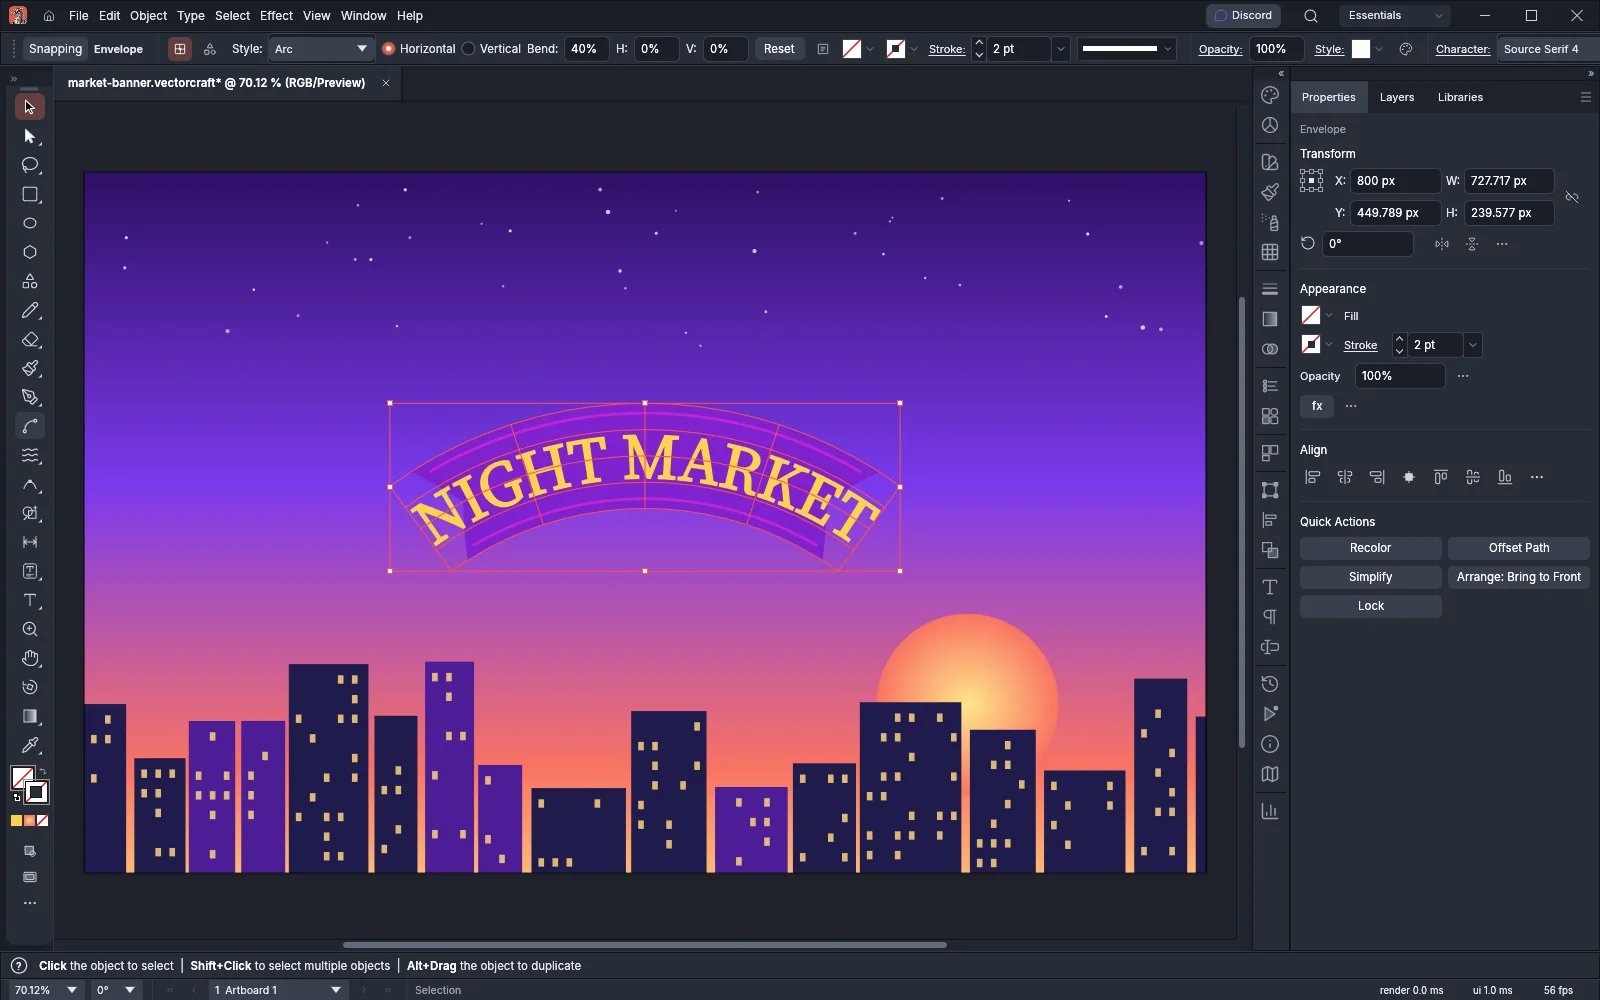
This guide covers the seven brush tools that reshape paths as you drag over them, the Reshape tool, the Puppet Warp tool, and the Object → Envelope Distort commands, which bend artwork and type into a warp, a mesh or the shape of another path.
| Tool or command | Windows and Linux | macOS |
|---|---|---|
| Warp tool | Shift+R | Shift+R |
| Envelope Distort → Make with Warp… | Ctrl+Alt+Shift+W | Cmd+Option+Shift+W |
| Envelope Distort → Make with Mesh… | Ctrl+Alt+M | Cmd+Option+M |
| Envelope Distort → Make with Top Object | Ctrl+Alt+C | Cmd+Option+C |
The Twirl, Pucker, Bloat, Scallop, Crystallize, Wrinkle, Reshape and Puppet Warp tools have no key of their own. You can give them one in Edit → Keyboard Shortcuts….
Pick a warp tool
Section titled “Pick a warp tool”The Warp tool and six more tools share a slot with the Width tool in the Tools panel. Each one changes the paths under a round brush as you drag.
| Tool | What a drag does |
|---|---|
| Warp | Pushes the outline along in the direction you drag |
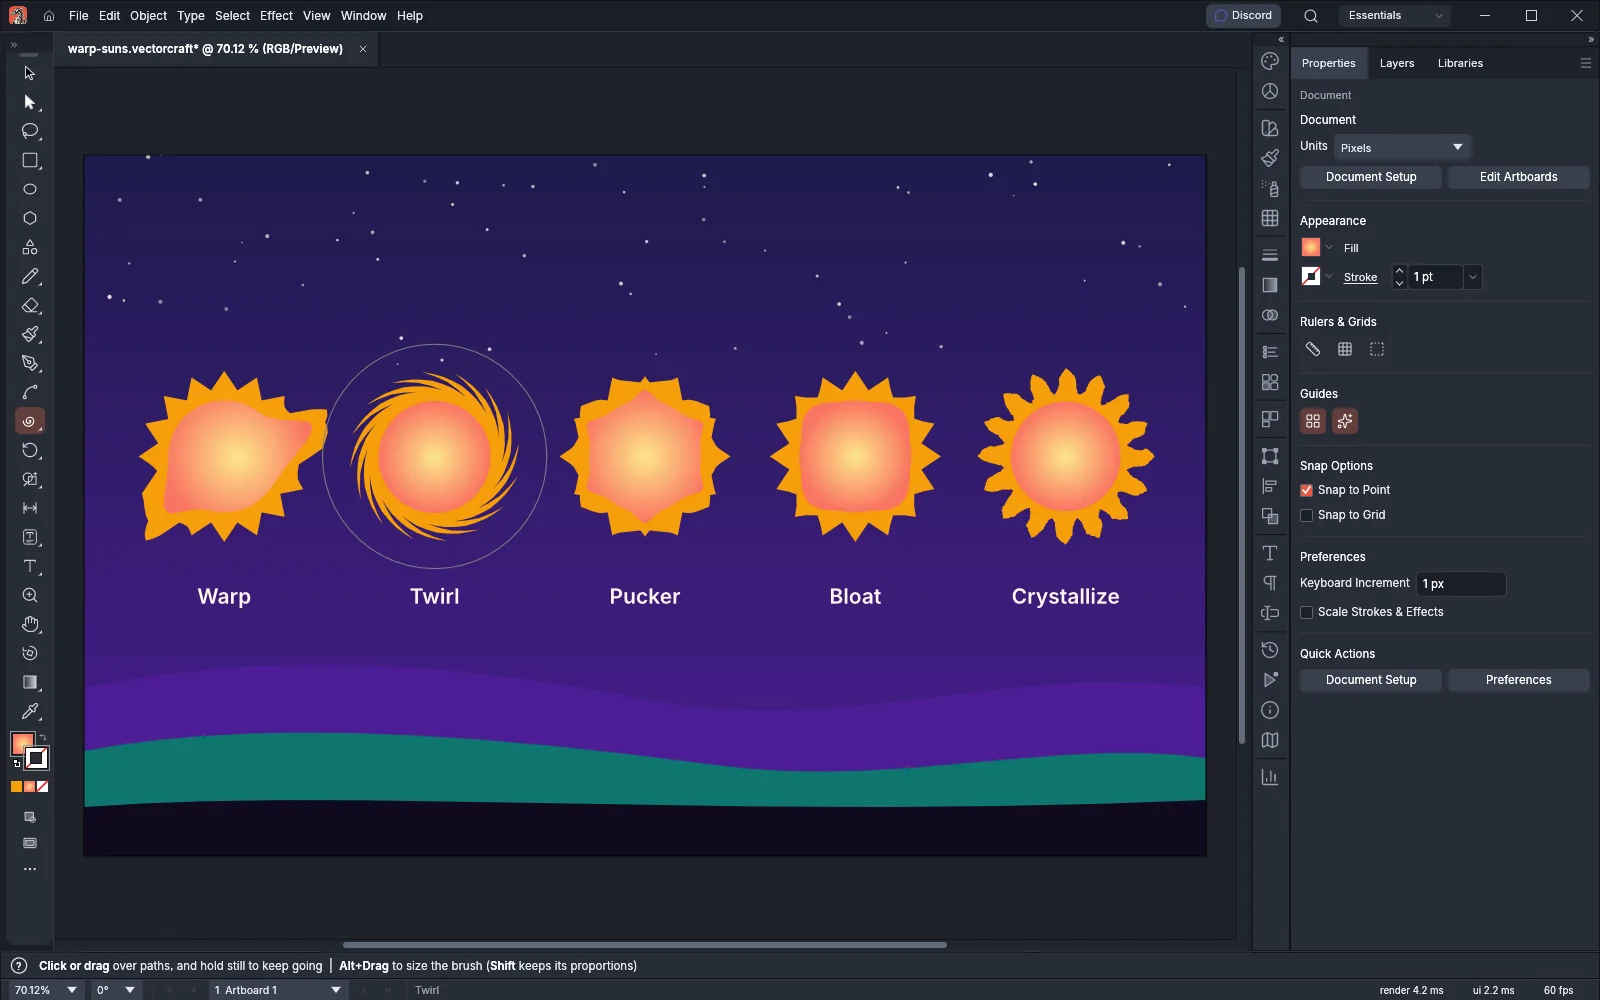
| Twirl | Turns the outline around the center of the brush into a spiral |
| Pucker | Pulls the outline in toward the center of the brush |
| Bloat | Pushes the outline out from the center of the brush |
| Scallop | Curls the outline into small arcs |
| Crystallize | Pushes the outline out into sharp spikes |
| Wrinkle | Roughens the outline with small random folds |
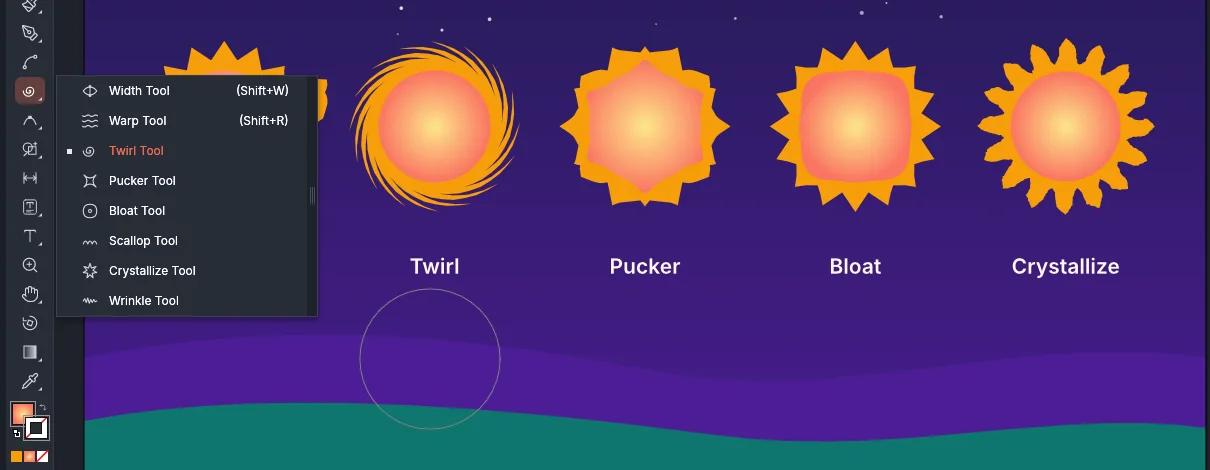
Twirl, Pucker and Bloat keep changing the paths while you hold the brush still.
Set the brush size and options
Section titled “Set the brush size and options”To resize the brush on the canvas, hold Alt (Option on macOS) and drag with the tool. The edge of the brush follows the pointer. Hold Shift as well to keep the brush’s proportions. Press Esc before you release to put the size back.
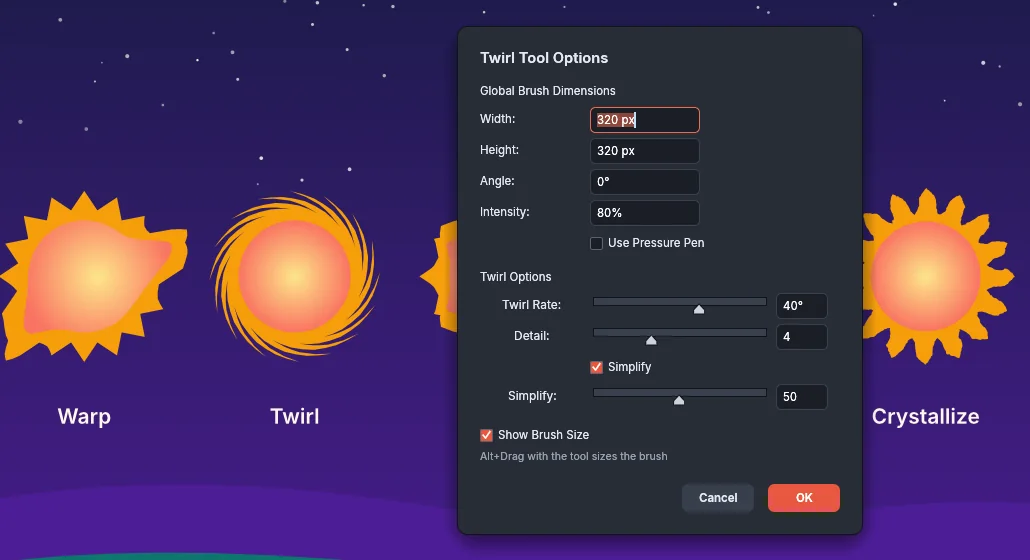
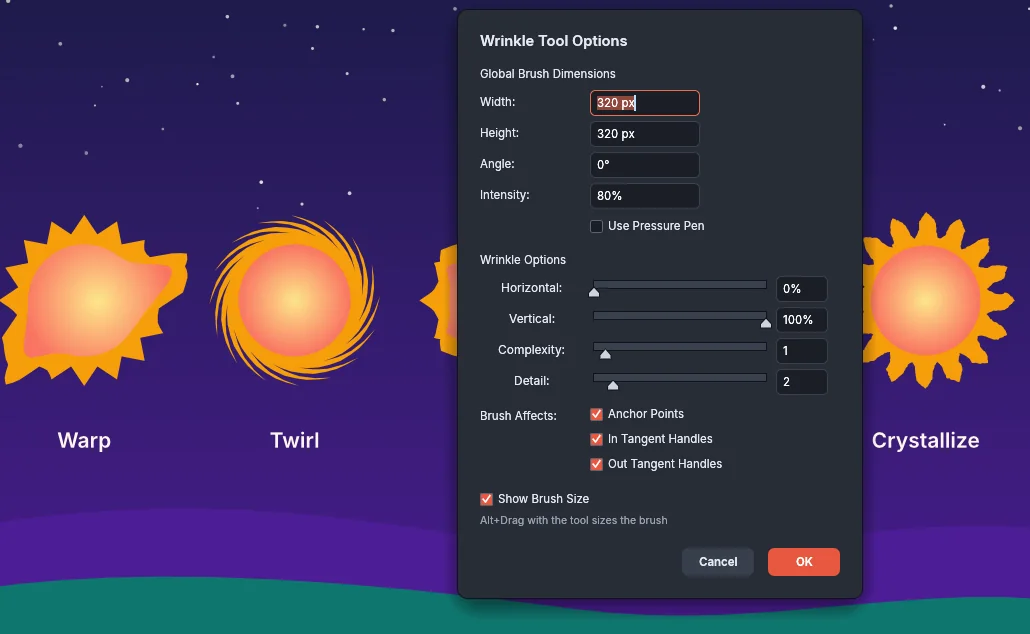
For exact values, double-click the tool in the Tools panel to open its options, for example Twirl Tool Options. The Global Brush Dimensions are shared by all seven tools, so a brush size that you set for one tool applies to the others too. The options stay as you set them when you switch tools or restart VectorCraft.
| Option | Default | What it does |
|---|---|---|
| Width and Height | 100 pt | The size of the brush. Different values make an oval brush |
| Angle | 0° | Turns an oval brush, from −360° to 360° |
| Intensity | 50% | How strongly each pass changes the paths, from 1% to 100% |
| Use Pressure Pen | Off | Uses the pen pressure of a drawing tablet as the intensity. Intensity is not available while it is on |
| Detail | 2 | How many anchor points the tool adds where the brush passes, from 1 to 10. More points give a smoother result |
| Simplify | On, 50 | Removes anchor points that the result does not need, from 1 to 100. Warp, Twirl, Pucker and Bloat only |
| Twirl Rate | 40° | How fast the outline turns, from −180° to 180°. Negative values turn it the other way. Twirl only |
| Complexity | 1 | How many arcs, spikes or folds the tool makes, from 0 to 15. Scallop, Crystallize and Wrinkle only |
| Horizontal and Vertical | 0% and 100% | How far the folds go in each direction. Wrinkle only |
| Brush Affects | All on | Which parts of the path the tool moves: Anchor Points, In Tangent Handles and Out Tangent Handles. Scallop, Crystallize and Wrinkle only |
| Show Brush Size | On | Shows the outline of the brush around the pointer |
Push and twist shapes
Section titled “Push and twist shapes”- Select the paths to change. With nothing selected, the tool changes every visible, unlocked path that the brush touches.
- Press Shift+R to choose the Warp tool, or choose another tool from the Width tool’s slot in the Tools panel.
- Drag over the outline of a path. For Twirl, Pucker and Bloat, you can also click and hold.
- Release the mouse button.
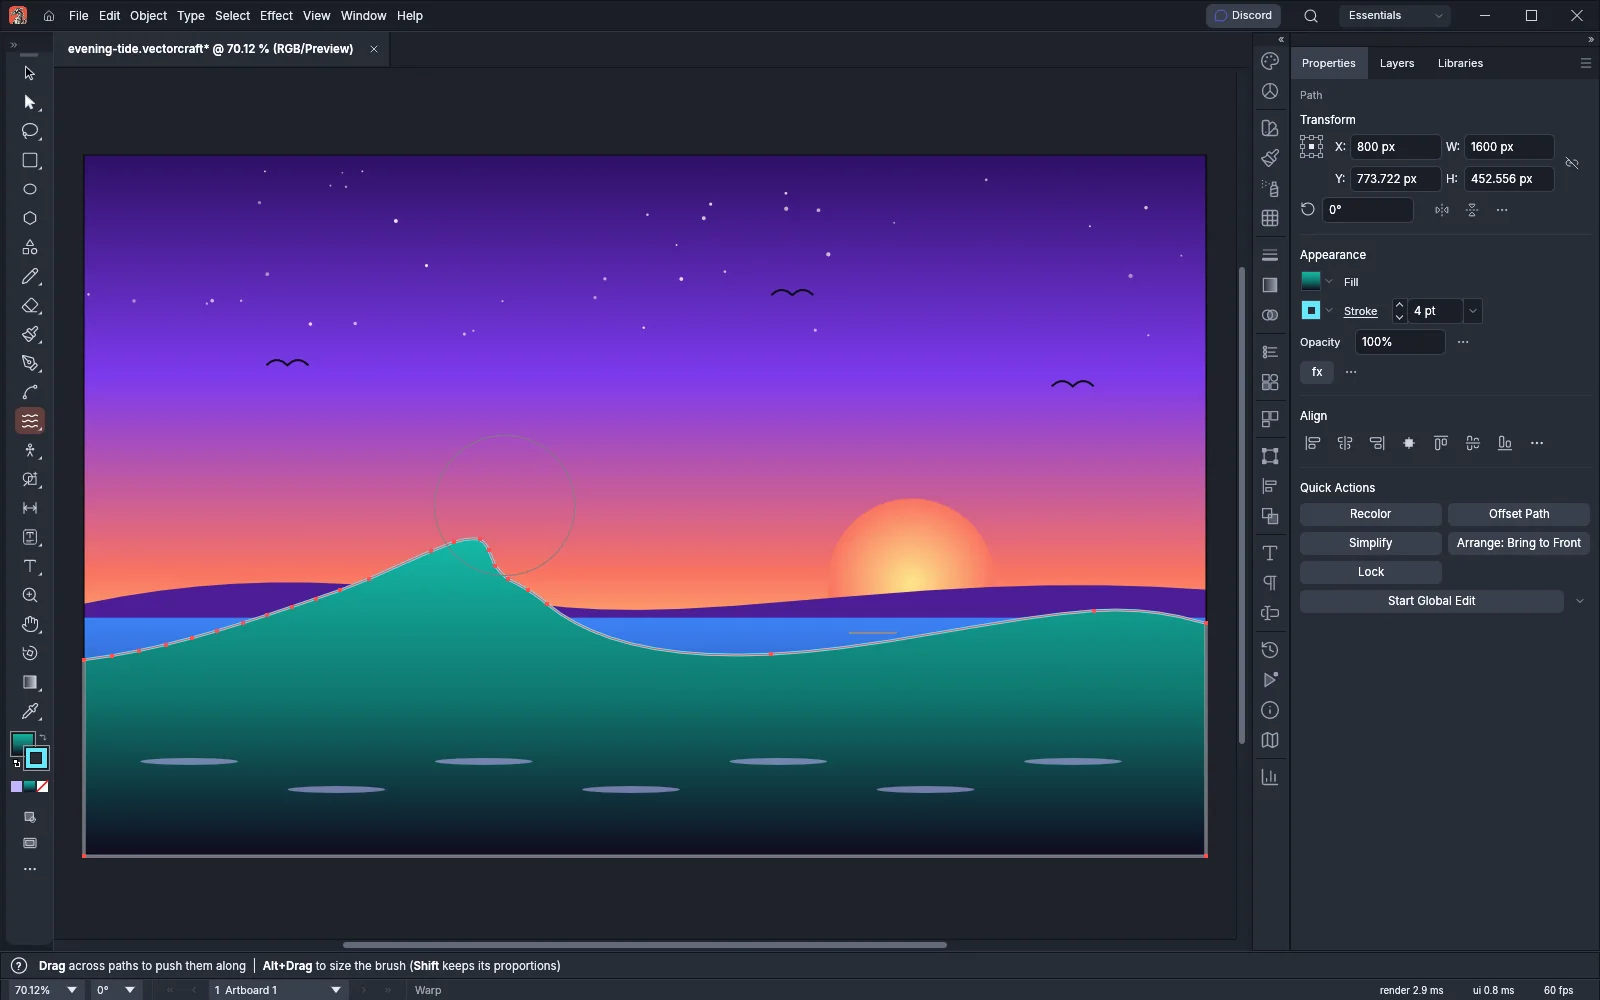
Each stroke is one step that Ctrl+Z (Cmd+Z on macOS) undoes. To cancel a stroke while you drag, press Esc.
These tools change paths only. A shape such as a rectangle or an ellipse becomes an ordinary path. The tools do not change type, symbols, images, gradient meshes, envelopes, repeats, blends, graphs or placed documents, and the status bar says how many objects the brush passed over without changing them, and what kind they are. To bend type, put it in an envelope, as Distort with an envelope describes.
Pull points with the Reshape tool
Section titled “Pull points with the Reshape tool”The Reshape tool moves one point of a path, and the nearby part of the path follows it smoothly.
- Select the path with the Selection tool.
- Choose the Reshape tool. It shares a slot with the Scale tool in the Tools panel.
- Point to the place on the path that you want to move, and drag. VectorCraft adds an anchor point there unless one is already under the pointer.
- Release the mouse button.
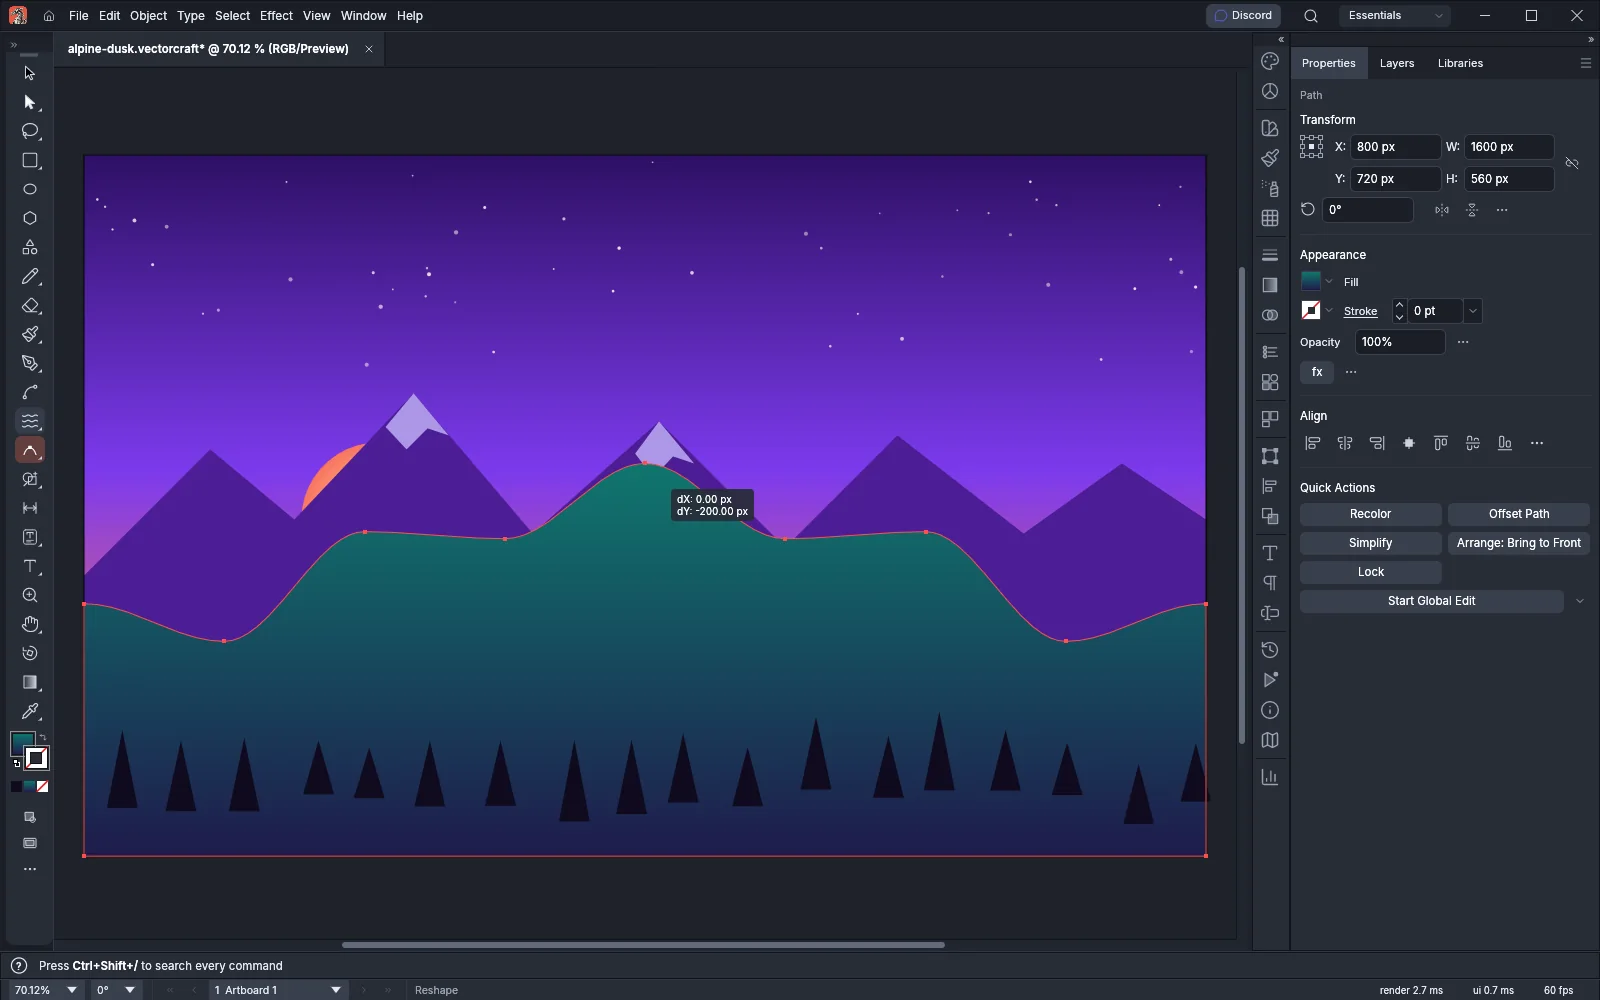
Anchor points close to the one you drag move almost as far, and points farther along the path move less. By default, the effect reaches along half the size of the path. Hold Shift to keep the drag at 45° steps, and press Esc before you release to cancel it. The Reshape tool works only on paths that are selected.
Bend art around pins with Puppet Warp
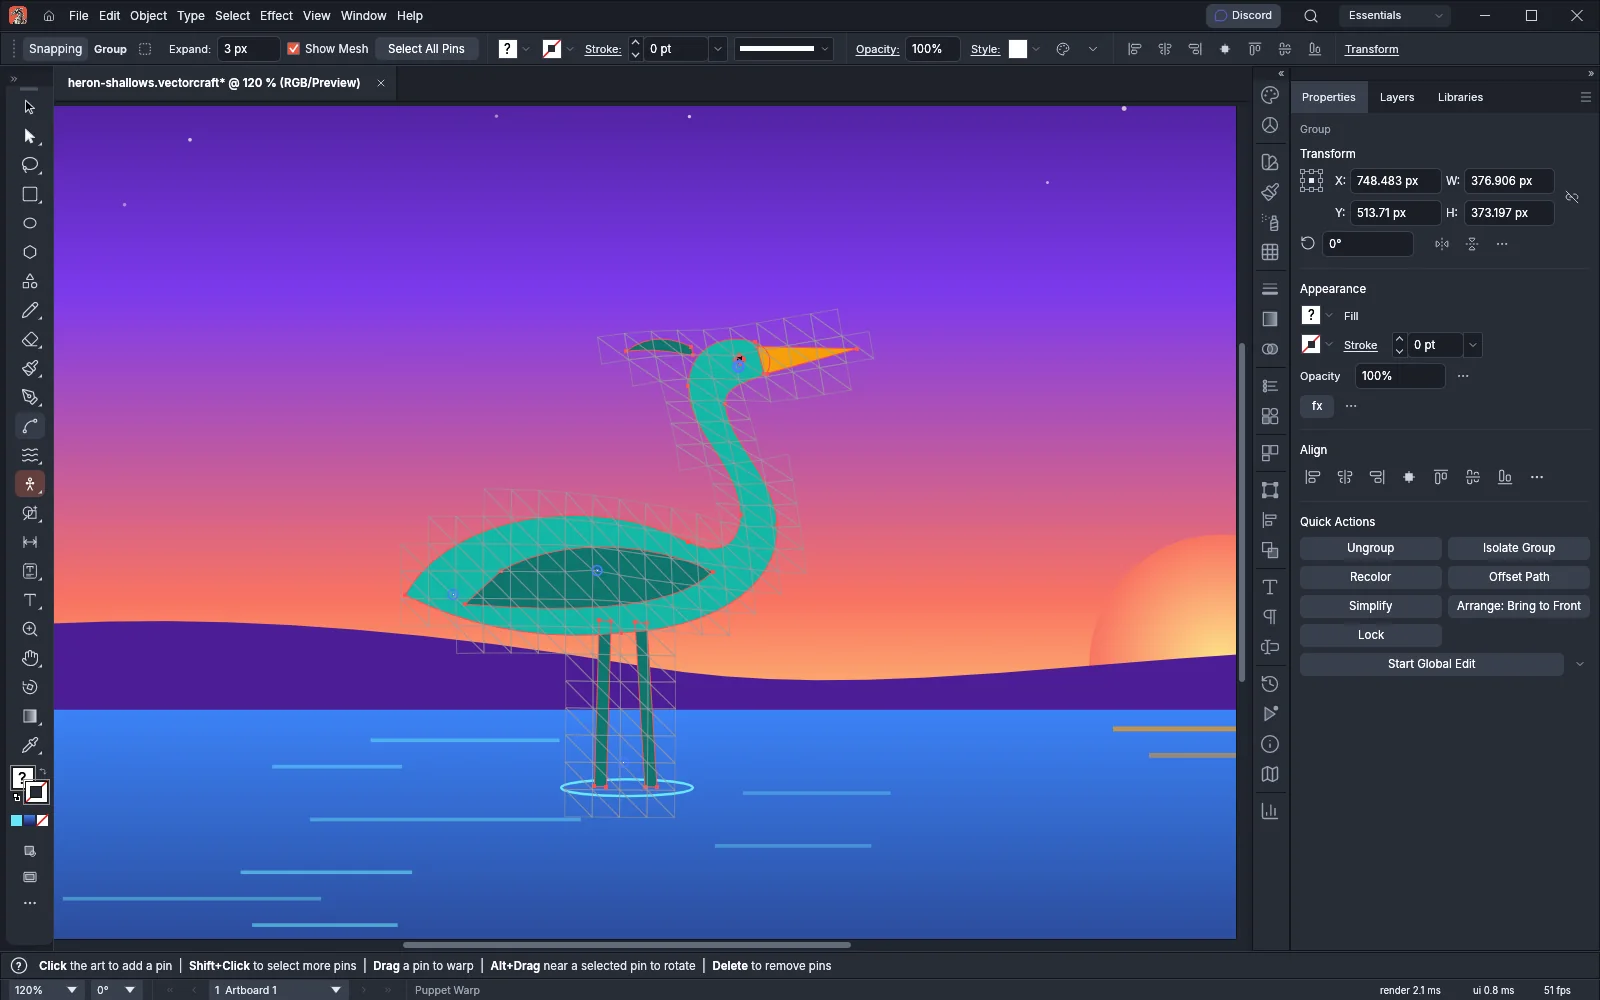
Section titled “Bend art around pins with Puppet Warp”Puppet Warp builds a mesh of triangles over the selected artwork. You pin the parts that should stay in place and drag other pins to bend the art around them.
- Select the artwork. All the selected objects bend together.
- Choose the Puppet Warp tool. It shares a slot with the Free Transform tool in the Tools panel. The mesh appears, with pins at the center of the art and at the end of each part that sticks out.
- Click the art to add more pins. A click outside the mesh does not add a pin.
- Drag a pin. The art bends, and the other pins hold their places.
- To turn the art around a pin, select the pin, then hold Alt (Option on macOS) and drag near it, not on it. The pin keeps that angle afterward.
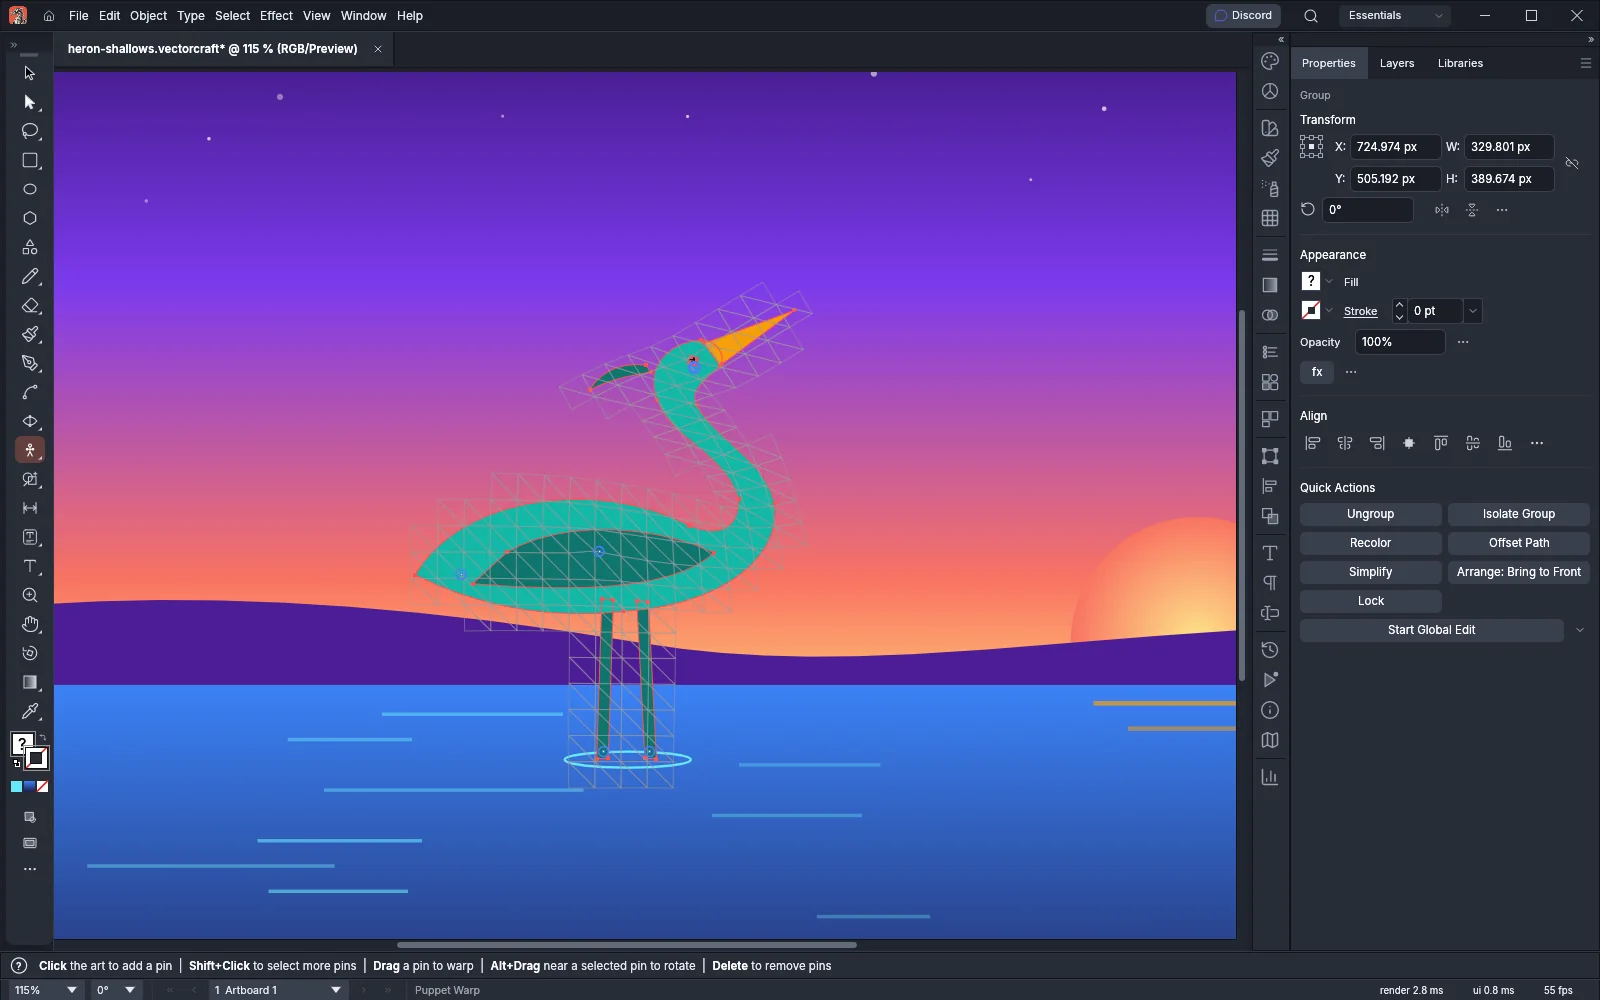
Shift-click pins to select more than one, and drag one of them to move them all. Press Delete or Backspace to remove the selected pins. Press Esc while you drag to put the art and the pins back where they were.
Each warp starts from the shape the art had when you placed the first pin. If you drag a pin back to where it started, the art goes back to its original shape. Each pin you add, delete or drag is one undo step. The pins stay while the same art is selected, and they are not saved with the document.
To see the Puppet Warp settings, choose Window → Control. The Control bar then shows:
| Setting | What it does |
|---|---|
| Expand | How far the mesh reaches past the edge of the art. The default is 3 pt |
| Show Mesh | Shows or hides the mesh. It is on by default |
| Select All Pins | Selects every pin |
Distort with an envelope
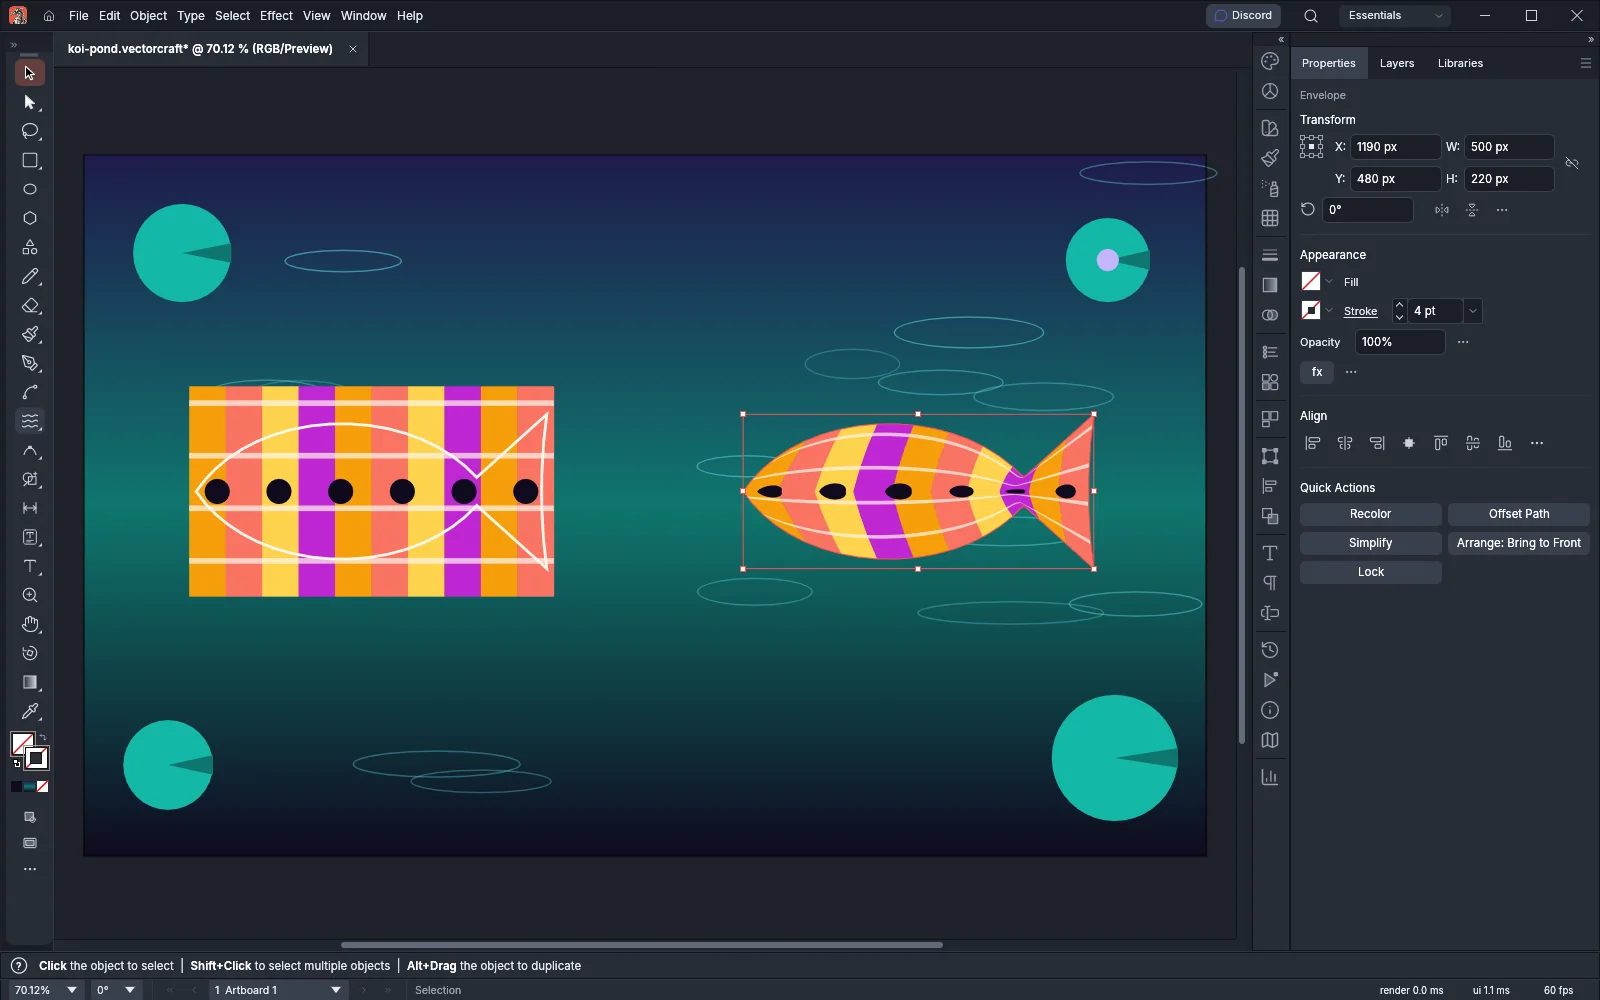
Section titled “Distort with an envelope”An envelope is a shape that holds artwork and bends it to fit. The artwork stays editable inside the envelope, and it can include type. Envelope Distort has three ways to make an envelope.
To bend artwork into a preset shape:
- Select the artwork.
- Choose Object → Envelope Distort → Make with Warp… (Ctrl+Alt+Shift+W, or Cmd+Option+Shift+W on macOS).
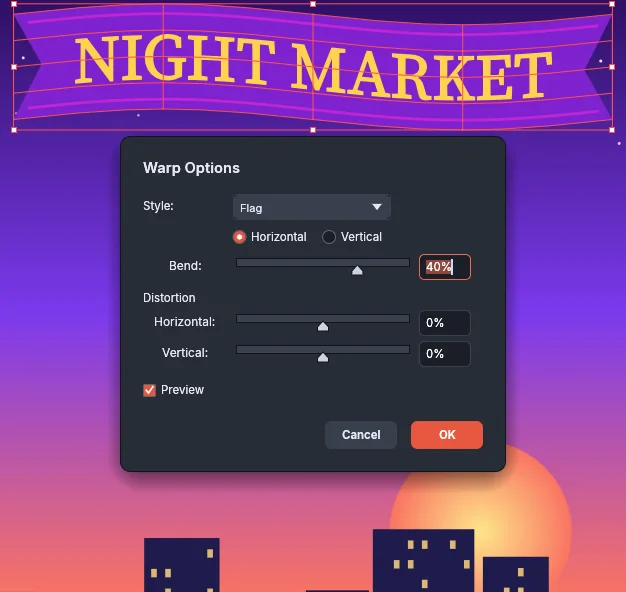
- In Warp Options, choose a Style and Horizontal or Vertical, and set the Bend. With Preview on, the canvas shows the result as you change the values.
- Click OK.
| Option | Default | What it does |
|---|---|---|
| Style | Arc | The shape of the warp: Arc, Arc Lower, Arc Upper, Arch, Bulge, Shell Lower, Shell Upper, Flag, Wave, Fish, Rise, Fisheye, Inflate, Squeeze or Twist |
| Horizontal or Vertical | Horizontal | The direction the warp runs in |
| Bend | 50% | How far the art bends, from −100% to 100%. Negative values bend it the other way |
| Distortion → Horizontal and Vertical | 0% | Distorts the art further along each direction, from −100% to 100% |
To bend artwork with a grid that you shape yourself:
-
Select the artwork.
-
Choose Object → Envelope Distort → Make with Mesh… (Ctrl+Alt+M, or Cmd+Option+M on macOS).
-
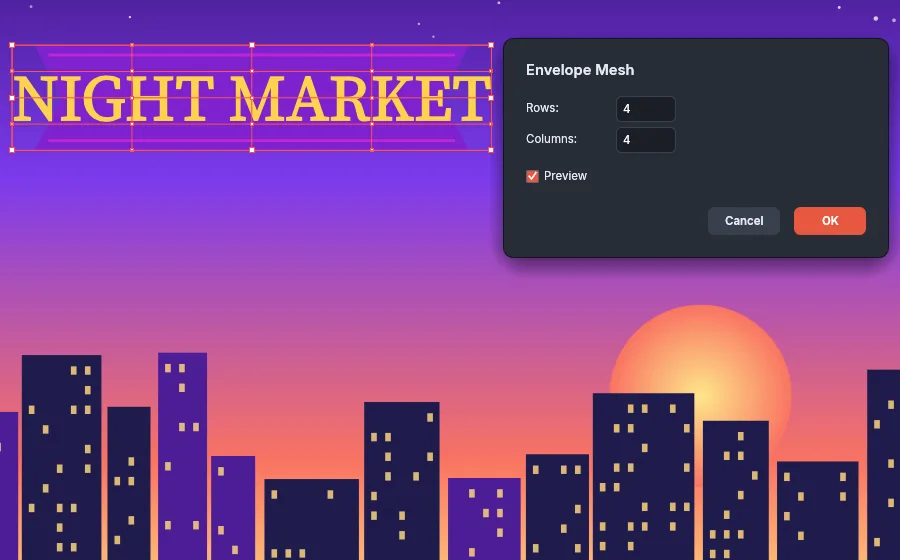
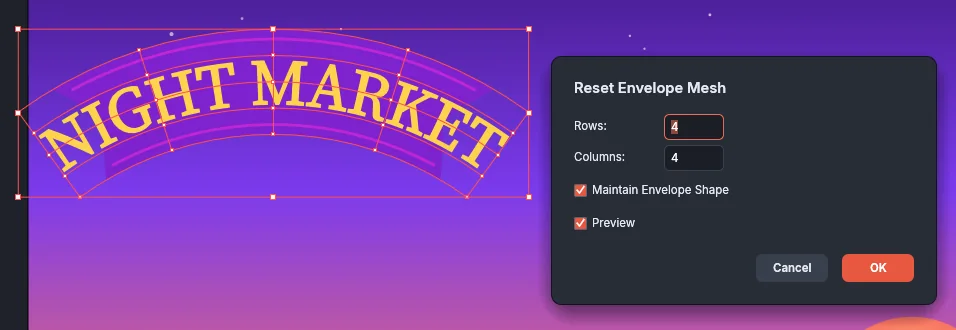
In Envelope Mesh, set Rows and Columns, from 1 to 50 each. The default is 4 by 4.
-
Click OK.
-
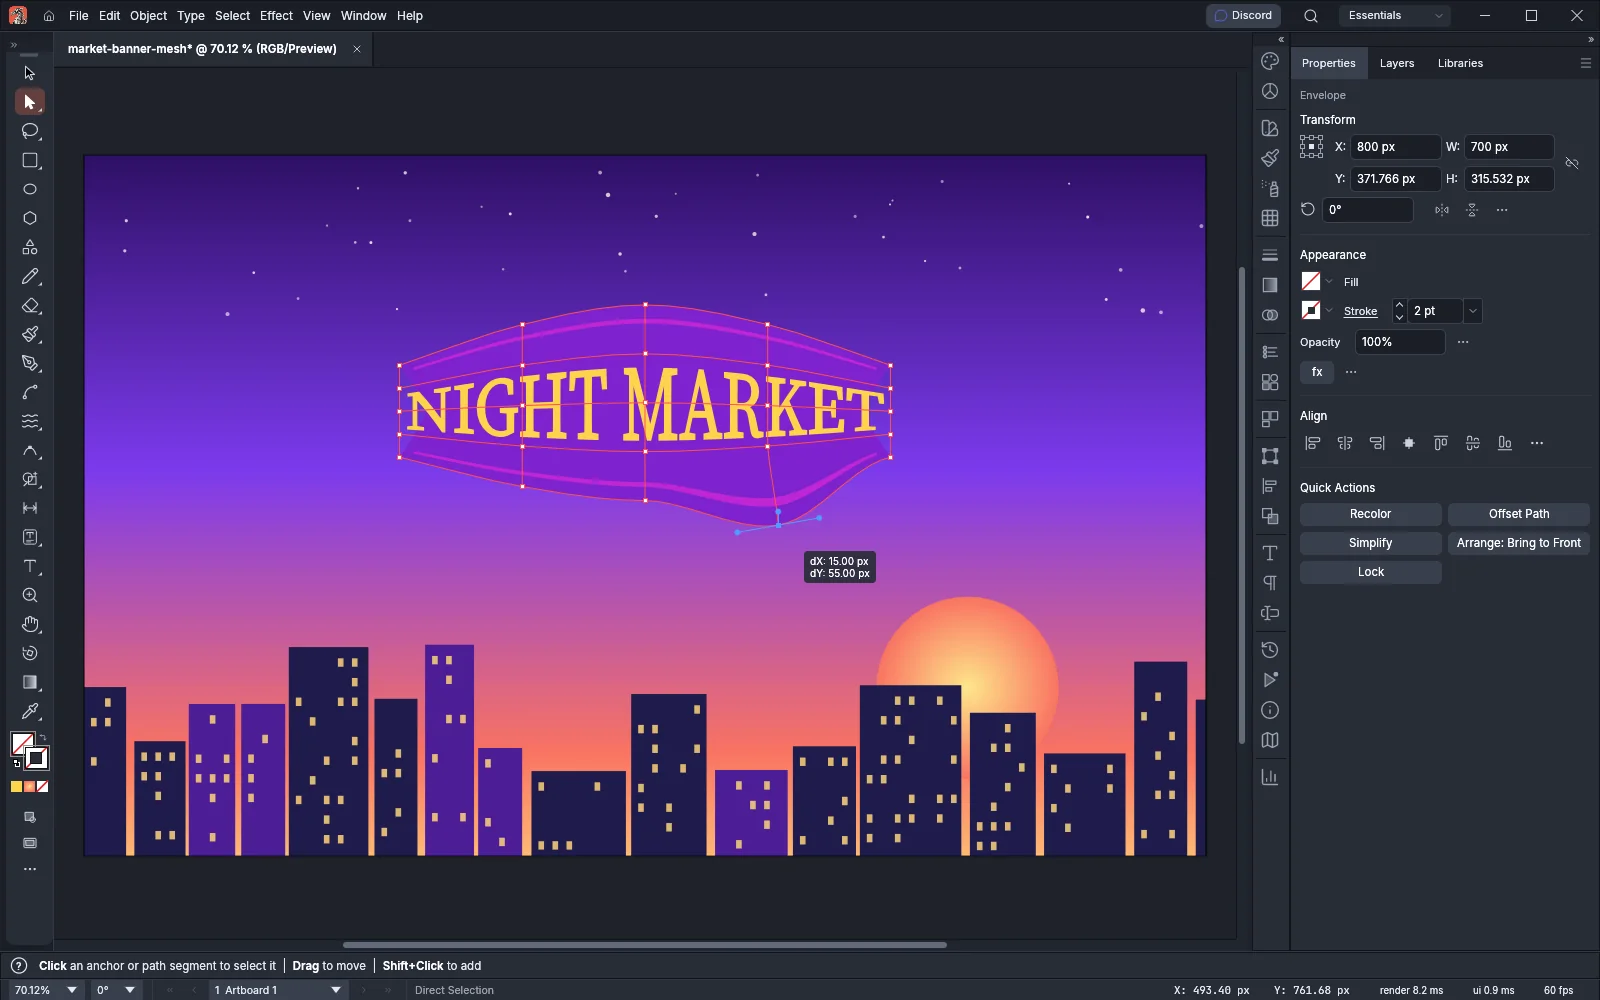
With the Direct Selection tool, drag the points of the mesh and their handles to bend the art. To add lines to the mesh, click inside it with the Mesh tool.
To fit artwork into the shape of a path:
- Draw the path, and place it in front of the artwork.
- Select the path and the artwork.
- Choose Object → Envelope Distort → Make with Top Object (Ctrl+Alt+C, or Cmd+Option+C on macOS). The front object must be a path or a compound path. It becomes the envelope, and the other selected objects are bent to fit inside it.
Edit, reset or remove an envelope
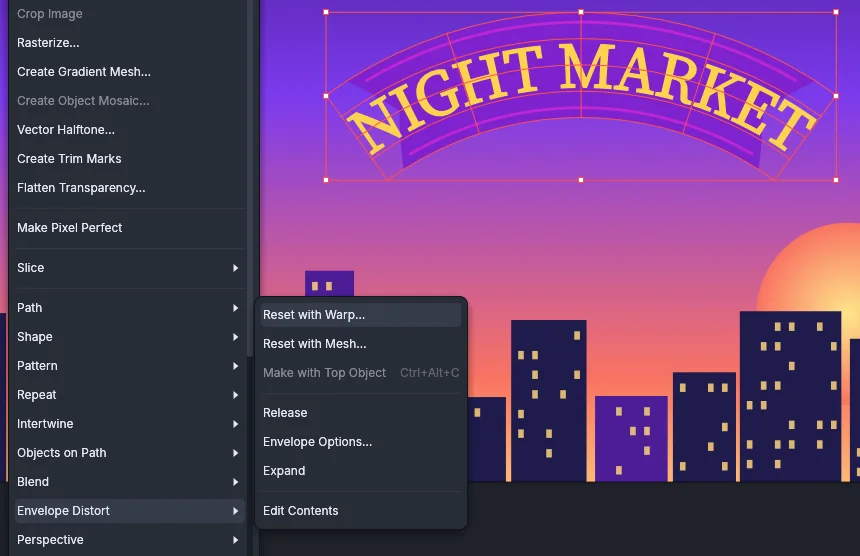
Section titled “Edit, reset or remove an envelope”Select the envelope with the Selection tool, then choose a command from Object → Envelope Distort. While an envelope is selected, Reset with Warp… and Reset with Mesh… take the place of the two Make commands in the menu, and their shortcuts open the Reset dialogs.
| Command | What it does |
|---|---|
| Reset with Warp… | Turns the envelope into a warp envelope with the style and values you choose. The artwork inside stays as it is |
| Reset with Mesh… | Turns the envelope into a mesh envelope with the rows and columns you choose. With Maintain Envelope Shape on, the new mesh keeps the current shape. With it off, the mesh starts flat |
| Edit Contents | Selects the artwork inside the envelope so that you can edit it. The command then reads Edit Envelope; choose it to select the envelope again |
| Envelope Options… | Sets how the envelope bends its artwork, as the next table describes |
| Release | Takes the artwork out of the envelope without the distortion, and keeps the envelope’s shape as a separate object: a gray gradient mesh for a warp or mesh envelope, or the path for a top object envelope. The artwork keeps the envelope’s opacity, blend mode and opacity mask |
| Expand | Replaces the envelope with a group of the bent artwork as ordinary paths. Type becomes outlines |
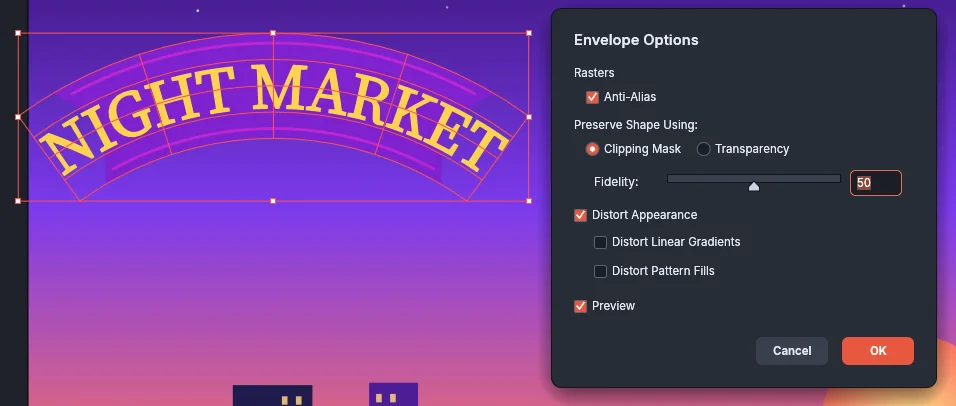
Envelope Options… applies to the selected envelopes. With no envelope selected, it sets the options of the envelopes you make next.
| Option | Default | What it does |
|---|---|---|
| Anti-Alias | On | Smooths the edges of images in the envelope |
| Preserve Shape Using | Clipping Mask | Keeps bent images inside the envelope’s shape with a Clipping Mask or with Transparency |
| Fidelity | 50 | How closely the bent artwork follows the envelope, from 0 to 100. Higher values add more anchor points |
| Distort Appearance | On | Bends strokes and effects with the art. When it is off, they are applied to the bent paths afterward |
| Distort Linear Gradients | Off | Bends linear gradient fills with the art. Available only with Distort Appearance |
| Distort Pattern Fills | Off | Bends pattern fills with the art. Available only with Distort Appearance |
When the Control bar is shown (Window → Control) and an envelope is selected, it has buttons for Edit Envelope and Edit Contents, the warp’s Style, Horizontal or Vertical, Bend, H and V, or the mesh’s Rows and Columns. Reset flattens the warp or the mesh, and the last button opens Envelope Options.