
Draw in perspective
This guide covers the perspective grid: the View → Perspective Grid commands, the Perspective Grid tool that adjusts the grid, drawing on the grid’s planes, the Perspective Selection tool that moves art along them, the Object → Perspective commands and grid presets.
Shortcuts are written for Windows and Linux first, then macOS. You can change these keys in Edit → Keyboard Shortcuts….
| Command or tool | Windows and Linux | macOS |
|---|---|---|
| View → Perspective Grid → Show Grid | Ctrl+Shift+I | Cmd+Shift+I |
| Perspective Grid tool | Shift+P | Shift+P |
| Perspective Selection tool | Shift+V | Shift+V |
| Left plane, horizontal plane, right plane, no plane (while the grid shows) | 1, 2, 3, 4 | 1, 2, 3, 4 |
The Perspective Grid and Perspective Selection tools share a group that the default toolbar does not show. Press their keys, or choose Window → Toolbars → Advanced to show every tool group.
Show the grid and choose a preset
Section titled “Show the grid and choose a preset”-
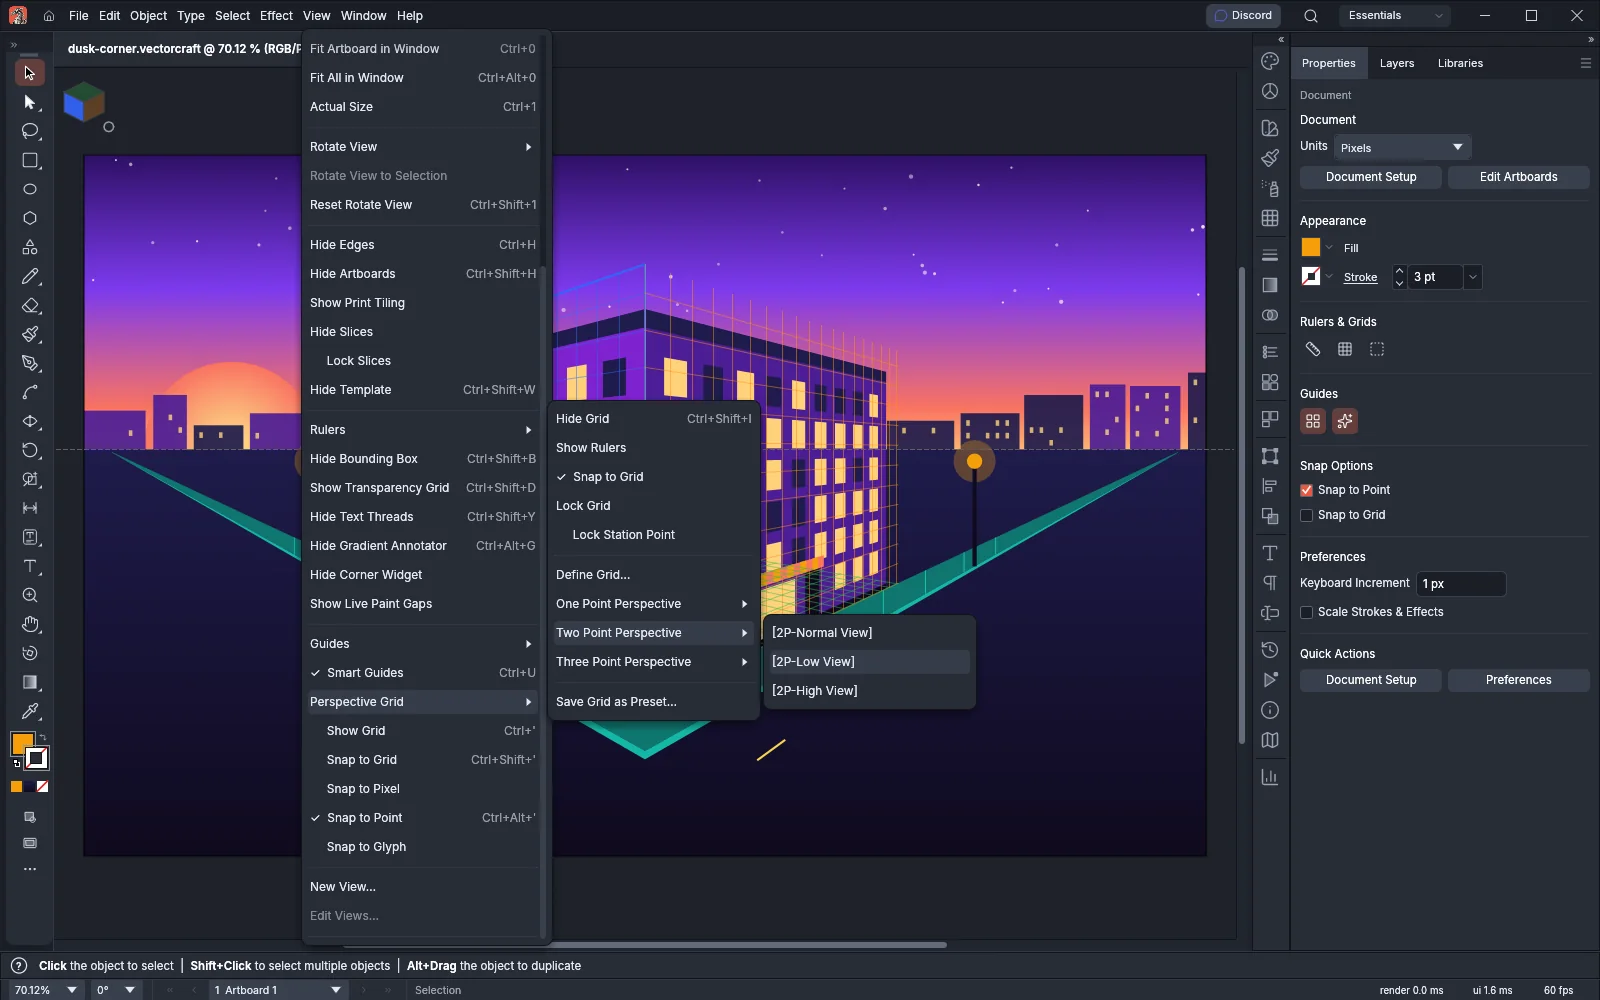
Choose View → Perspective Grid → Show Grid (Ctrl+Shift+I, or Cmd+Shift+I on macOS). A new document shows the [2P-Normal View] grid, fitted to the first artboard. While the grid shows, the menu item reads Hide Grid.
-
To start from another grid, choose one from View → Perspective Grid → One Point Perspective, Two Point Perspective or Three Point Perspective:
Submenu Presets One Point Perspective [1P-Normal View], [1P-Low View], [1P-High View] Two Point Perspective [2P-Normal View], [2P-Low View], [2P-High View] Three Point Perspective [3P-Normal View], [3P-Low View] The Low and High views place the horizon lower or higher on the artboard than the Normal view does. Your own presets of each type are listed below the built-in ones.
-
Set the grid’s view options in the same menu. These options are not undo steps.
| Option | What it does |
|---|---|
| Show Rulers | Shows a ruler up the line where the planes meet, in the grid’s units at its scale. It is off by default |
| Snap to Grid | Art you draw or move in perspective lands on a gridline when it comes within a quarter of a grid cell. It is on by default |
| Lock Grid | Stops the grid’s handles from being dragged. The plane switching widget still works |
| Lock Station Point | Dragging one vanishing point moves the other one with it, around the viewer’s position. It works on two- and three-point grids |
Choosing a preset keeps art that is already on the grid attached, and keeps these four options as they were.
Adjust the grid with the Perspective Grid tool
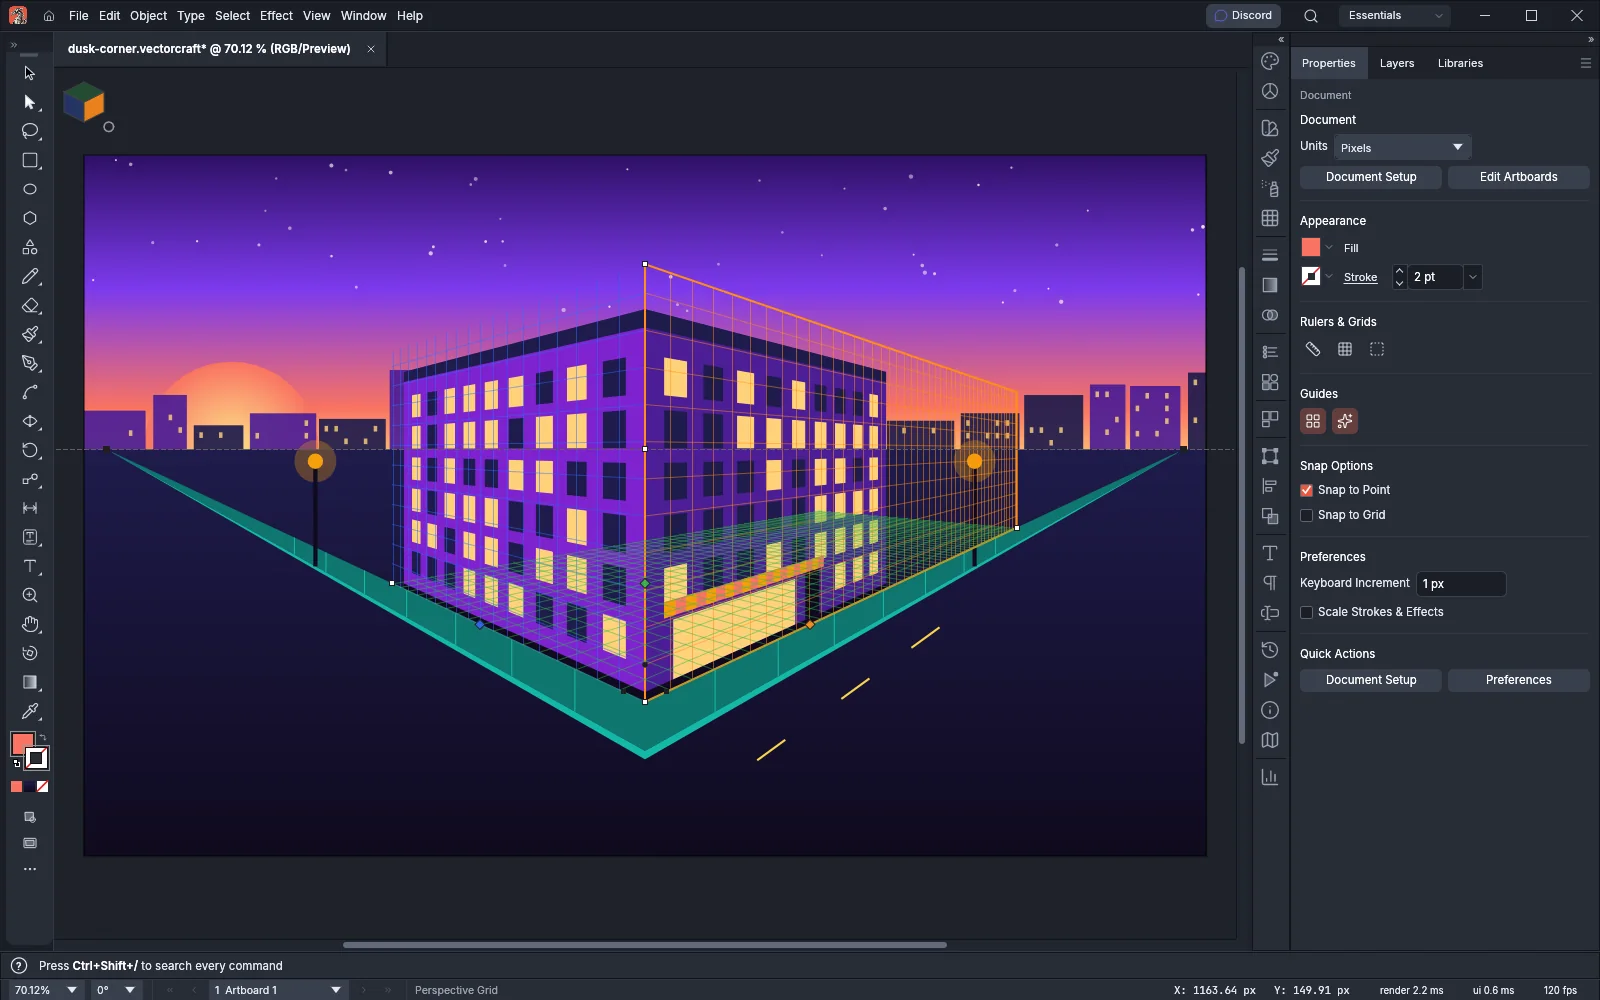
Section titled “Adjust the grid with the Perspective Grid tool”Press Shift+P for the Perspective Grid tool. If the grid is hidden, the tool shows it. Drag the grid’s handles:
| Handle | Where it is | What a drag does |
|---|---|---|
| Vanishing points | On the horizon where each wall’s lines meet, and above the grid in three-point perspective | Moves the vanishing point. The horizon moves with it; hold Shift to keep the horizon where it is |
| Horizon | On the horizon line, above the corner where the planes meet | Raises or lowers the horizon |
| Origin | The corner where the planes meet, at ground level | Moves the corner. Hold Shift to keep the move horizontal or vertical |
| Ground-level points | On each wall’s base, next to the origin | Moves the whole grid. Hold Shift to keep the move horizontal or vertical |
| Wall ends | At the far end of each wall’s base | Makes that wall longer or shorter. Hold Alt (Option on macOS) to change both walls, and Shift to move by whole grid cells |
| Wall height | At the top of the line where the planes meet | Makes the walls taller or shorter. Hold Shift to move by whole grid cells |
| Grid cell size | On the line where the planes meet, a few cells up from the origin | Changes the space between gridlines |
Press Esc before you release the mouse button to put the grid back as it was. Art already on the grid stays where it is when you change the grid.
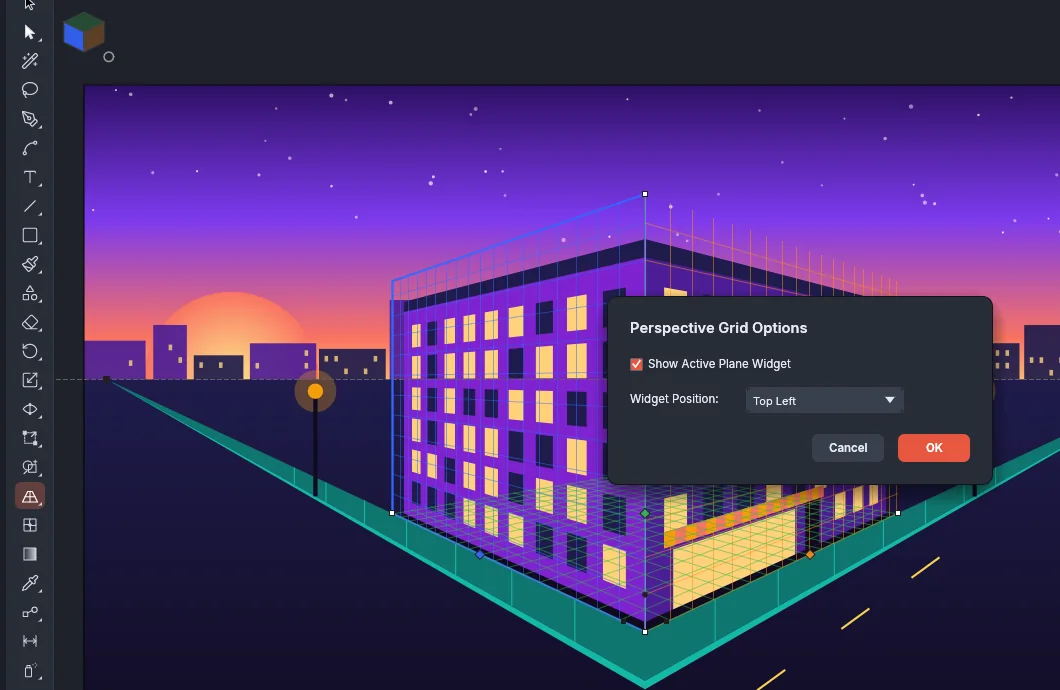
Double-click the tool’s button in the toolbar to open Perspective Grid Options. Show Active Plane Widget turns the plane switching widget on or off, and Widget Position puts it in the Top Left (the default), Top Right, Bottom Left or Bottom Right corner of the document window.
Define a grid by values
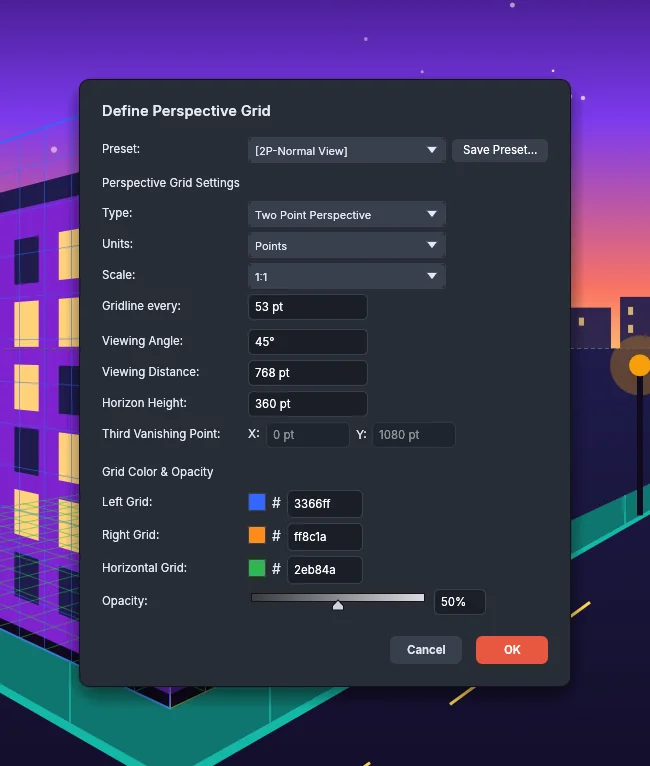
Section titled “Define a grid by values”Choose View → Perspective Grid → Define Grid… to set the grid by numbers. Clicking OK applies the changes as one undo step.
| Option | What it sets |
|---|---|
| Preset | Loads a preset’s values into the dialog. It reads [Custom] once the values differ from every preset. Save Preset… saves the values as a new preset |
| Type | One Point Perspective, Two Point Perspective or Three Point Perspective |
| Units | The unit the lengths below are in. Every document unit except Feet & Inches is available |
| Scale | 1:1, 1:2, 1:4, 1:8, 1:12, 1:24, 1:48, 1:96, 1:100 or Custom, which adds Artboard and Real World fields. The lengths below are real-world lengths at this scale |
| Gridline every | The space between gridlines |
| Viewing Angle | Where the viewer stands between the two vanishing points, from 0° to 90°. The built-in presets use 45°. Only two- and three-point grids use it |
| Viewing Distance | How far the viewer stands from the picture. A shorter distance foreshortens the planes more |
| Horizon Height | The height of the horizon above the ground |
| Third Vanishing Point | X and Y of the vertical vanishing point, measured from the center of vision, X to the right and Y up. Only three-point grids use it |
| Left Grid, Right Grid, Horizontal Grid | The color of each plane’s gridlines as a hex value. The defaults are blue (#3366ff), orange (#ff8c1a) and green (#2eb84a) |
| Opacity | The opacity of the gridlines, from 0% to 100%. The default is 50% |
A new type, viewing angle or viewing distance moves the vanishing points around the viewer’s position.
Pick the active plane
Section titled “Pick the active plane”New shapes and art you drag onto the grid go on the active plane. The grid has a left plane, a right plane and a horizontal (ground) plane.
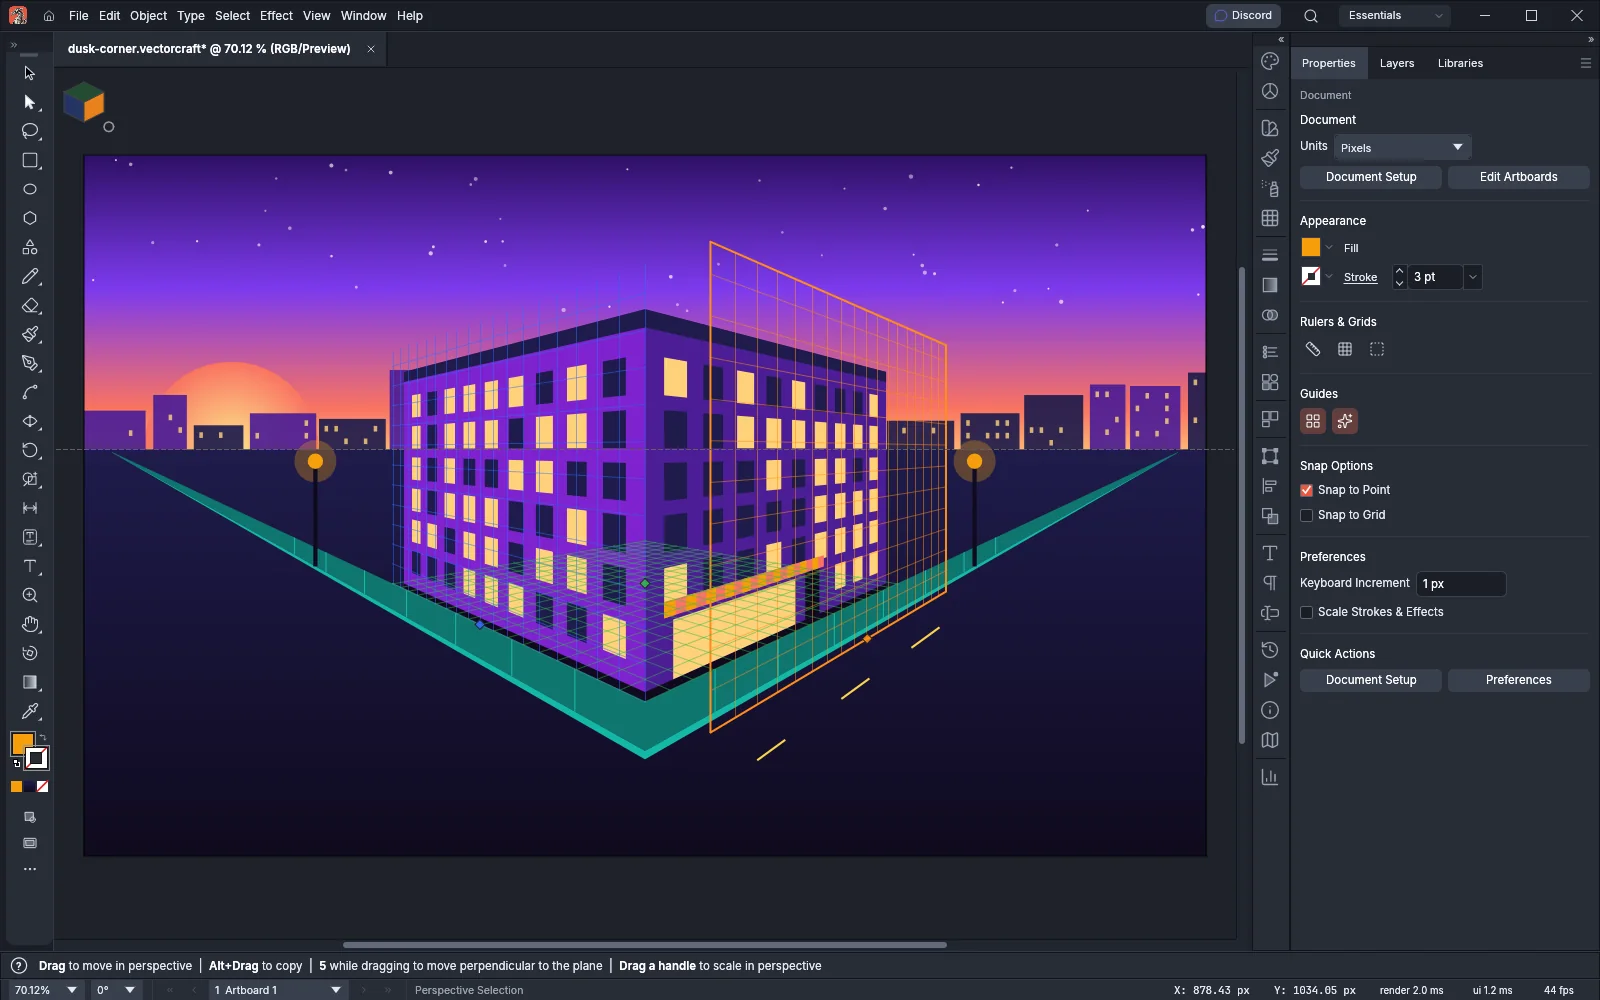
- Click a face of the plane switching widget, the small cube in the corner of the document window, with the Perspective Grid or Perspective Selection tool. The left face picks the left plane, the top face picks the horizontal plane and the right face picks the right plane. Click the dot beside the cube to work with no active plane.
- While the grid shows, press 1 for the left plane, 2 for the horizontal plane, 3 for the right plane or 4 for no plane.
- With the Perspective Selection tool, click an object that is on the grid. Its plane becomes the active plane.
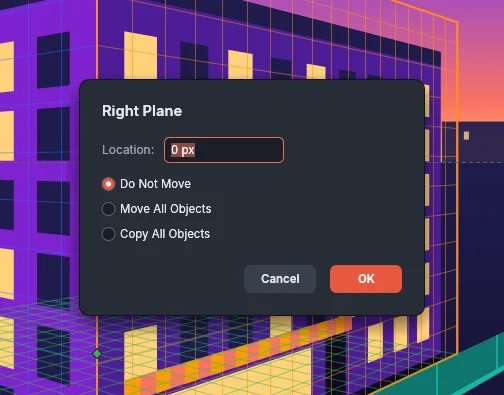
Each plane also has a diamond-shaped widget on the grid, in the plane’s color. With either perspective tool, drag a plane’s diamond to move that plane forward or back. Hold Shift to move the art on the plane with it, or Alt (Option on macOS) to move copies of that art. Double-click the diamond to open the plane’s dialog (Left Plane, Right Plane or Horizontal Plane). Type a Location and choose Do Not Move, Move All Objects or Copy All Objects.
Draw on a plane
Section titled “Draw on a plane”- Show the grid and pick the active plane.
- Choose the Rectangle, Rounded Rectangle, Ellipse, Polygon, Star, Line Segment, Arc, Spiral, Rectangular Grid, Polar Grid or Flare tool.
- Drag on the canvas. The shape is drawn on the active plane, foreshortened toward its vanishing point. With Snap to Grid on, its corners snap to gridlines within a quarter of a cell.
- To draw at an exact size, click once and type the size in the tool’s dialog. The shape keeps that size measured along the plane, starting where you clicked.
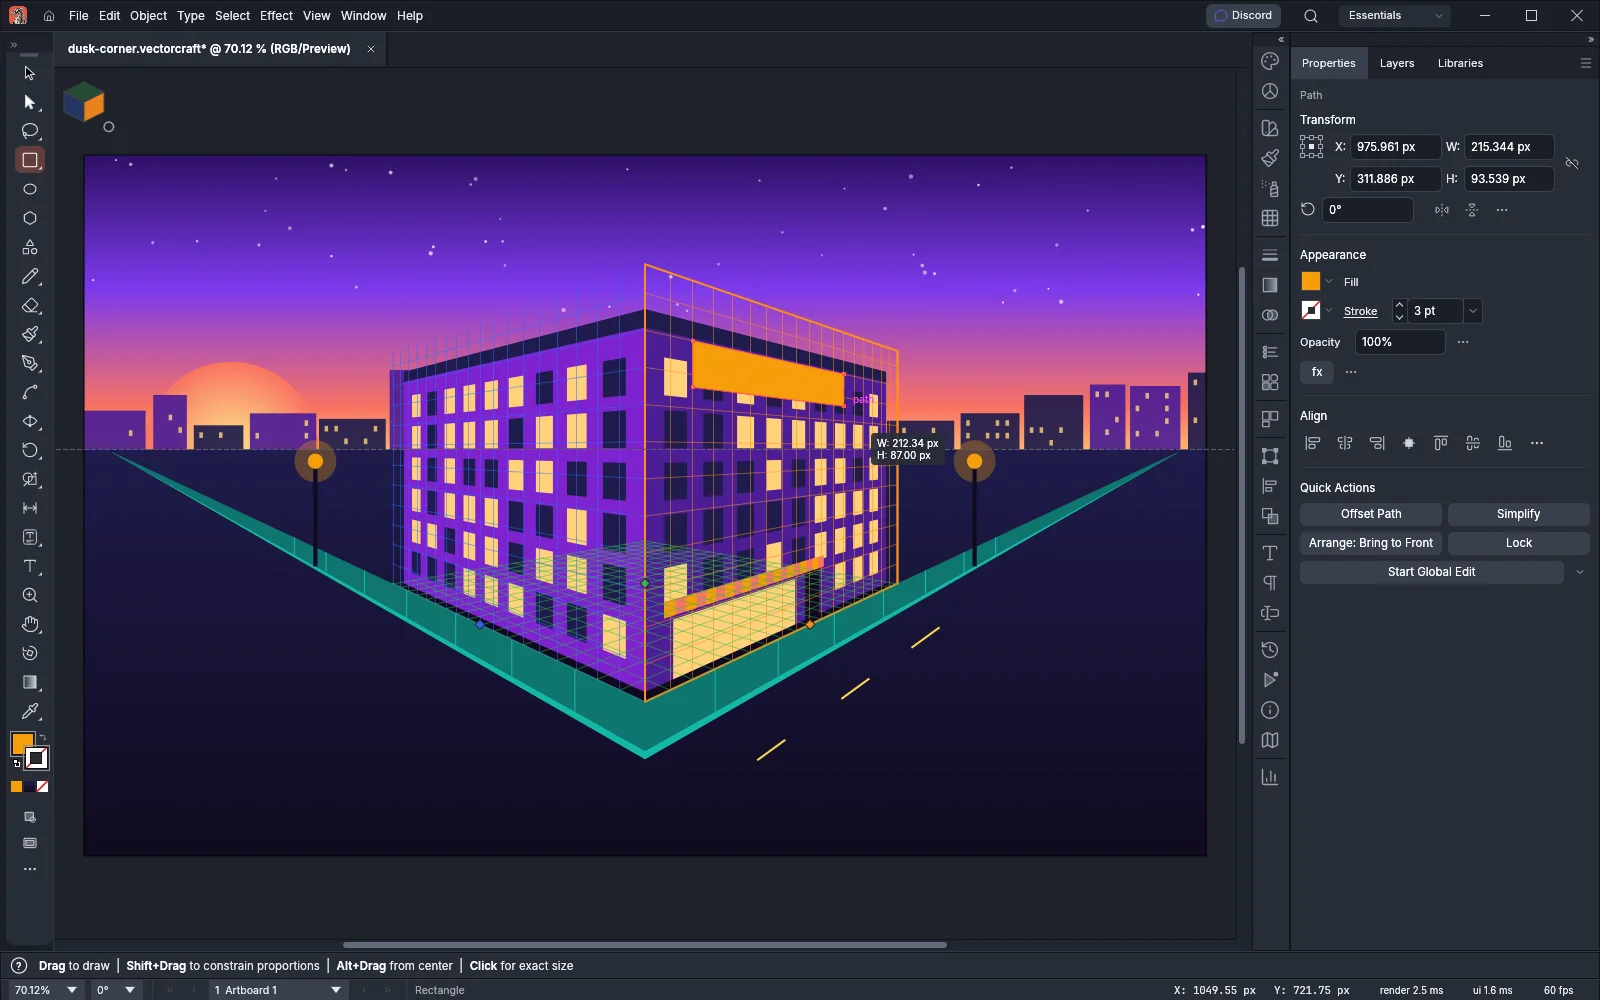
With no active plane (press 4), the shape tools draw flat shapes.
Move and copy art along a plane
Section titled “Move and copy art along a plane”Press Shift+V for the Perspective Selection tool, then drag art that is on the grid.
| Action | Result |
|---|---|
| Drag | Moves the art along its plane |
| Alt-drag (Option-drag on macOS) | Moves a copy and leaves the original in place |
| Shift-drag | Keeps the move along the plane’s lines or at 45° to them |
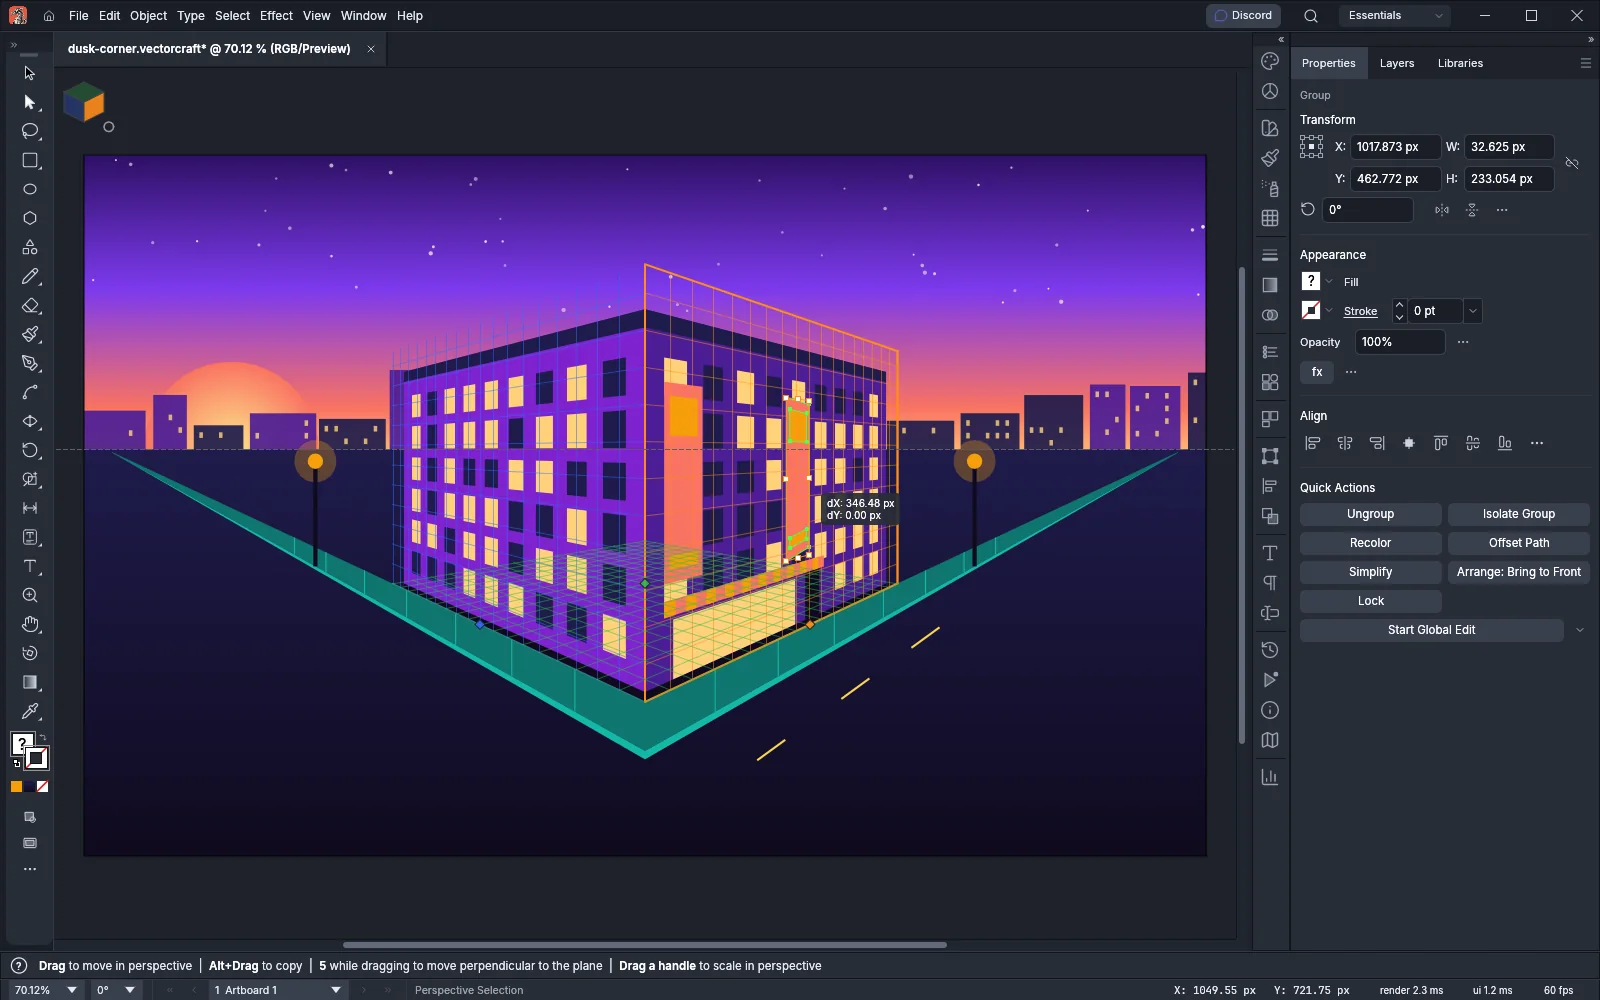
| Press 5 while dragging | Moves the art forward or back, at right angles to its plane. Press 5 again to slide along the plane |
| Press 1, 2 or 3 while dragging flat art | Picks the plane the art goes onto |
| Drag a handle of the bounding box | Scales the art in perspective. Hold Shift to keep its proportions, or Alt (Option on macOS) to scale from the center |
| Arrow keys | Nudge the selection along its plane by the Keyboard Increment preference. Shift nudges 10 times as far, and Alt (Option on macOS) nudges a copy |
Press Esc before you release the mouse button to cancel a move or a scale. While you drag, a label shows how far the art moved along the plane (dX and dY), or dZ when it moves at right angles to the plane. Object → Perspective → Move Plane to Match Object moves the selected object’s plane to where the object is and makes it the active plane.
Put flat art and type on a plane
Section titled “Put flat art and type on a plane”You can draw art and type flat and then put them on the grid.
- Pick the active plane.
- Choose one of these:
- With the Perspective Selection tool, drag the flat art. It goes onto the active plane as soon as the drag starts and then moves along it.
- Select the art and choose Object → Perspective → Attach to Active Plane. The art takes the plane’s perspective, with the corners of its bounding box where they were.
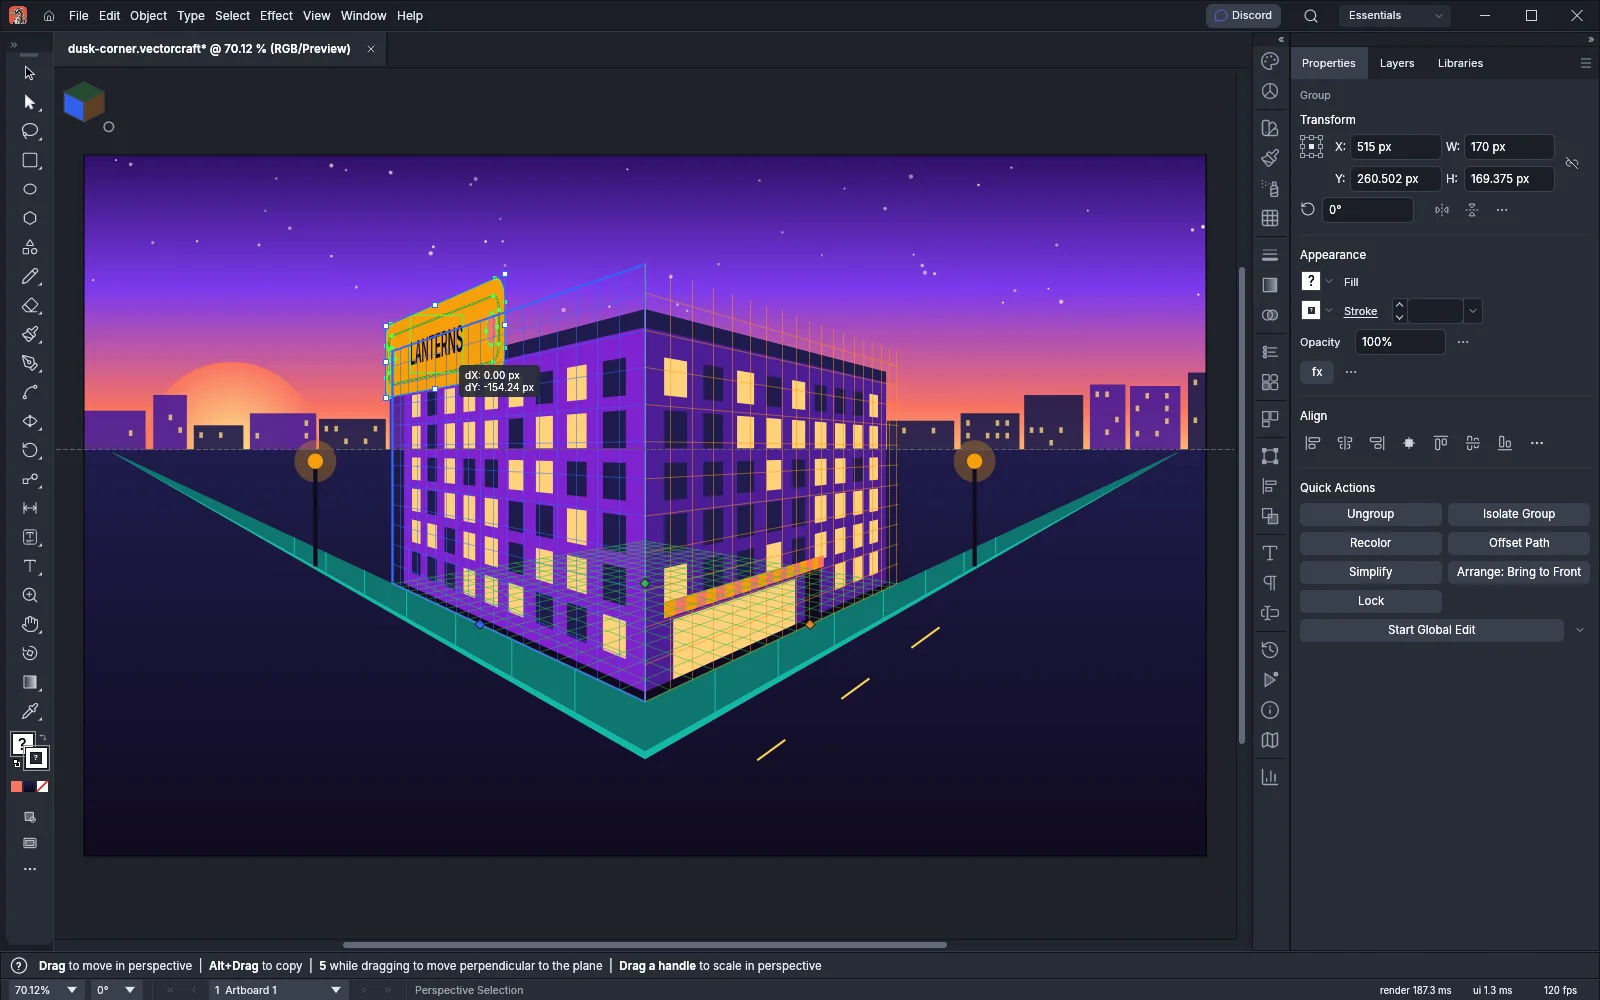
Type and symbols on a plane stay type and symbols. To change the words of type on a plane:
- Select the type and choose Object → Perspective → Edit Text, or double-click the type with the Perspective Selection tool. The type is shown flat in isolation mode, and you edit it with the Type tool.
- Press Esc, or exit isolation mode, to put the type back in perspective.
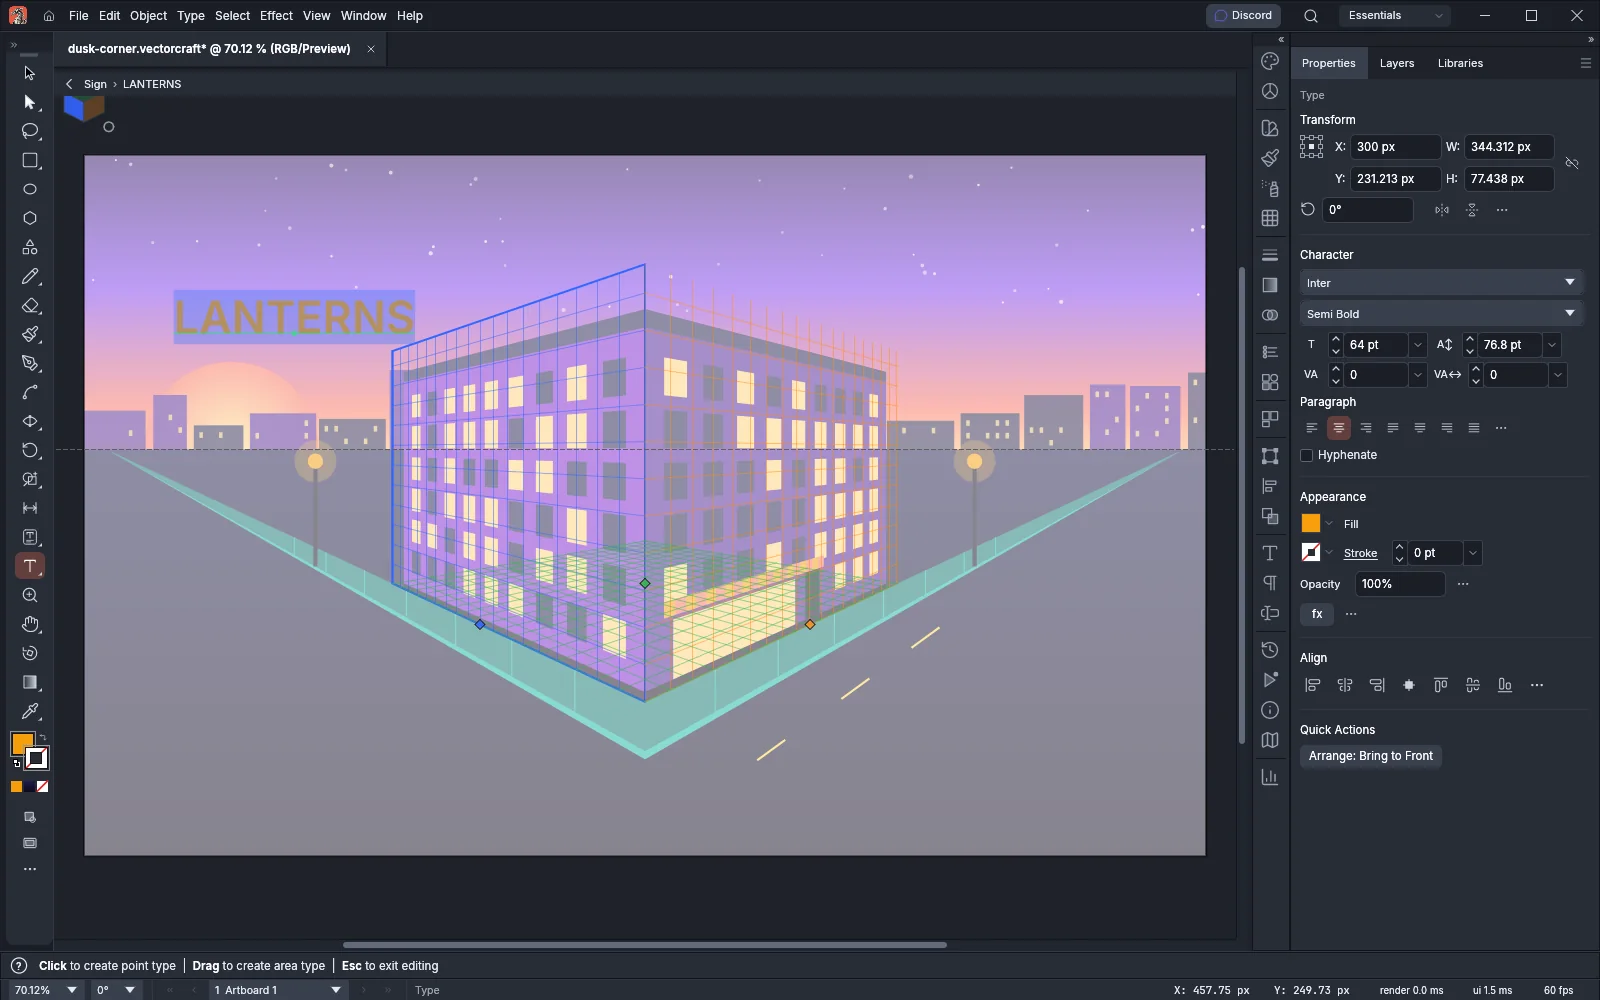
VectorCraft does not put art on a plane if part of it would cross the plane’s horizon.
Release art from the grid
Section titled “Release art from the grid”Select the art and choose Object → Perspective → Release with Perspective. The art keeps the shape it has on the page and is no longer attached to a plane.
Save grid presets
Section titled “Save grid presets”- To save the current grid, choose View → Perspective Grid → Save Grid as Preset…. Type a Name (the default is Perspective Preset 1, then 2, and so on) and click OK. In Define Grid…, Save Preset… does the same with the values in the dialog.
- To manage presets, choose Edit → Perspective Grid Presets…. The dialog lists every preset and shows the selected preset’s settings.
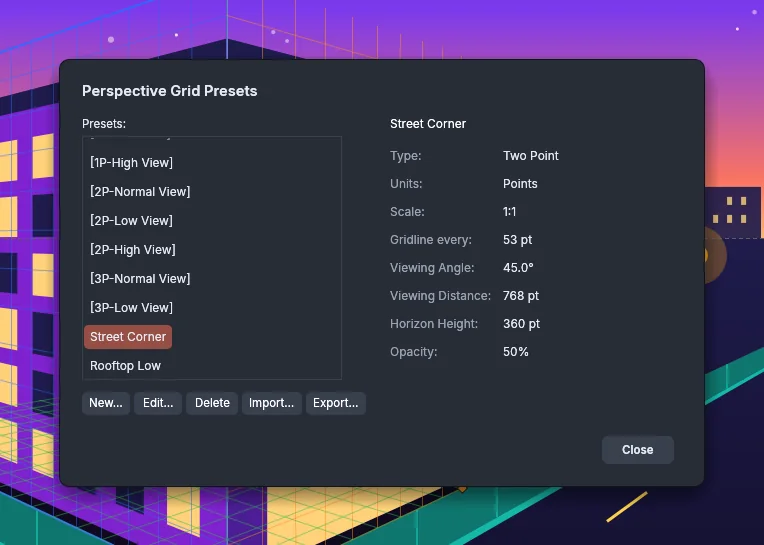
| Button | What it does |
|---|---|
| New… | Opens a new preset that starts from the selected one |
| Edit… | Changes the selected preset |
| Delete | Deletes the selected preset |
| Import… | Adds the presets in a .vcperspective file. An imported preset whose name is taken gets a number |
| Export… | Saves the selected preset to a .vcperspective file |
The built-in presets cannot be edited or deleted. To start from one, select it and click New…. VectorCraft keeps your presets with its preferences, and every document can use them.