
Customize the workspace
This guide covers how to set up the VectorCraft window: workspaces, panels, bars and toolbars, the edges and widgets drawn over the artwork, document windows, saved views, the Navigator panel, Rotate View, screen modes and Presentation Mode, and the History panel. The theme, accent color and language are set in Preferences.
Switch workspaces
Section titled “Switch workspaces”A workspace is a saved arrangement of the bars, the Tools panel and the panels. VectorCraft starts in Essentials.
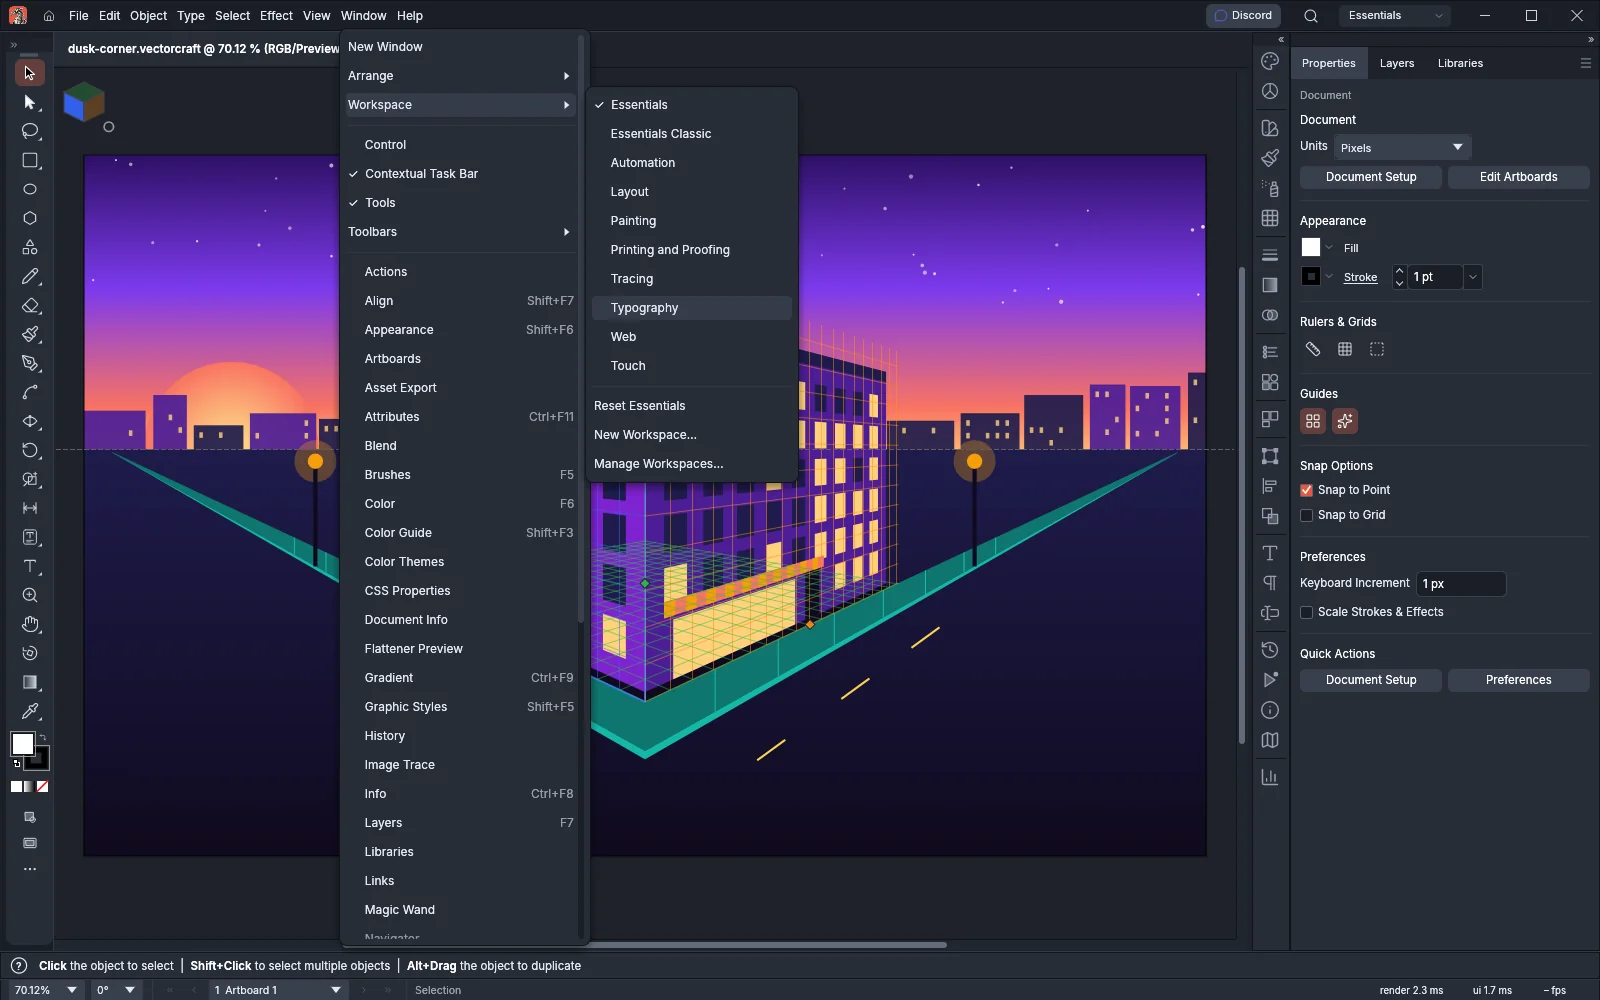
- Choose Window → Workspace, or click the workspace switcher at the right end of the menu bar. The switcher shows the name of the current workspace.
- Click a workspace in the list. The current one has a check mark.
| Workspace | Control bar | What else it sets up |
|---|---|---|
| Essentials | Hidden | Basic toolbar and the Contextual Task Bar |
| Essentials Classic | Shown | Rulers, the Advanced toolbar, no Contextual Task Bar, and the Color panel open |
| Automation | Shown | The Advanced toolbar, the Layers tab and the Actions panel open |
| Layout | Shown | Rulers, the Advanced toolbar, the Layers tab and the Align panel open |
| Painting | Shown | The Advanced toolbar in two columns and the Brushes panel open |
| Printing and Proofing | Shown | Rulers, the Advanced toolbar and the Info panel open |
| Tracing | Shown | The Advanced toolbar, the Layers tab and no Contextual Task Bar |
| Typography | Shown | Rulers, the Advanced toolbar and the Character panel open |
| Web | Shown | Rulers, the Advanced toolbar and the Symbols panel open |
The list also has a Touch workspace for touch screens. When Enable Touch Workspace is on in the Devices page of Edit → Preferences…, VectorCraft switches to Touch on a touch screen. When VectorCraft switched to Touch on its own, it switches back to the workspace you used before when you turn the preference off or it no longer finds a touch screen. If you chose Touch yourself, VectorCraft stays in Touch.
VectorCraft keeps the layout changes you make in each workspace. When you switch away and come back, the panels are where you left them. Switching workspaces does not change the UI brightness.
To put the current workspace back the way it was saved, choose Window → Workspace → Reset name. The item shows the name of the current workspace, for example Reset Essentials.
Arrange panels
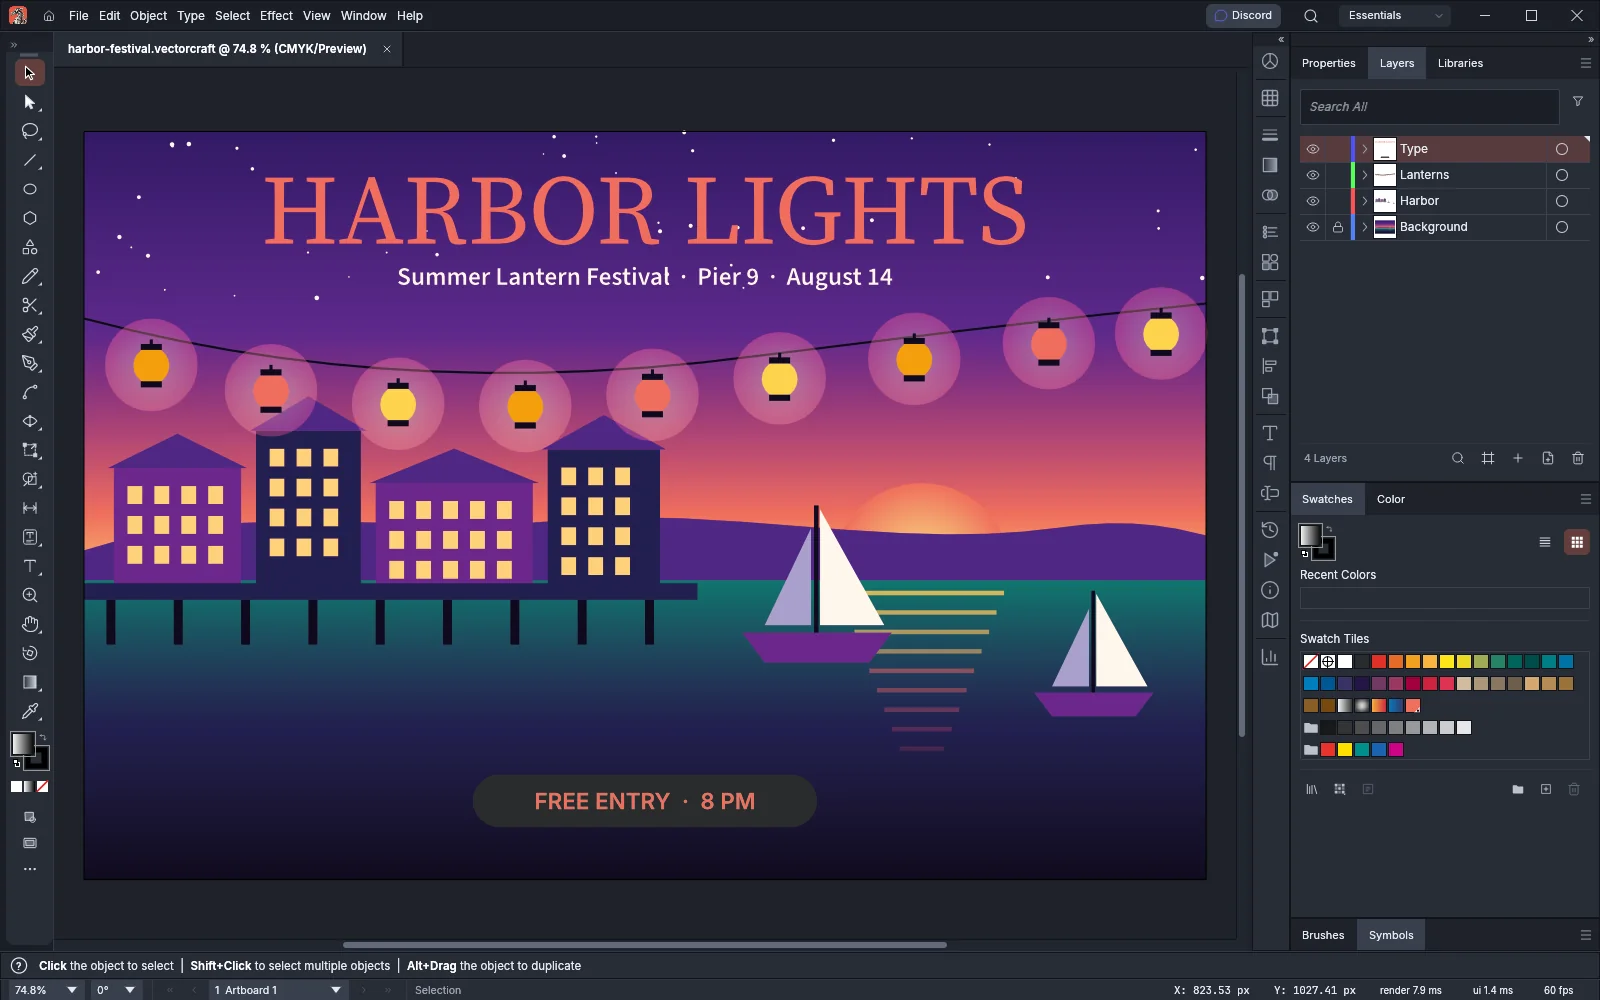
Section titled “Arrange panels”The dock runs down the right edge of the window. Its outer column holds the Properties, Layers and Libraries tabs, and the column of icons beside it opens the other panels. Every panel is listed in the Window menu. Choose a panel there to show it, and choose it again to hide it.
- To group panels, drag a panel’s tab onto another panel group. The panel joins that group as a tab.
- To dock a panel beside a group, drag its tab to the edge of the group. Drop it on the side edge to place it next to the group, or on the top or bottom edge to place it above or below the group in the column.
- To float a panel, drag its tab out of the dock. The panel opens in a window of its own that you can move anywhere.
- To collapse a group to its tabs, double-click a tab or the group’s drag bar. In a floating window, the window collapses to its title bar. Double-click again to restore it.
- To collapse the dock to icons, click the double arrow at the top of the dock. Click it again to expand the outer column.
- Press Tab to hide the panels, the Tools panel and the Control bar, and press Tab again to show them. Press Shift+Tab to hide or show only the panels.
Save your own workspace
Section titled “Save your own workspace”- Arrange the bars, the Tools panel and the panels the way you want them.
- Choose Window → Workspace → New Workspace….
- Type a name and click OK. VectorCraft suggests “Workspace 1,” “Workspace 2” and so on.
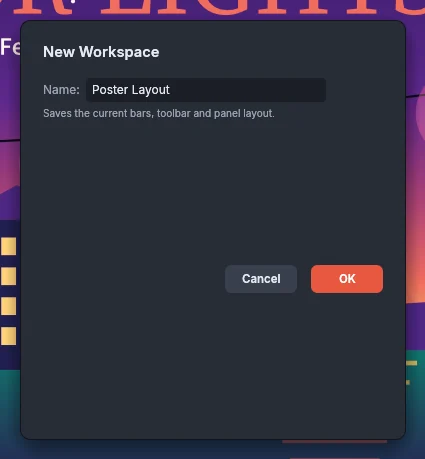
The new workspace appears in the Workspace menu below the built-in ones. You cannot use the name of a built-in workspace. If you use the name of one of your own workspaces, the new layout replaces it.
To rename or delete your workspaces, choose Window → Workspace → Manage Workspaces…:
- Click one of your workspaces in the list. The built-in workspaces are dimmed and cannot be changed.
- To rename it, type the new name in the field and click Rename. To delete it, click Delete.
- Click OK.
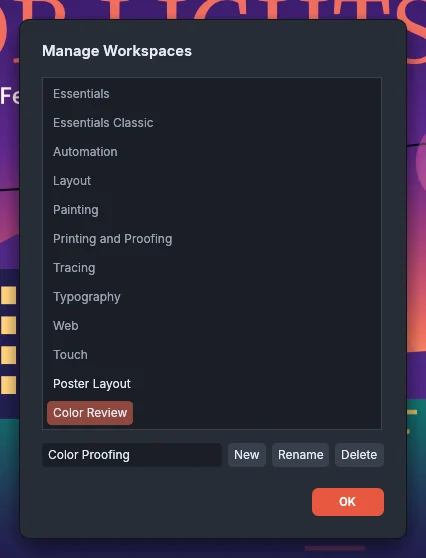
If you delete the workspace you are using, VectorCraft switches to Essentials. To save the current layout as another workspace from the same dialog, type a name in the field and click New. You do not need to select a workspace first.
Show or hide the Control bar and the Contextual Task Bar
Section titled “Show or hide the Control bar and the Contextual Task Bar”The Control bar runs across the top of the window under the menu bar. The Contextual Task Bar floats under the selection on the canvas.
- Choose Window → Control to show or hide the Control bar. Essentials hides it, and the other built-in workspaces show it.
- Choose Window → Contextual Task Bar to show or hide the task bar.
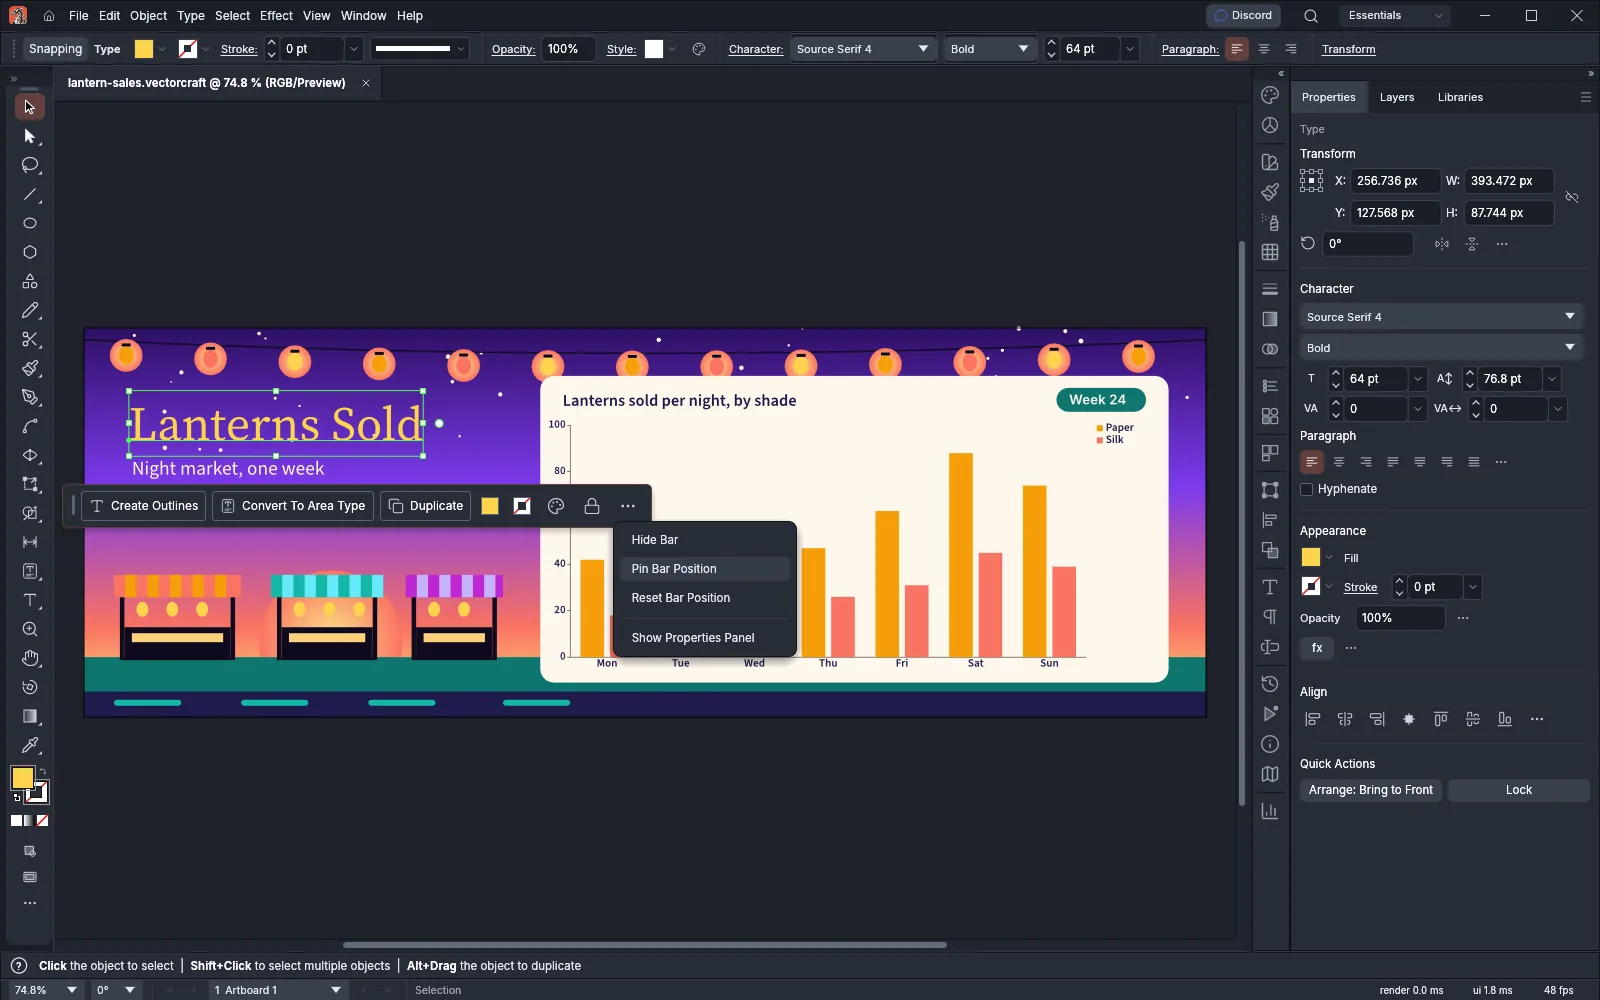
- To keep the task bar in one place, open its More Options menu and choose Pin Bar Position. Choose Reset Bar Position to put it back under the selection.
- Choose Window → Tools to show or hide the Tools panel.
Show or hide edges and widgets on the canvas
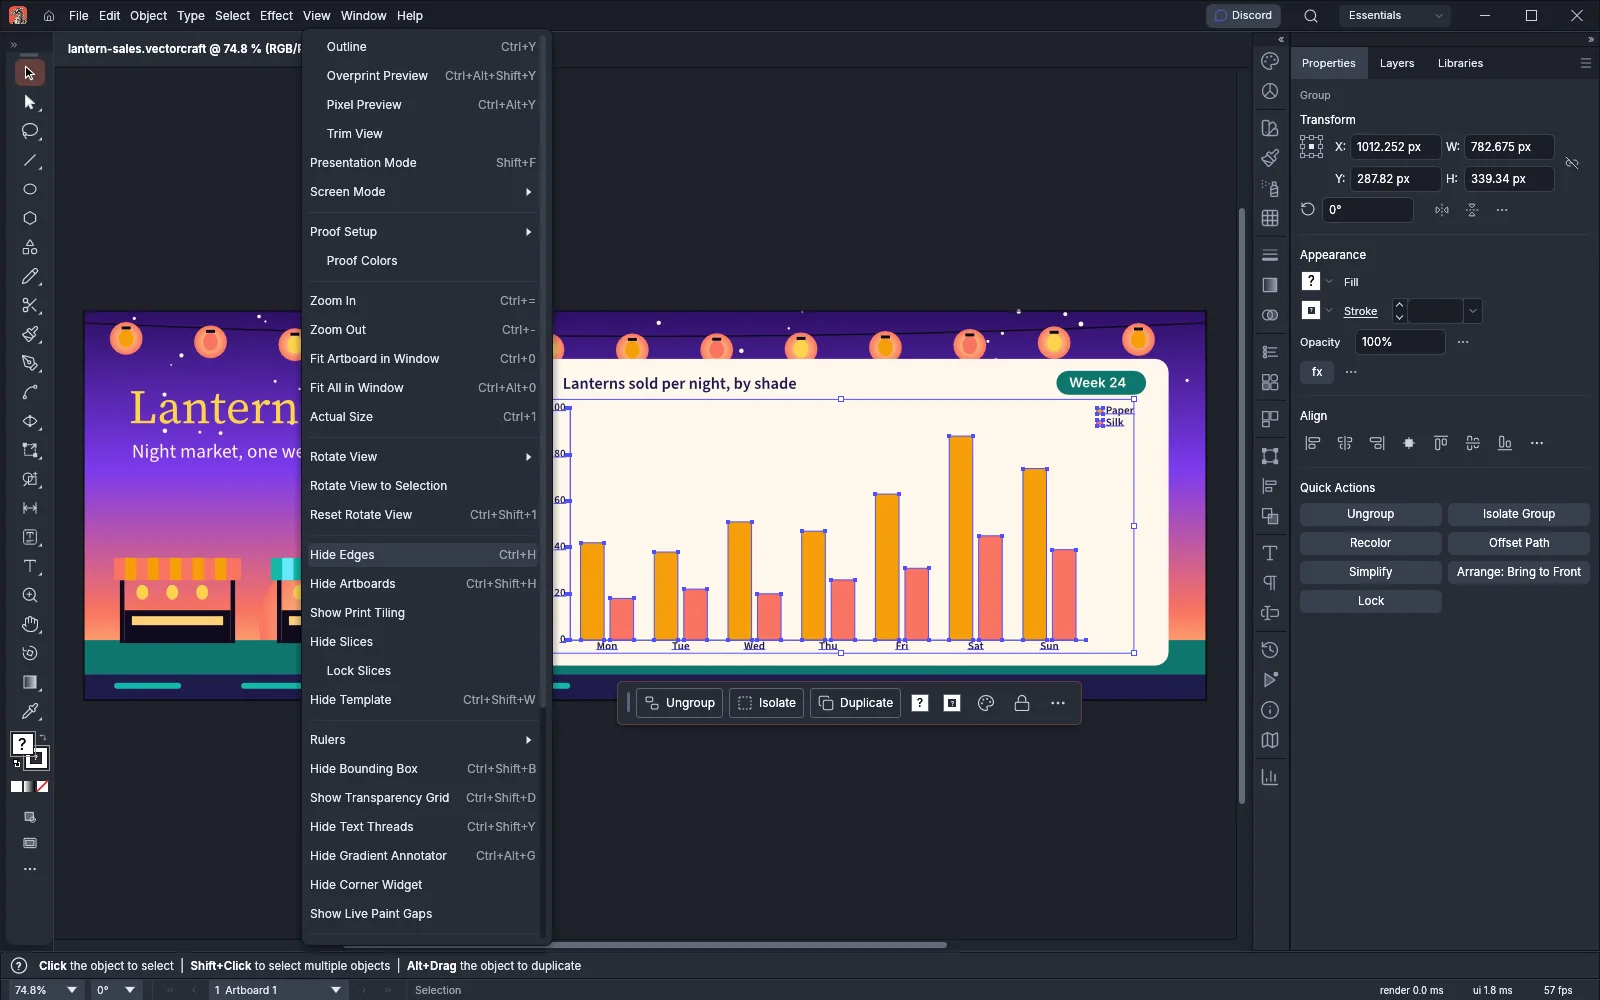
Section titled “Show or hide edges and widgets on the canvas”The View menu has commands that hide or show the marks VectorCraft draws over your artwork. They do not change the artwork. When you choose one, its name in the menu changes from Hide to Show, or from Show to Hide. Everything except the transparency grid and the Live Paint gaps shows by default.
| Command | What it hides or shows |
|---|---|
| View → Hide Edges | The paths and anchor points of the selected objects, the highlight under the pointer, and the bounding box, corner widgets, text threads and Live Paint gaps |
| View → Hide Bounding Box | The bounding box around the selection. While it is hidden, you cannot drag its handles |
| View → Show Transparency Grid | A grid behind the artboards of the current document. Each document has its own setting, and a .vectorcraft file keeps it when you save |
| View → Hide Text Threads | The lines that join threaded text frames |
| View → Hide Gradient Annotator | The Gradient tool’s annotator on the canvas |
| View → Hide Corner Widget | The corner widgets at the corners of the selected paths |
| View → Show Live Paint Gaps | The gaps in the selected Live Paint groups, in each group’s gap preview color. The gaps show only while edges show |
Make your own toolbar
Section titled “Make your own toolbar”The Tools panel comes in two layouts. Choose Window → Toolbars → Advanced to switch between the Basic and Advanced layouts, and Window → Toolbars → Double Column to show the tools in two columns.
Edit the Tools panel
Section titled “Edit the Tools panel”- Click the ••• button at the bottom of the Tools panel. The All Tools drawer opens beside it. Tools already in the panel are dimmed in the drawer.
- Drag a tool from the drawer onto the Tools panel. Drop it between two tools to give it a slot of its own, or onto a tool to add it to that tool’s group.
- To remove a tool, drag it from the Tools panel into the drawer.
- To show or hide the controls under the tools, click a button in the Show section at the foot of the drawer: Fill and Stroke Controls, Coloring Controls, Draw Mode Controls or Screen Mode Controls. VectorCraft saves these settings with the preferences.
- Press Esc or click outside the drawer to close it.
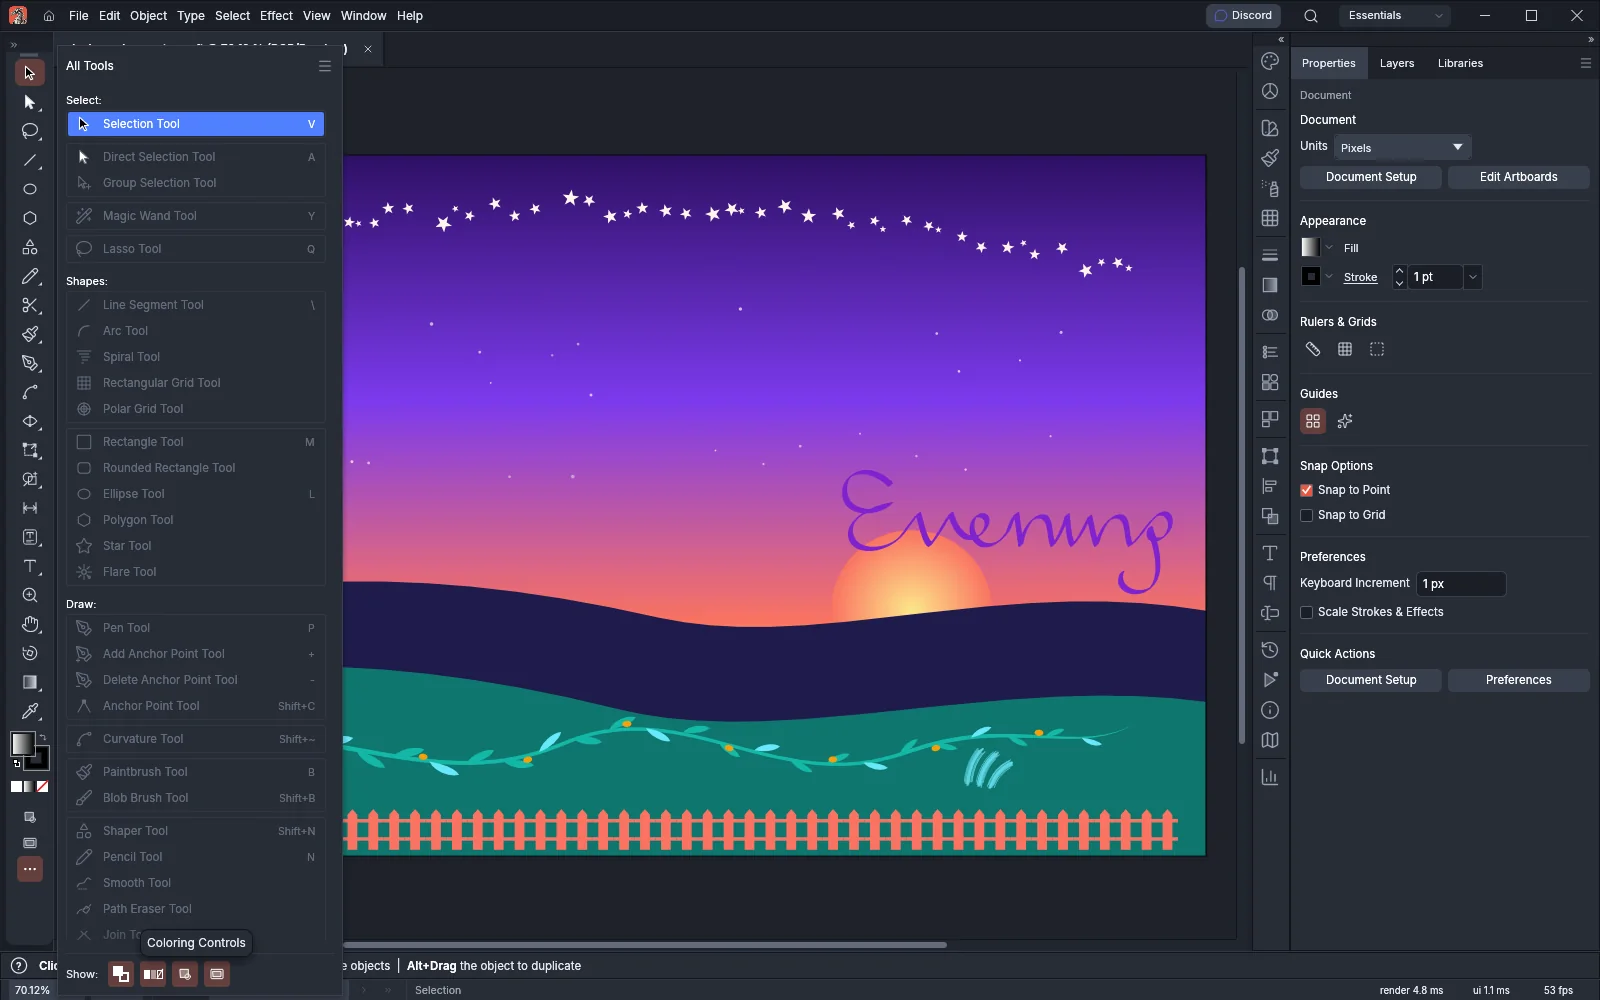
The Show section appears only when you open the drawer from the Tools panel. A toolbar made with New Toolbar… has no Show section.
To put the Tools panel back the way it ships, open the drawer’s menu and choose Reset. The menu also has Basic and Advanced items, which switch the Tools panel between the two layouts. The drawer also lists the tools of the built-in plug-ins under their own headings. To add the Path Precision Tools to the Tools panel, see Cut, join and refine paths.
Make a new toolbar
Section titled “Make a new toolbar”- Choose Window → Toolbars → New Toolbar…, or choose New Toolbar… in the All Tools drawer’s menu.
- Type a name of up to 200 characters and click OK. A blank toolbar floats beside the Tools panel.
- Click the ••• button at the foot of the new toolbar to open the All Tools drawer beside it.
- Drag tools from the drawer onto the toolbar.
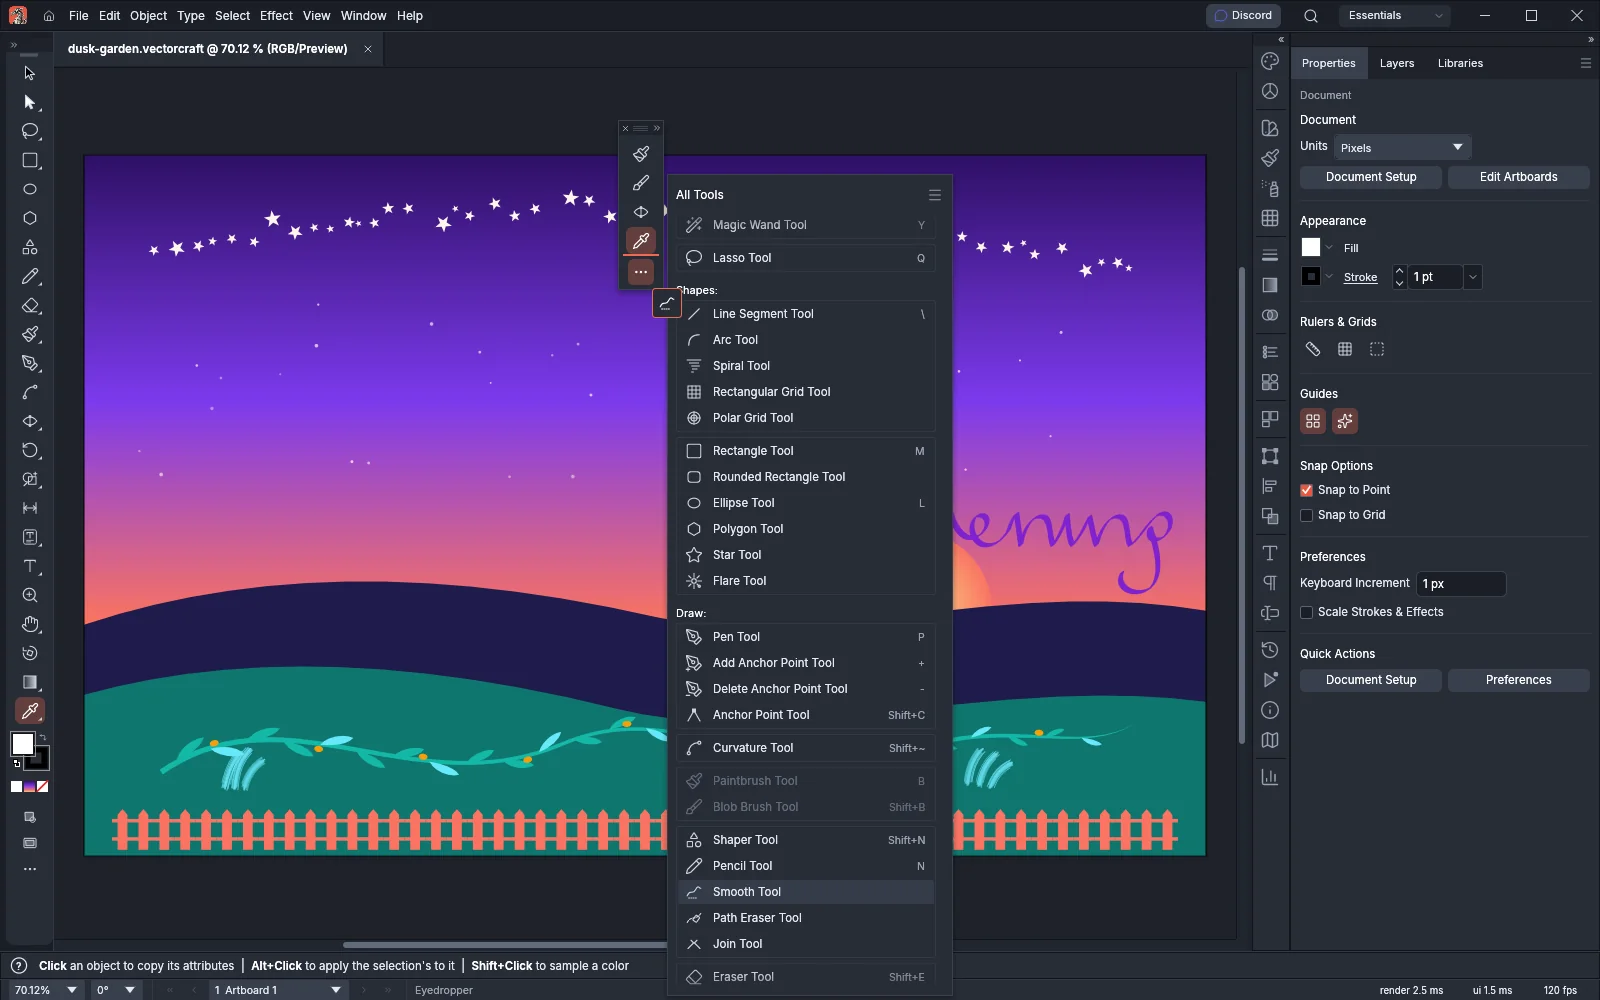
Drag a toolbar by its title bar to move it. Click the double arrow in the title bar to switch between one and two columns, and click the × to hide it. Each toolbar you make is listed under Window → Toolbars, where you can show it again. VectorCraft keeps each toolbar with the workspace you made it in. A workspace can have up to 64 toolbars.
To rename, copy or delete toolbars, choose Window → Toolbars → Manage Toolbars…. Select a toolbar and type a new name to rename it, click + to make a copy, or click the trash can to delete it. With no toolbar selected, + makes a blank toolbar.
Open more windows on a document
Section titled “Open more windows on a document”Choose Window → New Window to open another view of the current document. The new view has its own zoom, position, rotation, artboard and Outline or Preview mode, and it opens as a tab named after the document with the view’s number after a colon, for example heron.vectorcraft:2. When the current view floats, the new view opens in a floating window of its own instead. Changes you make in one view show in all of them. Closing the last view closes the document.
To see several documents or views at once, choose a command from Window → Arrange:
| Command | What it does |
|---|---|
| Cascade | Puts each open document in a floating window and stacks the windows from the upper left, 30 pt apart |
| Tile | Shows every open document and view side by side in a grid, each fitted to its pane. Click in a pane to work in it |
| Float in Window | Moves the current document out of the tab strip into a floating window. Dragging a document tab up or down out of the tab strip does the same |
| Float All in Windows | Moves every document into a floating window of its own |
| Consolidate All Windows | Puts every document back in the tab strip, so one document shows at a time |
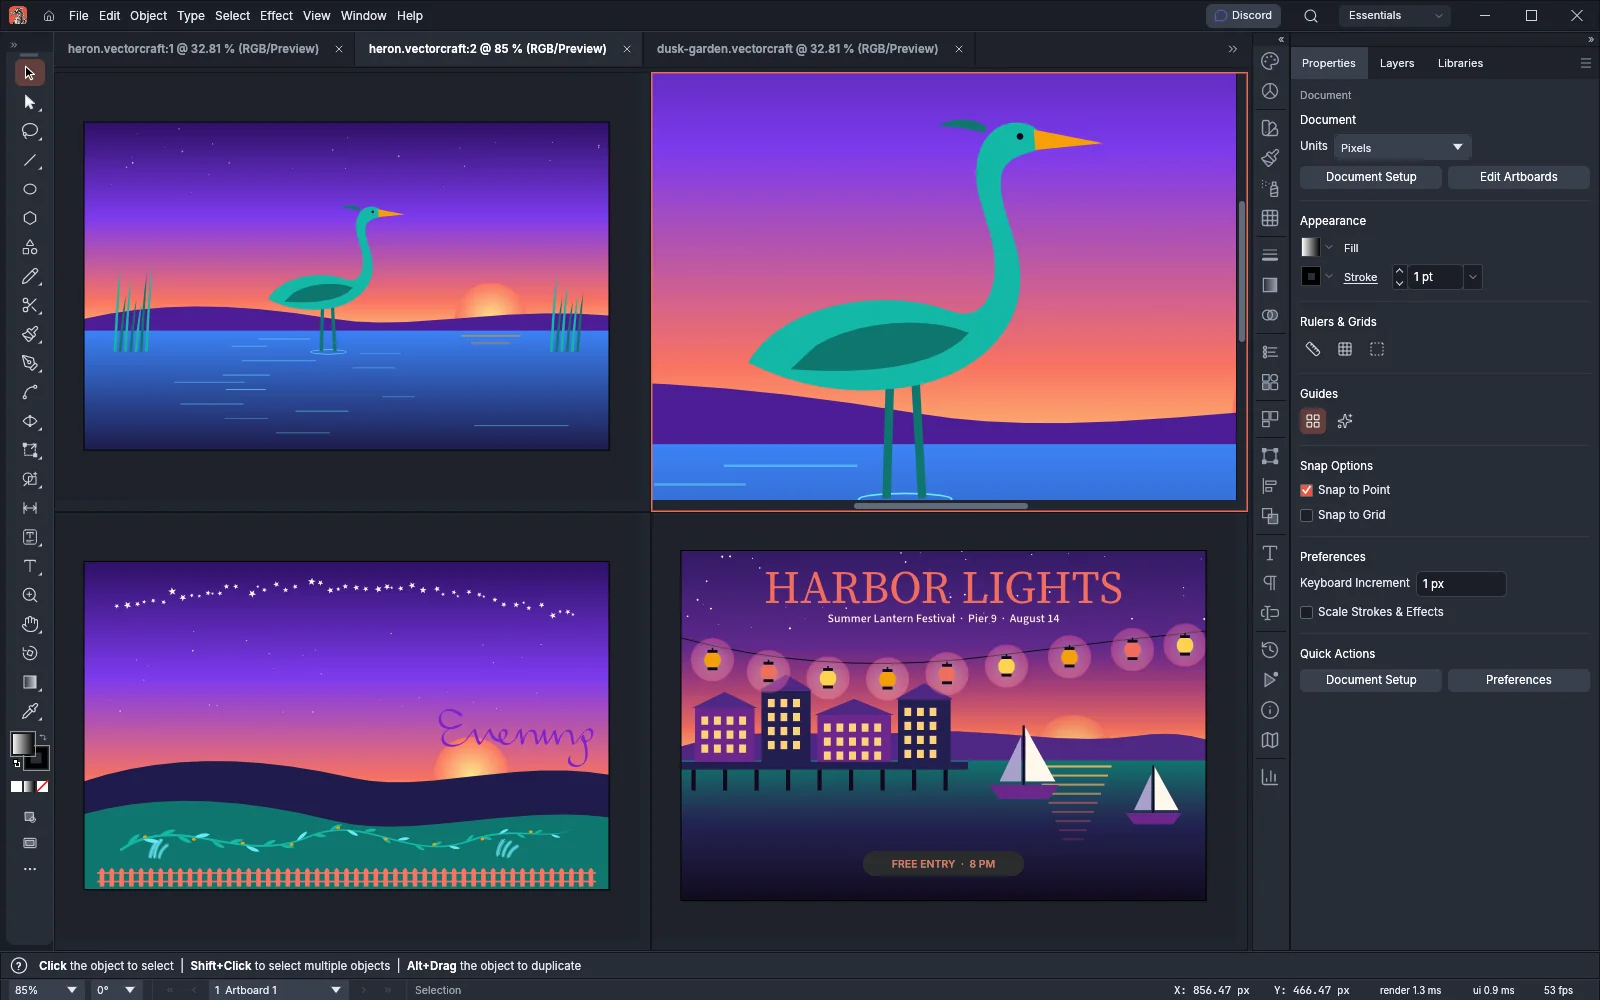
To dock one floating document again, drag its window onto the tab strip. VectorCraft does not save the window arrangement. Each document opens in the tab strip.
Save and return to views
Section titled “Save and return to views”A saved view stores the position, zoom and rotation of the canvas in the document.
- Zoom, scroll and rotate the canvas to the view you want.
- Choose View → New View…. The dialog suggests the first free name of the form “View 1,” “View 2” and so on. Type a name and click OK.
- To go back to the view later, choose its name at the bottom of the View menu.
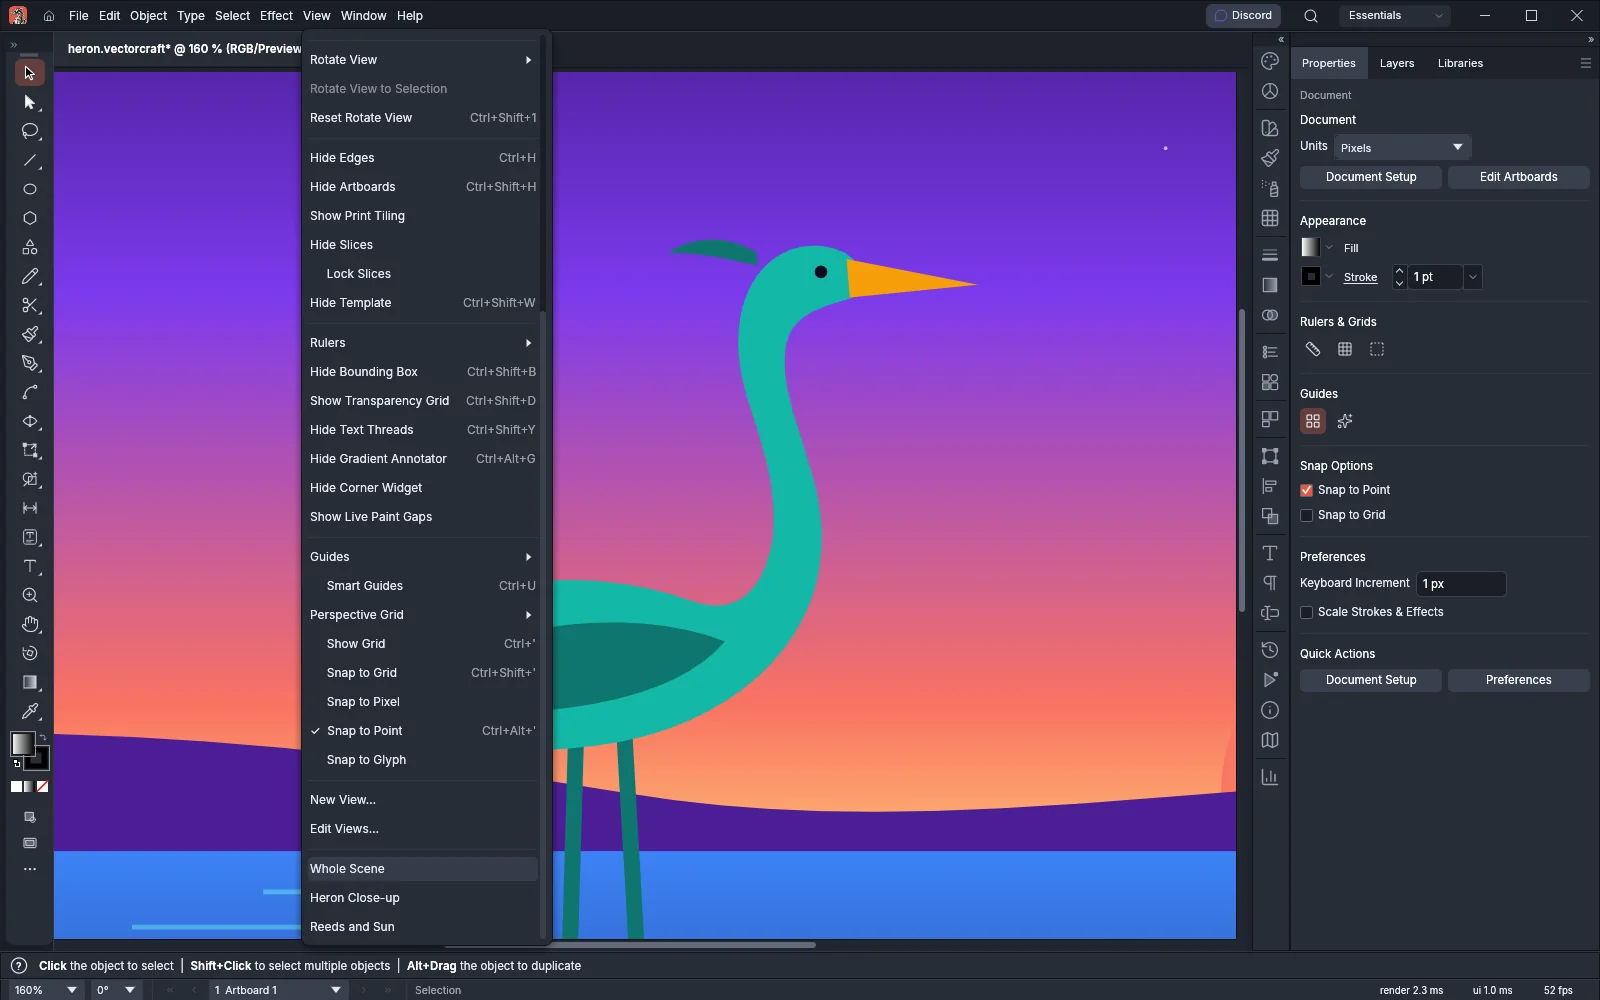
A document can have up to 25 saved views, each with a different name.
To rename or delete views, choose View → Edit Views…. This command is available once the document has a saved view. Select a view, edit its name or click Delete, and click OK. All the renames and deletions you make in the dialog are one undo step, and Cancel leaves the views as they were.
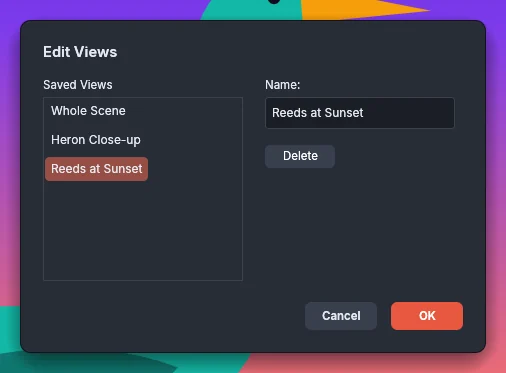
To set up and move between artboards, see Set up a document and artboards.
Move around with the Navigator and rotate the view
Section titled “Move around with the Navigator and rotate the view”Navigator panel
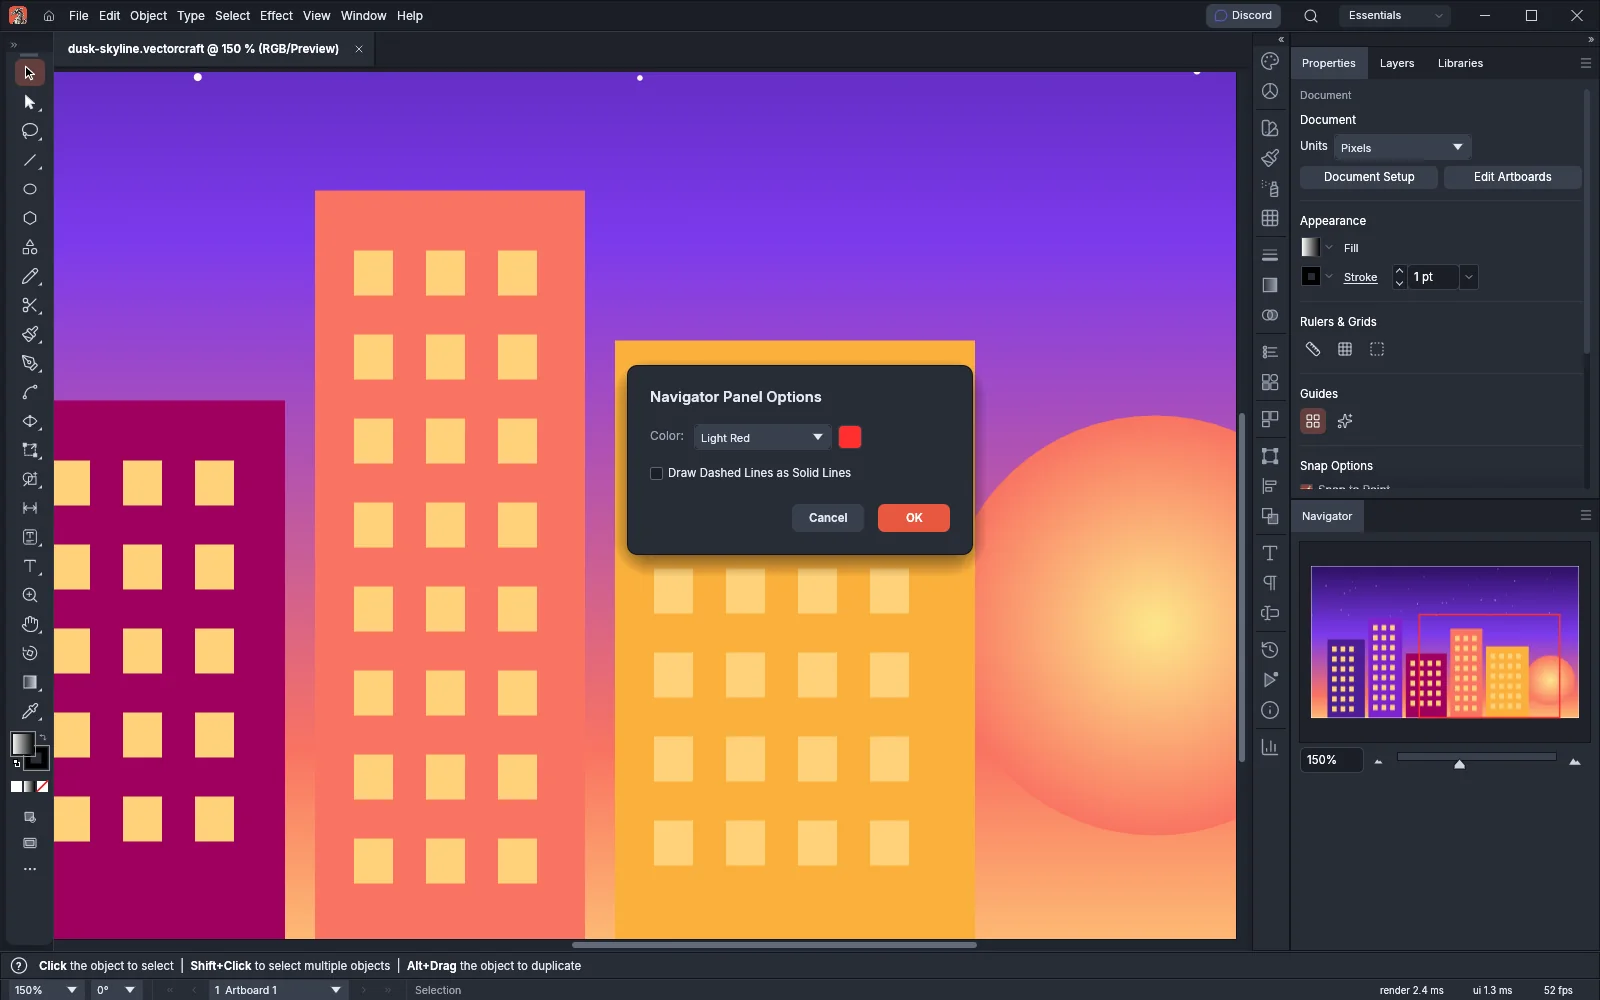
Section titled “Navigator panel”Choose Window → Navigator. The panel shows a thumbnail of the document with a red box around the part that the canvas shows.
- Drag the box, or click anywhere in the thumbnail, to move the view there.
- Type a zoom percentage in the field, drag the slider, or click the Zoom Out and Zoom In buttons on either side of the slider. The slider runs from 3.13% to 64,000%.
- In the panel menu, choose View Artboard Only to fit the thumbnail to the artboards. Without it, the thumbnail also takes in artwork that lies outside them.
- Choose Panel Options… in the panel menu to set the color of the view box (Light Red by default) and to turn on Draw Dashed Lines as Solid Lines for the thumbnail.
Rotate the view
Section titled “Rotate the view”Rotating the view turns the canvas on screen. The artwork itself does not rotate.
- Press Shift+H to choose the Rotate View tool. It is in the Hand tool’s group in the Tools panel.
- Drag on the canvas. The view turns about the center of the canvas, and a dial at the center shows the angle. Hold Shift to turn in 15° steps.
- Release the mouse button. The angle shows in the status bar next to the zoom level.
To rotate the view without changing tools, hold Space and Shift and drag.
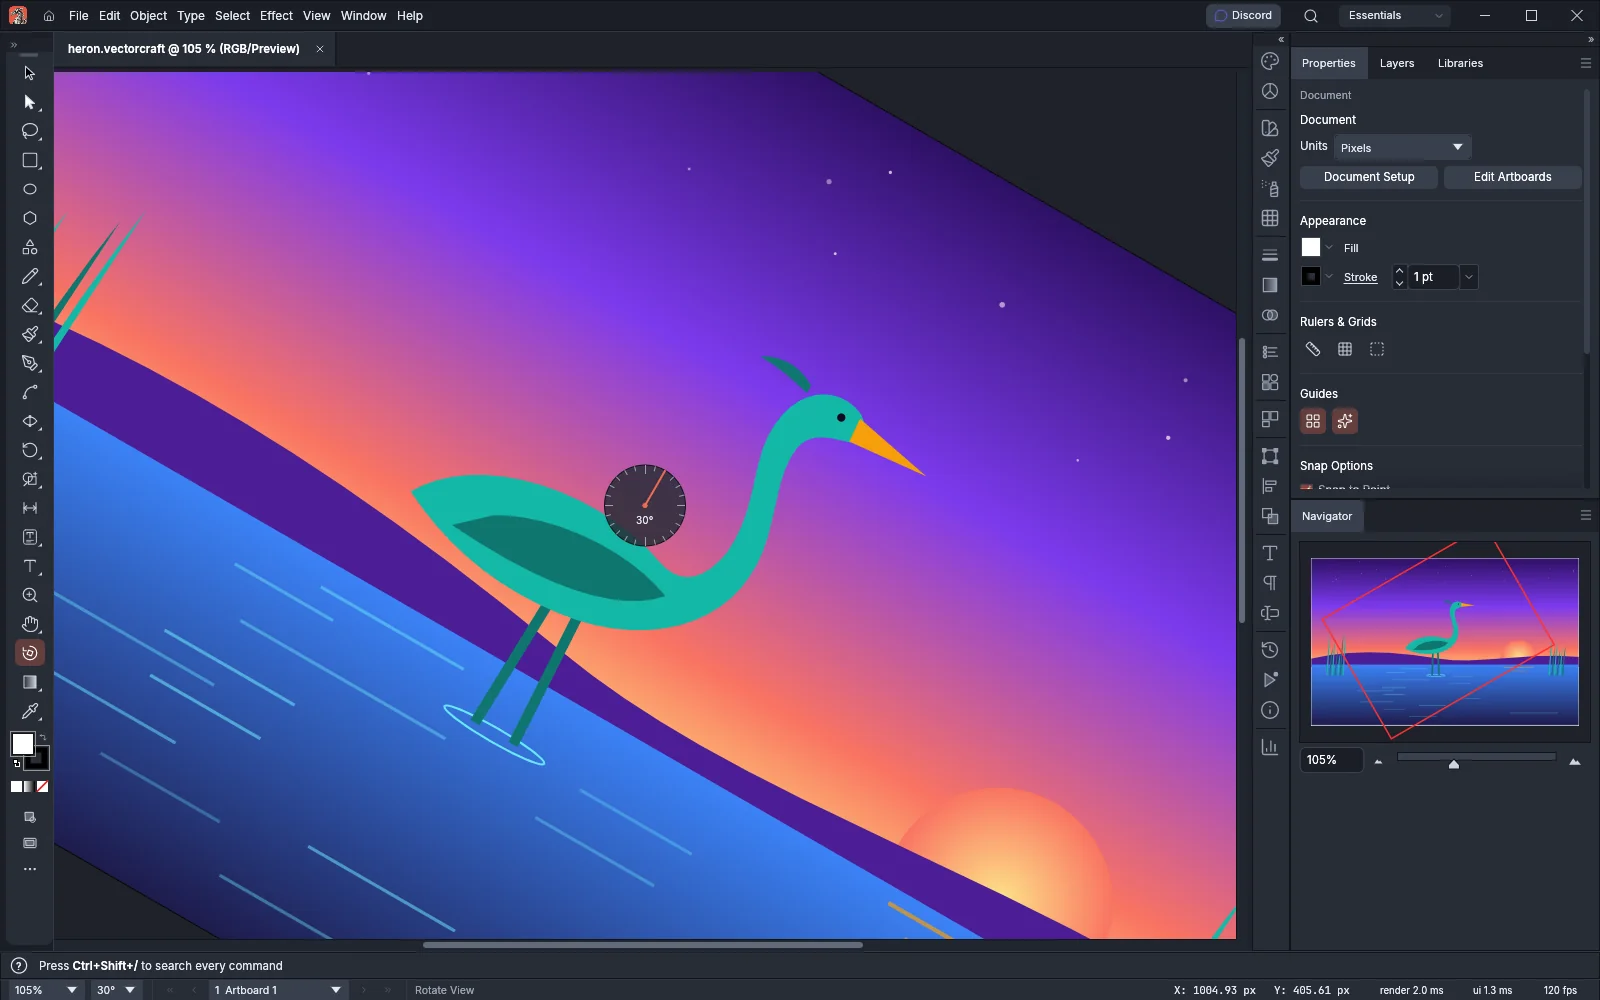
You can also set the angle from the menus:
- View → Rotate View turns the view to a preset angle: 0°, 15°, 30°, 45°, 60°, 90°, 180°, -15°, -30°, -45°, -60° or -90°. The angle menu in the status bar does the same.
- View → Rotate View to Selection turns the view to the angle of the selected objects, so the edges of their bounding box line up with the edges of the window. When the selected objects have different angles, the view turns to 0°.
- View → Reset Rotate View (Ctrl+Shift+1, or Cmd+Shift+1 on macOS) turns the view back to 0°. With the Rotate View tool chosen, press Esc to do the same. With any other tool, press Esc twice within one second.
Present your artwork
Section titled “Present your artwork”Screen modes
Section titled “Screen modes”Choose View → Screen Mode, or press F to cycle through the modes:
| Mode | What shows |
|---|---|
| Normal Screen Mode | The VectorCraft window with its menu bar, bars and panels |
| Full Screen Mode with Menu Bar | The window fills the screen and keeps the menu bar |
| Full Screen Mode | The window fills the screen without the menu bar and the Control bar |
VectorCraft always starts in Normal Screen Mode.
Presentation Mode
Section titled “Presentation Mode”Presentation Mode shows only the canvas, with no menu bar, tabs, panels, toolbars or status bar.
- Choose View → Presentation Mode, or press Shift+F.
- Press → or click to go to the next artboard. Press ← to go back.
- Press Esc to leave Presentation Mode.
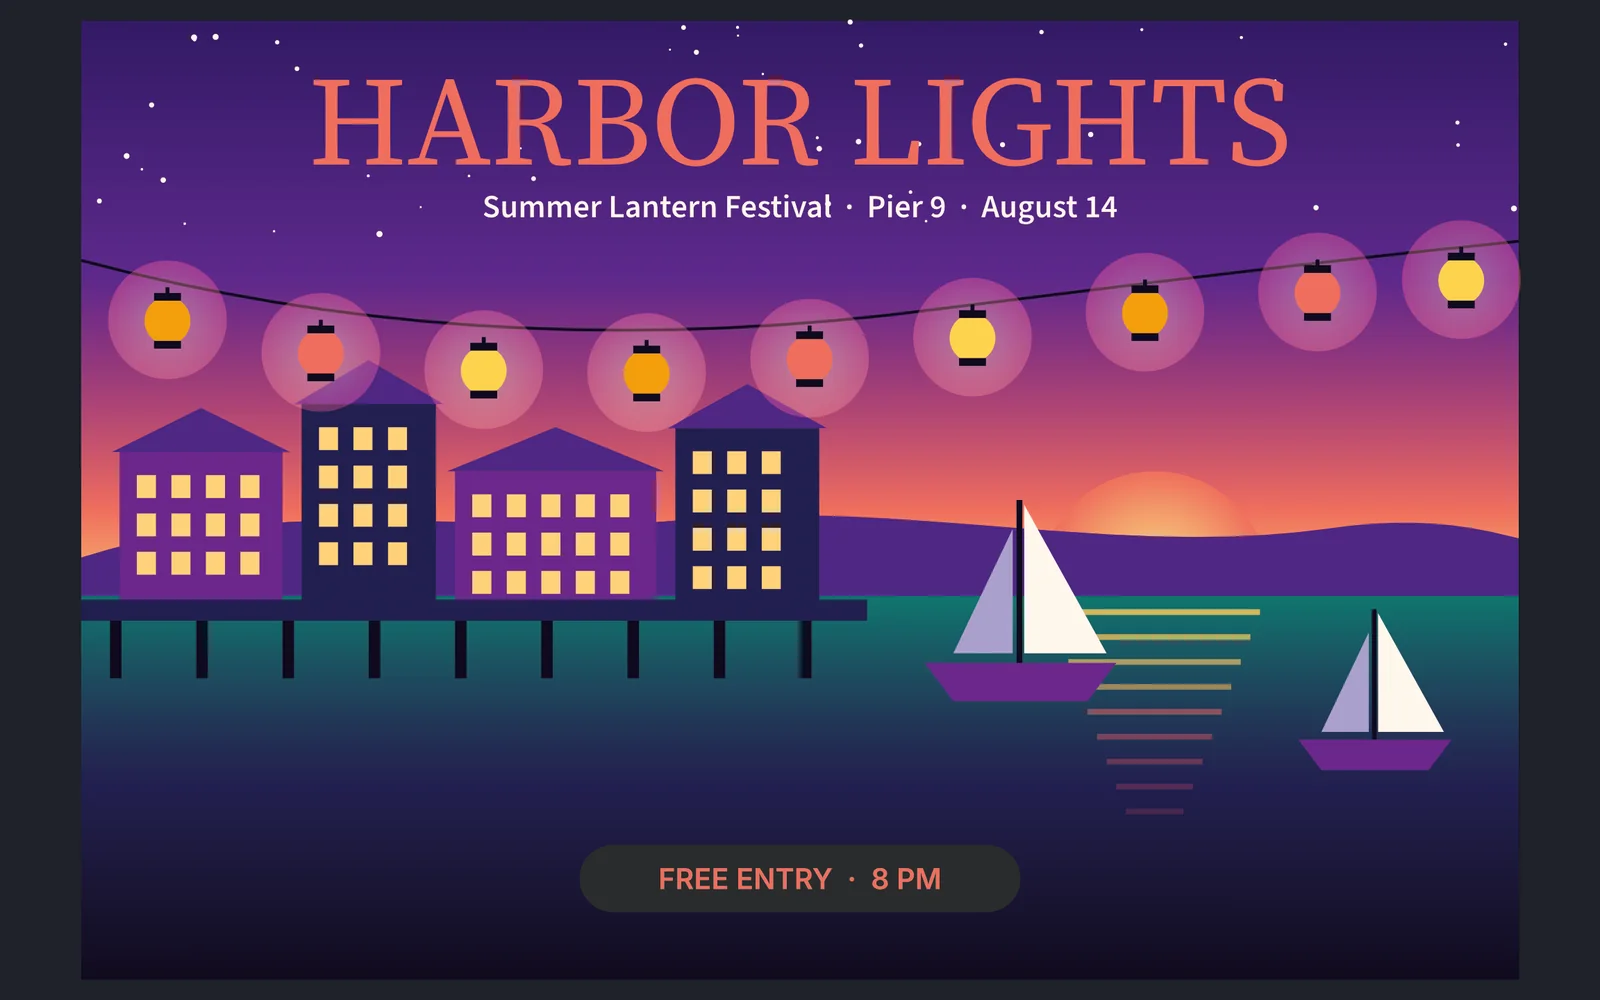
In Presentation Mode, other keys and the tools do not change the document.
Step back with the History panel
Section titled “Step back with the History panel”Choose Window → History. The panel lists every step you have taken in the current document. The first row, Open, is the document as you opened it, and the highlighted row is the current state.
- Click a row to go back to that step. The steps after it stay in the list, dimmed.
- Click a dimmed row to go forward to it again.
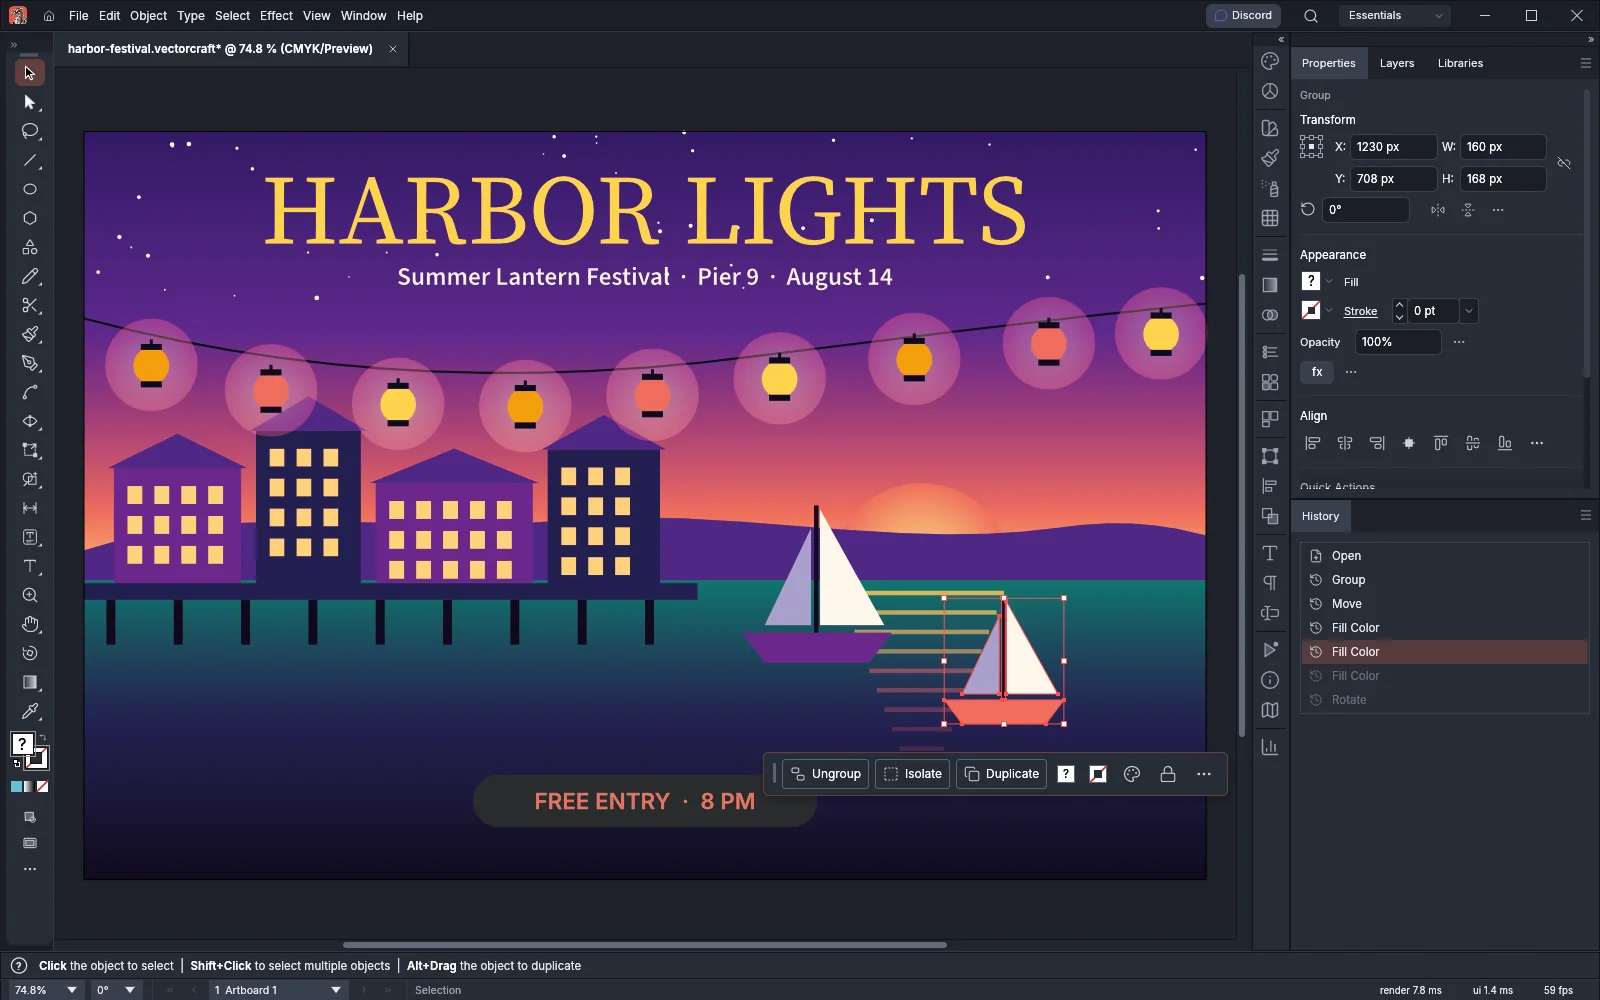
If you make a change after going back, the new step replaces the dimmed steps. The panel menu also has these commands:
| Command | What it does |
|---|---|
| Step Backward | Undoes one step, as Edit → Undo does |
| Step Forward | Redoes one step, as Edit → Redo does |
| Clear History | Removes every undo and redo step of the document. The artwork stays as it is, and you cannot undo the clearing |
| Set History Limit… | Opens the Performance page of the preferences, where History States sets how many steps are kept (500 by default) |
Shortcuts
Section titled “Shortcuts”| Action | Windows and Linux | macOS |
|---|---|---|
| Hide or show the panels, Tools panel and Control bar | Tab | Tab |
| Hide or show the panels only | Shift+Tab | Shift+Tab |
| Hide or show edges | Ctrl+H | Cmd+H |
| Hide or show the bounding box | Ctrl+Shift+B | Cmd+Shift+B |
| Show or hide the transparency grid | Ctrl+Shift+D | Cmd+Shift+D |
| Hide or show text threads | Ctrl+Shift+Y | Cmd+Shift+Y |
| Hide or show the gradient annotator | Ctrl+Alt+G | Cmd+Option+G |
| Rotate View tool | Shift+H | Shift+H |
| Rotate the view with any tool | Space+Shift+drag | Space+Shift+drag |
| Reset Rotate View | Ctrl+Shift+1 | Cmd+Shift+1 |
| Cycle screen modes | F | F |
| Presentation Mode | Shift+F | Shift+F |
| Undo | Ctrl+Z | Cmd+Z |
| Redo | Ctrl+Shift+Z | Cmd+Shift+Z |
To change these shortcuts, choose Edit → Keyboard Shortcuts…. The full list is in Keyboard shortcuts.