
Trace an image
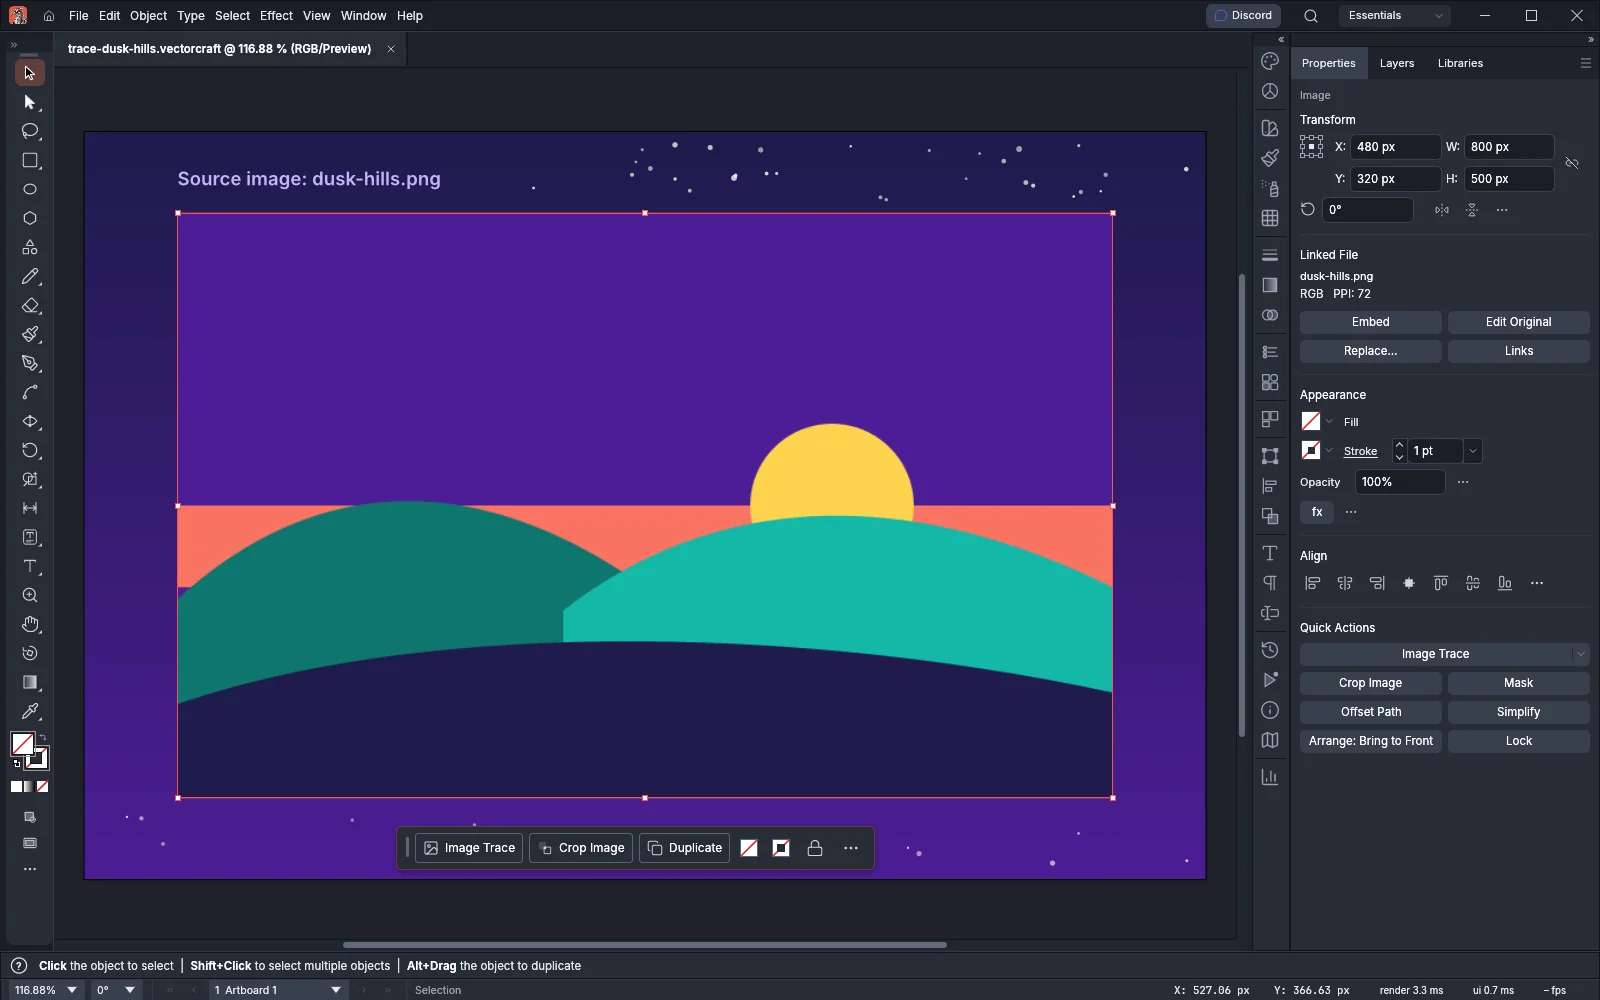
This guide shows how to place a raster image, such as a scan, a sketch or a flat-color logo, and trace it into paths you can edit. You pick a preset, adjust the tracing while the preview updates, save the settings you like as your own preset, and then expand the result into ordinary paths. The following image shows the picture traced in this guide, a flat-color landscape saved as a PNG file, placed in a document and selected.
Place the image
Section titled “Place the image”- Choose File → Place… (Ctrl+Shift+P, or Cmd+Shift+P on macOS) and pick the image file.
- In the Place dialog, choose how VectorCraft places the image:
- Link keeps a link to the image file instead of only embedding a copy of it. Link is on the first time you place a file, and the dialog then keeps the last setting you used.
- Template puts the image on a new locked template layer below the current layer. VectorCraft dims the template layer and does not select the image.
- Replace swaps the one selected object for the image and keeps that object’s place in the stacking order and its transform. Replace is available only when you place one file and one object is selected. If Template and Replace are both on, VectorCraft places nothing and shows an error.
- Click Place. VectorCraft places the image at 100% of its physical size, using the resolution saved in the file, or 72 ppi when the file has none. One image goes in the center of the view. When you pick several files, click to place each one at 100% or drag to set its size. The arrow keys switch between the files, and Esc skips one.
With the image selected, the Properties panel shows its Linked File or Embedded Image section and an Image Trace button. The Contextual Task Bar under the image also has Image Trace and Crop Image. To change how a new version of a linked file takes the image’s place, click Links in the Properties panel to open the Links panel, and choose Placement Options… from the panel’s menu. Placement Options… is also on the Control bar, in the menu that opens when you click the file name. The Essentials workspace does not show the Control bar; choose Window → Control to show it. Work with placed images describes these settings.
Trace it
Section titled “Trace it”- Select the image.
- Start the trace in one of these ways:
- Choose Object → Image Trace → Make. This traces the image with the Default preset, which gives a black and white result.
- Click Image Trace on the Control bar, in the Properties panel or on the Contextual Task Bar. The button traces with the Default preset. On the Control bar and in the Properties panel, its arrow lists the other presets.
- Choose Window → Image Trace to open the Image Trace panel, choose a Preset, and click Trace.
- The traced object replaces the image on the artboard, and the source image stays inside it. With the traced object selected, the Control bar shows its preset, its view, a button that opens the Image Trace panel, and Expand. The Properties panel shows the same preset and view in an Image Trace section, with an Image Trace button that opens the panel and Expand and Release buttons.
Object → Image Trace → Make and Expand traces with the Default preset and expands the result into plain paths in one step.
| Command | Result |
|---|---|
| Make | Traces the selected image into an Image Trace object that you can still adjust |
| Make and Expand | Traces the image and expands the result, leaving only paths |
| Release | Puts the source image back in place of the Image Trace object |
| Expand | Keeps the traced paths and drops the source image |
All four commands are in Object → Image Trace. Release and Expand are also in the Image Trace panel’s menu.
Choose a preset
Section titled “Choose a preset”The Preset list in the Image Trace panel holds these built-in presets. Presets you save yourself follow them at the end of the list.
| Preset | Mode | Colors |
|---|---|---|
| Default | Black and white, threshold 128 | 2 |
| Auto Color | Color, with the image’s own colors for flat art and as many as the tones need otherwise | Set by the image |
| High Fidelity Photo | Color, overlapping | 64 |
| Low Fidelity Photo | Color, overlapping | 20 |
| 3 Colors | Color | 3 |
| 6 Colors | Color | 6 |
| 16 Colors | Color | 16 |
| Shades of Gray | Grayscale, overlapping | 8 grays |
| Black and White Logo | Black and white, threshold 128, white left out | 2 |
| Sketched Art | Black and white, threshold 150, white left out | 2 |
| Silhouettes | Black and white, threshold 200, white left out | 2 |
| Line Art | Black and white, threshold 128, white left out | 2 |
| Technical Drawing | Black and white, threshold 128, white left out | 2 |
| Outline | Black and white, traced as strokes instead of fills | 2 |
| Flat Logo | Flat Logo, for logos made of flat colors | Up to 8 found in the image, plus white |
To keep your own settings, click the Manage Presets button next to the Preset list and choose Save as New Preset…. The same menu renames or deletes a preset you saved. Built-in presets cannot be renamed or deleted. Save your own preset gives the steps.
Adjust the tracing
Section titled “Adjust the tracing”The following screenshot shows the Image Trace panel with the 6 Colors preset and the Advanced section open.
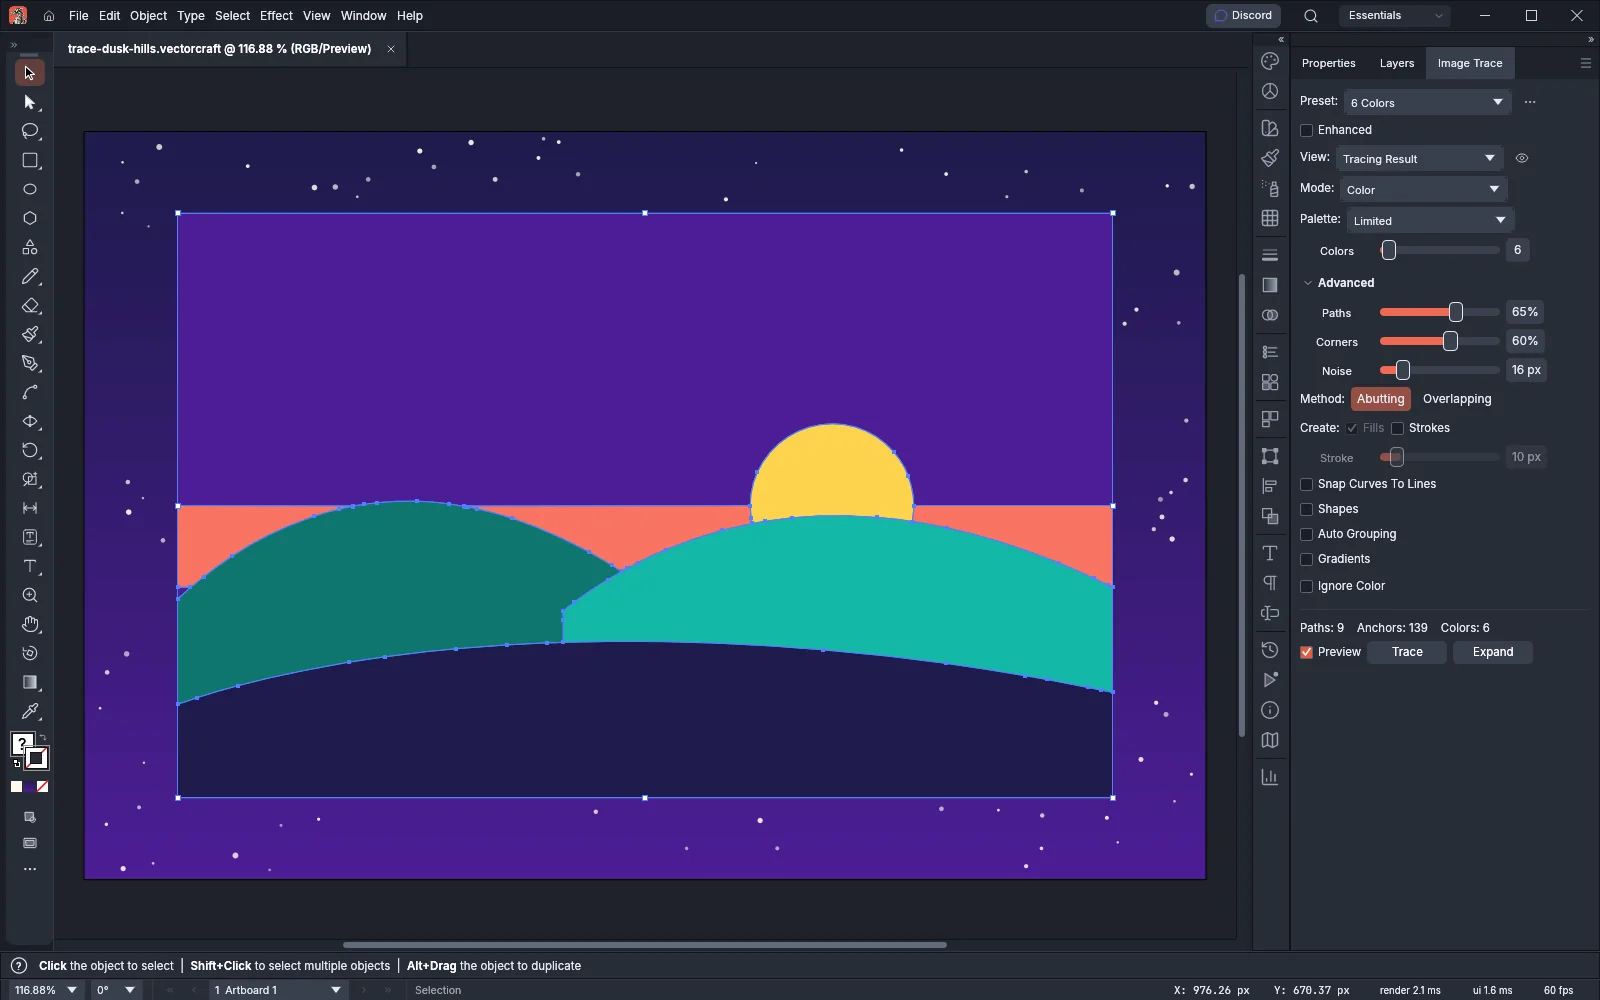
- Keep Preview checked at the bottom of the panel. Preview is on by default, and VectorCraft traces the selected object again each time you change a setting. A slider applies its value when you release it. With Preview off, your changes wait in the panel until you click Trace or turn Preview on again.
- Set Mode to Black and White, Grayscale, Color or Flat Logo. In Black and White mode, Threshold sets how dark a pixel must be to become black. In Color mode, Palette chooses where the colors come from: Limited, Full Tone, Automatic or Document Library.
- Set the slider under Mode. Its name and range depend on the mode and the palette, as the following table shows.
- Click Advanced to show the rest of the settings.
- Check the counts above the Preview checkbox. After a trace from the panel, they show how many paths, anchors and colors the current tracing has.
Changing any setting turns the preset name into Custom.
| Mode and palette | Slider | Range | What it sets |
|---|---|---|---|
| Black and White | Threshold | 0 to 255 | Pixels darker than this value become black |
| Grayscale | Grays | 2 to 256 | The number of grays |
| Color, Limited palette | Colors | 2 to 256 | The number of colors that best represent the image |
| Color, Full Tone palette | Colors | 0% to 100% | VectorCraft uses as many colors as the image’s tones need. A higher value keeps more of them. |
| Color, Automatic palette | Colors | 0% to 100% | Flat art keeps its own colors, and any other image is traced as with Full Tone |
| Color, Document Library palette | Colors | 2 to 256 | The most colors to take from the library, which VectorCraft uses exactly as they are |
| Flat Logo | Colors | 2 to 10 | The number of flat colors to find in the logo |
With the Document Library palette, two more lists appear:
- Library chooses where the colors come from: Document Swatches, or one of the color swatch libraries.
- Colors appears when Library is Document Swatches. It traces with All of the document’s swatches or with the colors of one color group. Fill, stroke and color covers swatches and color groups.
| Setting | What it does |
|---|---|
| Paths | Sets how closely the paths follow the pixels, from 0% to 100%. A higher value follows them more tightly. |
| Corners | Sets how many corners the paths keep, from 0% to 100%. A higher value keeps more corners. |
| Noise | Leaves out areas smaller than this many pixels, from 1 to 100 px. |
| Method | Abutting traces each color on its own, and neighboring shapes share their edges. Overlapping stacks the colors, and each one extends under the colors above it. Flat Logo mode does not show Method. |
| Create | Fills makes filled areas. Strokes makes thin lines into stroked lines up to the Stroke width in pixels, from 1 to 100 px. One of the two stays on. Flat Logo mode does not show Create. |
| Snap Curves To Lines | Straightens slightly curved edges and makes lines that are almost level or upright exactly level or upright. |
| Shapes | Makes outlines that are a circle, an ellipse, a rectangle or a regular polygon into live shapes. |
| Auto Grouping | Groups each path with the paths inside it. |
| Gradients | In Grayscale and Color modes, traces an area whose color changes evenly in one direction as one path with a linear gradient. |
| Ignore Color | Leaves out the white areas, or the areas of another color that you pick, so no background shape is made. When Ignore Color is on, click the color button beside it to pick another color. Flat Logo mode leaves out white only. |
The Trace button is available when an image or an Image Trace object is selected. Expand next to it is available when an Image Trace object is selected.
Save your own preset
Section titled “Save your own preset”When a set of panel settings works well for a kind of image, save it as a preset and choose it from the Preset list later. Saved presets are kept with your preferences, so they are available in every document.
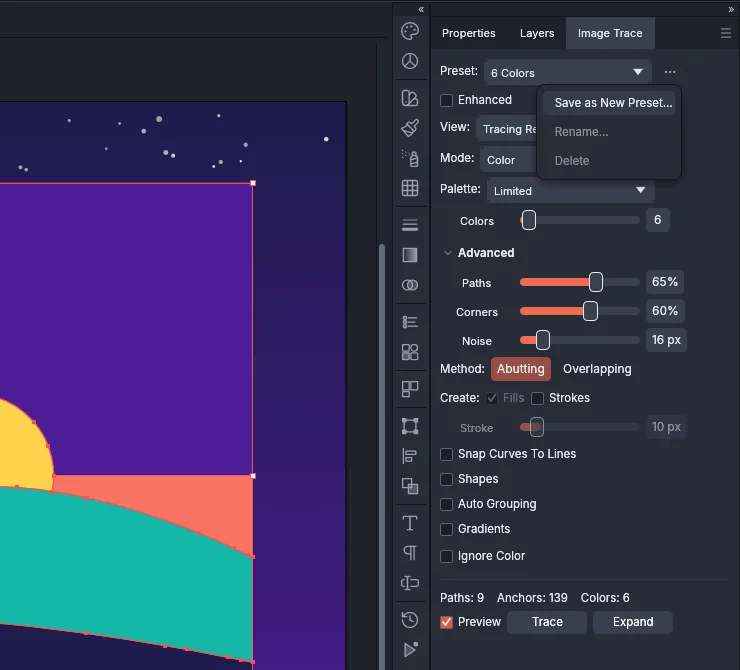
- Set up the panel the way you want to keep it.
- Click the Manage Presets button (…) next to the Preset list and choose Save as New Preset….
- In the Save Preset dialog, type a Name. VectorCraft suggests the first free name of the form Tracing Preset 1.
- Click OK. The new preset is added to the end of the Preset list.
The name cannot be empty, Custom, or the name of a built-in preset. If you type the name of a preset you saved before, the dialog shows “Replaces the saved preset of that name.” and OK replaces that preset.
| Menu item | What it does |
|---|---|
| Save as New Preset… | Saves the panel’s current settings as a new preset |
| Rename… | Opens the Rename Preset dialog for the saved preset that the Preset list shows. The new name cannot be the name of another preset. |
| Delete | Deletes the saved preset that the Preset list shows, without asking first |
Rename… and Delete are available only when the Preset list shows a preset you saved. An Image Trace object traced with a saved preset shows the preset’s new name after you rename it. After you delete the preset or change its settings, the object shows Custom.
Get a cleaner tracing
Section titled “Get a cleaner tracing”Select the Image Trace object, open the Advanced section of the Image Trace panel, and change one setting at a time with Preview on. The following table pairs common problems with the setting that fixes them.
| Problem | Setting to change |
|---|---|
| The tracing has too many paths and anchors | Lower Paths, so the paths follow the pixels less tightly. In Color mode, also lower Colors. |
| Sharp corners come out rounded | Raise Corners, so the paths keep more corners. |
| Small specks and stray dots become paths | Raise Noise, so areas smaller than that many pixels are left out. |
| A white box is traced behind the art | Turn on Ignore Color, which leaves out the white areas. For a background of another color, click the color button beside it and pick that color. |
| Edges that should be straight are slightly curved | Turn on Snap Curves To Lines. |
| Thin lines come out as narrow filled shapes | Turn on Strokes under Create, and set Stroke to the widest line you want stroked. |
After each change, compare the counts above the Preview checkbox with the counts before it.
Change the view
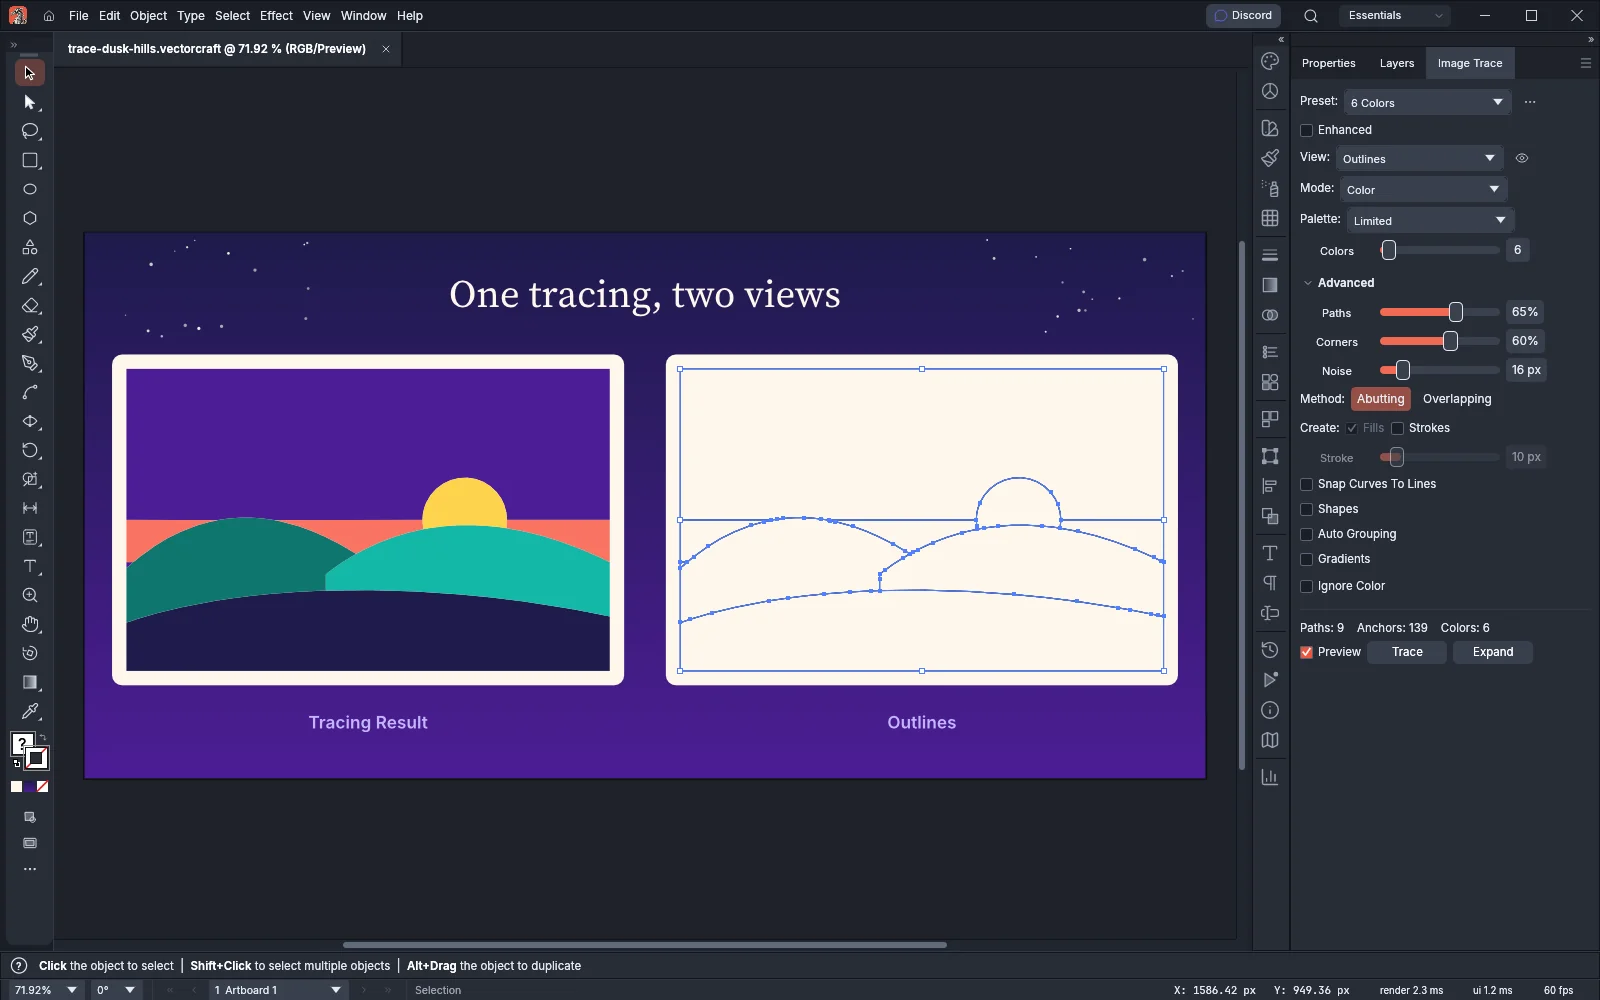
Section titled “Change the view”The View list in the Image Trace panel and on the Control bar changes how the selected Image Trace object is drawn on screen.
| View | What you see |
|---|---|
| Tracing Result | The traced paths, filled |
| Tracing Result with Outlines | The traced paths with their outlines on top |
| Outlines | Only the outlines of the traced paths |
| Outlines with Source Image | The outlines over the source image |
| Source Image | The image before tracing |
To compare the tracing with the original for a moment, press and hold the eye button next to the View list. The source image shows until you release the button. The button works when an Image Trace object is selected, and it does not change the document or add a step to the undo history.
Release a tracing
Section titled “Release a tracing”To go back to the image and start again, release the tracing.
- Select one or more Image Trace objects.
- Choose Object → Image Trace → Release, choose Release from the Image Trace panel’s menu, or click Release in the Properties panel.
- The source image returns in place of each Image Trace object, at the same place in the stacking order, and VectorCraft selects it. You can trace it again with any preset.
The release is one step in the undo history. Edit → Undo brings the tracing back.
Finish the tracing
Section titled “Finish the tracing”- Select the Image Trace object.
- Choose Object → Image Trace → Expand, or click Expand in the Image Trace panel, in the Properties panel, on the Control bar or on the Contextual Task Bar. The traced paths stay, and the source image is removed.
- Edit the paths as you would any other paths. Draw and edit paths covers the tools.
To go back to the image instead, choose Object → Image Trace → Release. The source image returns in place of the Image Trace object.