
Select artwork
This guide covers the ways to select artwork beyond a click or a marquee with the Selection tool: the Group Selection, Lasso, Magic Wand and Enclosing Lasso tools, the commands in the Select menu, Global Edit, saved selections and the Select by Artboards plug-in.
Select with the Group Selection tool
Section titled “Select with the Group Selection tool”The Group Selection tool selects an object inside a group without ungrouping it, and then selects the groups that hold it, one level at a time. It shares a slot in the Tools panel with the Direct Selection tool and has no shortcut.
- Press and hold the Direct Selection tool’s button in the Tools panel, then choose the Group Selection tool.
- Click an object inside a group. Only that object is selected.
- Click the same object again. The group that holds it is added to the selection.
- Keep clicking to add the next group up each time.
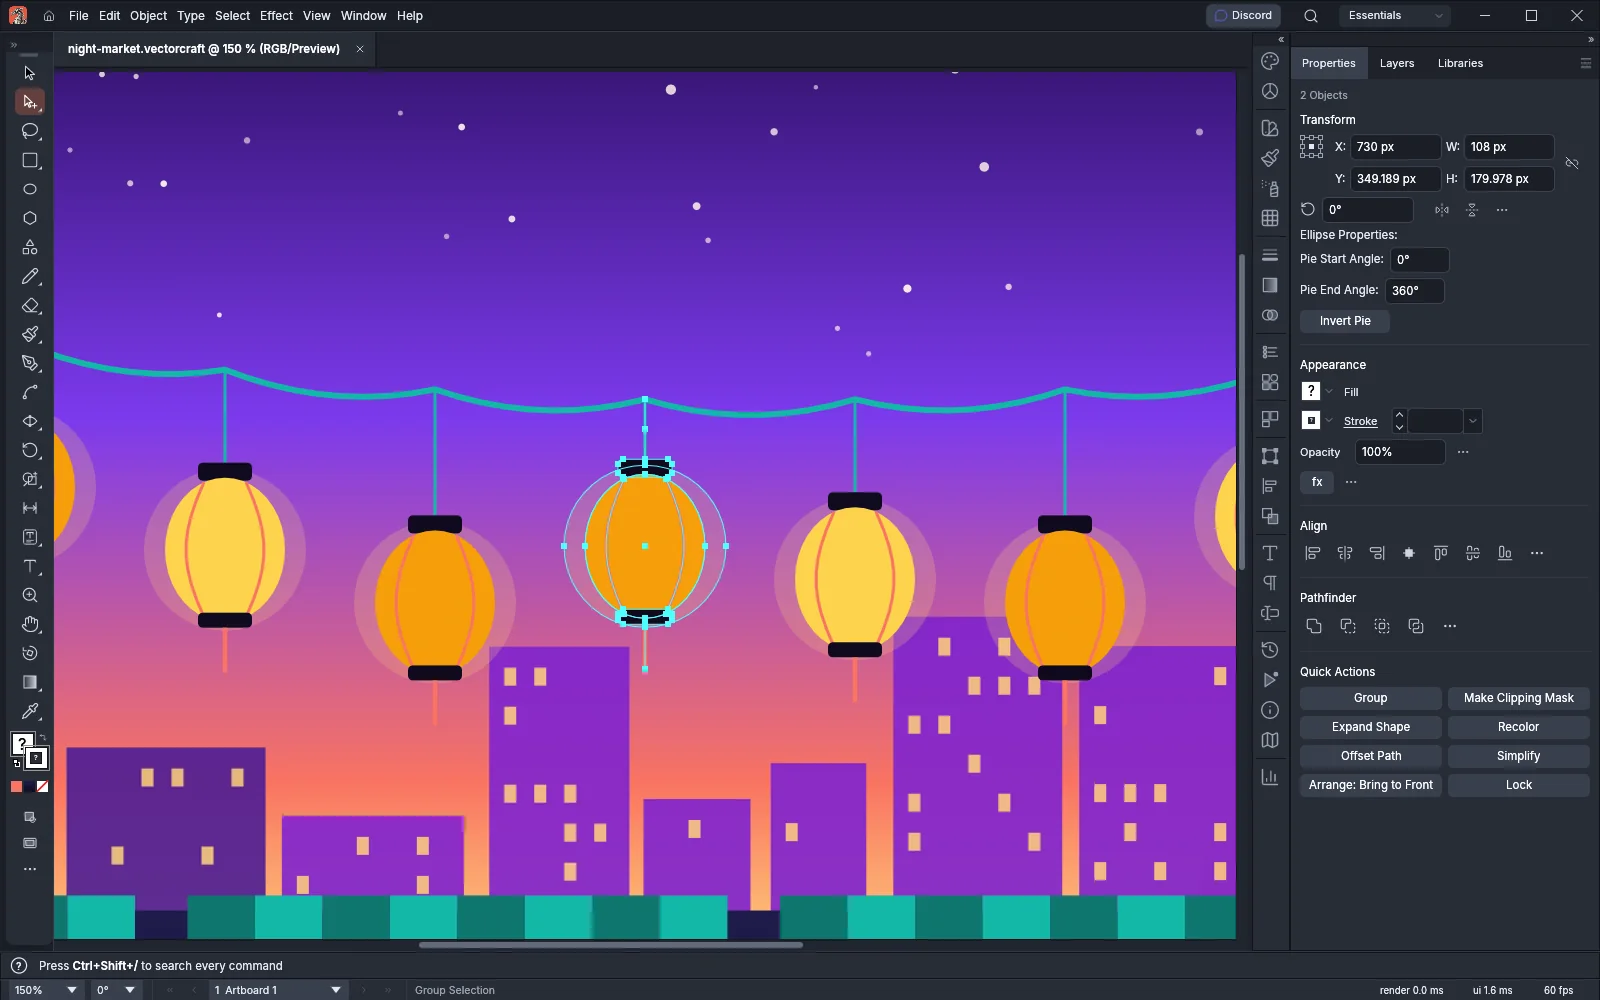
Shift-click a selected object to deselect it.
When you drag a marquee with the Group Selection tool, it selects the anchor points inside the marquee, as the Direct Selection tool does. Press E during the drag to select only the objects that lie entirely inside the marquee, each as a whole object. Press E again to return to selecting anchor points.
Draw around objects with the Lasso
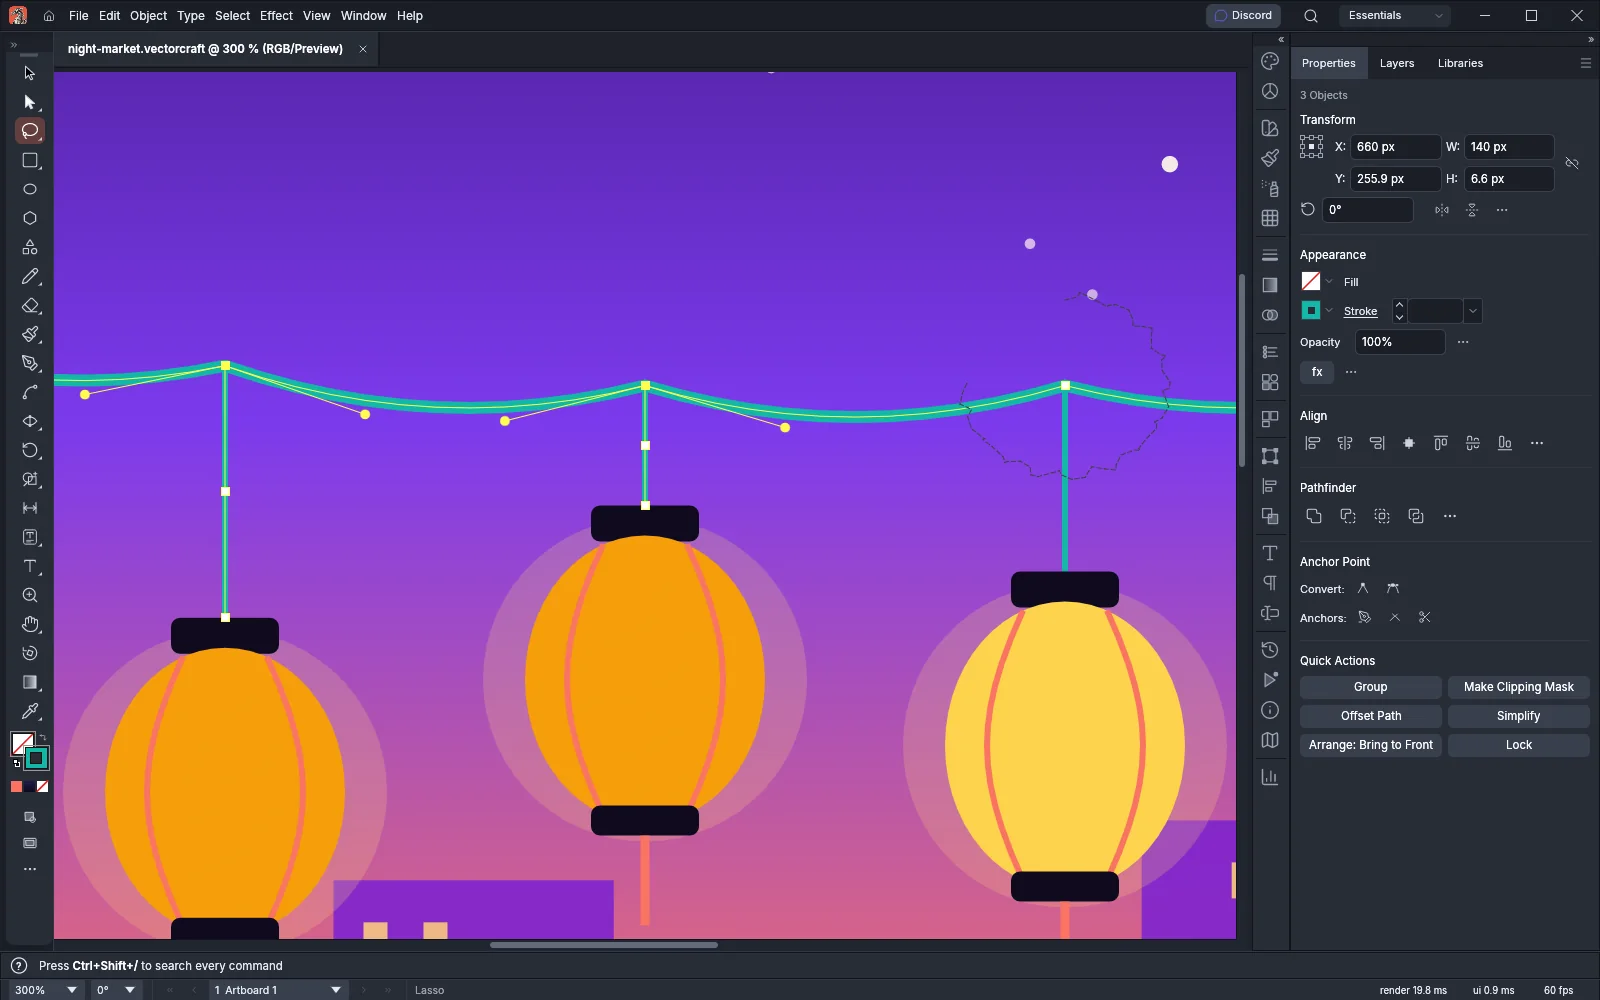
Section titled “Draw around objects with the Lasso”The Lasso tool selects the anchor points inside a freehand loop that you draw. In the default Tools panel, the Lasso shares a slot with the Magic Wand tool, and the Lasso is the button shown.
- Press Q to choose the Lasso tool.
- Drag a loop around the anchor points you want. A dashed line follows the pointer.
- Release the mouse button. The anchor points inside the loop are selected, and the paths they belong to show their anchor points.
The Lasso also picks the gradient mesh points inside the loop and selects the meshes they belong to. To add anchor points to the selection, hold Shift as you drag. To remove them, hold Alt (Option on macOS). Press Esc during the drag to cancel the loop. A click or a very short drag without Shift or Alt deselects everything. The Lasso does not select anchor points on hidden or locked objects.
Select by color and stroke with the Magic Wand
Section titled “Select by color and stroke with the Magic Wand”The Magic Wand tool selects every object that looks like the one you click: by default, every object with a similar fill color.
- Press and hold the Lasso tool’s button in the Tools panel and choose the Magic Wand tool. Double-click the Magic Wand tool, or choose Window → Magic Wand, to open the Magic Wand panel.
- Turn on the attributes to compare and set a tolerance for each.
- Press Y to choose the Magic Wand tool, then click an object.
Every visible, unlocked object that matches on all the attributes you turned on is selected, including objects inside groups. Hold Shift as you click to add the matches to the selection, or Alt (Option on macOS) to remove them. Click an empty part of the canvas without Shift or Alt to deselect everything.
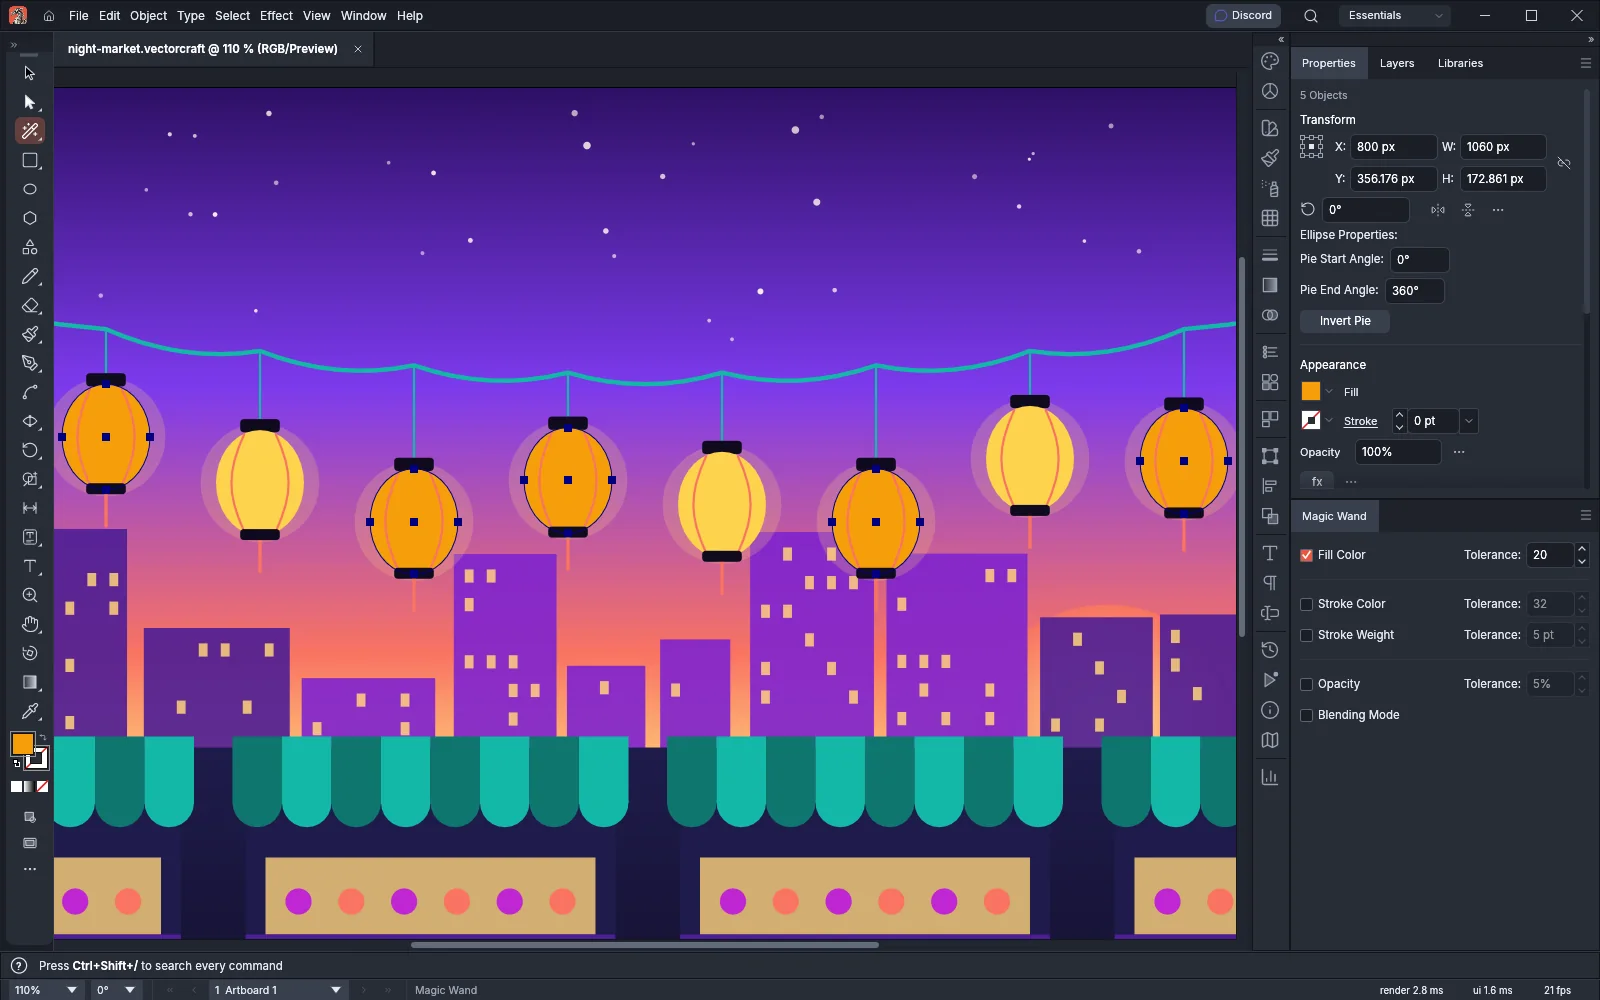
In the image, Fill Color has a Tolerance of 20. The yellow lanterns are too far from amber to match, so the click on one amber lantern selects only the bodies of the five amber ones.
| Option | Default | What it compares |
|---|---|---|
| Fill Color | On, Tolerance 32 | The fill color. The Tolerance is a distance between RGB colors, from 0 to 255 |
| Stroke Color | Off, Tolerance 32 | The stroke color. The Tolerance runs from 0 to 255 |
| Stroke Weight | Off, Tolerance 5 pt | The stroke weight. The Tolerance runs from 0 to 1000 pt |
| Opacity | Off, Tolerance 5% | The opacity. The Tolerance runs from 0 to 100% |
| Blending Mode | Off | The blending mode, which must be the same |
A Tolerance of 0 matches only the exact color. Gradients and patterns match only when they are identical. The settings stay as you set them when you switch tools.
The panel menu has Hide Stroke Options and Hide Transparency Options, which hide those rows (choose Show Stroke Options or Show Transparency Options to bring them back), and Reset, which restores the defaults.
Select only what is fully inside with the Enclosing Lasso
Section titled “Select only what is fully inside with the Enclosing Lasso”The Enclosing Lasso tool is a built-in plug-in. Like the Lasso, it draws a freehand loop, but it selects whole objects, and only the objects that lie entirely inside the loop.
- Choose Object → Plug-ins → Enclosing Lasso → Enclosing Lasso Tool.
- Drag a loop around the objects.
- Release the mouse button.
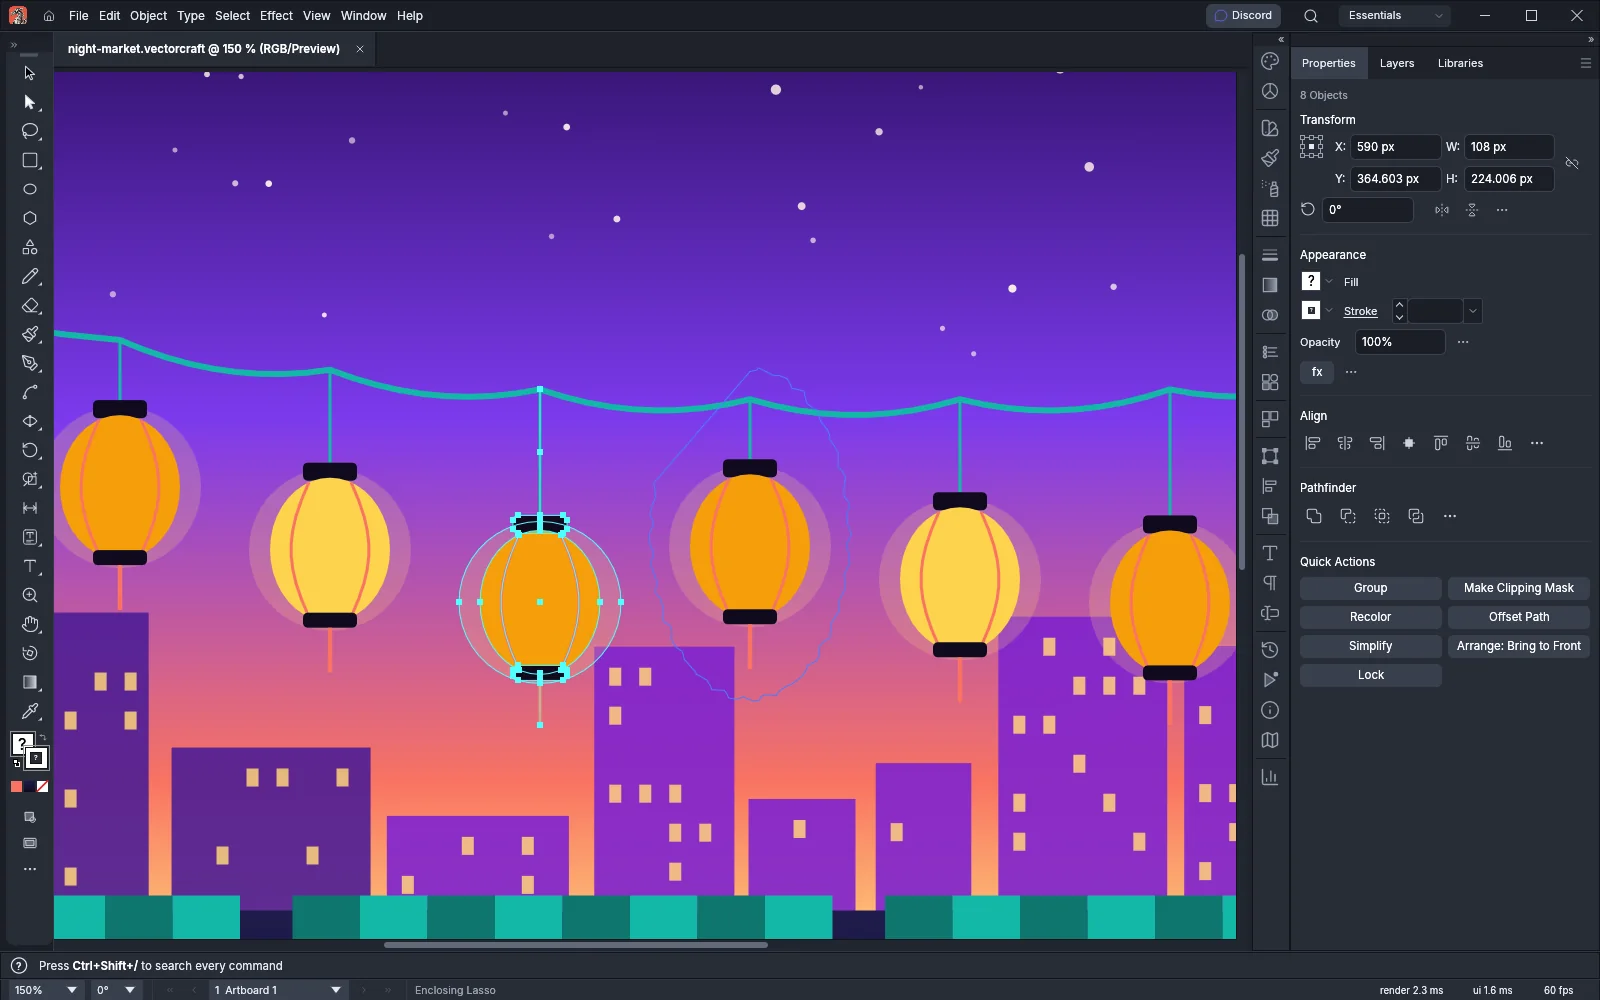
The tool measures each path without its stroke width or effects. Inside a group, it selects each fully enclosed object on its own. A compound path counts as one object. Hold Shift to add to the selection, or Alt (Option on macOS) to deselect the selected objects inside the loop. Press Esc during the drag to cancel.
Use the Select menu
Section titled “Use the Select menu”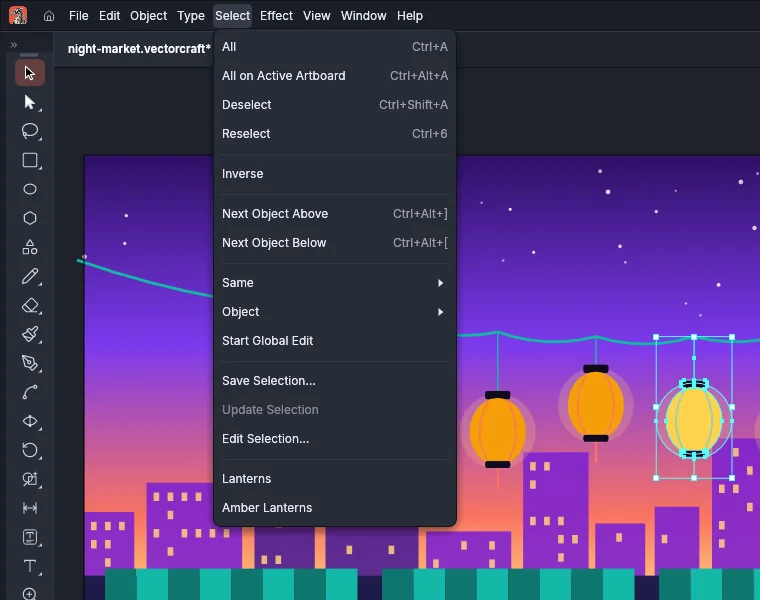
| Command | Windows and Linux | macOS | What it does |
|---|---|---|---|
| Select → All | Ctrl+A | Cmd+A | Selects every object on the visible, unlocked layers. While you are typing in a text object, it selects all of that text instead |
| Select → All on Active Artboard | Ctrl+Alt+A | Cmd+Option+A | Selects the objects that overlap the active artboard or whose center is on it |
| Select → Deselect | Ctrl+Shift+A | Cmd+Shift+A | Clears the selection |
| Select → Reselect | Ctrl+6 | Cmd+6 | Runs the last Select → Same command again |
| Select → Inverse | Selects every object that is not selected, and deselects the ones that are | ||
| Select → Next Object Above | Ctrl+Alt+] | Cmd+Option+] | Selects the next object above the selected one in its layer or group |
| Select → Next Object Below | Ctrl+Alt+[ | Cmd+Option+[ | Selects the next object below the selected one in its layer or group |
Next Object Above and Next Object Below pass over hidden and locked objects. They are also on the canvas’s right-click menu, under Select. To select objects that share a fill, stroke, opacity or font, use Select → Same, described in Select objects that share an attribute.
Select objects of one kind
Section titled “Select objects of one kind”The Select → Object submenu selects every object of one kind in the document. Hidden and locked objects are left out.
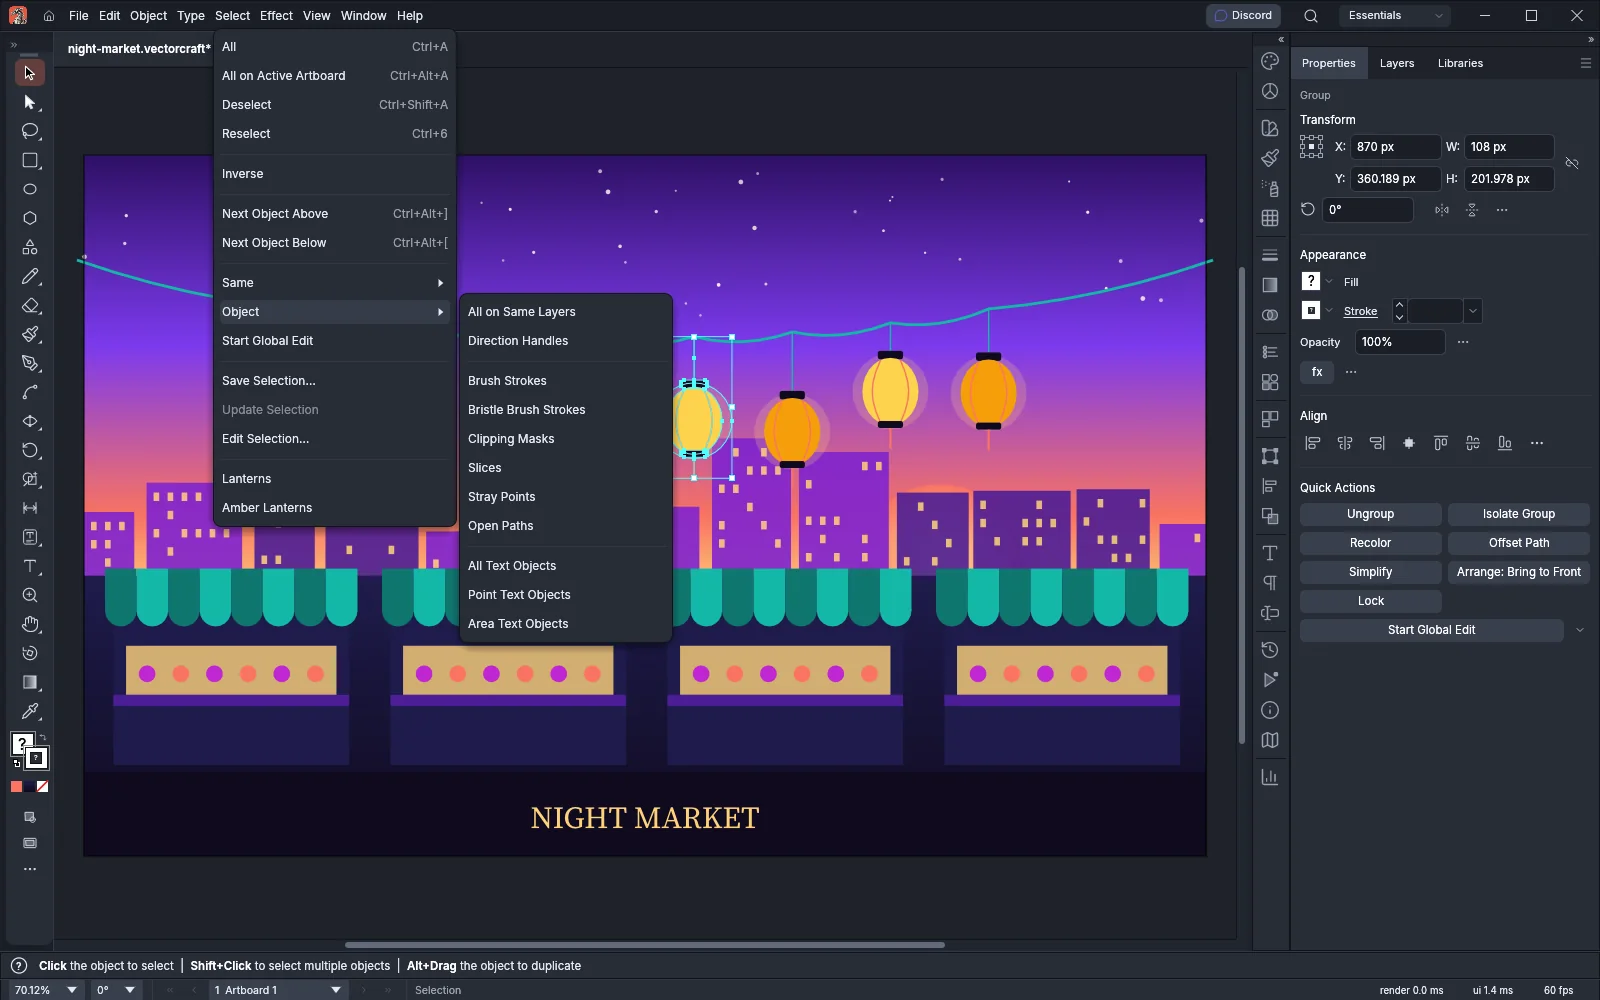
| Command | Selects |
|---|---|
| All on Same Layers | Every object on the layers that hold the selected objects |
| Direction Handles | Every anchor point of the selected paths, with their direction handles shown |
| Brush Strokes | Every object whose stroke uses a brush |
| Bristle Brush Strokes | Every object whose top stroke uses a bristle brush |
| Clipping Masks | Every clipping path |
| Slices | Every slice |
| Stray Points | Every path that has only one anchor point |
| Open Paths | Every path that is not closed |
| All Text Objects | Every type object |
| Point Text Objects | Every point type object |
| Area Text Objects | Every area type object |
All on Same Layers and Direction Handles need a selection to start from.
Edit every copy at once with Global Edit
Section titled “Edit every copy at once with Global Edit”Global Edit finds the objects that have the same shape as the selected object, wherever they are and at whatever size. Any change you then make to one of them is made to all of them.
- Select one path, compound path, symbol instance, or group of these.
- Choose Select → Start Global Edit. The matching objects are highlighted.
- Edit the selected object. Each match changes in proportion to its own size, so halving the height of a 100 pt object halves a 20 pt match to 10 pt.
- To finish, choose Select → Stop Global Edit or press Esc.
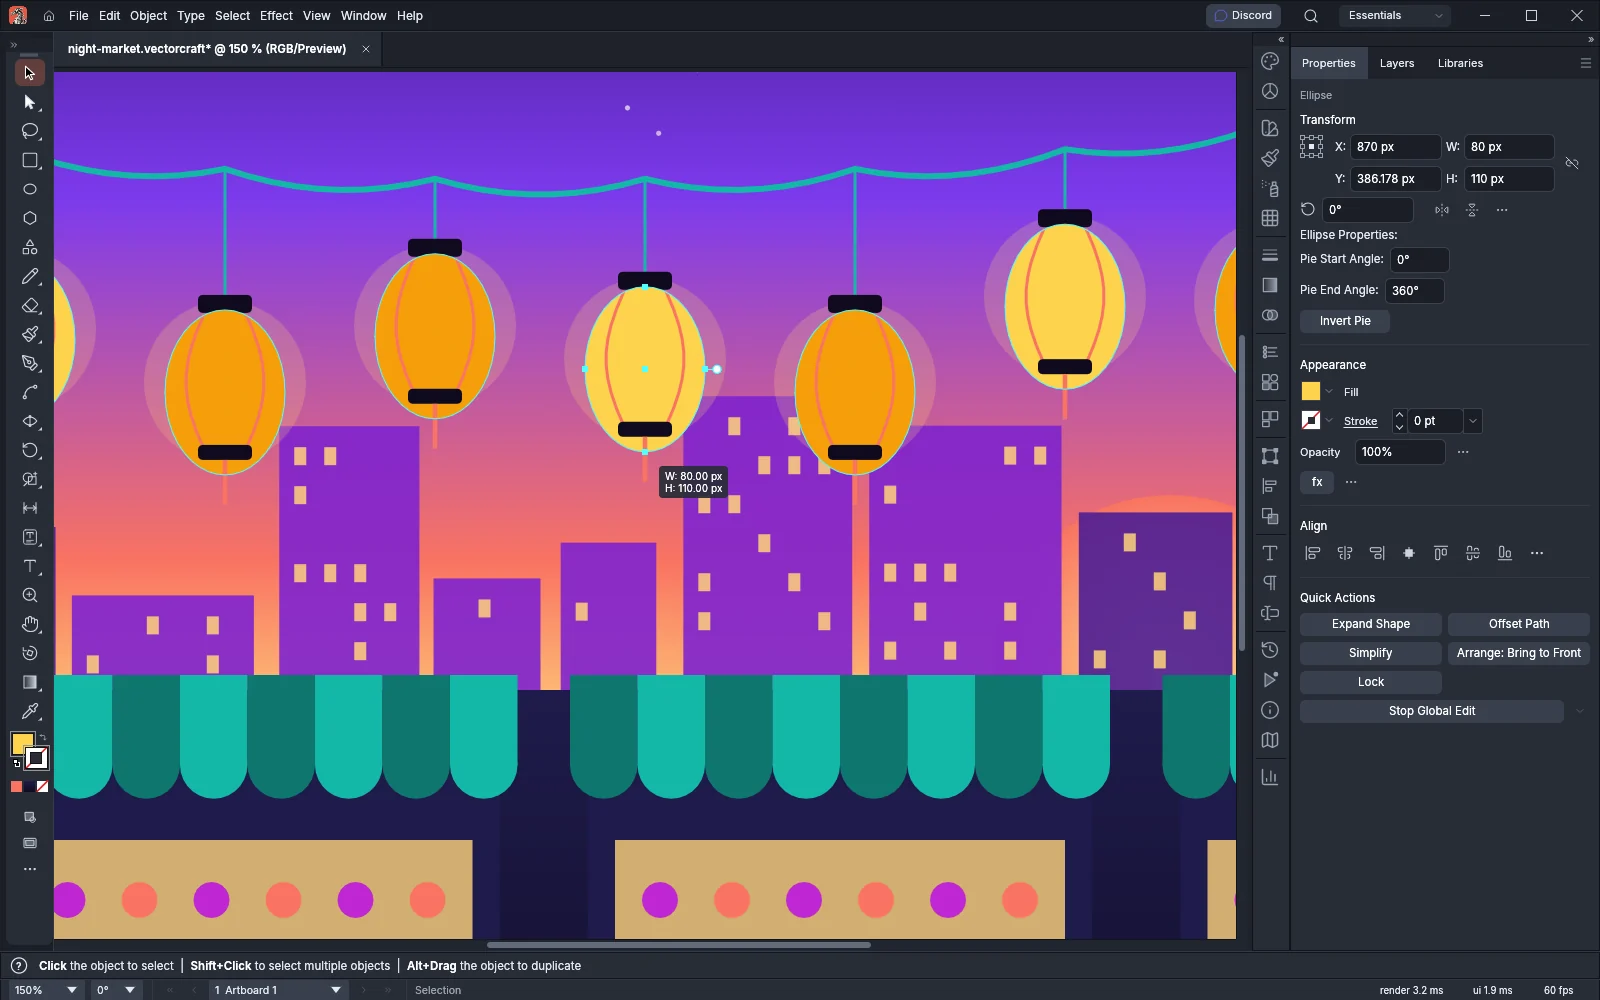
To leave one of the highlighted objects out, Shift-click it with the Selection tool. Hidden and locked matches are not changed. Global Edit includes at most 10,000 objects.
For a group, Global Edit finds the groups that hold the same kinds of objects in the same places. An edit to an object inside one group is made to the matching object in each of the others.
The Global Edit Options narrow the search. Open them with the arrow beside Start Global Edit in the Quick Actions section of the Properties panel, or on the Control bar.

| Option | Default | What it does |
|---|---|---|
| Appearance | Off | Matches only objects with the same fill and stroke |
| Size | Off | Matches only objects with the same width and height |
| All Artboards | On | Searches every artboard. Turn it off to type a Range, such as 1, 3-5 |
| Include Objects On Canvas | On | Also matches objects that lie on no artboard |
The Results line shows how many objects Start Global Edit would include with the current options.
Save and reuse a selection
Section titled “Save and reuse a selection”A saved selection stores a set of objects under a name, so you can select them again later. Saved selections are stored in the document.
- Select the objects.
- Choose Select → Save Selection….
- Type a name and click OK. If you leave the suggested name, it is Selection 1, Selection 2 and so on.

The saved selections are listed by name at the bottom of the Select menu. Choose one to select its objects again. Objects that were deleted, hidden or locked since are left out.
- To change what a saved selection holds, first choose it from the Select menu, change the selection, then choose Select → Update Selection.
- To rename or delete saved selections, choose Select → Edit Selection…, pick a selection in the list, then change its Name or click Delete. Click OK to apply all the changes as one undo step.
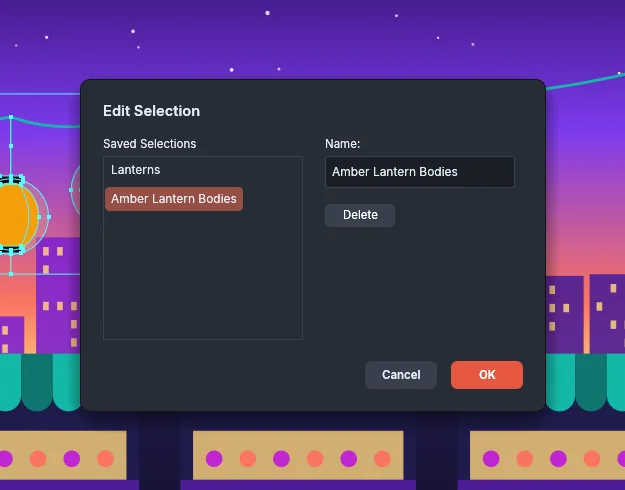
A document keeps up to 25 saved selections, with names up to 255 characters. Saving under a name that already exists replaces that saved selection. The Layers panel menu has the same commands under Save Selection.
Select by artboard
Section titled “Select by artboard”The Select by Artboards plug-in selects the objects on, inside or outside the artboards you choose.
- Choose Object → Plug-ins → Selection Tools → Select by Artboards…. The dialog lists every artboard with its number, name and size. The active artboard is chosen.
- Choose the artboards:
- Click a row to choose only that artboard.
- Ctrl-click (Cmd-click on macOS) a row to add or remove it.
- Shift-click a row to choose every row from the last one you clicked.
- Click Select All or None, or type in the search field to list only the artboards whose names contain the text.
- In Select, choose how the objects relate to the chosen artboards.
- Click OK.
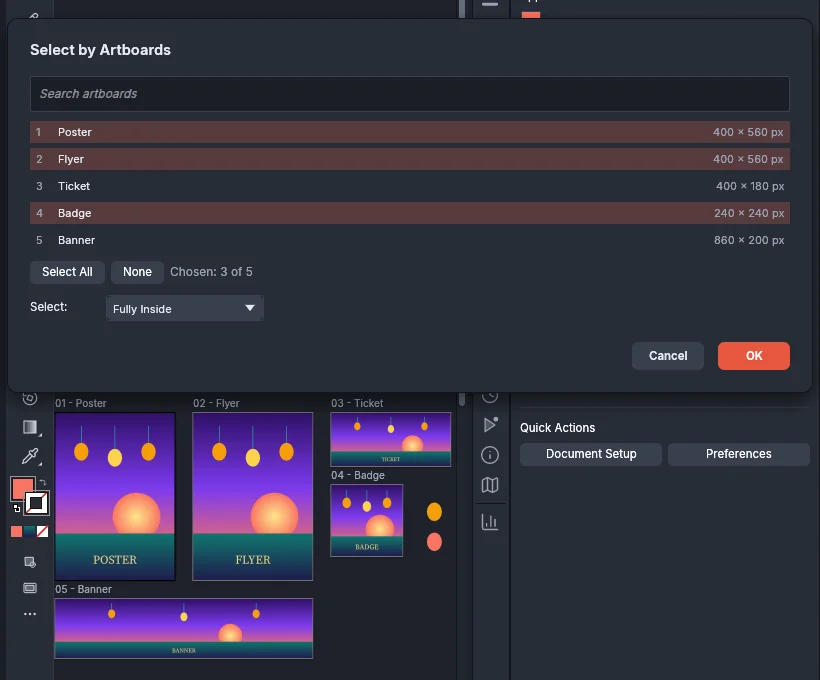
| Select | Selects the objects that |
|---|---|
| Overlapping | Overlap one of the chosen artboards, or whose center is on one |
| Fully Inside | Lie entirely within one of the chosen artboards, edges included |
| Fully Outside | Are on none of the chosen artboards |
Double-click a row to make that artboard active and fit it in the window. The dialog stays open. Hidden and locked objects, and objects on hidden, locked or template layers, are not selected. Chosen artboards that the search hides stay chosen, and the line beside the buttons shows how many are chosen.