
Arrange, group and align
This guide shows how to change which of several overlapping objects sits in front, group objects so that they move together, and lock or hide the objects you are not working on. It then shows how to select objects that share an attribute and line objects up with the Align panel.
Change the stacking order
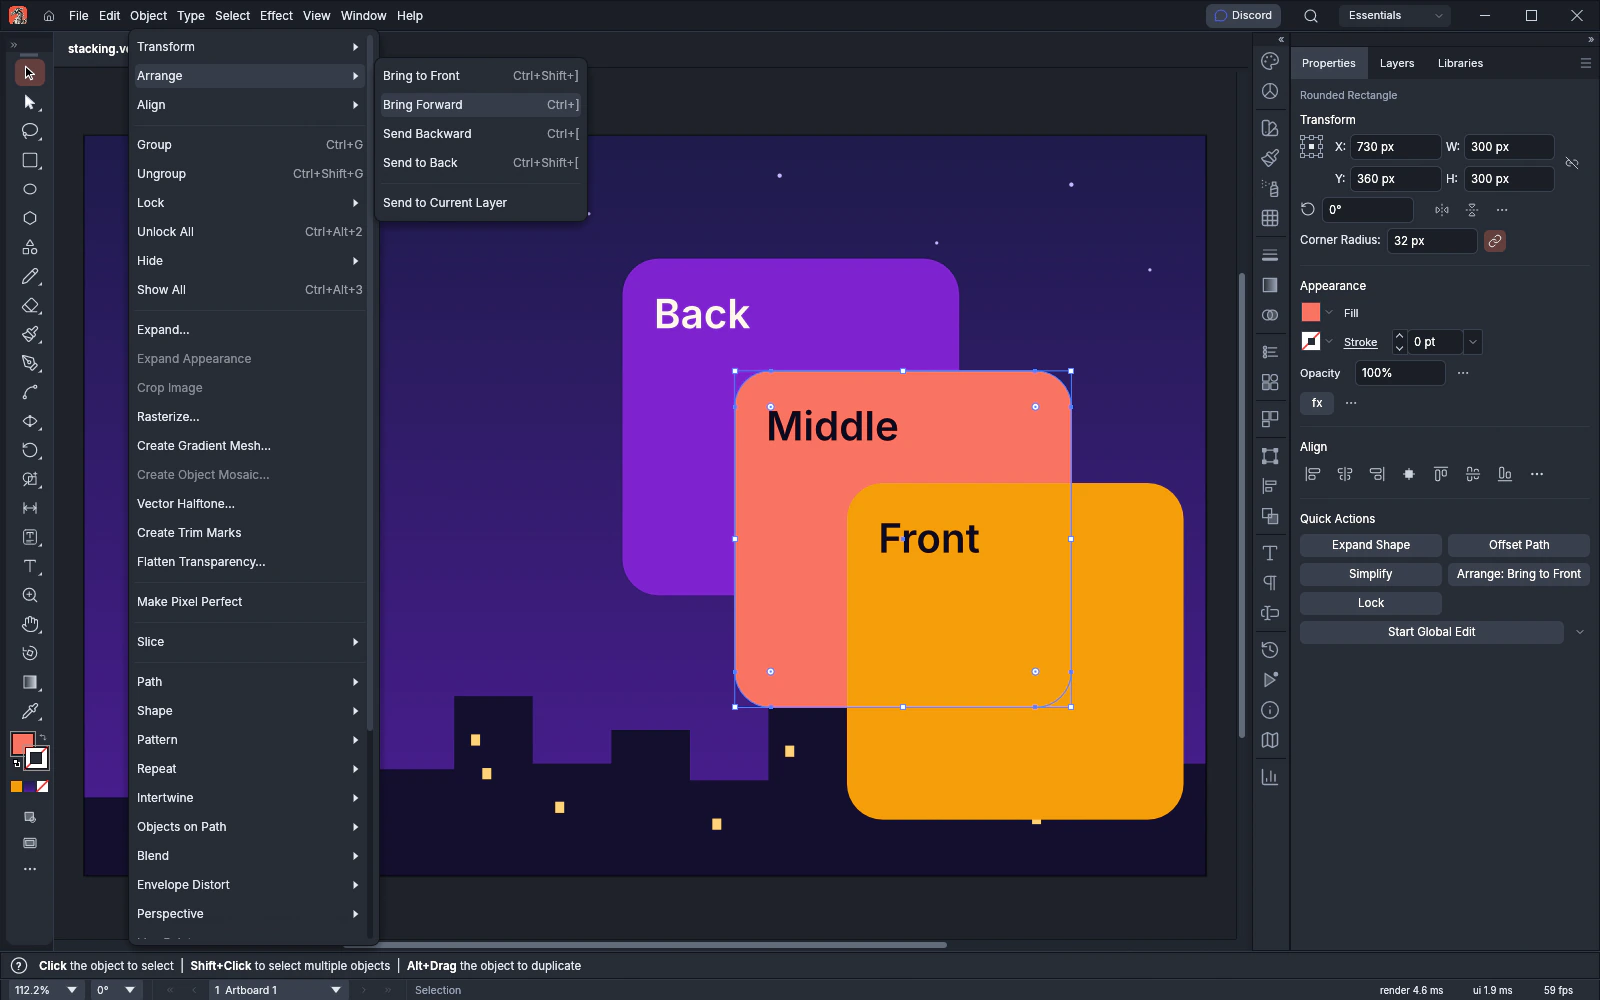
Section titled “Change the stacking order”Overlapping objects are drawn in stacking order. An object higher in the order covers the objects below it. In the following image, the square labeled Front is highest in the stacking order and covers the other two.
- Select one or more objects with the Selection tool (V).
- Choose Object → Arrange, or right-click the selection and choose Arrange.
- Choose one of the commands below.
| Command | What it does |
|---|---|
| Bring to Front | Moves the selection above every other object in its layer or group |
| Bring Forward | Moves the selection up one place |
| Send Backward | Moves the selection down one place |
| Send to Back | Moves the selection below every other object in its layer or group |
| Send to Current Layer | Moves the selection to the top of the current layer |
The first four commands move objects within the layer or group that holds them. To move objects into another layer, make that layer the current layer and choose Send to Current Layer.
Group and ungroup objects
Section titled “Group and ungroup objects”A group moves, scales and rotates as one object.
- Select two or more objects.
- Choose Object → Group (Ctrl+G, or Cmd+G on macOS).
To take a group apart, select it and choose Object → Ungroup (Ctrl+Shift+G, or Cmd+Shift+G on macOS).
To select an object inside a group without ungrouping it, use the Group Selection tool. The first click selects the object under the pointer. Each further click on it adds the next group that holds it. The tool shares a slot with the Direct Selection tool in the Tools panel and has no shortcut. For its other uses, see Select with the Group Selection tool.
Edit a group in isolation mode
Section titled “Edit a group in isolation mode”In isolation mode you edit the contents of one group, and you cannot select the rest of the artwork.
- With the Selection tool, double-click the group. You can also right-click a single selected group and choose Isolate Selected Group.
- Select, move and edit the objects inside the group.
- Press Esc, or right-click and choose Exit Isolation Mode.
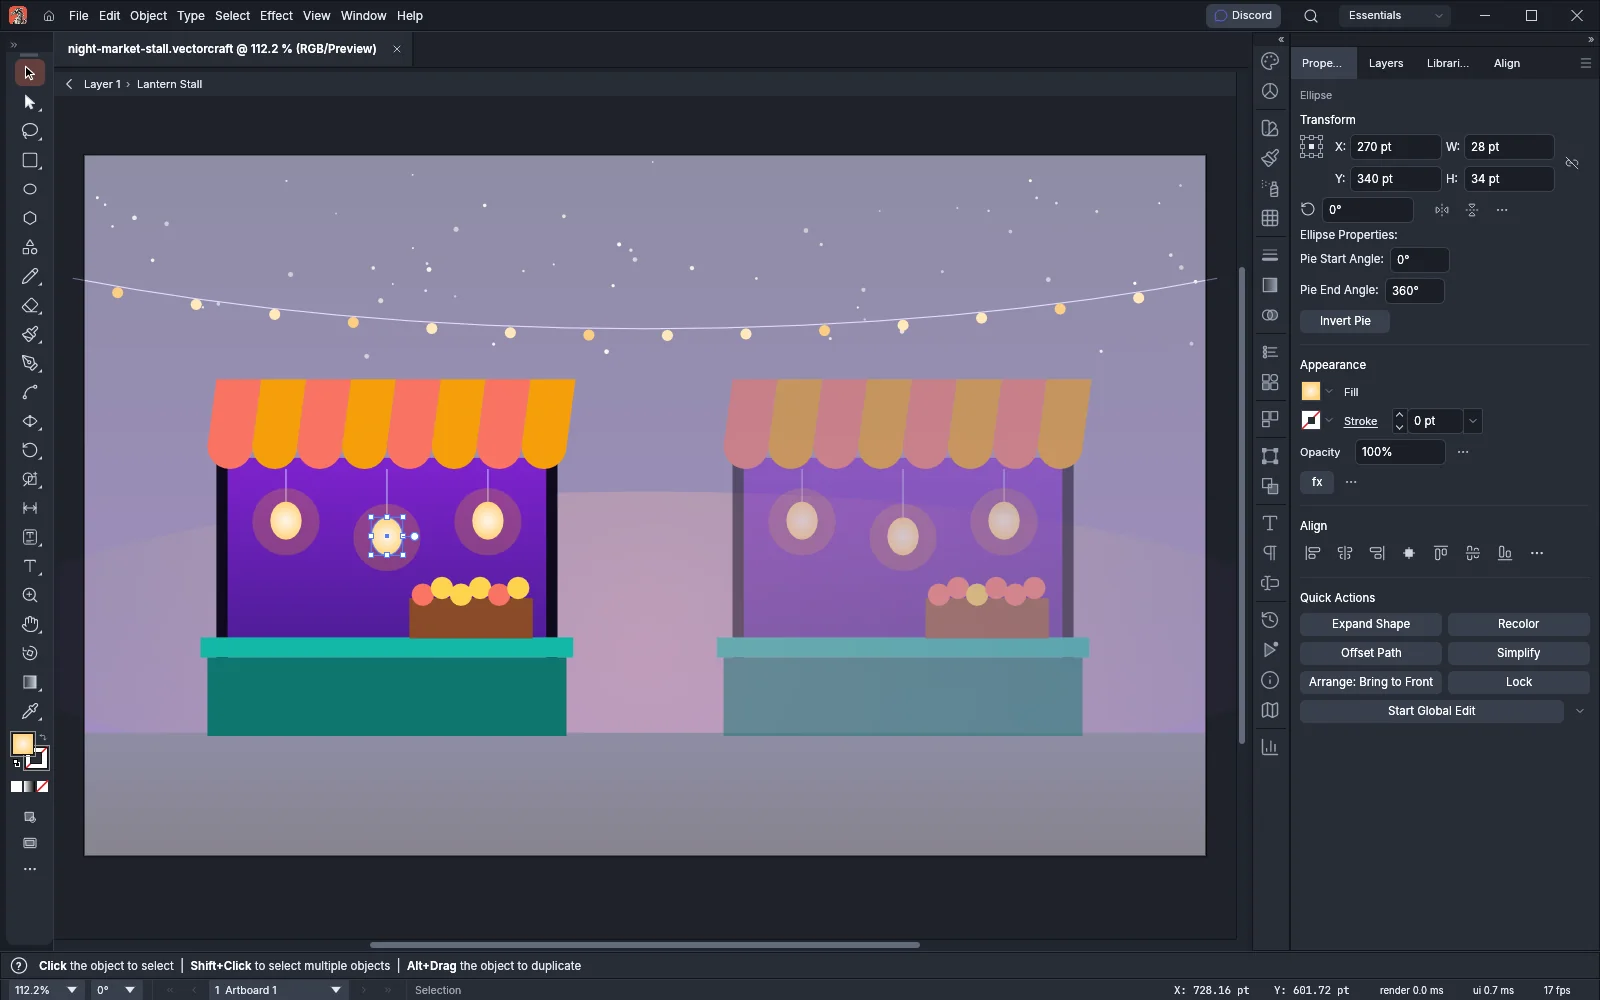
While a group is isolated, the artwork outside it is dimmed. A bar across the top of the canvas lists the layer and each group that holds the isolated group, then the isolated group’s own name, with › between them.
- To isolate a group that holds the current one, click that group’s name in the bar.
- To leave isolation mode, click the layer’s name in the bar.
- To go up one level, click the ‹ button at the left end of the bar. When the isolated group sits directly in a layer, the button leaves isolation mode.
When the Control bar is showing (Window → Control), its Exit Isolation Mode button also leaves isolation mode.
Lock and hide objects
Section titled “Lock and hide objects”A locked object stays visible but cannot be selected. A hidden object is not drawn.
- Select the objects.
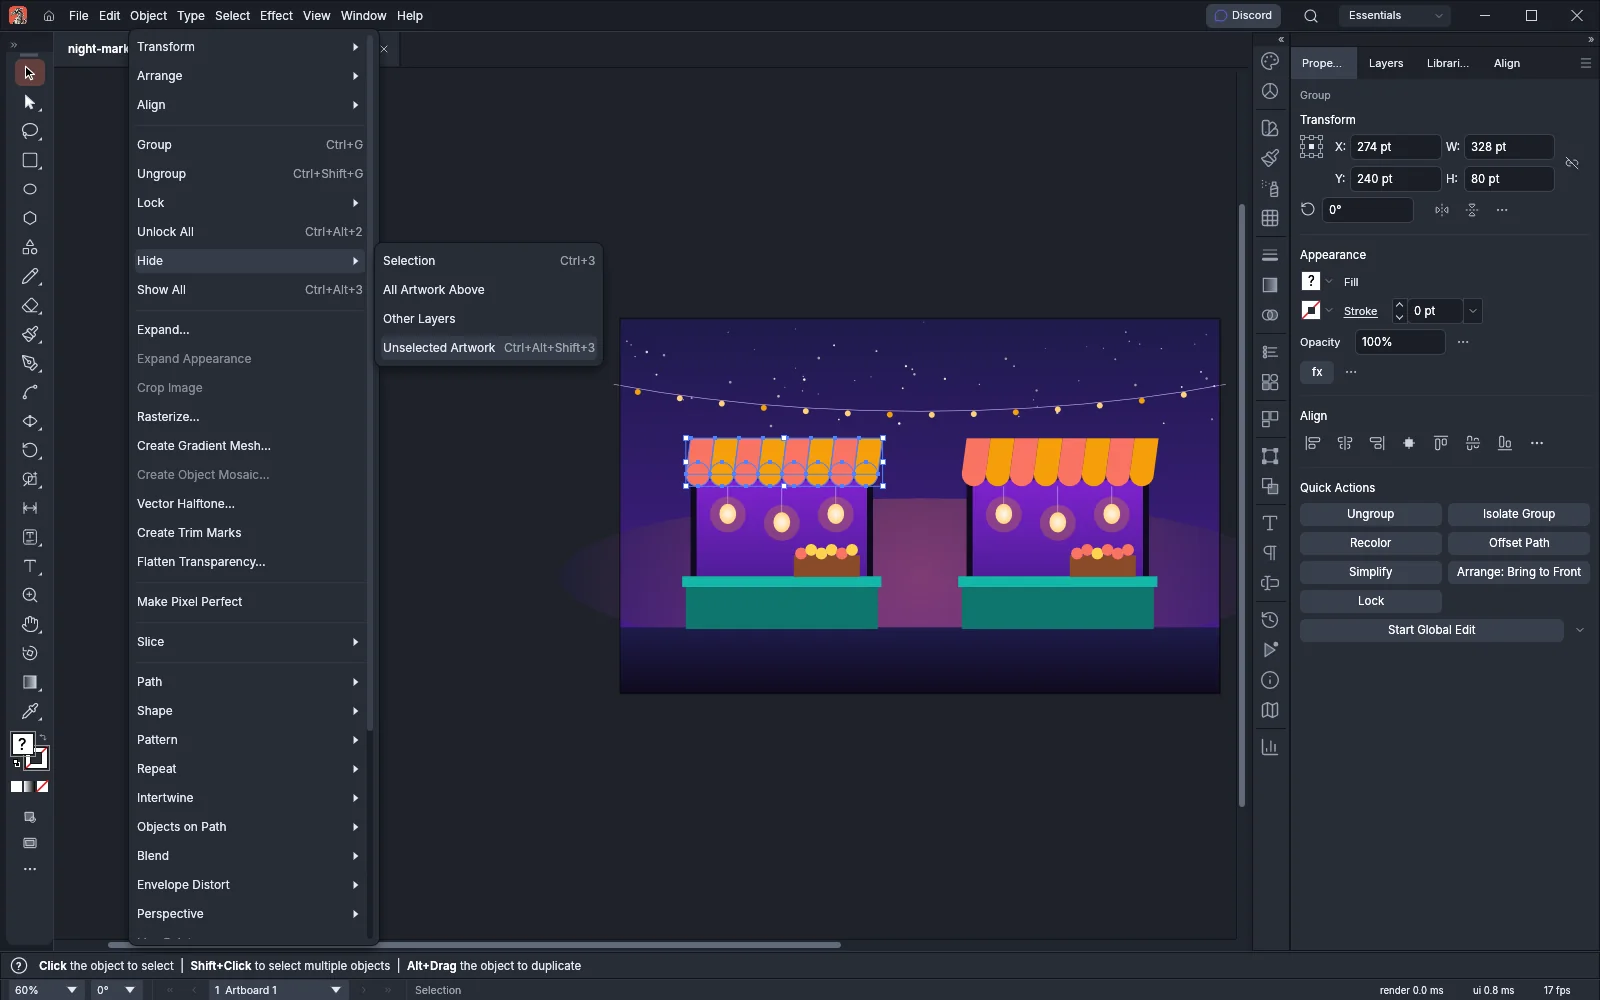
- Choose Object → Lock → Selection (Ctrl+2, or Cmd+2 on macOS) or Object → Hide → Selection (Ctrl+3, or Cmd+3 on macOS).
The Lock submenu also has All Artwork Above and Other Layers. The Hide submenu has those two and Unselected Artwork.
To bring everything back, choose Object → Unlock All (Ctrl+Alt+2, or Cmd+Option+2 on macOS) or Object → Show All (Ctrl+Alt+3, or Cmd+Option+3 on macOS). Afterward, the objects that were locked or hidden are selected.
| Command | What it does | Windows and Linux | macOS |
|---|---|---|---|
| Object → Lock → Selection | Locks the selected objects | Ctrl+2 | Cmd+2 |
| Object → Lock → All Artwork Above | Locks the objects in the same layer that sit above the selection and overlap it | None | None |
| Object → Lock → Other Layers | Locks every layer that holds no selected object | None | None |
| Object → Unlock All | Unlocks every locked object and selects it | Ctrl+Alt+2 | Cmd+Option+2 |
| Object → Hide → Selection | Hides the selected objects | Ctrl+3 | Cmd+3 |
| Object → Hide → All Artwork Above | Hides the objects in the same layer that sit above the selection and overlap it | None | None |
| Object → Hide → Other Layers | Hides every layer that holds no selected object | None | None |
| Object → Hide → Unselected Artwork | Hides every object that is not selected, in one step | Ctrl+Alt+Shift+3 | Cmd+Option+Shift+3 |
| Object → Show All | Shows every hidden object and selects it | Ctrl+Alt+3 | Cmd+Option+3 |
All Artwork Above deselects any selected object that it locks or hides. When a group holds a selected object, Hide → Unselected Artwork hides the other objects in that group one by one.
Ctrl+Alt+Shift+2 (Cmd+Option+Shift+2 on macOS) locks every object that is not selected, in one step. The Lock submenu has no item for it. Hidden objects and objects on locked layers stay unlocked.
To unlock or show only the objects inside the groups that hold the selection, hold Shift+Alt while you click Object → Unlock All or Object → Show All in the menu bar inside the window. This works on Windows and Linux. On macOS the menus are in the system menu bar, so it works only when VectorCraft is started with --in-window-menus; then hold Shift+Option.
In isolation mode, Unlock All, Show All and the Lock and Hide commands act only inside the isolated group. Lock → Other Layers and Hide → Other Layers do not change anything in isolation mode.
To lock or hide a whole layer, or one object, without selecting it, click the lock or eye column of its row in the Layers panel. See Work in the Layers panel.
Select objects that share an attribute
Section titled “Select objects that share an attribute”Select → Same selects every object that matches the selected object in one attribute.
- Select an object with the attribute you want to match, for example a fill color.
- Choose Select → Same and pick the attribute.
| Group | Choices in Select → Same |
|---|---|
| Objects | Appearance, Appearance Attribute, Blending Mode, Fill & Stroke, Fill Color, Opacity, Stroke Color, Stroke Weight, Graphic Style, Shape, Symbol Instance, Link Block Series |
| Type | Font Family, Font Family & Style, Font Family, Style & Size, Font Size, Text Fill Color, Text Stroke Color, Text Fill & Stroke Color |
The Select menu also steps through and changes the selection:
| Command | Windows and Linux | macOS |
|---|---|---|
| Select → All | Ctrl+A | Cmd+A |
| Select → Deselect | Ctrl+Shift+A | Cmd+Shift+A |
| Select → Reselect | Ctrl+6 | Cmd+6 |
| Select → Next Object Above | Ctrl+Alt+] | Cmd+Option+] |
| Select → Next Object Below | Ctrl+Alt+[ | Cmd+Option+[ |
Align and distribute objects
Section titled “Align and distribute objects”The Align panel lines objects up along an edge or center line and spaces them evenly. Open it with Window → Align (Shift+F7).
In the following image, Vertical Align Center lines the circles up, and Horizontal Distribute Center spaces their centers evenly.
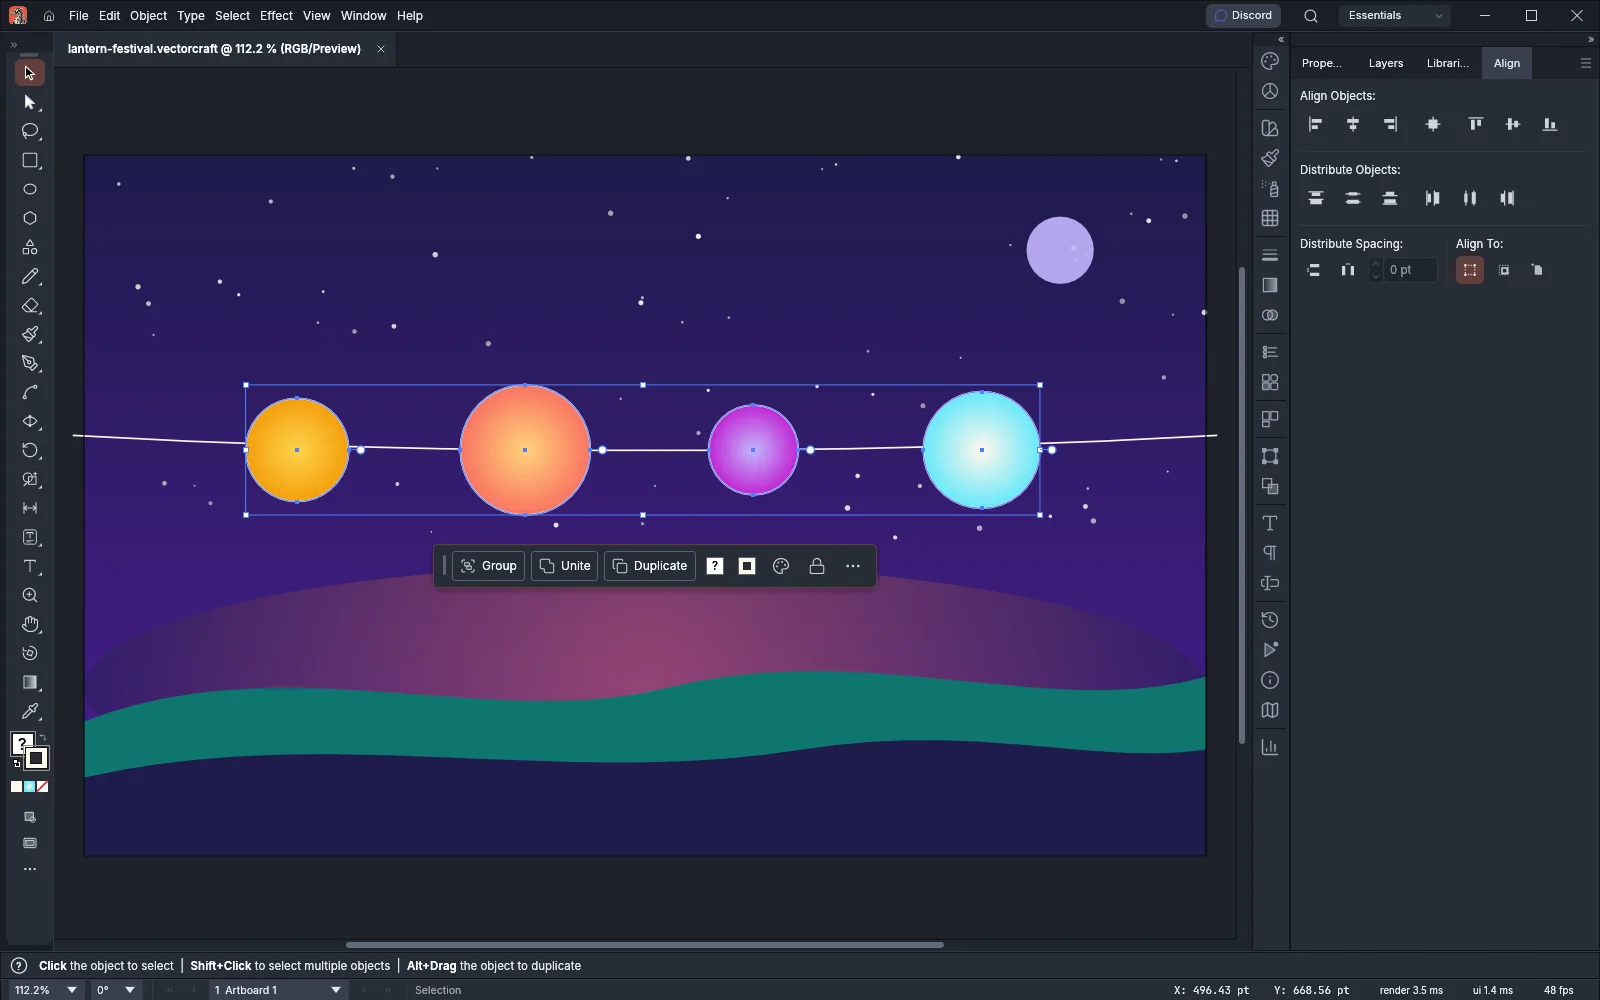
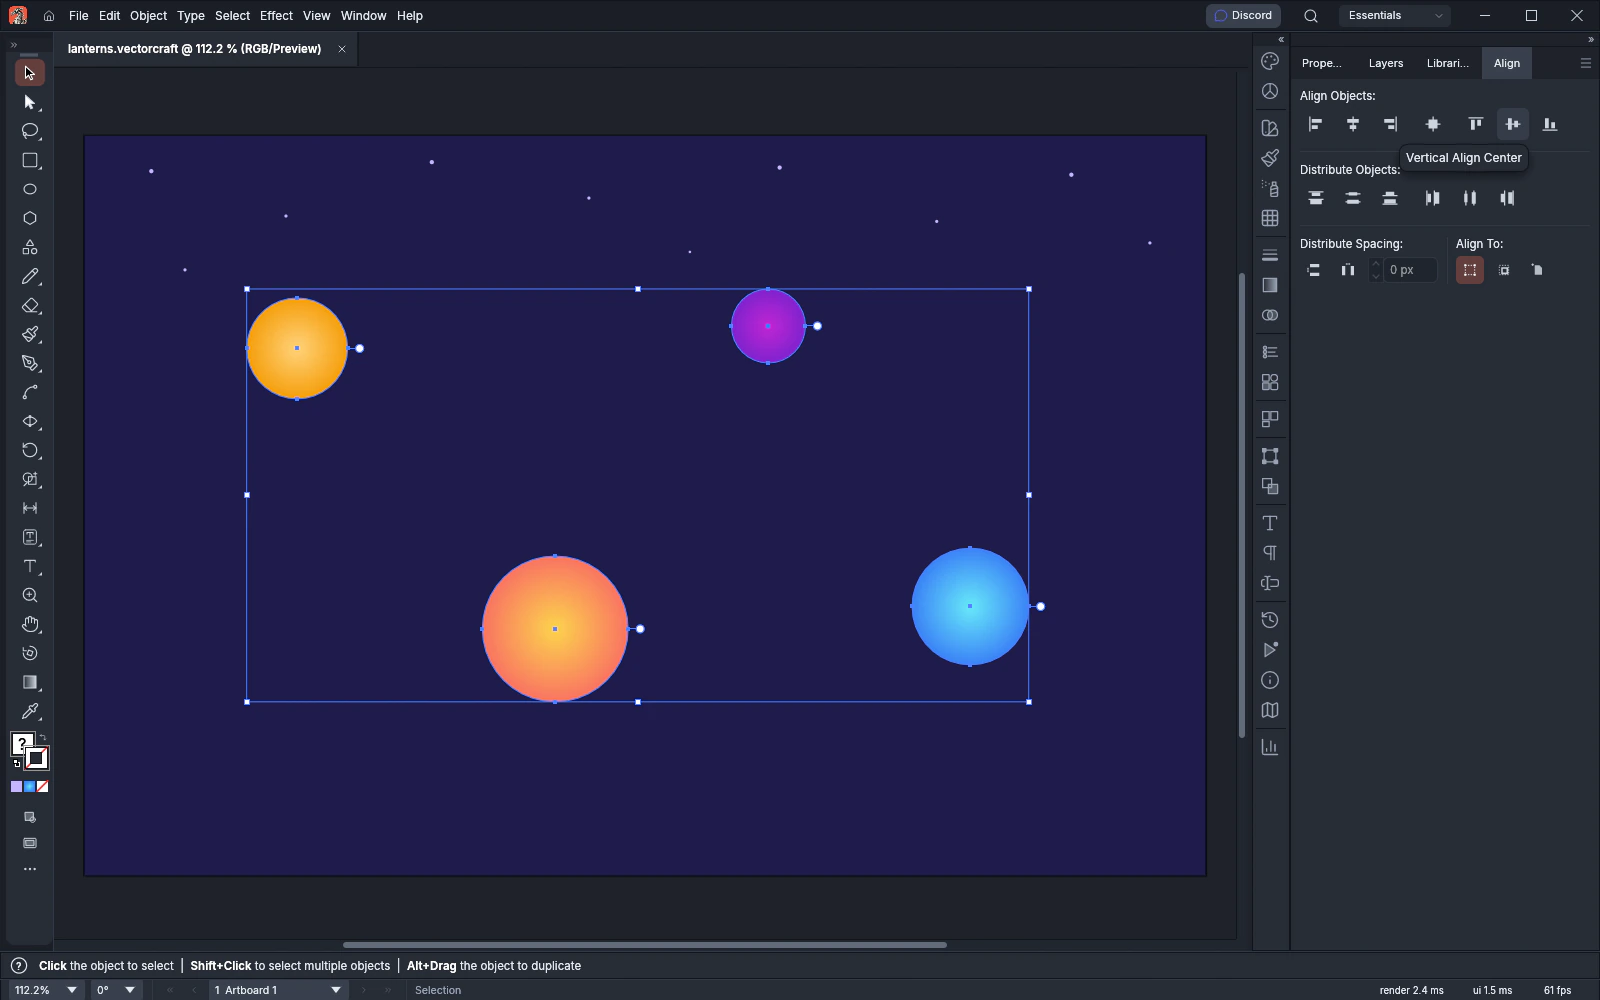
The panel has four sections:
| Section | Buttons |
|---|---|
| Align Objects | Horizontal Align Left, Horizontal Align Center, Horizontal Align Right, Horizontal & Vertical Align Center, Vertical Align Top, Vertical Align Center, Vertical Align Bottom |
| Distribute Objects | Vertical Distribute Top, Vertical Distribute Center, Vertical Distribute Bottom, Horizontal Distribute Left, Horizontal Distribute Center, Horizontal Distribute Right |
| Distribute Spacing | Vertical Distribute Space, Horizontal Distribute Space, and a spacing field |
| Align To | Align to Selection, Align to Key Object, Align to Artboard |
The same Align Objects buttons are in two other places:
- The Align section of the Properties panel has the seven Align Objects buttons. Its More Align options button opens the Align panel.
- When the Control bar is showing (Window → Control), it has the seven Align Objects buttons. With two or more objects selected, it also has the six Distribute Objects buttons. The Control bar shows these buttons only while it has room for them.
These buttons use the Align To choice set in the Align panel, and they line objects up with the key object while there is one.
Line objects up
Section titled “Line objects up”- Select the objects with the Selection tool.
- In the Align To section, choose what the objects line up with.
- Click a button in the Align Objects section.
| Align To choice | Objects line up with |
|---|---|
| Align to Selection | The bounds of all the selected objects |
| Align to Key Object | The key object, which stays where it is |
| Align to Artboard | The edges or center of the artboard |
When only one object is selected, the Align Objects buttons align it to the artboard. The same alignments are in Object → Align.
Space objects evenly
Section titled “Space objects evenly”- Select the objects. With Align to Selection, select three or more. With Align to Artboard, two are enough.
- Click a button in the Distribute Objects section.
Distribute Objects spaces the objects’ left edges, centers or right edges (or top edges, centers or bottom edges) evenly. With Align to Selection, the first and last objects stay where they are. With Align to Artboard, the first object moves to the artboard’s left (or top) edge and the last object moves to its right (or bottom) edge.
Horizontal Distribute Space and Vertical Distribute Space make the gaps between the selected objects equal. With Align to Selection, the outer edges of the first and last objects stay where they are. With Align to Artboard, those outer edges move to the edges of the artboard.
Use a key object
Section titled “Use a key object”A key object stays in place, and the other selected objects are aligned to it or spaced from it.
- Select two or more objects with the Selection tool.
- Click one of the selected objects again. It becomes the key object and is drawn with a thicker outline.
- Click an Align Objects button. The other objects line up with the key object.
When no object is the key object, clicking Align to Key Object makes the topmost selected object the key object.
To set an exact gap between objects:
- Select the objects and click the one that should stay in place, so that it becomes the key object.
- Type the gap in the Distribute Spacing field. The field accepts a value only while there is a key object.
- Click Horizontal Distribute Space or Vertical Distribute Space. The key object stays where it is, and the other objects are placed that distance apart, starting from it.
Measure with strokes
Section titled “Measure with strokes”By default the Align panel measures each object’s path, without its stroke. Choose Use Preview Bounds in the panel menu to measure the drawn object, stroke included. The same setting is in Edit → Preferences… → General on Windows and Linux, and in VectorCraft → Settings → General… on macOS. The panel menu also has Hide Options, which hides the Distribute Spacing and Align To sections, and Show Options, which shows them again. For every item in the panel menu, see Set align options.
Set align options
Section titled “Set align options”The Align panel menu holds the panel’s settings. To open it, click the menu button at the right end of the panel’s tab row.
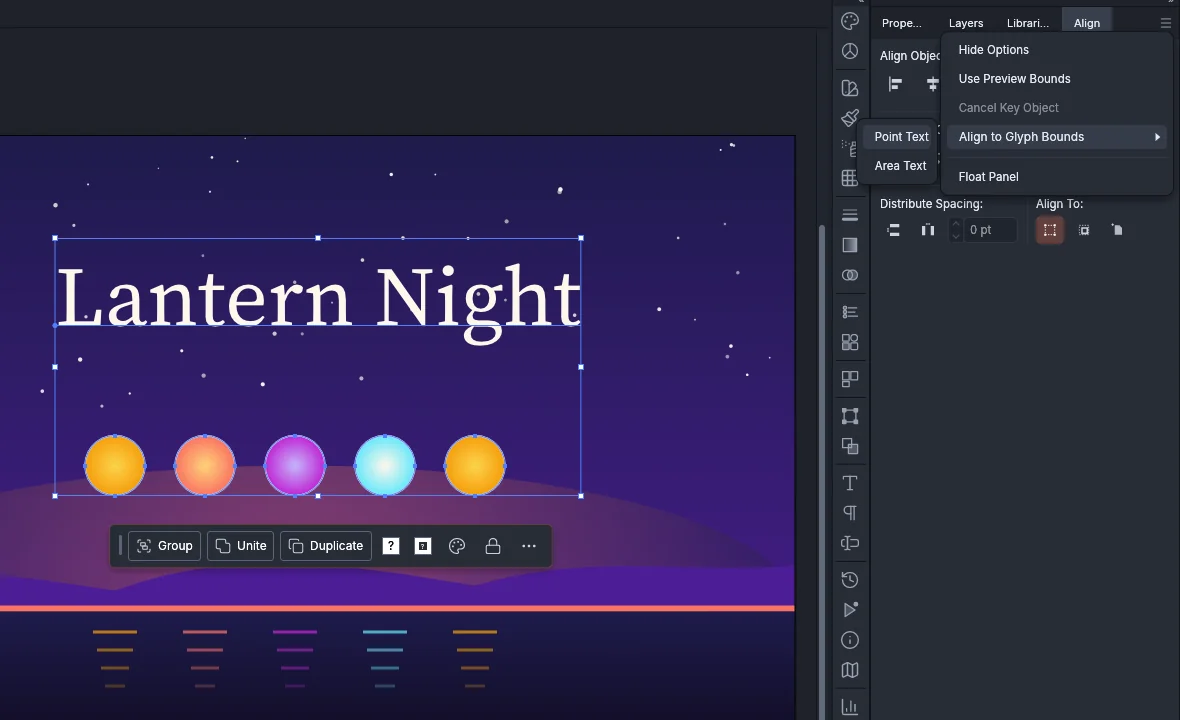
| Menu item | What it does | Default |
|---|---|---|
| Hide Options | Hides the Distribute Spacing and Align To sections. The item then reads Show Options, which shows them again | Sections shown |
| Use Preview Bounds | Measures each object as it is drawn, stroke included, instead of by its path. A check mark shows while it is on. The same setting is in the General preferences | Off |
| Cancel Key Object | Cancels the key object, as described in Use a key object. It is available only while there is a key object | |
| Align to Glyph Bounds → Point Text | Measures point type by the outlines of its characters instead of its em box. A check mark shows while it is on | Off |
| Align to Glyph Bounds → Area Text | Measures area type by the outlines of its characters instead of its frame. A check mark shows while it is on | Off |
| Float Panel | Moves the Align panel out of the dock into a window of its own. While the panel floats, the item reads Dock Panel and puts the panel back in the dock |
For the difference between point type and area type, see Kinds of type.
To line a headline up with artwork by the letters you see, for example the tops of the capitals with the tops of a row of shapes:
- In the Align panel menu, choose Align to Glyph Bounds → Point Text, or Area Text for type in a frame.
- Select the type and the artwork.
- Click a button in the Align Objects or Distribute Objects section.
The Align to Glyph Bounds settings apply to both Align and Distribute. Each one stays on until you choose it again.
Align from the Object menu
Section titled “Align from the Object menu”Object → Align has the seven commands of the Align panel’s Align Objects section.
- Select the objects.
- Choose Object → Align.
- Choose one of the commands below.
| Command | What it does |
|---|---|
| Horizontal Align Left | Lines up the left edges |
| Horizontal Align Center | Lines up the centers on a vertical line |
| Horizontal Align Right | Lines up the right edges |
| Horizontal & Vertical Align Center | Puts the centers on one point |
| Vertical Align Top | Lines up the top edges |
| Vertical Align Center | Lines up the centers on a horizontal line |
| Vertical Align Bottom | Lines up the bottom edges |
The commands use the Align To choice set in the Align panel. While there is a key object, the other objects line up with it. When only one object is selected, it lines up with the artboard. When anchor points are selected with the Direct Selection tool, the points line up instead of the objects.
The Object menu has no Distribute commands. Use the Distribute Objects and Distribute Spacing buttons in the Align panel.
Shortcuts
Section titled “Shortcuts”| Command | Windows and Linux | macOS |
|---|---|---|
| Bring to Front | Ctrl+Shift+] | Cmd+Shift+] |
| Bring Forward | Ctrl+] | Cmd+] |
| Send Backward | Ctrl+[ | Cmd+[ |
| Send to Back | Ctrl+Shift+[ | Cmd+Shift+[ |
| Group | Ctrl+G | Cmd+G |
| Ungroup | Ctrl+Shift+G | Cmd+Shift+G |
| Lock → Selection | Ctrl+2 | Cmd+2 |
| Lock unselected artwork | Ctrl+Alt+Shift+2 | Cmd+Option+Shift+2 |
| Unlock All | Ctrl+Alt+2 | Cmd+Option+2 |
| Hide → Selection | Ctrl+3 | Cmd+3 |
| Hide → Unselected Artwork | Ctrl+Alt+Shift+3 | Cmd+Option+Shift+3 |
| Show All | Ctrl+Alt+3 | Cmd+Option+3 |
| Window → Align | Shift+F7 | Shift+F7 |
Lock → All Artwork Above, Lock → Other Layers, Hide → All Artwork Above, Hide → Other Layers, Send to Current Layer and the Align panel’s buttons have no default shortcut.
To change these shortcuts, choose Edit → Keyboard Shortcuts…. The Align panel’s buttons are listed there under Align. For every default shortcut, see Keyboard shortcuts.