
Use the built-in plug-ins
VectorCraft comes with twelve plug-ins that add tools, panels and commands. This page lists what each one does and where to find it, and covers the plug-ins that no other guide describes.
Find the plug-ins
Section titled “Find the plug-ins”Choose Object → Plug-ins. Each built-in plug-in has its own submenu:
| Submenu | What it adds | Covered in |
|---|---|---|
| 3D Box | The 3D Box tool | Draw boxes with the 3D Box tool |
| Arrange Tools | Commands that lay out, swap, resize, group and sort objects | Arrange objects |
| Artwork Cleanup | The Artwork Cleanup panel, which finds and fixes problems, and commands that tidy paths and type | Check and clean up a document |
| Color Effects | The Color Effects panel, color effects and swatch commands | Adjust colors |
| Compound Shapes | Commands that make, release and expand compound shapes | Make compound shapes |
| Contour | The Contour tool | Cut, join and refine paths |
| Document Tools | Commands that save, export and trace several files at once, and turn layers into symbols | Work on many documents at once |
| Enclosing Lasso | The Enclosing Lasso tool | Select artwork |
| Path Precision Tools | Tools, panels and commands for anchor points, corners, crossings and dashes | Cut, join and refine paths |
| Selection Tools | Select by Artboards… and commands that select images by link status | Where the other plug-ins are covered |
| Smart Pen | The Smart Pen tool and its panel | Cut, join and refine paths |
| Type Tools | Text Tweaker… and Release Type on a Path… | Work with styles and long text |
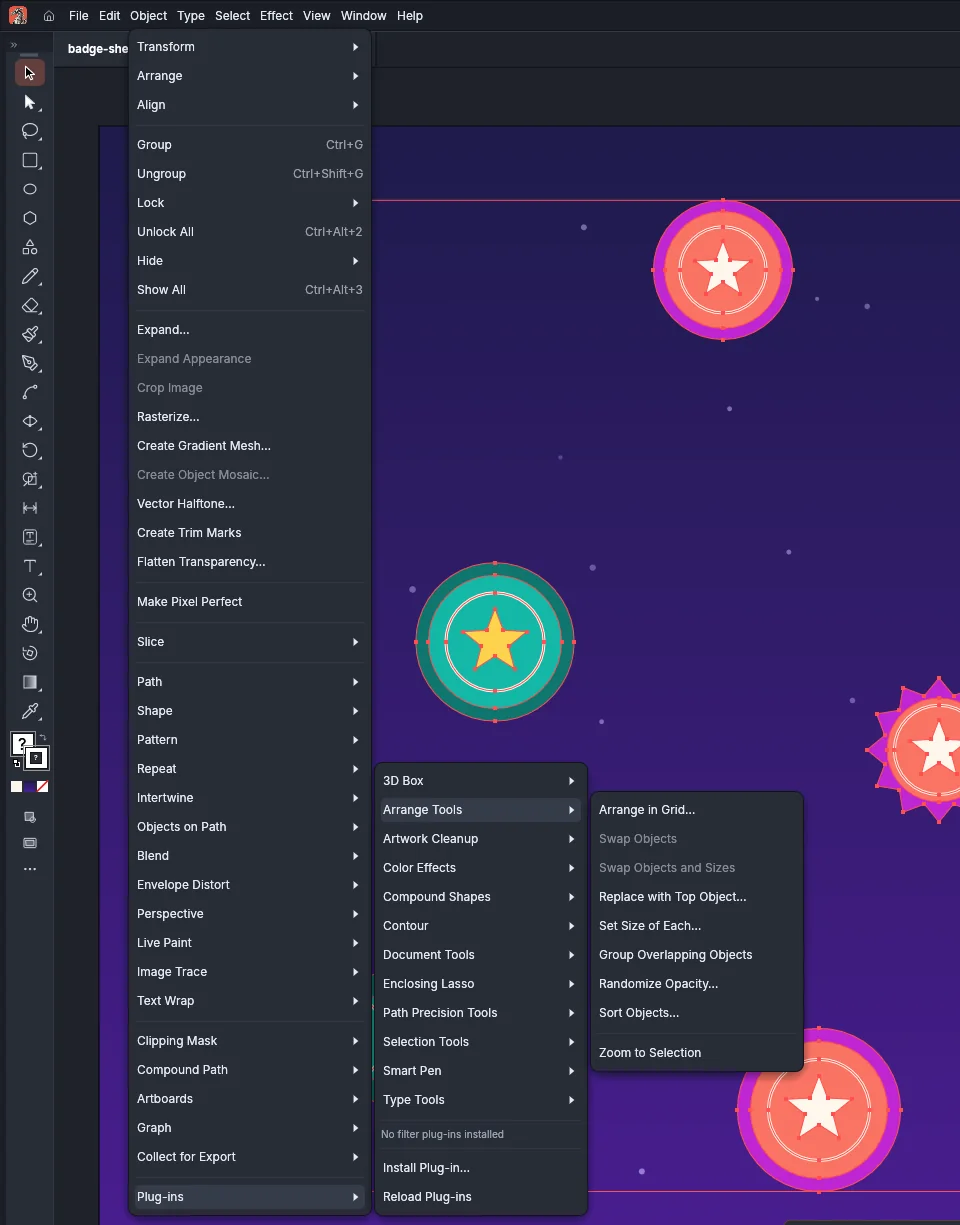
The plug-in tools (3D Box, Contour, Enclosing Lasso, Smart Pen and the Path Precision Tools) are not in the Tools panel at first, and none of them has a keyboard shortcut. Choose a tool from its submenu, or add it to the Tools panel from the All Tools drawer, as Add the path plug-in tools to the Tools panel describes. To give a tool or command a shortcut, use Edit → Keyboard Shortcuts….
Below the built-in submenus, Object → Plug-ins lists the filter plug-ins you have installed, or No filter plug-ins installed when there are none, then two commands:
- Install Plug-in… installs a plug-in from a
.wasmfile. - Reload Plug-ins installs every
.wasmfile in the Additional Plug-ins Folder again.
To install all the plug-ins that a folder holds, set Additional Plug-ins Folder under Plug-ins & Scratch Disks in Edit → Preferences… (VectorCraft → Settings → Plug-ins & Scratch Disks… on macOS). When you install a plug-in that adds a live effect, VectorCraft adds Effect → Plug-ins and lists the effect there. To run commands from scripts and other programs instead, see Automate VectorCraft.
Arrange objects
Section titled “Arrange objects”Select the objects, then choose a command from Object → Plug-ins → Arrange Tools. Each command that changes the artwork is one undo step. The commands that end in … open a dialog that previews the result on the canvas while you change its values.
| Command | What it does |
|---|---|
| Arrange in Grid… | Lays the objects out in rows and columns, in one row, or in one column |
| Swap Objects | Swaps the places of two selected objects. Select exactly two |
| Swap Objects and Sizes | Swaps the places, widths and heights of two selected objects |
| Replace with Top Object… | Puts a copy of the topmost selected object in place of each of the other selected objects. Each copy is centered on the object it replaces and takes that object’s place in the stacking order |
| Set Size of Each… | Gives every selected object the same width, height or both |
| Group Overlapping Objects | Groups the objects whose bounds overlap or touch. When A overlaps B and B overlaps C, all three go in one group. Only objects in the same layer or group are grouped together |
| Randomize Opacity… | Gives each object its own opacity, picked at random between a minimum and a maximum |
| Sort Objects… | Sorts the objects by one attribute and gives them another in that order |
| Zoom to Selection | Zooms and scrolls the view so the selection fills the window |
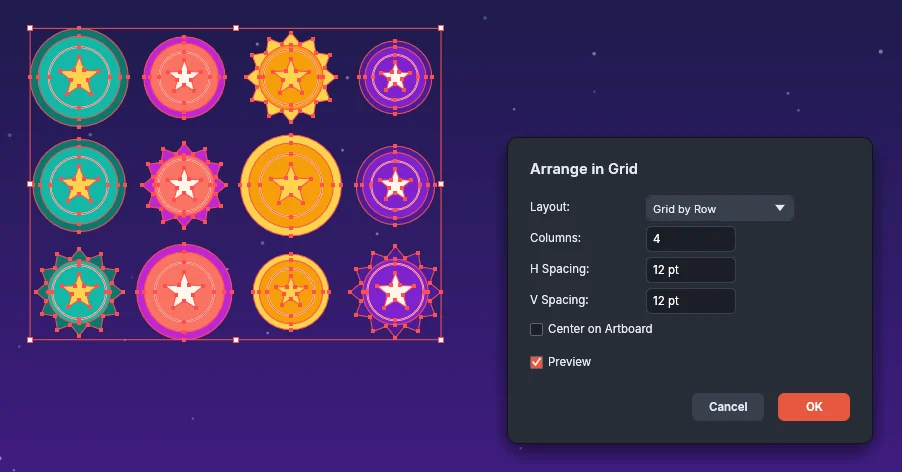
Arrange in Grid… has these options:
| Option | What it does |
|---|---|
| Layout | Sets the layout to Grid by Row, Arrange by Row or Arrange by Column |
| Columns | Sets the number of columns, from 1 to 10,000. It is available only for Grid by Row. By default it is the square root of the number of objects, rounded up |
| H Spacing and V Spacing | Set the gaps between columns and between rows, from −1,000,000 pt to 1,000,000 pt. A negative gap makes the objects overlap. Both are 10 pt by default |
| Center on Artboard | Centers the grid on the artboard. When it is off, the grid starts at the top-left corner of the selection |
The objects go into the grid in their stacking order, from the back, left to right and top to bottom. Each column is as wide as its widest object, each row is as tall as its tallest object, and each object is centered in its cell.
In Replace with Top Object…, Set Size of Each… and Sort Objects…, Scale Strokes & Effects starts with the value of Scale Strokes & Effects under General in Edit → Preferences… (VectorCraft → Settings → General… on macOS), which is off by default.
Replace with Top Object… has these options:
| Option | What it does |
|---|---|
| Size | Sets the size of each copy: Actual Size (the default), Bounds, which scales the copy to the replaced object’s width and height, or Bounds (Fit Proportionally), which scales it in proportion to fit inside them |
| Keep Original | Keeps the replaced objects under their copies. It is off by default |
| Scale Strokes & Effects | Scales the stroke widths and effects of the copies with them |
Set Size of Each… has these options:
| Option | What it does |
|---|---|
| Width and Height | Select one or both and type the size, from 0.001 pt to 1,000,000 pt. By default both are selected and show the size of the first selected object. OK is available only while at least one is selected |
| Constrain Width and Height Proportions | Scales the other side in proportion. It is available only when exactly one of Width and Height is selected, and it is off by default |
| Reference Point | Sets the point of each object that stays in place. It is the center by default |
| Scale Strokes & Effects | Scales the stroke widths and effects with the objects |
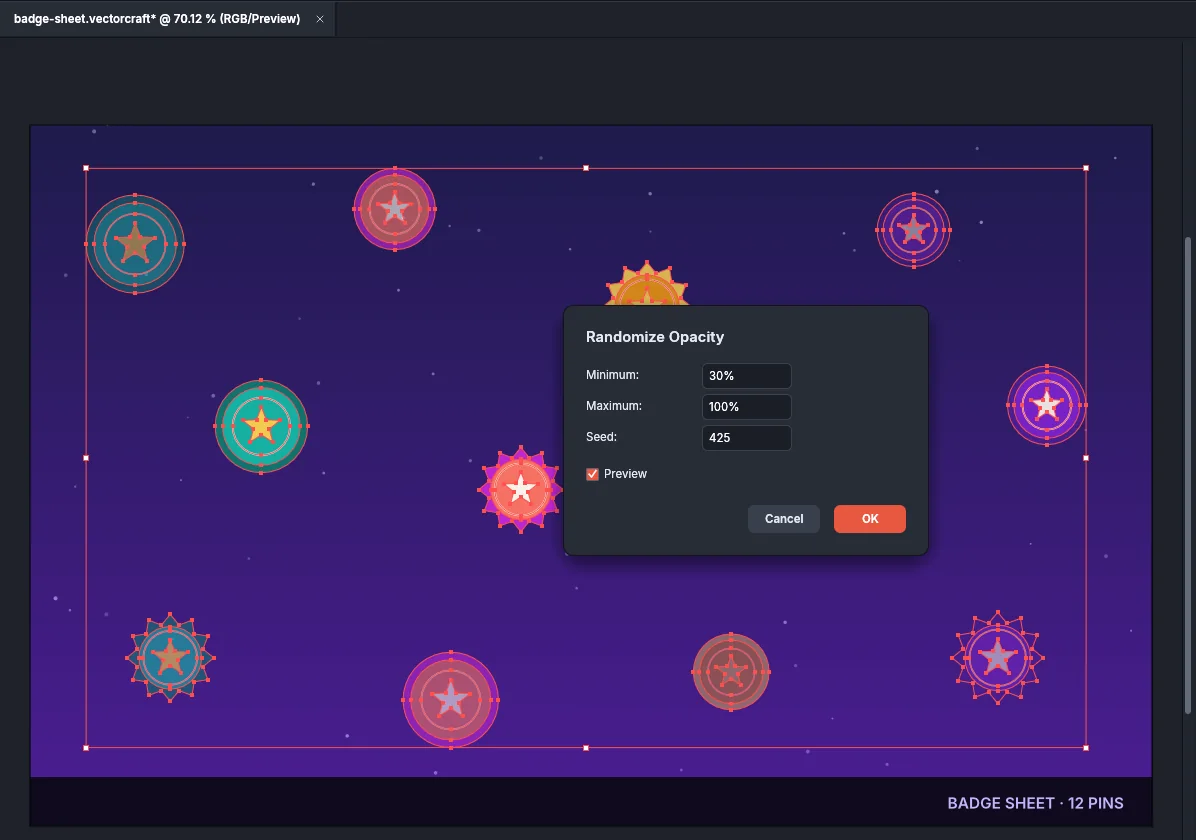
Randomize Opacity… has these options:
| Option | What it does |
|---|---|
| Minimum and Maximum | Set the range the opacities are picked from, from 0% to 100%. By default the range is 30% to 100%. OK is unavailable while Minimum is above Maximum |
| Seed | Sets the starting number of the random picks, from 0 to 999,999. The same seed gives the same result. The dialog shows a new seed after each change to the document, so running the command again gives a different result |
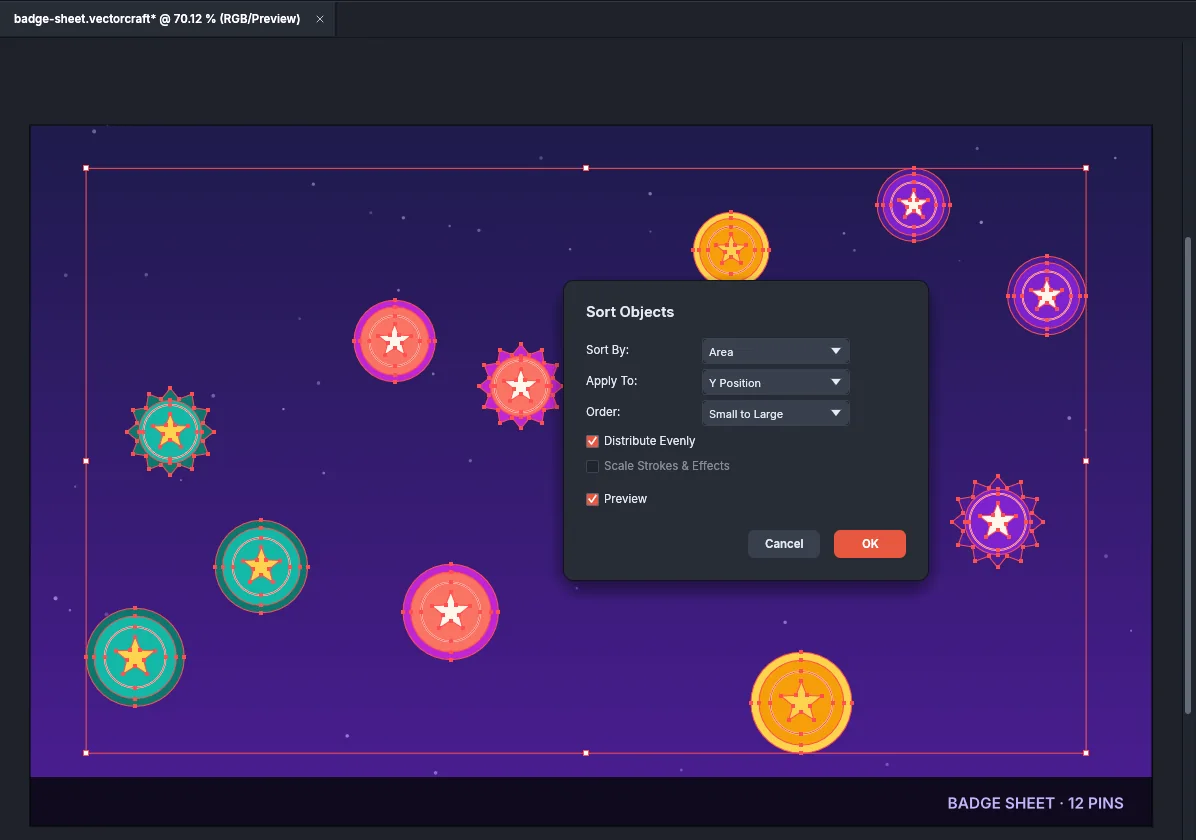
Sort Objects… sorts the objects by one attribute and gives them the values of another in that order. The first object in the order gets the smallest value. It has these options:
| Option | What it does |
|---|---|
| Sort By | Sets the attribute that orders the objects: Width, Height, Area, X Position (the left edge), Y Position (the top edge), Opacity or Stacking Order. The default is Area |
| Apply To | Sets the attribute the objects get in that order, from the same list. The default is Stacking Order, so the smallest object goes to the back |
| Order | Sets the order to Small to Large (the default), Large to Small or Random |
| Distribute Evenly | Spaces the values evenly from the smallest to the largest, instead of trading the values the objects have. It is available when Apply To is not Stacking Order, and it is off by default |
| Scale Strokes & Effects | Scales the stroke widths and effects with the objects. It is available only when Apply To is Width, Height or Area |
The dialog opens with Apply To set to Stacking Order, so Distribute Evenly and Scale Strokes & Effects are both dimmed at first.
Check and clean up a document
Section titled “Check and clean up a document”Object → Plug-ins → Artwork Cleanup → Document Health Check opens the Artwork Cleanup panel.
- Select the objects to check, or select nothing to check the whole document.
- In the Artwork Cleanup panel, click Check Selection or Check Document. The panel lists each kind of problem it found with a count, or shows No issues found. The check leaves out locked and hidden objects, so unlock and show any objects you want it to check.
- Click a row to pick it. Ctrl-click (Cmd-click on macOS) or Shift-click a row to add it to the picked rows, or to remove it.
- Click Show to select the objects of the one picked row, Fix Selected to fix the picked rows, or Fix All to fix every row. Each fix is one undo step. The panel then checks again and shows Issues fixed with the number of problems it fixed.
When you change the document after a check, the panel shows Changed since the last check. Click Check Selection or Check Document again to update the list.
Object → Plug-ins → Artwork Cleanup → Fix All Issues fixes every kind of problem without opening the panel. It fixes the selection, or the whole document when nothing is selected. It checks and fixes again, up to three rounds in all, while a round still finds problems, and the whole run is one undo step.
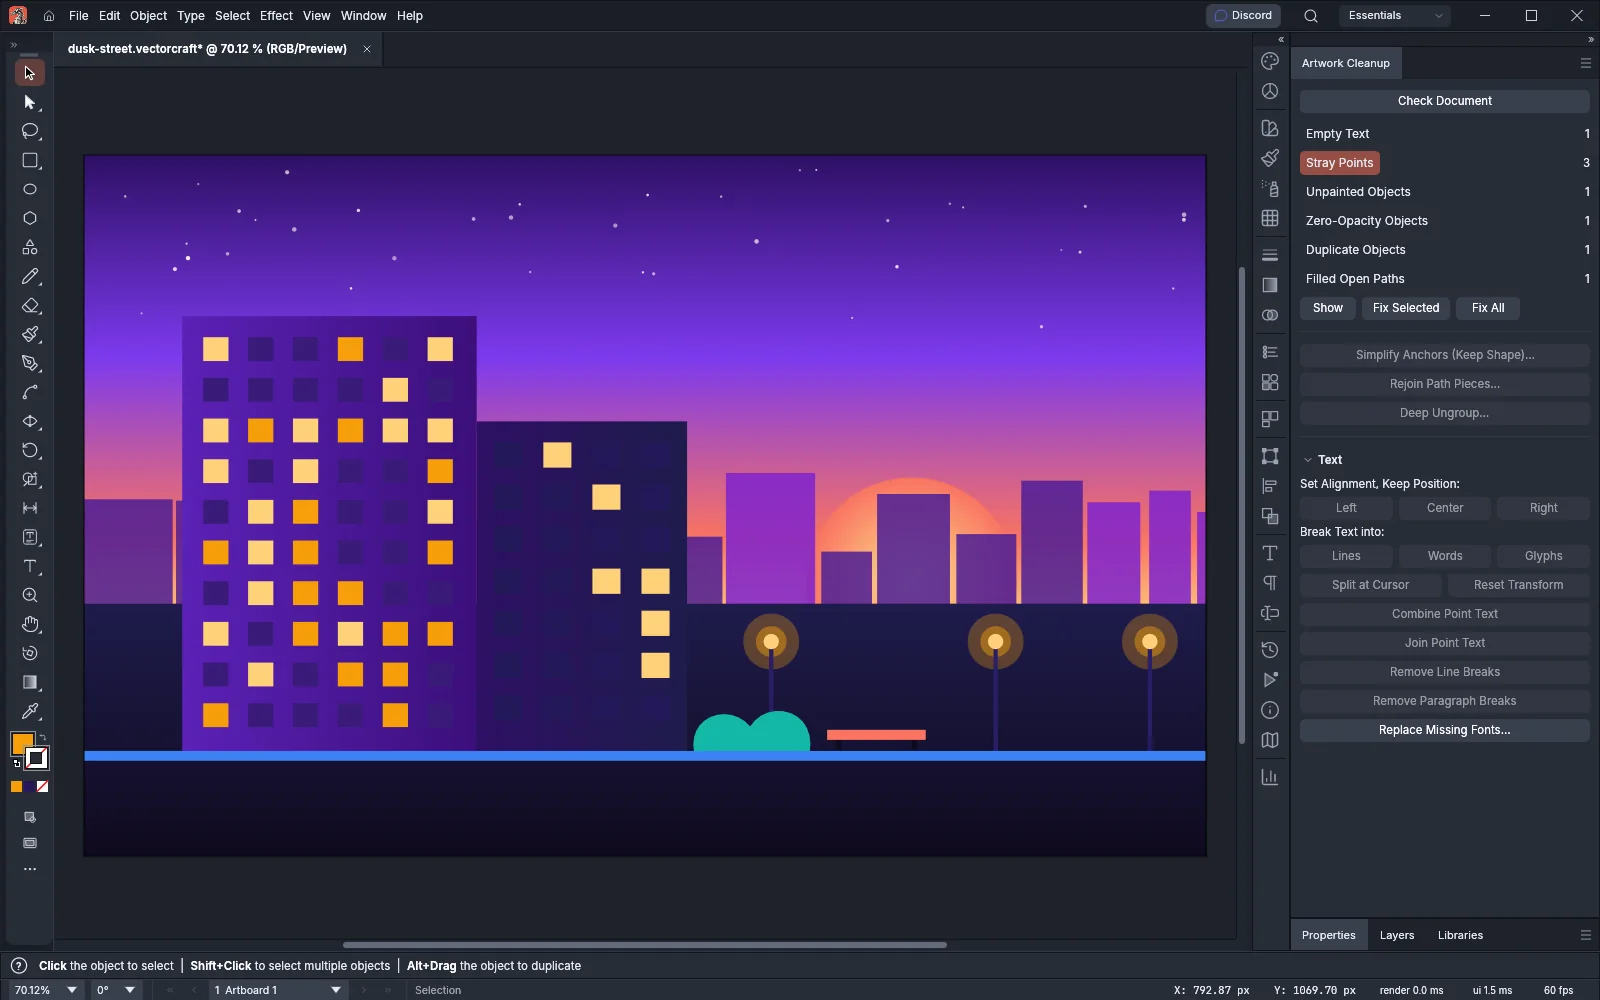
The check looks for these problems:
| Problem | What the fix does |
|---|---|
| Empty Text, Stray Points (paths with one anchor point), Unpainted Objects, Zero-Opacity Objects, Duplicate Objects, Off-Artboard Art | Deletes the objects |
| Duplicate Anchors, Nearly Coincident Anchors, Collinear Anchors | Merges, snaps together or removes the anchor points |
| Tiny Handles | Retracts the handles |
| Nearly Closed Paths, Filled Open Paths | Closes the paths |
| Needless Clipping Groups, Needless Compound Paths, Needless Groups | Replaces each one with its contents |
| Empty Artboards | Deletes the artboards. The check looks for these only when it checks the whole document |
The panel and the submenu also run these commands on the selection:
| Command | What it does |
|---|---|
| Simplify Anchors (Keep Shape)… | Removes the anchor points each path can do without and keeps its outline. Tolerance runs from 1 to 100 and is 20 by default. Select Protect Corners to keep the anchor points where the path turns by more than 30° |
| Rejoin Path Pieces… | Joins open paths whose ends lie within the Gap of each other. The gap is 0.1 pt by default and can be up to 6 pt |
| Deep Ungroup… | Ungroups every level of nested groups. Clipping groups stay as they are unless you select Include Clip Groups |
| Combine Point Text | Merges pieces of one-line point type whose baselines line up, keeping each letter in place |
| Join Point Text | Joins pieces of point type into one object, one paragraph per line |
| Break Text into Lines, Paragraphs, Words or Glyphs | Breaks each point or area type object into point type objects, each where its letters were |
| Split Text at Cursor | While you edit type with a Type tool, splits it into separate objects at the cursor or around the selected letters |
| Set Alignment, Keep Position | Sets point type to Left, Center or Right alignment without moving its longest line |
| Reset Text Transform | Removes the rotation, shear and reflection from point type. Reset Text Transform and Scale also removes horizontal scaling |
| Remove Line Breaks, Remove Paragraph Breaks | Removes forced line breaks or paragraph returns from the selected type |
| Replace Missing Fonts… | Sets every character in a font that is not installed to the font you choose. The font is Source Sans 3 by default |
In the panel, Shift-click Lines to break type into paragraphs, and Alt-click Reset Transform (Option-click on macOS) to remove horizontal scaling too. Click the Text heading to hide or show the text buttons.
Adjust colors
Section titled “Adjust colors”Object → Plug-ins → Color Effects holds these commands:
| Command | What it does |
|---|---|
| Color Effects Panel | Opens the Color Effects panel |
| Exposure…, Desaturate, Duotone…, Invert Colors, Vector Halftone… | Adds the effect to the selection as a live effect. Effect → Color Effects lists the same effects |
| Print Ink Fixes… | Prepares the inks of a CMYK document for print, as one undo step. See Print Ink Fixes |
| Find Nearest Swatch… | Lists the swatches closest to the selection’s colors and gives the colors those swatches. See Find Nearest Swatch |
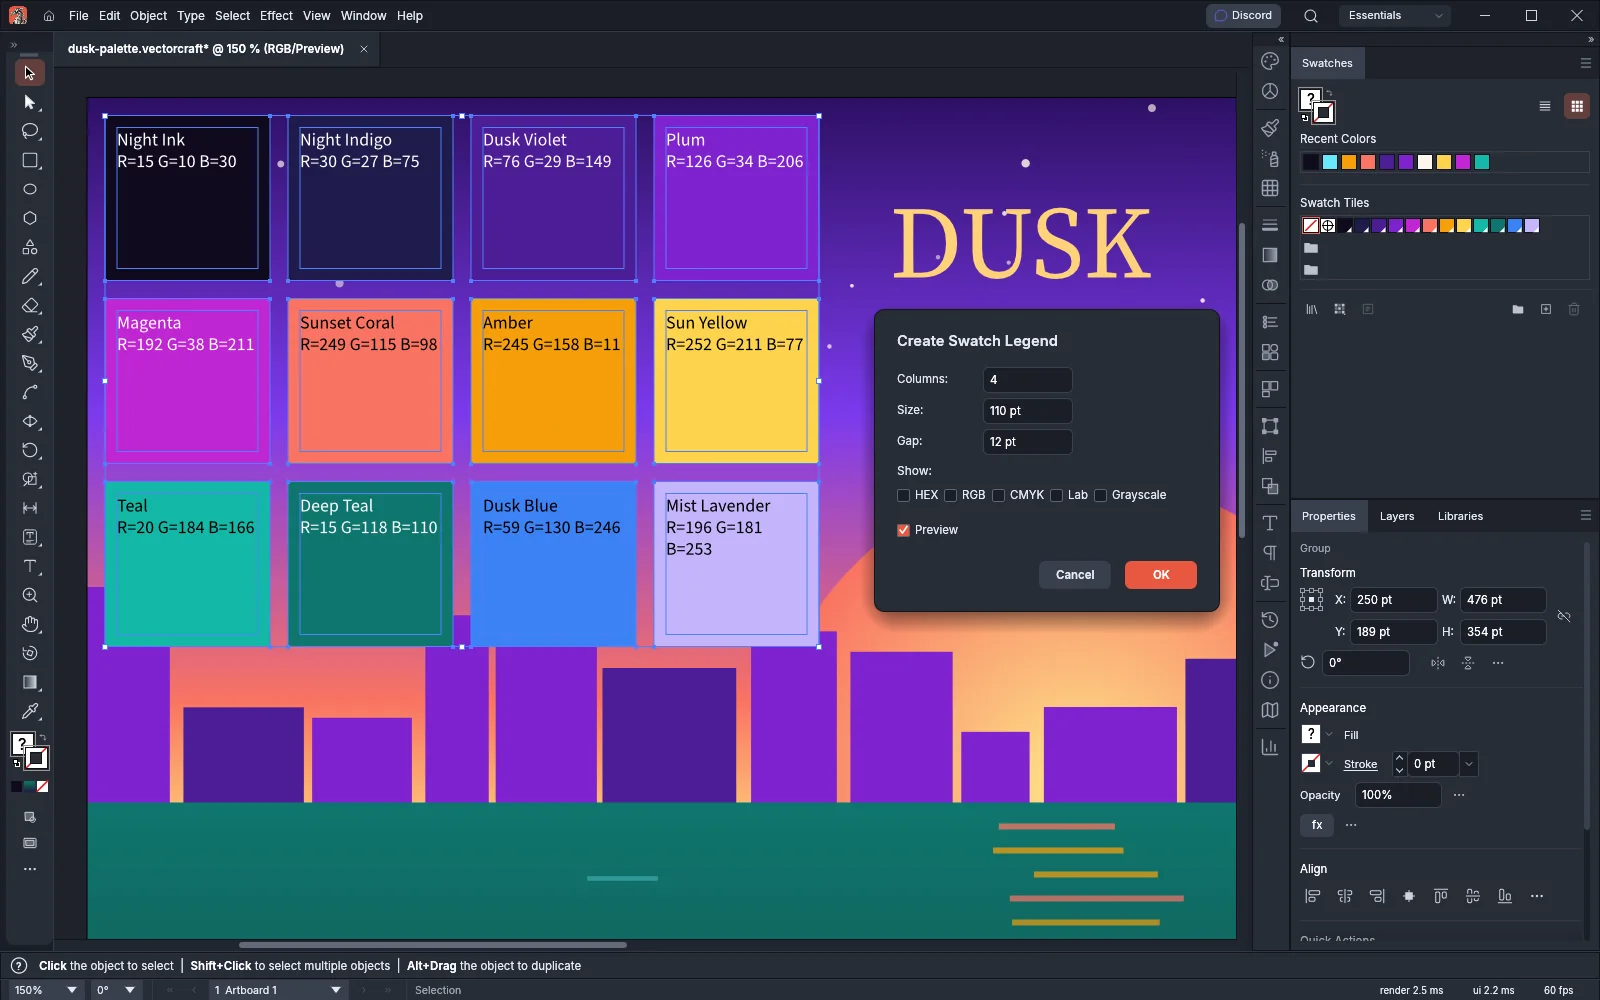
| Create Swatch Legend… | Draws a chart of the document’s swatches, one labeled square per swatch, as a group. See Create Swatch Legend |
| Apply Fill to Stroke | Gives each selected object’s stroke the paint of its own fill |
| Apply Stroke to Fill | Gives each selected object’s fill the paint of its own stroke |
| Select by Color Kind | Selects Objects with Spot Colors, Objects with Color Effects, RGB Images, CMYK Images or Grayscale Images |
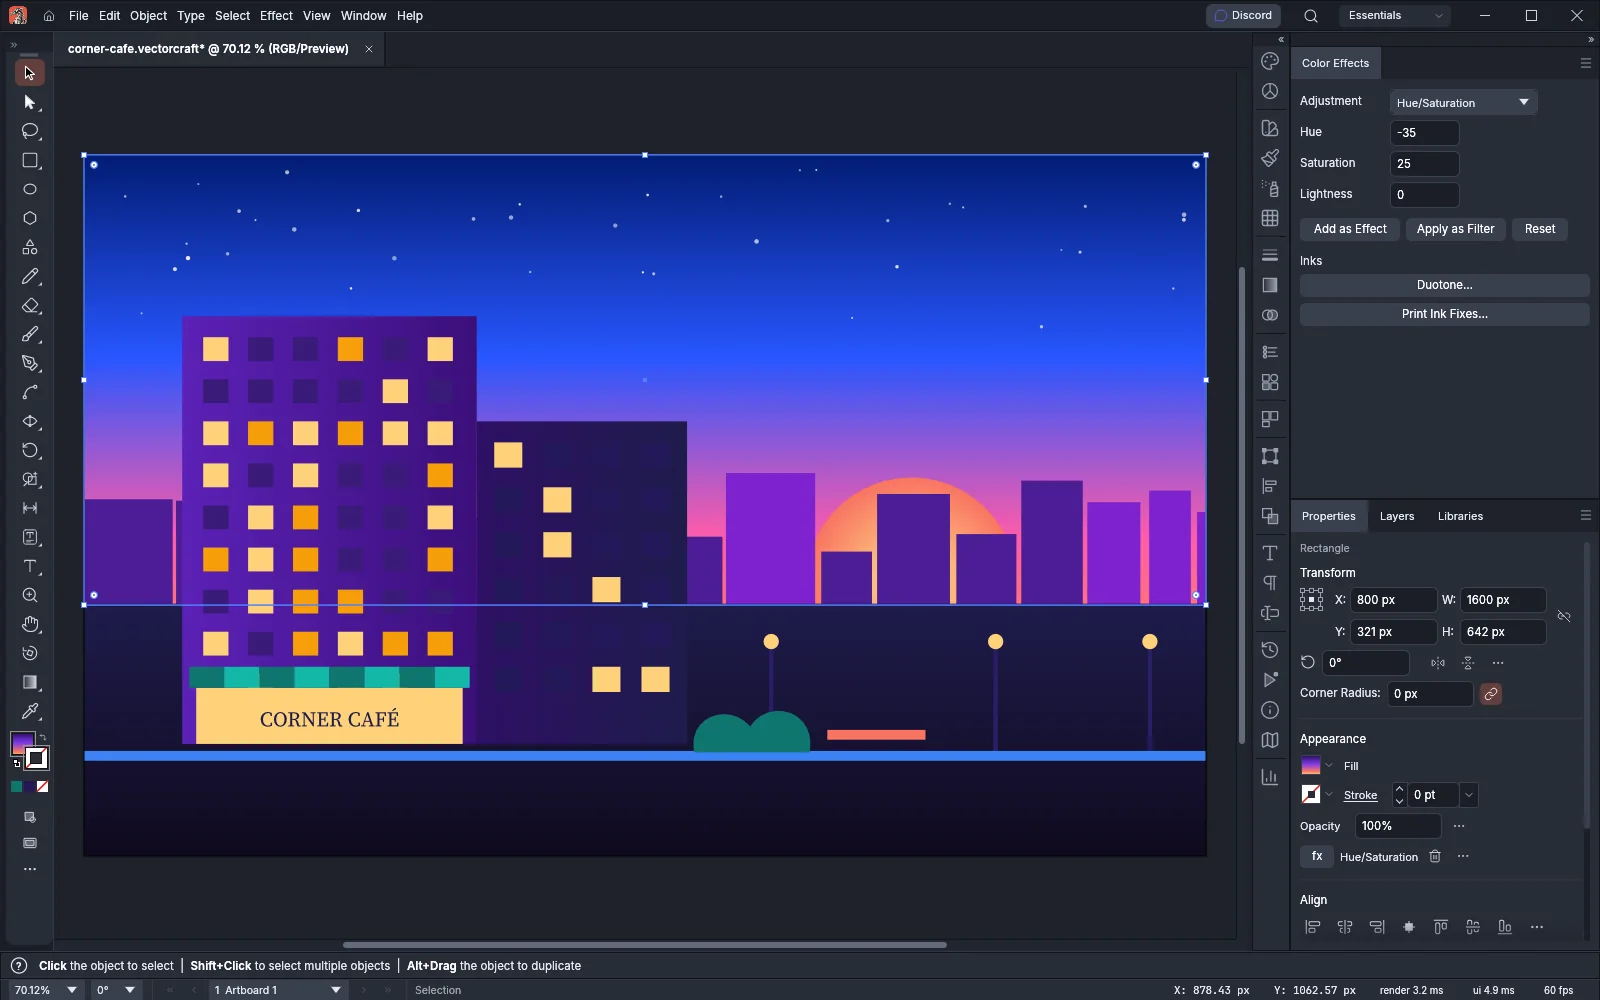
In the Color Effects panel, choose an Adjustment (Brightness/Contrast, Hue/Saturation, Levels, Temperature/Tint, Exposure, Desaturate or Invert Colors) and set its values. Then click Add as Effect to add it as a live effect that you can edit later, or Apply as Filter to change the colors themselves. Reset returns the values to where they started. The Inks section opens Duotone… and Print Ink Fixes….
Print Ink Fixes
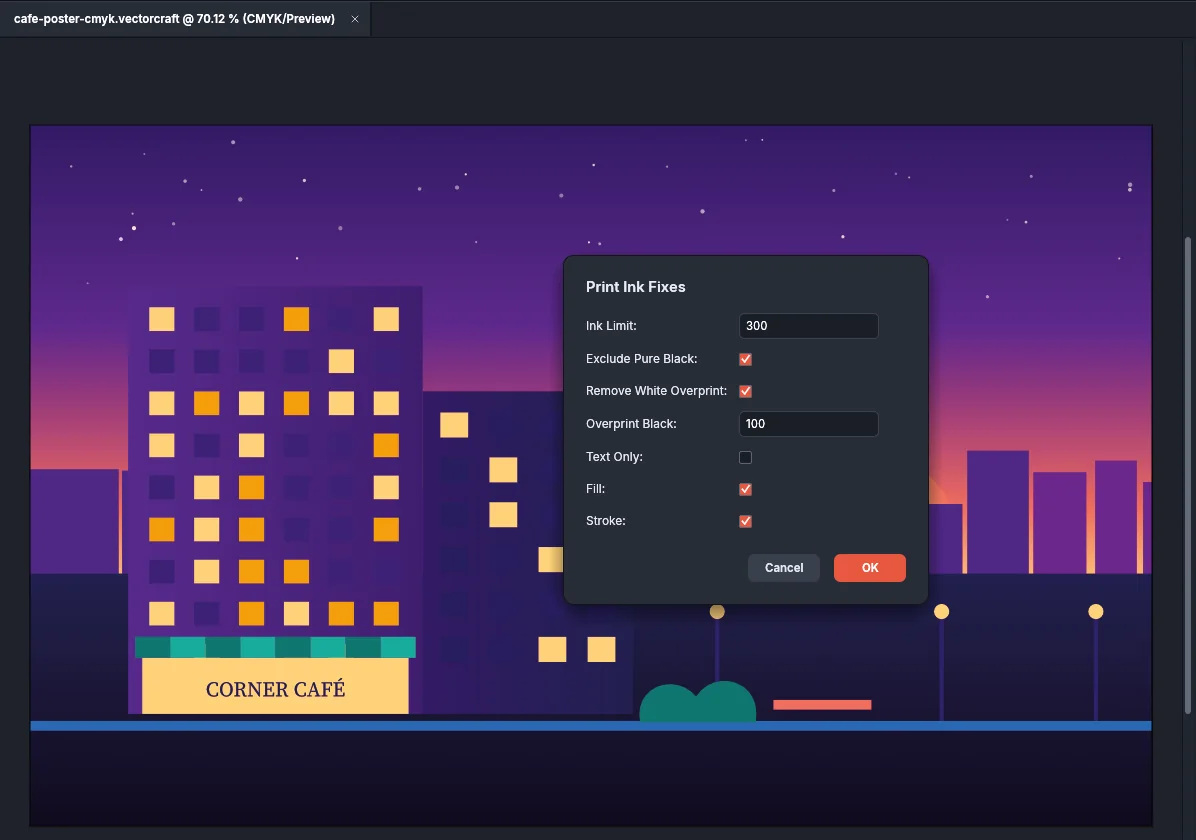
Section titled “Print Ink Fixes”Print Ink Fixes… works only in a CMYK document. In an RGB document it does not run and reports an error; choose File → Document Color Mode → CMYK Color first. It changes the selection, or the whole document when nothing is selected. The dialog has these options:
| Option | What it does |
|---|---|
| Ink Limit | Scales down each CMYK color whose total ink is above this percentage, from 1% to 400%. The default is 300%. Set it to 0 to leave the total ink as it is. Colors of spot swatches and Registration keep their ink |
| Exclude Pure Black | Leaves black-only and gray colors out of the ink limit. It is on by default |
| Remove White Overprint | Turns overprint off for white fills and strokes. It is on by default |
| Overprint Black | Sets black-only and gray fills and strokes with at least this percentage of black to overprint, from 1% to 100%. The default is 100%. Set it to 0 to leave overprint as it is |
| Text Only | Sets black overprint on type only. It is off by default |
| Fill and Stroke | Choose whether the fixes change fills, strokes or both. Both are on by default |
Find Nearest Swatch
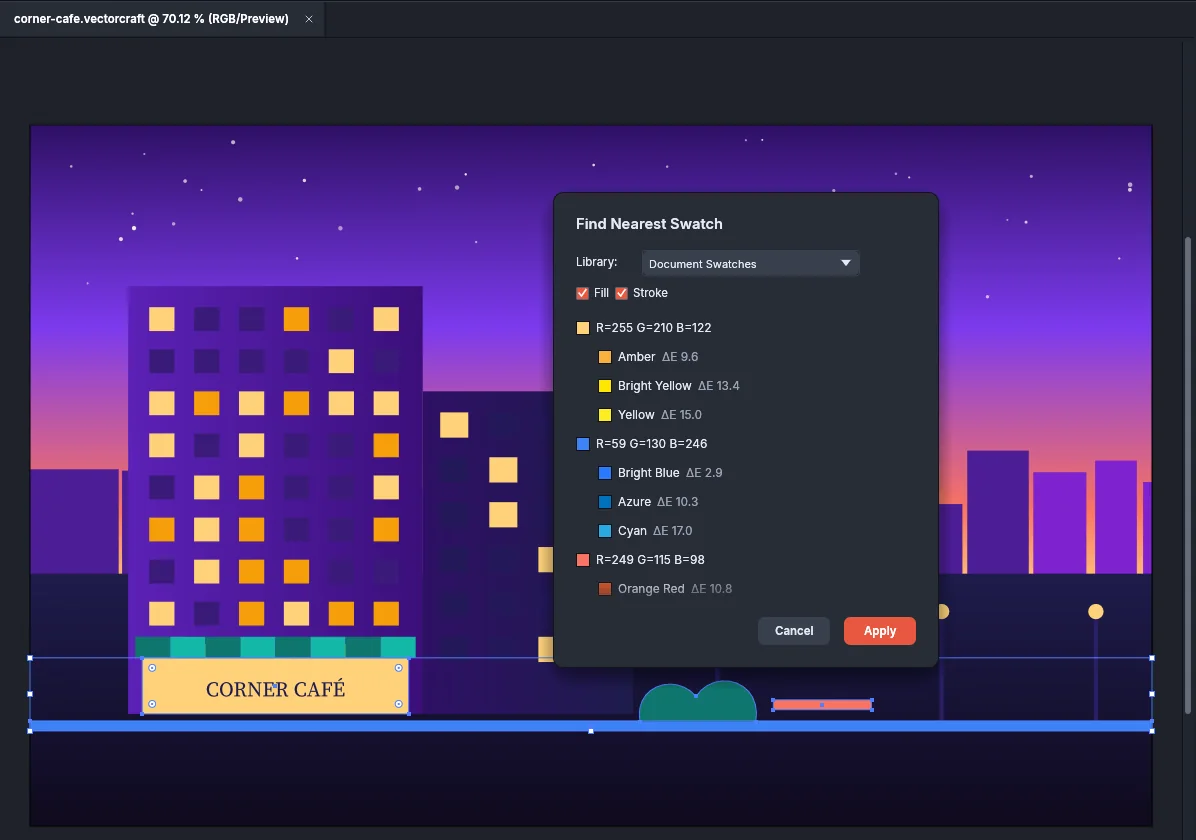
Section titled “Find Nearest Swatch”Select the objects first. In the Find Nearest Swatch dialog, choose a Library (Document Swatches by default, or a color library or color book) and select Fill, Stroke or both (both by default). The dialog lists each color of the selection with its three closest swatches, closest first, and the ΔE difference of each. Click Apply to give each color its nearest swatch, as one undo step. A color that takes a global or spot swatch is linked to it, and a swatch from a library is added to the document’s swatches first.
Create Swatch Legend
Section titled “Create Swatch Legend”The Create Swatch Legend dialog previews the legend on the canvas and has these options:
| Option | What it does |
|---|---|
| Columns | Sets the number of chips in each row, from 1 to 50. The default is 4 |
| Size | Sets the side of each square chip, from 8 pt to 1,000 pt. The default is 72 pt |
| Gap | Sets the space between chips, from 0 pt to 1,000 pt. The default is 12 pt |
| Show | Sets the color values each label shows: HEX, RGB, CMYK, Lab and Grayscale. When none is selected, as by default, each label shows the values of its swatch’s own color model |
| Selected Swatches Only | Draws only the swatches selected in the Swatches panel. It shows only while some swatches are selected there |
Each chip is filled with its swatch and labeled inside with the swatch’s name and values, in black on light chips and white on dark ones. The legend starts at the top-left corner of the first artboard, inset by the gap, and is selected when you click OK.
Make compound shapes
Section titled “Make compound shapes”A compound shape shows the combined area of its members, and you can still edit each member.
- Select two or more objects.
- Choose Object → Plug-ins → Compound Shapes → Make Compound Shape.
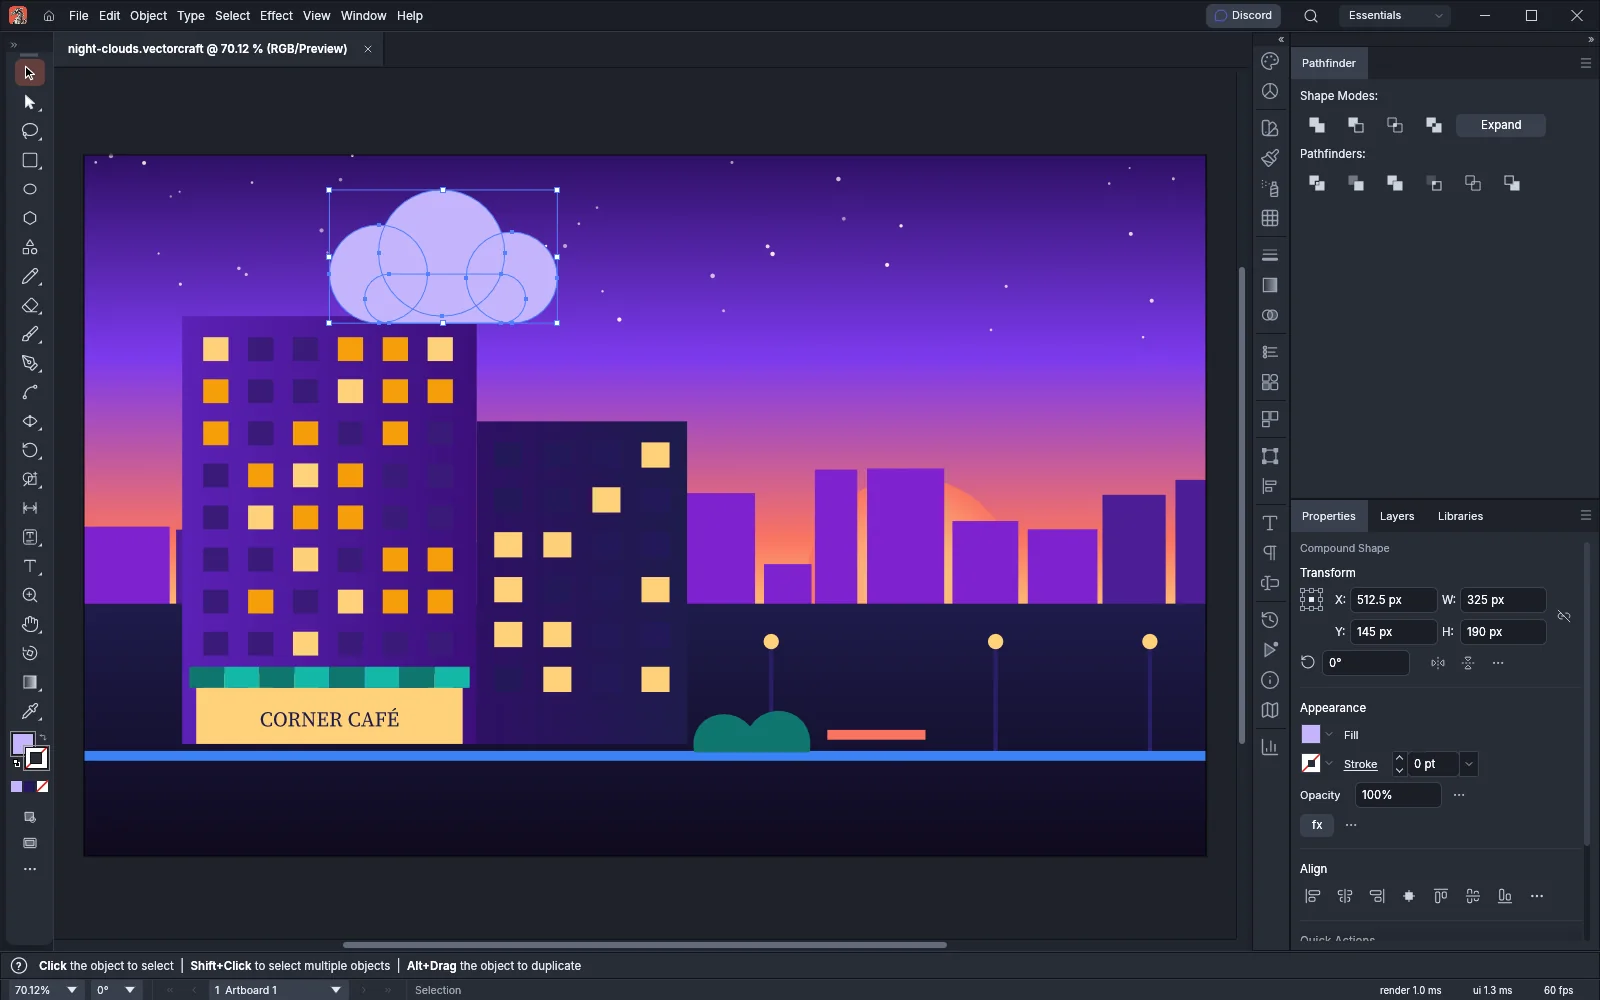
To get the members back as they were, choose Release Compound Shape. To turn the compound shape into one path or compound path, choose Expand Compound Shape.
Shape Mode Buttons Make Compound Shapes changes what the Shape Mode buttons in the Pathfinder panel do. When it is on, a click makes a compound shape and an Alt-click (Option-click on macOS) applies the Pathfinder operation permanently. When it is off, as it is by default, a click applies the operation permanently and an Alt-click makes a compound shape.
Work on many documents at once
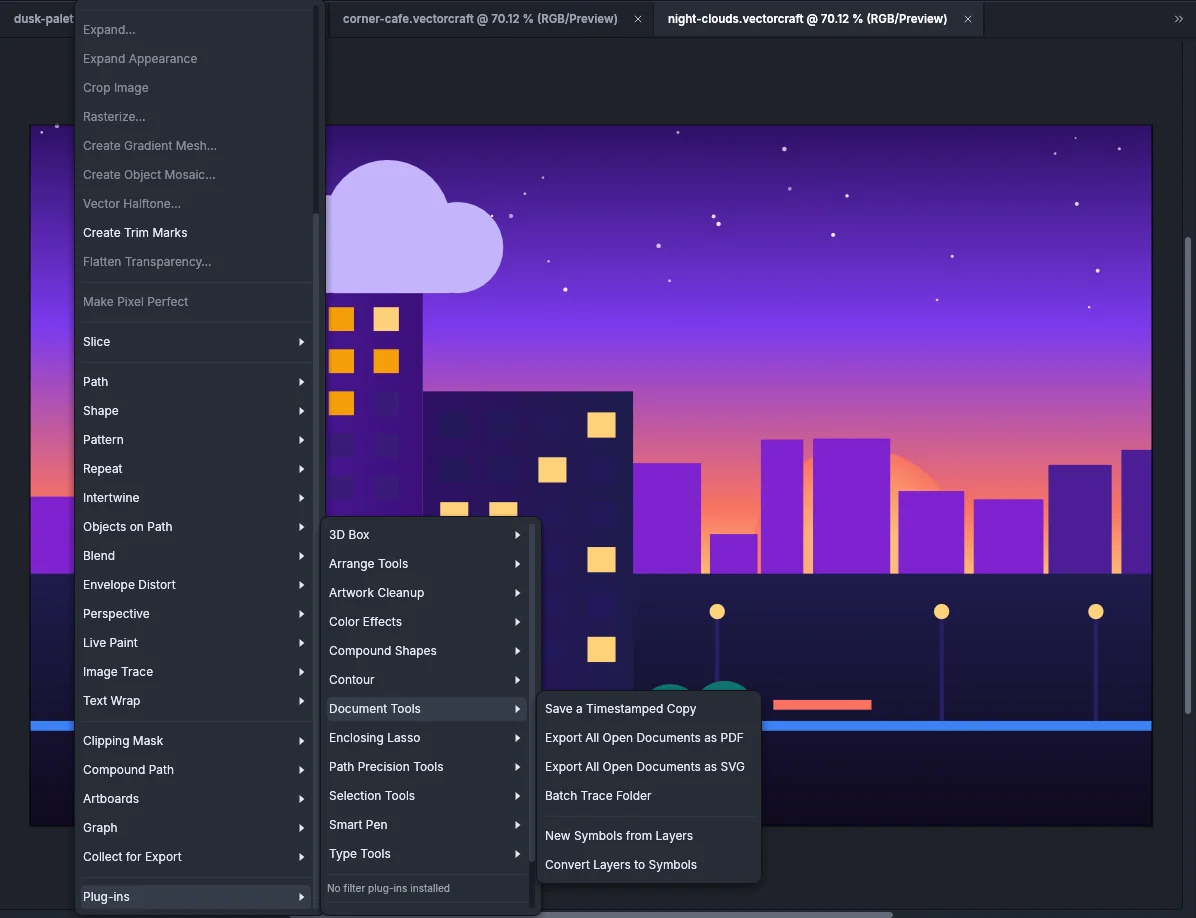
Section titled “Work on many documents at once”Object → Plug-ins → Document Tools holds these commands:
| Command | What it does |
|---|---|
| Save a Timestamped Copy | Saves a copy of the document next to it, named with the date and time in UTC, such as poster_2026-11-07_14-30.vectorcraft. The open document keeps its file path, and its unsaved changes stay unsaved. For a document you have never saved, VectorCraft asks for a folder |
| Export All Open Documents as PDF | Asks for a folder and saves a PDF copy of every open document there, named after the document. A number is added to a name that is already taken, so no file is replaced |
| Export All Open Documents as SVG | Saves an SVG copy of every open document in the same way |
| Batch Trace Folder | Asks for a folder of images and then a folder for the results. It traces each PNG, JPEG, TIFF, BMP, GIF, WebP and PSD image with the Default preset and saves each result as a .vectorcraft file. It traces up to 500 images |
| New Symbols from Layers | Makes one symbol from each layer’s art, named after the layer. When two or more layers are selected in the Layers panel, only those layers are used. Empty layers are skipped |
| Convert Layers to Symbols | Does the same and replaces each layer’s art with an instance of its symbol. Locked layers are skipped |
The status bar reports how many files were written or traced. After an export, it also names the first document that could not be written. For tracing one image with your own settings, see Trace an image.
Draw boxes with the 3D Box tool
Section titled “Draw boxes with the 3D Box tool”- Choose Object → Plug-ins → 3D Box → 3D Box Tool.
- Drag on the canvas to draw the box. Hold Shift to draw it with equal width and height. Click without dragging to draw a box 100 pt wide and 100 pt high.
- Hold Space while you drag to move the box.
- While you drag, press ↑ or ↓ to rotate the box 5° around its X axis, or ← or → to rotate it 5° around its Y axis. Press Esc to cancel.
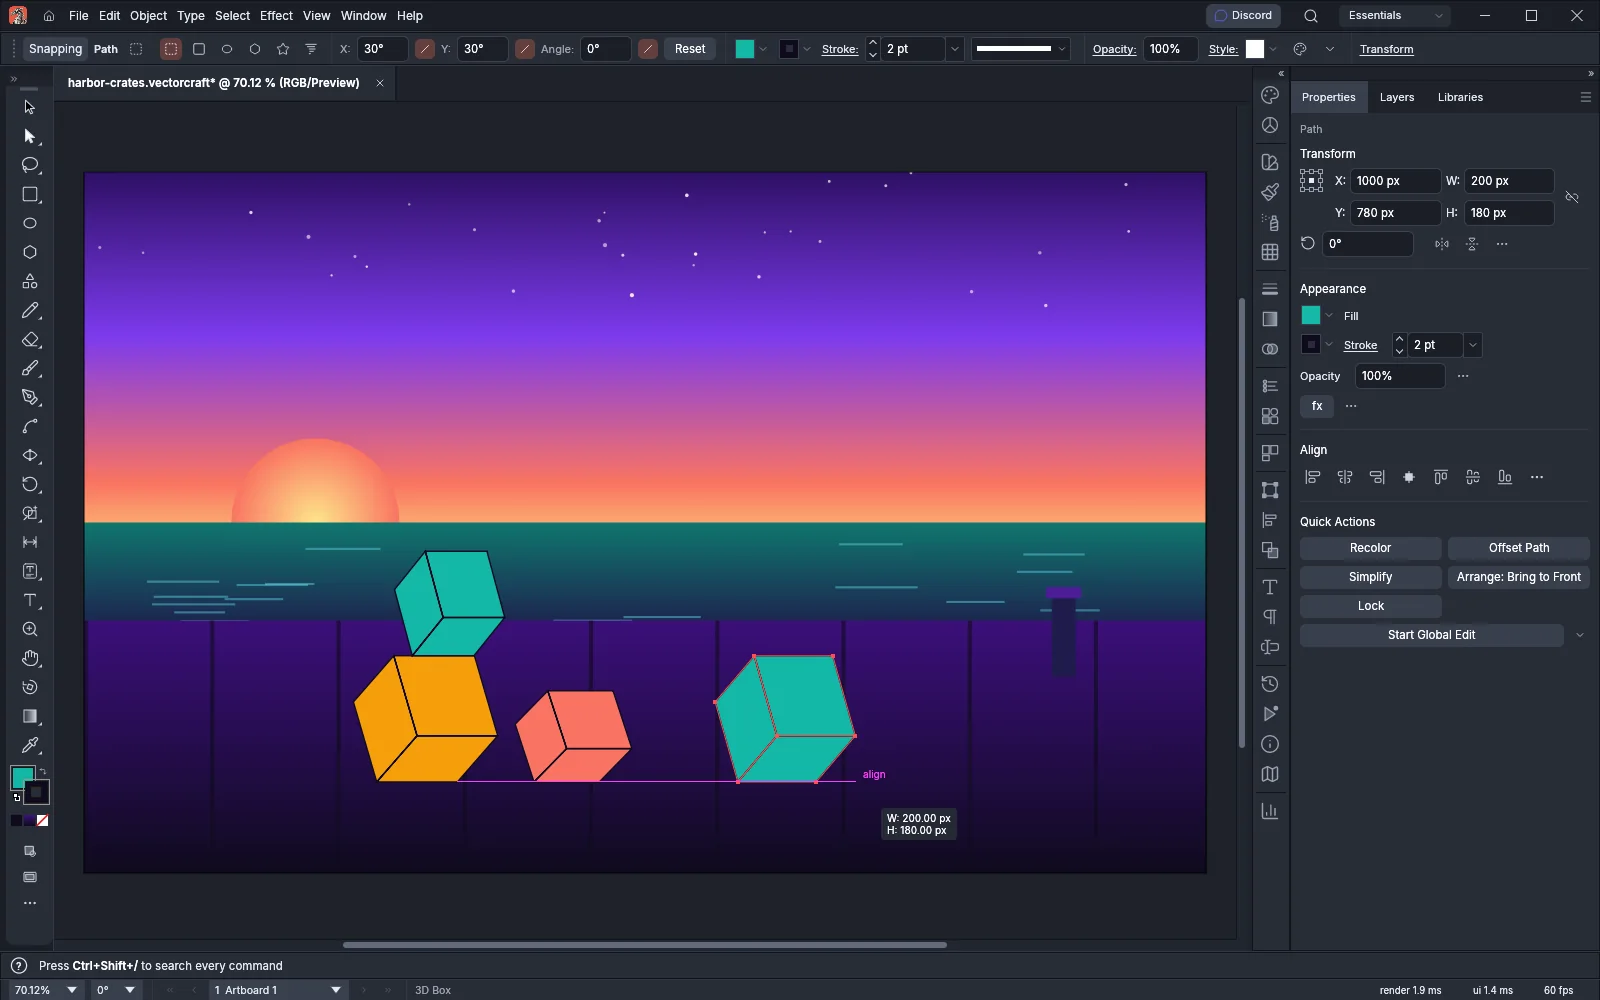
While the tool is active, the Control bar (Window → Control) shows its settings:
| Setting | What it does |
|---|---|
| Shape buttons | Switch the tool between 3D Box, Rectangle, Ellipse, Polygon, Star and Spiral |
| X, Y | Rotate the box around its X and Y axes, from −180° to 180°. Both are 30° by default |
| Angle | Rotates the box in the plane of the page, from −180° to 180°. The default is 0° |
| Link buttons | Project the axis beside each button in parallel instead of in perspective while the button is on. By default only the button beside Y is on |
| Reset | Returns the angles and the Link buttons to their defaults |
With a box selected, the Control bar shows that box’s values, and changing them changes the box.
Where the other plug-ins are covered
Section titled “Where the other plug-ins are covered”| Plug-in | Guide |
|---|---|
| Path Precision Tools | Cut, join and refine paths covers its tools, the Anchor Inspector and Parametric Shape panels, and its crossing and dash commands. The Measure & Inspect Tool is in Measure and dimension |
| Smart Pen | Draw with the Smart Pen |
| Contour | Outline areas with the Contour tool |
| Enclosing Lasso | Select only what is fully inside with the Enclosing Lasso |
| Selection Tools | Select by artboard covers Select by Artboards… |
| Type Tools | Tweak single letters with Text Tweaker and Release type from a path |
Selection Tools also has Select Linked, Select Embedded, Select Missing and Select Modified, which select the placed images and documents with that link status, and Select by Link Status…, which lists them in a dialog. Hold Shift as you choose one to add to the selection. The Links panel’s menu has the same commands.