Find your place with the Navigator panel
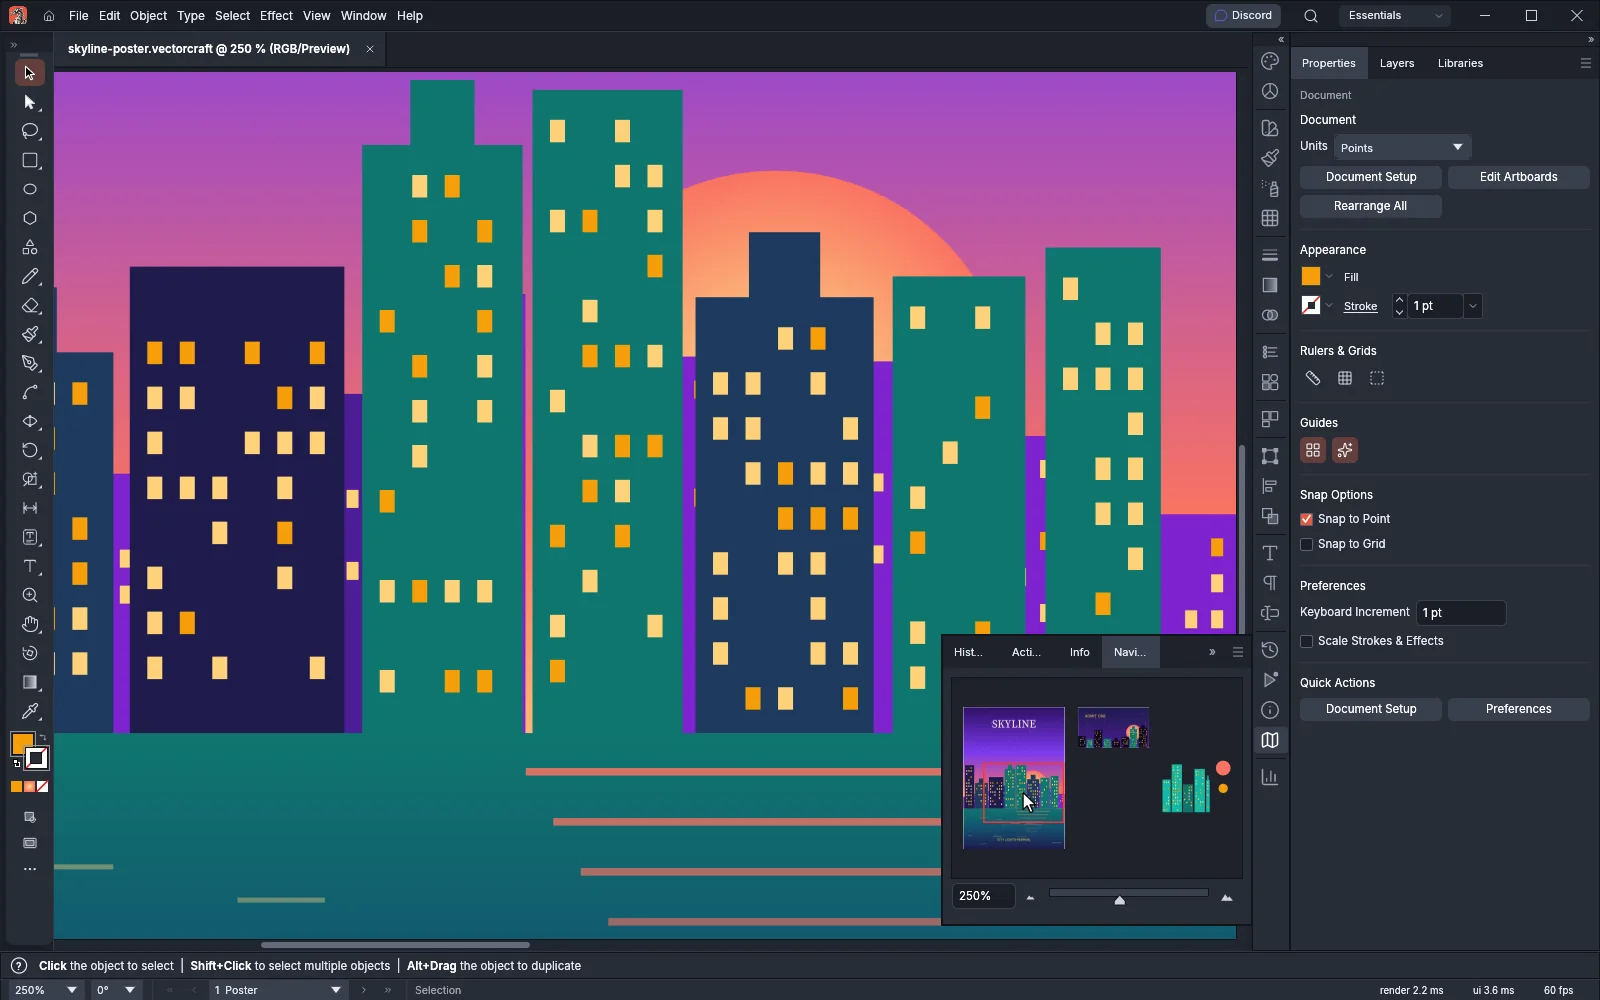
The Navigator panel shows a thumbnail of the whole document with a box around the part the canvas shows. This page covers moving the view with that box, zooming from the panel, fitting the thumbnail to the artboards and changing the panel options.
Open the Navigator panel
Section titled “Open the Navigator panel”- Open a document. Without one, the panel shows No document.
- Choose Window → Navigator. In the Essentials workspace, the panel opens from the map icon in the column of panel icons, beside the Properties panel. History, Actions and Info are tabs in the same group.
The thumbnail draws the artboards in white with the artwork over them, on the pasteboard color. It draws the document as an export does, so template layers and guides are left out. While you drag on the canvas, the thumbnail keeps its last image and updates after you release the mouse button.
Move the view with the view box
Section titled “Move the view with the view box”The red box in the thumbnail is the view box. It outlines the part of the document that the canvas shows.
- Drag the view box in the thumbnail. The canvas follows the pointer and keeps the same zoom.
- To jump to another part of the document, click it in the thumbnail. The view centers on the point you click.
When you rotate the view, the view box turns with it, so it still outlines what the canvas shows. The box is cut off at the edge of the thumbnail, and it is not drawn when the view lies wholly outside the thumbnail. To turn the view, see Rotate the view.
Zoom from the panel
Section titled “Zoom from the panel”The row under the thumbnail holds the zoom controls:
| Control | What it does |
|---|---|
| Zoom field | Shows the zoom with up to two decimals. Type a percentage and press Enter to zoom to it. |
| Zoom Out button | Zooms out to the next preset level, as View → Zoom Out does: Ctrl+- (Cmd+- on macOS). |
| Slider | Drag it to zoom. It runs from 3.13% to 64,000%. Equal distances along the slider multiply the zoom by the same factor. |
| Zoom In button | Zooms in to the next preset level, as View → Zoom In does: Ctrl+= (Cmd+= on macOS). |
The preset levels run 3.13%, 4.17%, 6.25%, 8.33%, 12.5%, 16.67%, 25%, 33.33%, 50%, 66.67%, 100%, 150%, 200%, 300%, 400%, 600%, 800%, 1,200%, 1,600%, 2,400%, 3,200%, 4,800%, 6,400%, 12,800%, 25,600% and 64,000%. The field accepts any value from 3.13% to 64,000%. A typed value outside that range zooms to the nearest end of it. For the other ways to zoom, see Zoom and pan the canvas.
Show only the artboards
Section titled “Show only the artboards”By default the thumbnail takes in every artboard and all the artwork, with a small margin, so art left on the pasteboard shows too.
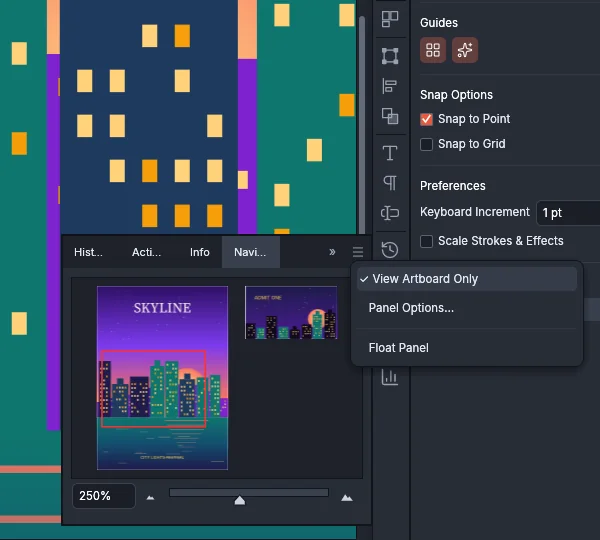
- Click the menu button at the right end of the panel’s tab row.
- Choose View Artboard Only. A check mark shows next to it.
The thumbnail now fits the outer edges of the artboards and does not show artwork that lies beyond them. Artwork between two artboards still shows, because it lies inside their outer edges. Choose View Artboard Only again to turn it off.
Change the panel options
Section titled “Change the panel options”- In the panel menu, choose Panel Options…. The Navigator Panel Options dialog opens.
- Set the options and click OK.
| Option | Default | What it does |
|---|---|---|
| Color | Light Red | The color of the view box. The list holds Light Red and the layer colors (Light Blue, Red, Green, Blue, Yellow, Magenta, Cyan, Gray, Black, Orange, Dark Green, Teal and more). Click the color button beside the list to pick any other color; the list then shows Custom. |
| Draw Dashed Lines as Solid Lines | Off | The thumbnail draws dashed strokes without their dashes. The canvas, printing and exports keep the dashes. |
VectorCraft keeps these options with the rest of the window settings, so they stay the same in your next session. To arrange panels and save the layout, see Customize the workspace.