Sketch and ink a drawing
This guide shows how to turn a scanned or photographed sketch into finished line art: you place the sketch on a template layer, rough in the lines with the Pencil, ink them with the Paintbrush or the Blob Brush, clean them up, and reduce the anchor points. Each step links to the page that lists every option of the tool it uses.
Put the sketch on a template layer
Section titled “Put the sketch on a template layer”A template layer is locked, its images can be dimmed, and it is left out of printing and export.
- Choose File → Place… (Ctrl+Shift+P, or Cmd+Shift+P on macOS) and pick the scan of your sketch.
- Turn on Template in the Place dialog, then place the file. VectorCraft puts the image on a new locked template layer directly below the current layer and names the layer Template followed by the file name.
- Double-click the template layer’s thumbnail in the Layers panel to open Layer Options.
- To give the layer a shorter name, type one such as Sketch in Name.
- Turn on Dim Images to, enter a percentage such as 50%, and click OK.
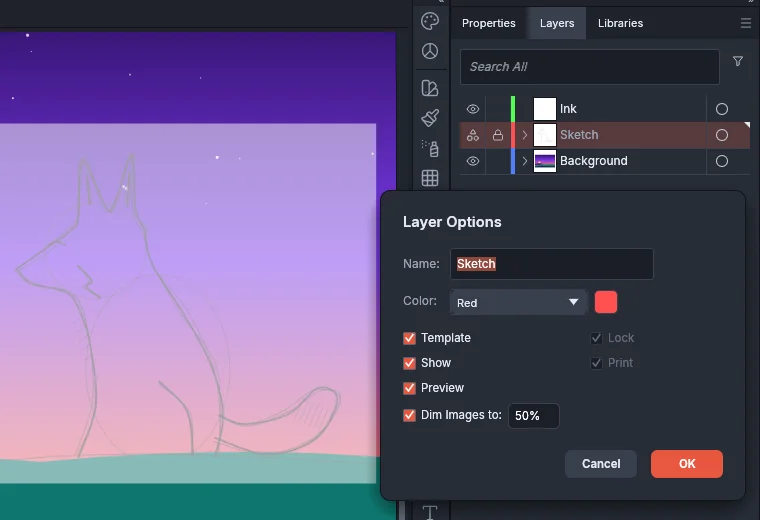
The template layer is locked, so you draw on layers above it.
You can also make an existing layer a template: open its Layer Options and turn on Template. The dialog then locks the layer and sets Dim Images to 50%. Organize with layers and symbols describes every option in the dialog.
Rough in the lines with the Pencil
Section titled “Rough in the lines with the Pencil”- Click the template layer’s row in the Layers panel to make it the current layer, then click Create New Layer at the bottom of the panel. The new layer goes directly above the template layer. Double-click its name and type Rough.
- Press N to choose the Pencil tool.
- Set the stroke color and weight you want for the rough lines, and set the fill to None.
- Drag along the lines of the sketch. While you drag, the Pencil shows the path it fits to the stroke, and VectorCraft keeps that path when you release the mouse button.
- To fix part of a line, keep the path selected and draw over that part again. A stroke that starts and ends near the selected path replaces the section between those two points.
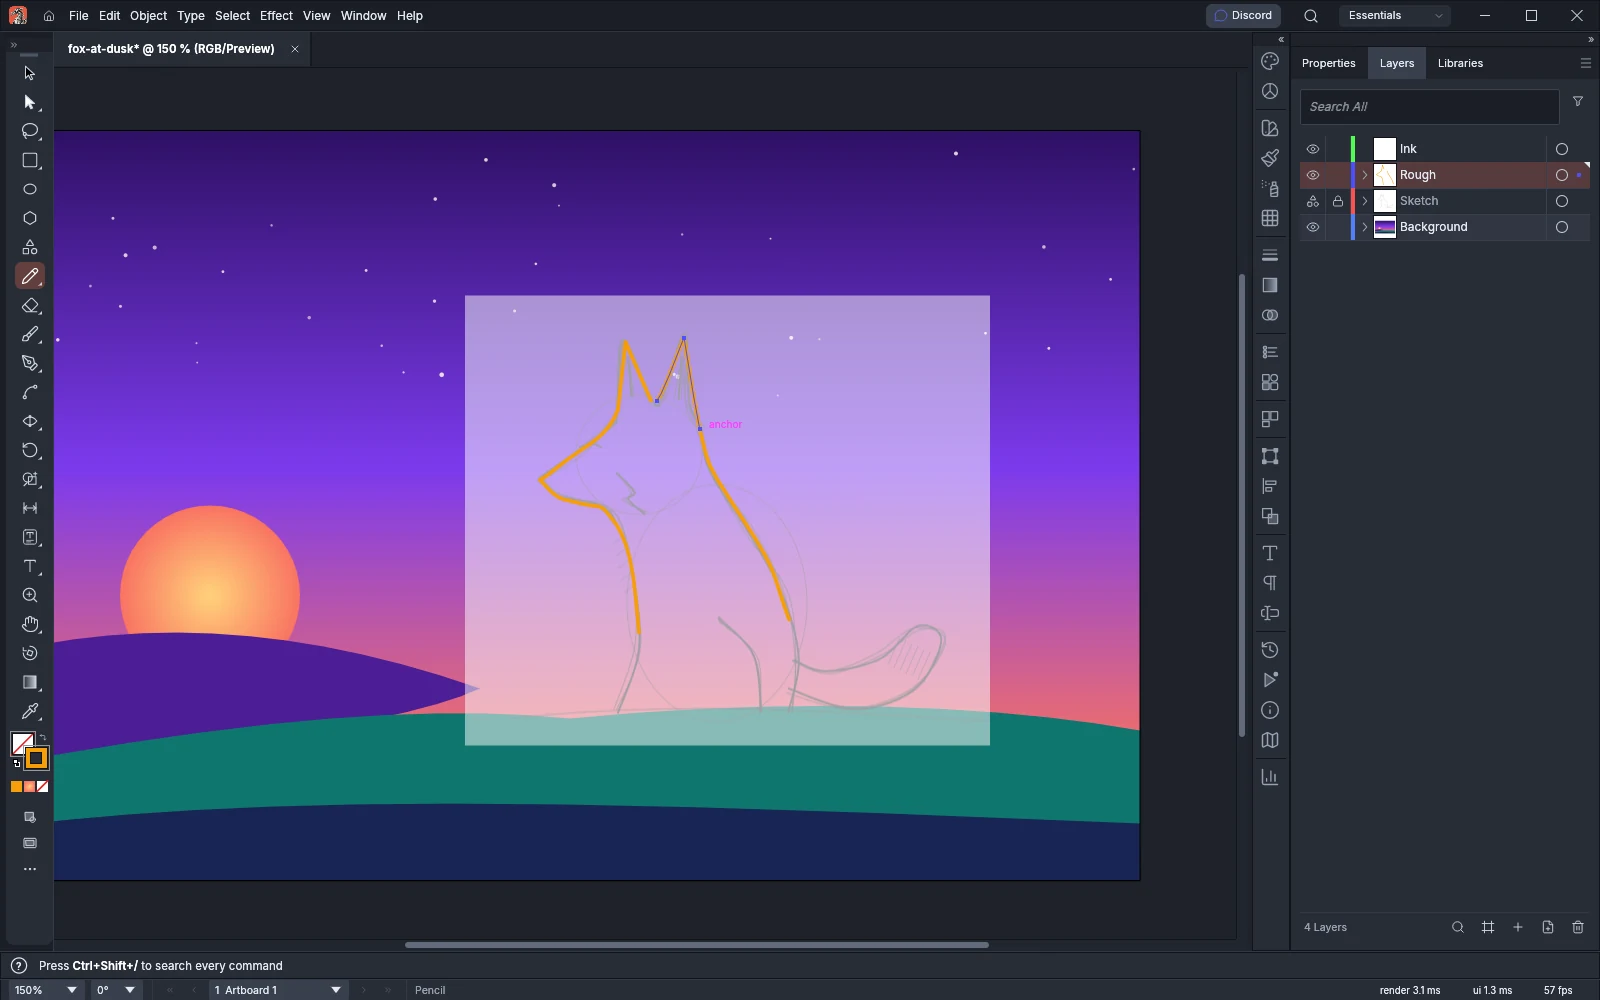
Double-click the Pencil tool to open Pencil Tool Options. Three options change how rough lines behave:
- Fidelity (1.5 px by default) sets how closely the path follows your hand. Move it toward Accurate to keep small wobbles, or toward Smooth for fewer anchor points and smoother curves.
- Close paths when ends are within (15 px) closes a path when you end the stroke this close to its start. Set it to 0 if your lines often end near where they began and you want them to stay open.
- Edit selected paths within (12 px) sets how close to a selected path a stroke must start to continue or redraw it. Set it to 0 to always start a new path.
The full table of Pencil options is in Draw and edit paths.
Ink with the Paintbrush or the Blob Brush
Section titled “Ink with the Paintbrush or the Blob Brush”Ink the final lines on a layer above the Rough layer: highlight the Rough layer and click Create New Layer, or click a layer that is already above it. With a drawing tablet, both brushes respond to pen pressure.
Ink with the Paintbrush
Section titled “Ink with the Paintbrush”The Paintbrush draws a path with the current brush on its stroke.
- Press Ctrl+Shift+A (Cmd+Shift+A on macOS) to deselect everything. Clicking a brush while ink is selected applies that brush to the selection.
- In the Brushes panel, click a Calligraphic brush, then double-click it to open its Calligraphic Brush Options.
- Set Size to Pressure, enter a Variation, and click OK. The line is Size minus Variation wide at the lightest pressure and Size plus Variation at the heaviest, so with a Variation of 0 it does not change with pressure. Clicking OK also updates the strokes already painted with that brush.
- Press B to choose the Paintbrush tool.
- Drag along the rough lines. The Paintbrush records the pen pressure along each stroke.
The Paintbrush has the same Fidelity, Close paths when ends are within and Edit selected paths within options as the Pencil. See Paint with the Paintbrush.
Ink with the Blob Brush
Section titled “Ink with the Blob Brush”The Blob Brush paints filled shapes instead of stroked paths. A new shape that touches a shape with the same fill and no stroke merges with it, so the strokes of one outline build up into a single shape.
- Set the stroke color to your ink color. The Blob Brush paints with the stroke color, or with the fill color when the stroke is None.
- Press Shift+B to choose the Blob Brush tool.
- Double-click the Blob Brush tool in the Tools panel to open its options, set Size to Pressure, enter a Variation, and click OK. With a Size of 7 pt and a Variation of 3 pt, the tip is 4 pt wide at the lightest pressure and 10 pt at the heaviest.
- Drag along the rough lines. Press [ or ] to make the tip 1 pt smaller or larger.
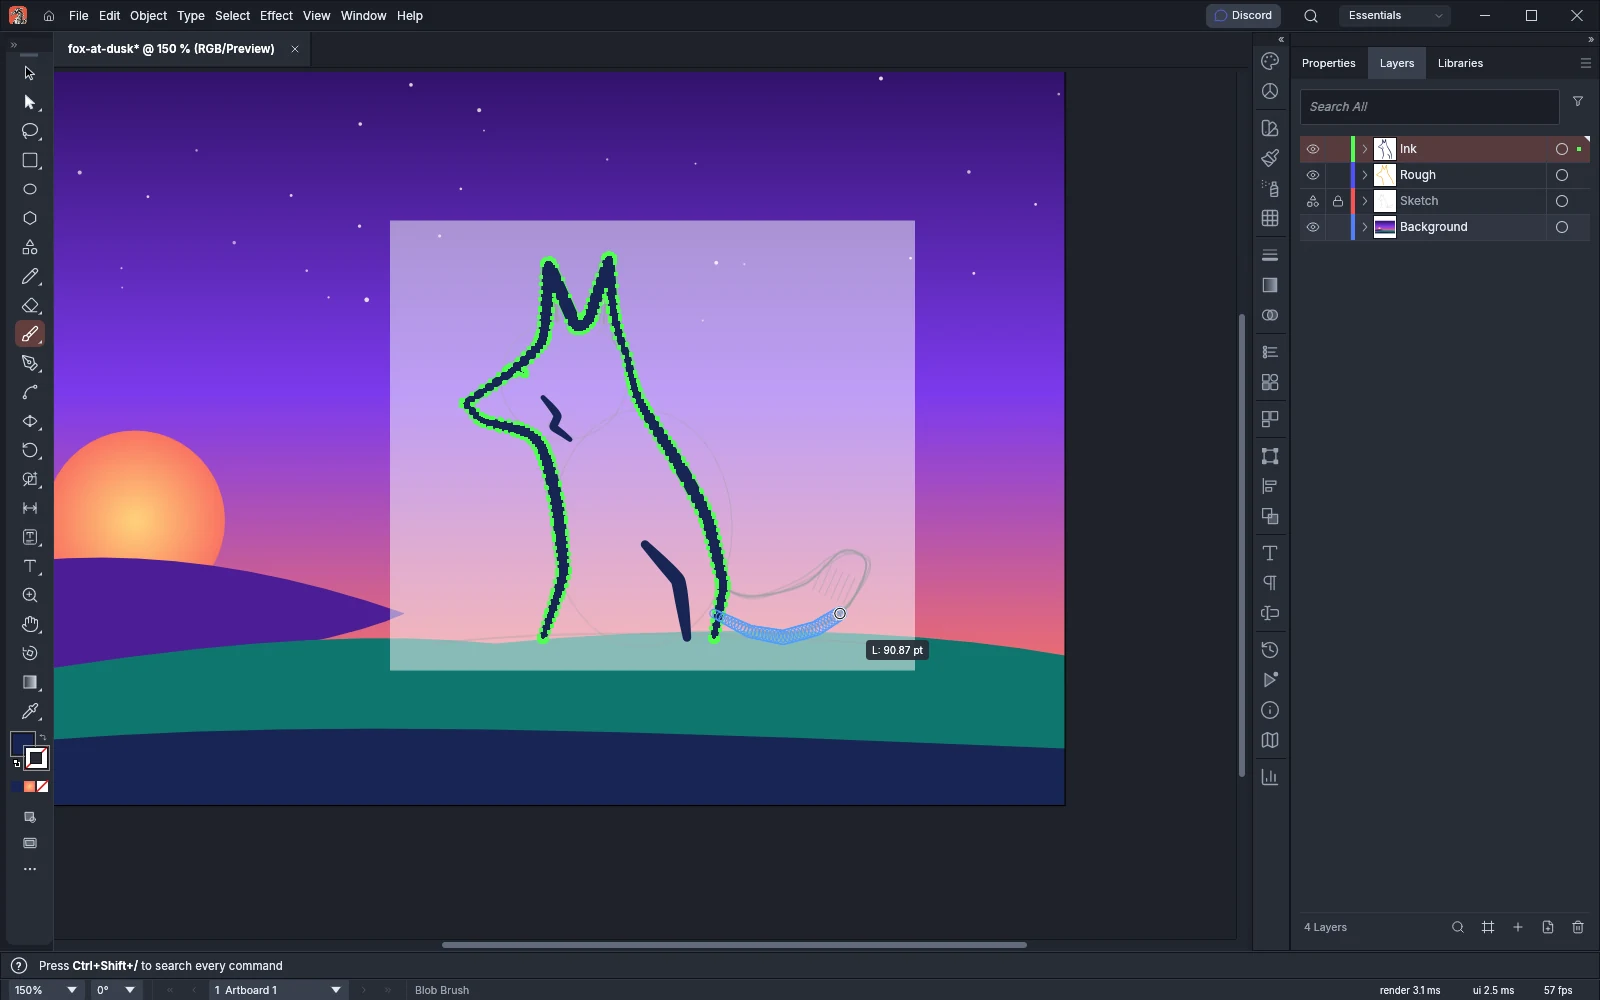
The other Blob Brush options, including Keep selected and Merge only with selection, are in Paint filled shapes with the Blob Brush.
Add flat color under the ink
Section titled “Add flat color under the ink”To color the drawing without covering the ink, highlight the ink layer and Ctrl+Alt-click (Cmd+Option-click on macOS) Create New Layer, which adds a layer directly below it. Double-click its name, type Color, and draw filled shapes with no stroke on that layer.
Clean up the lines
Section titled “Clean up the lines”When the ink is finished, delete the Rough layer: highlight it in the Layers panel and click Delete Selection (the trash button). Hide the template layer while you clean up, so you see the lines on their own: choose View → Hide Template (Ctrl+Shift+W, or Cmd+Shift+W on macOS). Choose View → Show Template to see the sketch again.
The Smooth and Path Eraser tools are in the Pencil tool’s group and change only selected paths. Select the path you want to fix first.
- Smooth removes wobbles from the part of a selected path near your drag. Drag along the wobbly part, and repeat for a smoother result. Double-click the tool to change its Fidelity (2.5 pt by default).
- Path Eraser removes the parts of a selected path that you drag over, such as an overshoot past a corner.
- Join closes small gaps. Drag across the two open ends to join them into one path. When two open lines cross and their ends stick out past the crossing, drag over those ends, and the Join tool trims them and joins the lines where they cross. To join the selected ends without dragging, choose Object → Path → Join (Ctrl+J, or Cmd+J on macOS).
- Eraser (Shift+E) cuts through filled shapes, which is how you trim Blob Brush ink. It erases from the selected shapes, or from every path it crosses when nothing is selected.
For more on these tools, see Smooth and erase parts of a path, Join open ends with the Join tool and Erase parts of shapes with the Eraser.
Simplify the finished paths
Section titled “Simplify the finished paths”Freehand paths often have more anchor points than their shape needs. Object → Path → Simplify… removes anchor points while keeping the shape close to the original.
- Select the inked paths.
- Choose Object → Path → Simplify…. A slider opens under the selection at the Auto-Simplify setting, and the canvas shows the simplified paths.
- Drag the slider to the left for fewer anchor points, or to the right to stay closer to the original.
- Press Enter, or click outside the slider, to keep the result. Press Esc to put the paths back.
Simplify is also in the Contextual Task Bar and in the Quick Actions of the Properties panel. The Simplify dialog’s options are in Draw and edit paths.
When the drawing is finished, you can delete the template layer: highlight it in the Layers panel and click the trash button. Template layers do not print and are left out of export, so you can also keep the layer in the document.