View, Window and Help menus
This page lists every item of the View and Help menus, in menu order, with what it does, its default shortcut and the guide that covers it. It also lists the Window menu items that are not panels, and sums up the panels and libraries, which Panels describes one by one. The File and Edit menus, the Object menu and the Type, Select and Effect menus have their own pages.
Where Windows and Linux use Ctrl, macOS uses Cmd, and where they use Alt, macOS uses Option. A shortcut cell that reads “None” means the item has no default shortcut. You can give any item a shortcut in Edit → Keyboard Shortcuts…, and Keyboard shortcuts lists every default.
Many View items show or hide something, and their names change to match. For example, Hide Edges reads Show Edges while edges are hidden, and Outline reads Preview while the document is in Outline view. This page names each item as it reads with VectorCraft’s default view settings. Items that turn a setting on or off without changing their name, such as Smart Guides, show a check mark while the setting is on.
View menu
Section titled “View menu”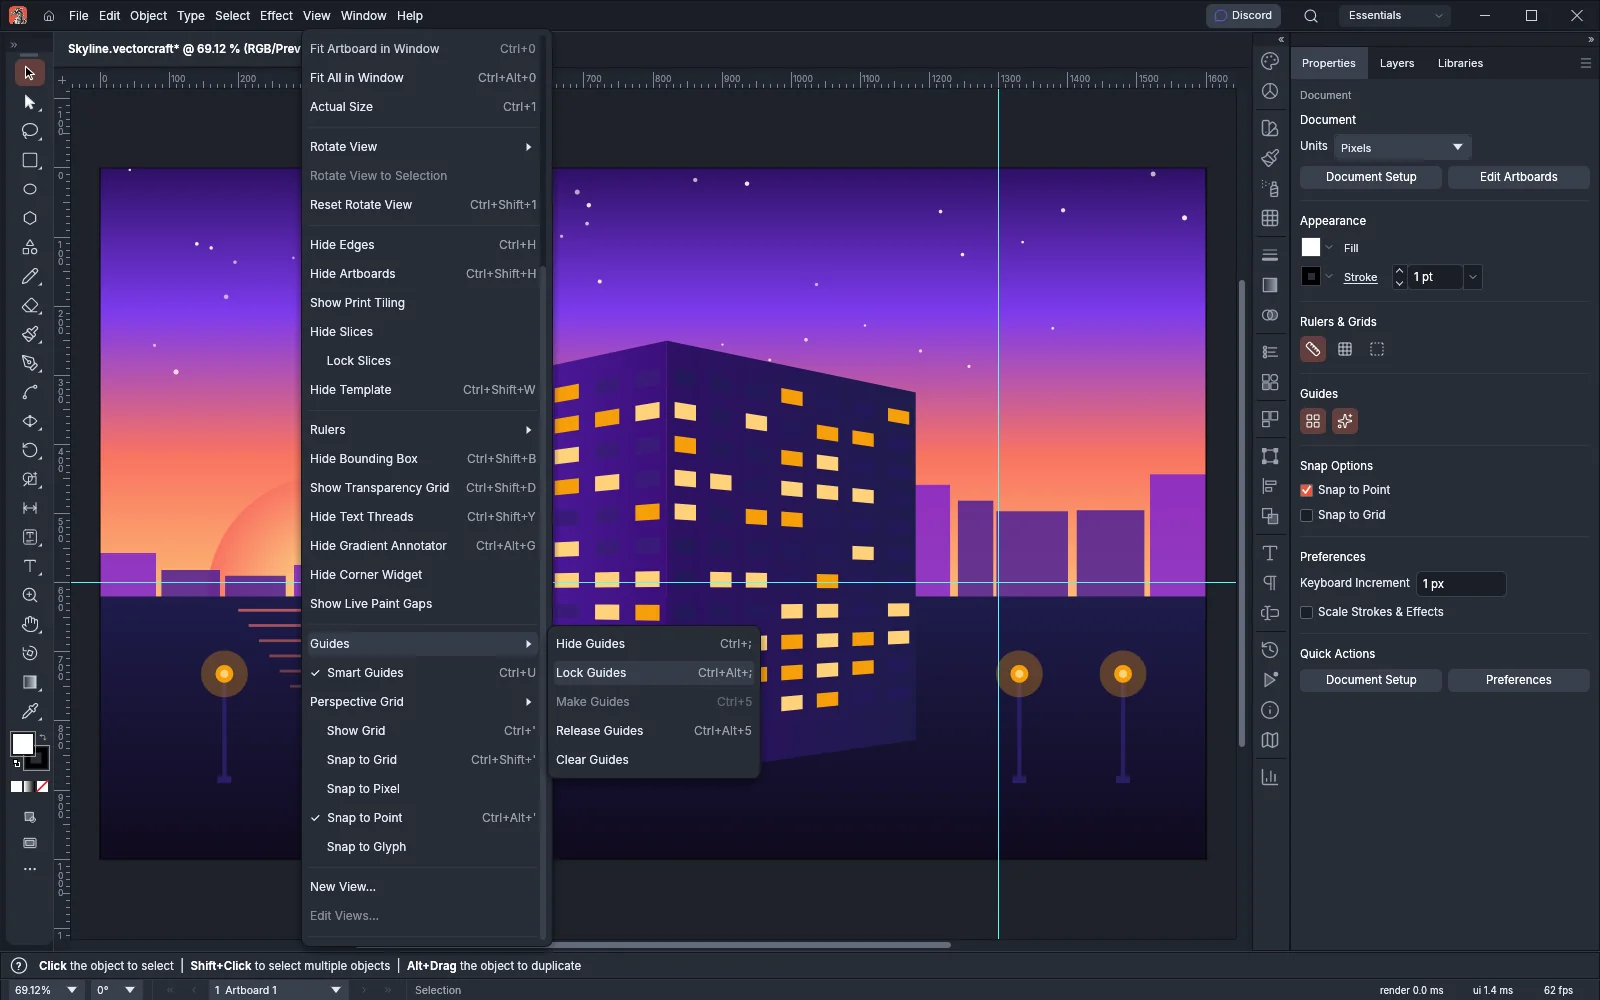
Previews and screen modes
Section titled “Previews and screen modes”| Item | What it does | Windows and Linux | macOS | Guide |
|---|---|---|---|---|
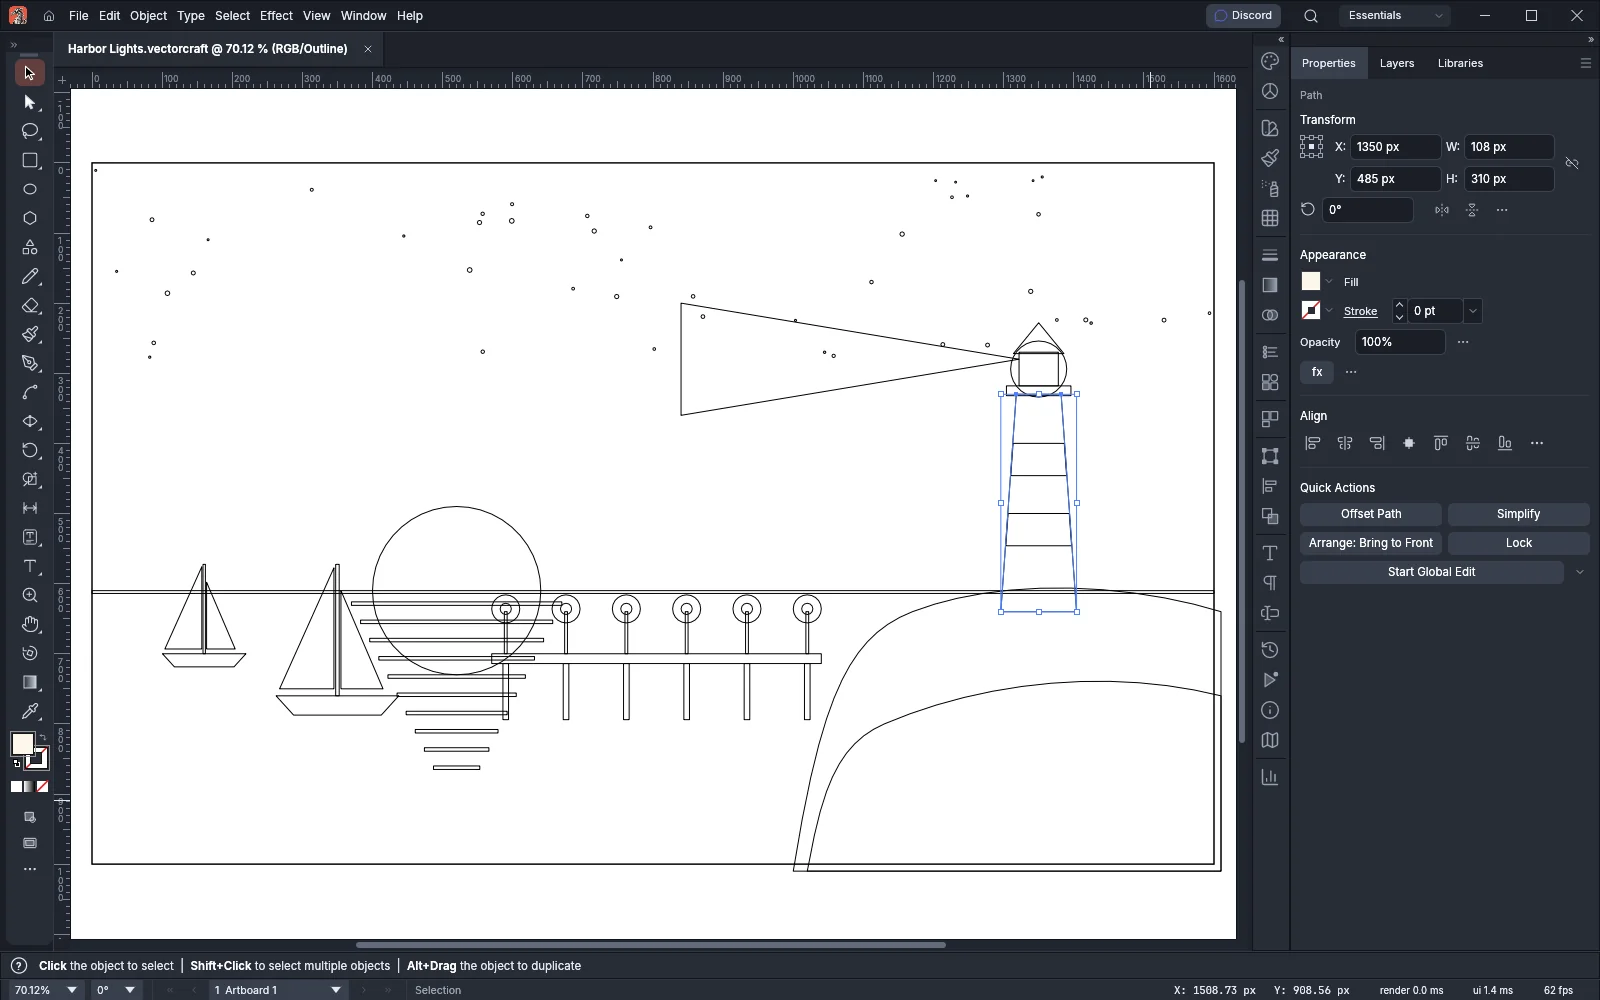
| Outline | Draws the artwork as thin outlines, without its fills and strokes. While it is on, the item reads Preview, and the document tab shows (RGB/Outline) or (CMYK/Outline) after the zoom. | Ctrl+Y | Cmd+Y | Set up a document and artboards |
| Overprint Preview | Shows how inks set to overprint mix where they overlap. | Ctrl+Alt+Shift+Y | Cmd+Option+Shift+Y | Manage color and proof for print |
| Pixel Preview | Shows the artwork as it will look when written to pixels. | Ctrl+Alt+Y | Cmd+Option+Y | Export for screens and the web |
| Trim View | Hides everything outside the artboards. | None | None | Manage color and proof for print |
| Presentation Mode | Shows the active artboard on the whole screen with nothing but the artwork. The Left and Right arrow keys and a click go between artboards, and Escape leaves the mode. | Shift+F | Shift+F | Customize the workspace |
| Screen Mode → Normal Screen Mode, Full Screen Mode with Menu Bar, Full Screen Mode | Switches the window between the three screen modes. F steps through them. | F | F | Customize the workspace |
Proofing
Section titled “Proofing”| Item | What it does | Windows and Linux | macOS | Guide |
|---|---|---|---|---|
| Proof Setup | Picks the device or condition that Proof Colors simulates: Working CMYK, Legacy Macintosh RGB (Gamma 1.8), Internet Standard RGB (sRGB), Monitor RGB, Color blindness – Protanopia-type, Color blindness – Deuteranopia-type or Color blindness – Tritanopia-type. Picking one also turns Proof Colors on. Customize… opens the Separations Preview panel. | None | None | Manage color and proof for print |
| Proof Colors | Turns the color proof on or off. | None | None | Manage color and proof for print |
Zoom and rotation
Section titled “Zoom and rotation”| Item | What it does | Windows and Linux | macOS | Guide |
|---|---|---|---|---|
| Zoom In | Zooms in one step. | Ctrl+= | Cmd+= | Set up a document and artboards |
| Zoom Out | Zooms out one step. | Ctrl+- | Cmd+- | Set up a document and artboards |
| Fit Artboard in Window | Zooms so that the active artboard fills the window. | Ctrl+0 | Cmd+0 | Set up a document and artboards |
| Fit All in Window | Zooms so that every artboard fits in the window. | Ctrl+Alt+0 | Cmd+Option+0 | Set up a document and artboards |
| Actual Size | Zooms to 100%. With Display Print Size at 100% Zoom on in Preferences, one inch of the document fills 96 screen points, whatever the display scaling. | Ctrl+1 | Cmd+1 | Set up a document and artboards |
| Rotate View | Turns the view to 0°, 15°, 30°, 45°, 60°, 90°, 180°, -15°, -30°, -45°, -60° or -90°. The artwork does not change. | None | None | Customize the workspace |
| Rotate View to Selection | Turns the view to the angle of the selected objects. When their angles differ, the view turns to 0°. The item is grayed out while nothing is selected. | None | None | Customize the workspace |
| Reset Rotate View | Turns the view back to 0°. | Ctrl+Shift+1 | Cmd+Shift+1 | Customize the workspace |
Show and hide
Section titled “Show and hide”| Item | What it does | Windows and Linux | macOS | Guide |
|---|---|---|---|---|
| Hide Edges | Hides the paths and anchor points of the selected objects, the highlight under the pointer, and the bounding box, corner widgets, text threads and Live Paint gaps. | Ctrl+H | Cmd+H | Customize the workspace |
| Hide Artboards | Hides the artboards’ edges, bleeds, marks and names. The Artboard tool still shows them while you use it. | Ctrl+Shift+H | Cmd+Shift+H | Set up a document and artboards |
| Show Print Tiling | Shows on the canvas the pages that the document’s print settings print. Each document has its own setting. | None | None | Print a large poster |
| Hide Slices | Hides the slices and deselects them. | None | None | Slice artwork for the web |
| Lock Slices | Locks the slices, so that you cannot select or edit them with the Slice Selection tool. The item shows a check mark while slices are locked. | None | None | Slice artwork for the web |
| Hide Template | Hides the template layers. | Ctrl+Shift+W | Cmd+Shift+W | Organize with layers and symbols |
| Rulers → Show Rulers | Shows the rulers along the top and the left of the canvas. | Ctrl+R | Cmd+R | Set up a document and artboards |
| Rulers → Change to Global Rulers | Measures the whole document from one zero point instead of from the active artboard. The item then reads Change to Artboard Rulers. The document keeps the setting when you save it. | Ctrl+Alt+R | Cmd+Option+R | Set up a document and artboards |
| Rulers → Show Video Rulers | Makes the rulers count the active artboard in video pixels from its top-left corner. | None | None | Set up a document and artboards |
| Hide Bounding Box | Hides the bounding box around the selection. | Ctrl+Shift+B | Cmd+Shift+B | Customize the workspace |
| Show Transparency Grid | Shows a grid behind the artboards of the current document. Each document has its own setting. | Ctrl+Shift+D | Cmd+Shift+D | Customize the workspace |
| Hide Text Threads | Hides the lines that join threaded text frames. | Ctrl+Shift+Y | Cmd+Shift+Y | Customize the workspace |
| Hide Gradient Annotator | Hides the Gradient tool’s annotator on the canvas. | Ctrl+Alt+G | Cmd+Option+G | Customize the workspace |
| Hide Corner Widget | Hides the corner widgets of the selected paths. | None | None | Customize the workspace |
| Show Live Paint Gaps | Shows the gaps in the selected Live Paint groups, in each group’s gap preview color, while edges show. | None | None | Combine and cut shapes |
Most items in this table change a setting for every open document at once. For example, when you choose Show Rulers in one document, the rulers also show in the other open documents and in documents you open later. By default the rulers and the Live Paint gaps are hidden, video rulers are off, and the slices are unlocked. The other app-wide items show by default.
Three items in this table are set for each document on its own. Show Print Tiling is off when a document opens. Show Transparency Grid and Change to Global Rulers are saved with the document. A new document starts with the transparency grid hidden and with rulers that measure from the active artboard.
Guides, grids and snapping
Section titled “Guides, grids and snapping”| Item | What it does | Windows and Linux | macOS | Guide |
|---|---|---|---|---|
| Guides → Hide Guides | Hides every guide. | Ctrl+; | Cmd+; | Set up a document and artboards |
| Guides → Lock Guides | Stops you from selecting or moving guides. The item then reads Unlock Guides. | Ctrl+Alt+; | Cmd+Option+; | Set up a document and artboards |
| Guides → Make Guides | Turns the selected paths into guides. The item is grayed out while nothing is selected. | Ctrl+5 | Cmd+5 | Set up a document and artboards |
| Guides → Release Guides | Turns the selected guides back into paths. A ruler guide becomes a straight path with no fill or stroke, and a guide made with Make Guides returns to an ordinary path with its own fill and stroke. With no guide selected, the command releases every unlocked guide path in the document. | Ctrl+Alt+5 | Cmd+Option+5 | Set up a document and artboards |
| Guides → Clear Guides | Deletes every guide in the document. | None | None | Set up a document and artboards |
| Smart Guides | Turns on or off the guides that appear while you draw and move, to line objects up with each other. It is on by default. | Ctrl+U | Cmd+U | Preferences |
| Perspective Grid | Holds the perspective grid commands, listed in the next table. | None | None | Draw in perspective |
| Show Grid | Shows the grid behind the artwork. | Ctrl+’ | Cmd+’ | Set up a document and artboards |
| Snap to Grid | Snaps the art you draw and move to the grid lines. | Ctrl+Shift+’ | Cmd+Shift+’ | Set up a document and artboards |
| Snap to Pixel | Places the art you draw and move on whole pixels. VectorCraft ignores it while Snap to Grid is on. | None | None | Export for screens and the web |
| Snap to Point | Snaps the pointer to anchor points and guides. It is on by default. | Ctrl+Alt+’ | Cmd+Option+’ | Set up a document and artboards |
| Snap to Glyph | Snaps the art you draw to the bounds of the letters in live type. On a single line of type, it also snaps to the baseline, the x-height, the character widths and the anchor points of the letters. It works only while Smart Guides is on and Snap to Grid is off. | None | None | Add and style type |
The Perspective Grid submenu holds these items:
| Item | What it does | Windows and Linux | macOS |
|---|---|---|---|
| Show Grid | Shows the perspective grid. The item then reads Hide Grid. | Ctrl+Shift+I | Cmd+Shift+I |
| Show Rulers | Shows a ruler up the line where the grid’s planes meet. The item then reads Hide Rulers. | None | None |
| Snap to Grid | Snaps the art you draw or move in perspective to the grid lines. It is on by default. | None | None |
| Lock Grid | Stops you from dragging the grid’s widgets. The item then reads Unlock Grid. | None | None |
| Lock Station Point | Makes a drag of one vanishing point move the other one with it, so that the viewing angle turns. | None | None |
| Define Grid… | Sets up the grid by values in a dialog. | None | None |
| One Point Perspective, Two Point Perspective, Three Point Perspective | Resets the grid to a preset, such as [2P-Normal View], fitted to the first artboard. Each submenu lists the built-in presets of that kind, then the ones you saved. | None | None |
| Save Grid as Preset… | Saves the current grid as a preset under a name. | None | None |
While you edit text with the Type tool, Ctrl+Shift+I (Cmd+Shift+I on macOS) runs Type → Italic instead of Show Grid. Draw in perspective shows how to use the grid.
Saved views
Section titled “Saved views”| Item | What it does | Windows and Linux | macOS | Guide |
|---|---|---|---|---|
| New View… | Saves the current zoom, position and rotation of the canvas in the document, under a name. A document can hold up to 25 saved views. | None | None | Customize the workspace |
| Edit Views… | Renames or deletes saved views. The item is grayed out until the document has a saved view. | None | None | Customize the workspace |
The document’s saved views are listed by name at the end of the menu. Choose one to go back to it.
Window menu
Section titled “Window menu”The Window menu starts with these items. None of them has a default shortcut.
| Item | What it does | Guide |
|---|---|---|
| New Window | Opens another view of the current document in a tab of its own, named with the view’s number, for example “Skyline.vectorcraft:2”. Each view has its own zoom, position, rotation, active artboard and Outline or Preview setting. | Customize the workspace |
| Arrange → Cascade | Puts each open document in a floating window of its own and stacks the windows from the upper left to the lower right. It is grayed out while fewer than two windows are open. | Customize the workspace |
| Arrange → Tile | Shows every open document and view at once, side by side in a grid. It is grayed out while fewer than two windows are open. | Customize the workspace |
| Arrange → Float in Window | Moves the current document out of the tab strip into a floating window. | Customize the workspace |
| Arrange → Float All in Windows | Moves every document in the tab strip into a floating window of its own. | Customize the workspace |
| Arrange → Consolidate All Windows | Puts every document back under its tab after Tile, Cascade or a float, so that one document shows at a time. | Customize the workspace |
| Workspace | Switches to the Essentials, Essentials Classic, Automation, Layout, Painting, Printing and Proofing, Tracing, Typography, Web or Touch workspace, or to one you saved. | Customize the workspace |
| Workspace → Reset Essentials | Puts the current workspace back the way it was saved. The item names the current workspace. | Customize the workspace |
| Workspace → New Workspace… | Saves the current panel layout as a workspace. | Customize the workspace |
| Workspace → Manage Workspaces… | Renames and deletes the workspaces you saved. | Customize the workspace |
| Control | Shows or hides the Control bar. | Customize the workspace |
| Help Bar | Shows or hides the strip at the bottom of the window that lists the current tool’s hints. | Customize the workspace |
| Contextual Task Bar | Shows or hides the bar of common commands that floats under the selection. | Customize the workspace |
| Tools | Shows or hides the Tools panel. | Customize the workspace |
| Toolbars | Holds Advanced, Double Column and Keep Tools Beside the Canvas, which change the Tools panel, then the toolbars you made, New Toolbar… and Manage Toolbars…. | Customize the workspace |
Control, Help Bar, Contextual Task Bar and Tools show a check mark while their bar or panel shows, and so does the current workspace in the Workspace submenu.
Below these items, the Window menu lists the panels in alphabetical order, from 3D and Materials to Variables. The Type submenu holds the type panels: Character, Character Styles, Glyphs, OpenType, Paragraph, Paragraph Styles and Tabs. Choose a panel to show it, or to hide it while it shows. Some panels have default shortcuts, such as F7 for Layers and Ctrl+T (Cmd+T on macOS) for Character.
The menu ends with Brush Libraries, Graphic Style Libraries, Swatch Libraries and Symbol Libraries. Each submenu opens the libraries that come with VectorCraft, a library file with Other Library…, and has a command that saves the document’s items as a library. Panels describes every panel and library submenu, with its shortcut.
Help menu
Section titled “Help menu”| Item | What it does | Windows and Linux | macOS | Guide |
|---|---|---|---|---|
| Join Our Discord | Opens the ArtCraft community Discord at discord.gg/artcraft in your browser. | None | None | VectorCraft |
| ArtCraft Website | Opens getartcraft.com. | None | None | VectorCraft |
| VectorCraft on getartcraft.com | Opens VectorCraft’s page on the ArtCraft website. | None | None | VectorCraft |
| VectorCraft on GitHub | Opens VectorCraft’s repository on GitHub, where you can report a problem. | None | None | Troubleshooting |
| Search Commands… | Finds a command or tool by name and runs it. | Ctrl+Shift+/ | Cmd+Shift+/ | Automate VectorCraft |
| VectorCraft Help… | Shows F1 as its shortcut, but the item is grayed out in VectorCraft 0.24.1 and you cannot choose it. | F1 | F1 | None |
| Safe Mode… | Shows whether VectorCraft is in Safe Mode and lists the disabled plug-ins, each with Enable on Re-launch. | None | None | Install and manage plug-ins |
| Check for Updates… | Checks for a newer version of VectorCraft. | None | None | Install and update |
| About VectorCraft | Shows the version number, the community links, the licenses, the contributors and the models. | None | None | Install and update |
On macOS, About VectorCraft is in the VectorCraft menu instead of the Help menu. The other Help items stay in the Help menu.