
Prepare artwork for CMYK printing
This page takes artwork drawn in RGB through the checks and conversions it needs, in order, before it goes to a printing press that uses cyan, magenta, yellow and black (CMYK) inks.
Check the CMYK working space
Section titled “Check the CMYK working space”VectorCraft converts colors to CMYK through the CMYK working space in the color settings. Set it to the profile your print shop uses before you check or convert any colors.
- Choose Edit → Color Settings… (Ctrl+Shift+K, or Cmd+Shift+K on macOS). The Separations Preview panel opens at its Color Settings section.
- Under CMYK, pick the working space. The default is VectorCraft Generic CMYK (SWOP-like).
- If your print shop sent an ICC profile, press Load Profile… and choose the
.iccor.icmfile. The file can be at most 32 MB. VectorCraft keeps a copy and lists the profile under CMYK each time it starts. Pick it there. - Check Intent and Use Black Point Compensation. The defaults are Relative Colorimetric and on.
The color settings apply to every open document. For the full list of settings and profiles, see Choose color settings and profiles.
Find colors the press cannot print
Section titled “Find colors the press cannot print”Some bright RGB colors, such as saturated violets and cyans, are outside the range of colors that CMYK inks can print. That range is the CMYK gamut. Gamut Check finds these colors while the document is still in RGB. Run it before you switch the document to CMYK.
- Select the objects to check, or select nothing to check the whole document.
- In the Color Settings section of the Separations Preview panel, press Gamut Check.
- Read the result in the status bar: “All colors are within the CMYK gamut”, or the number of colors that are out of the CMYK gamut. Each distinct color counts once, however many objects use it.
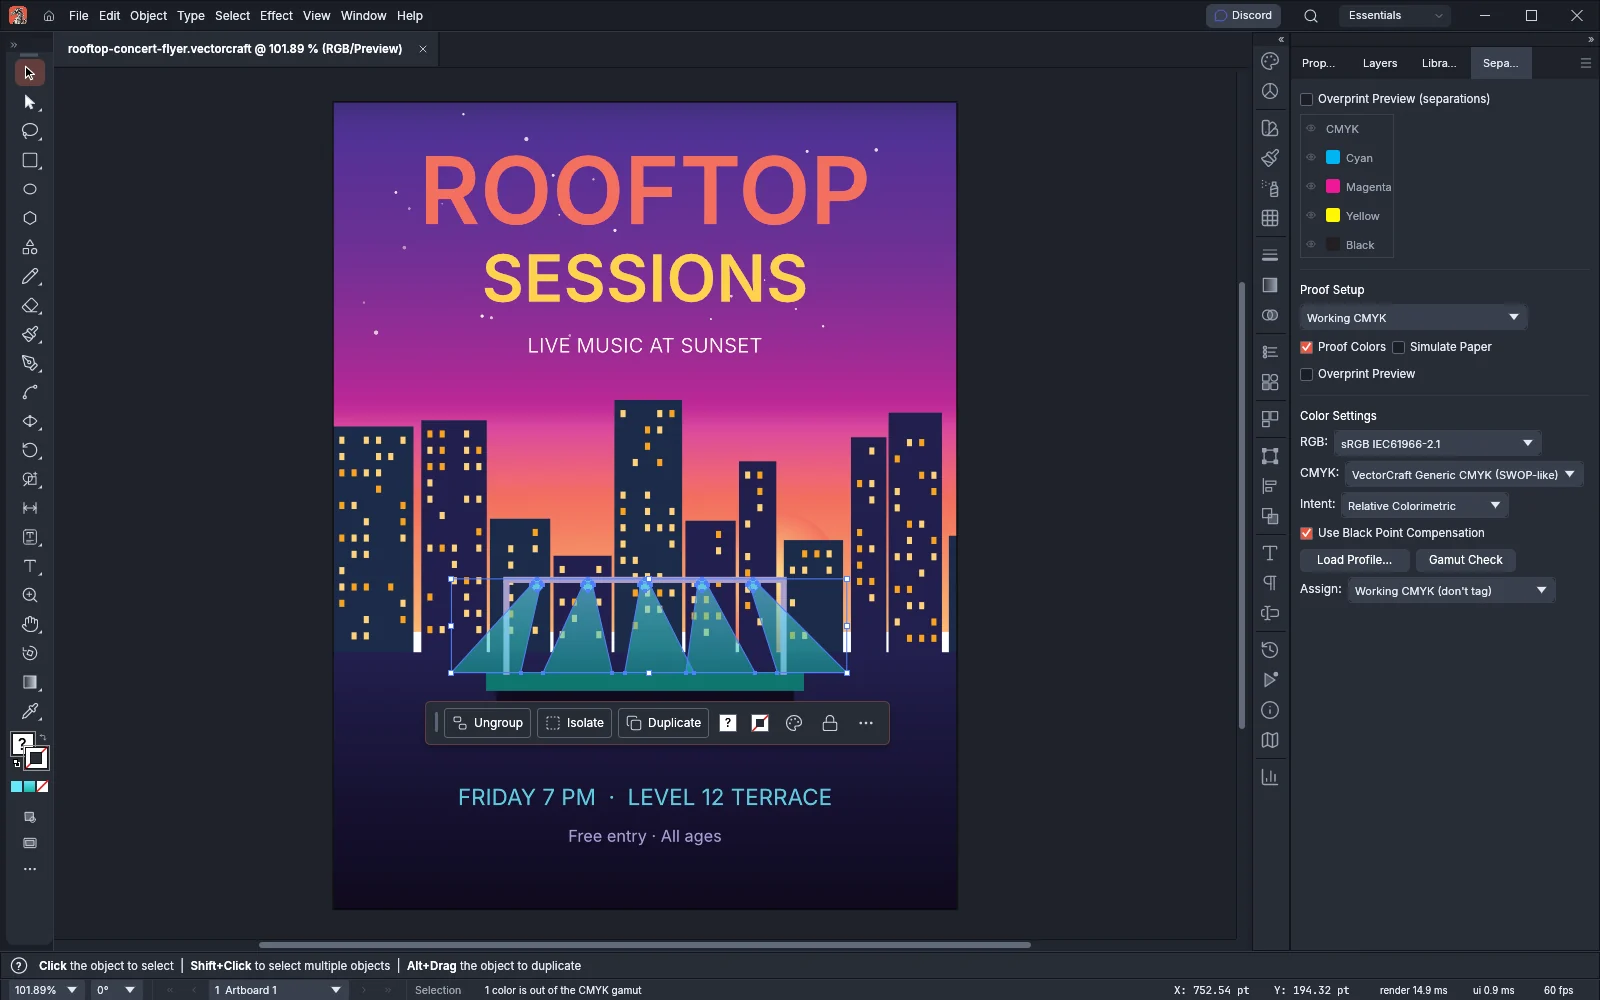
To bring a color into the gamut, change it to a less saturated color with the Color panel. If you leave it, the color changes to a printable color when the document switches to CMYK, and it can look duller. The proof in the next section shows how much.
After the switch to CMYK, every process color is a CMYK or gray color, and Gamut Check does not report any of them. Spot colors defined in Lab do not convert, so Gamut Check can still report them as out of the CMYK gamut.
Preview the press colors on screen
Section titled “Preview the press colors on screen”A soft proof shows on screen how the colors will look when printed with the CMYK working space. The document’s colors do not change.
- Choose View → Proof Setup → Working CMYK. Choosing it also turns on View → Proof Colors.
- Compare the proof with the original colors. To turn the proof off and on, choose View → Proof Colors.
The proof works in RGB and in CMYK documents. For the other proof targets and Simulate Paper, see Preview colors for another device.
Switch the document to CMYK
Section titled “Switch the document to CMYK”- Save a copy of the RGB document if you want to keep the RGB colors, for example for a screen version.
- Choose File → Document Color Mode → CMYK Color. The checked item is the document’s current mode.
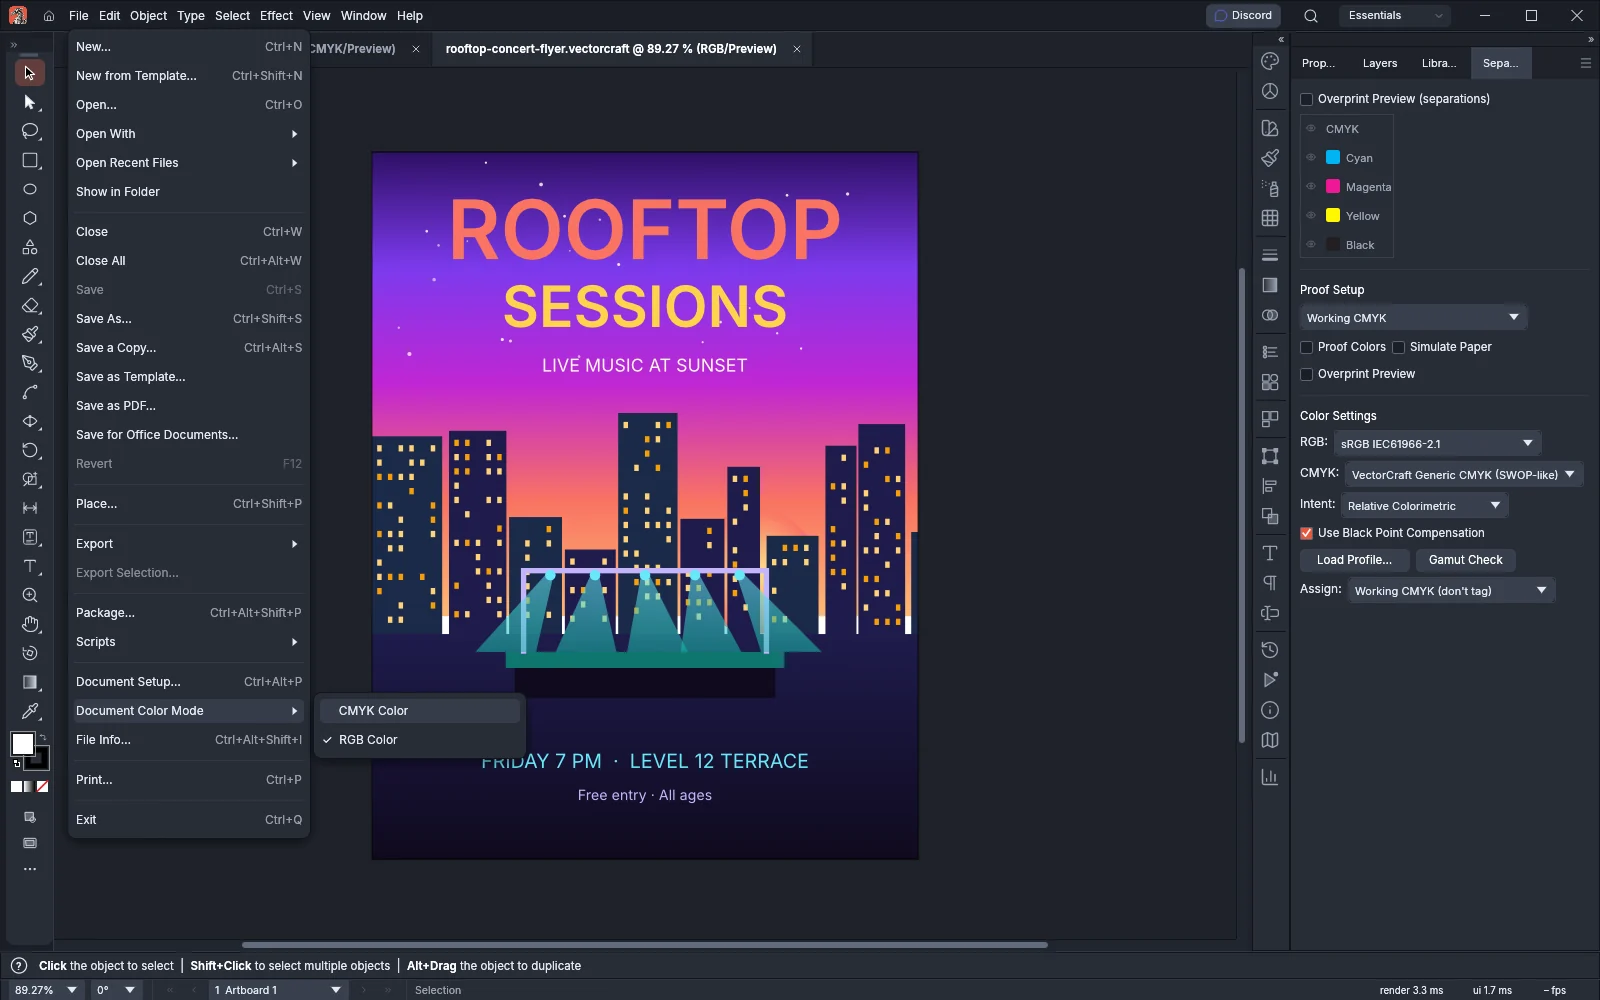
VectorCraft converts these colors through the color settings, all in one undo step named Document Color Mode:
- the colors of the artwork, including opacity masks, effect colors and the colors of graphs;
- symbols, graph designs and pattern tiles;
- graphic styles, brushes and swatches;
- the fill and stroke that new objects get.
Swatches stay linked to the objects that use them, and a tint of a global swatch stays a tint of the converted swatch. Colors set in the Gray model stay gray and print on the black plate only. The document tab changes from (RGB/Preview) to (CMYK/Preview).
To go back to the RGB values, choose Edit → Undo right after the switch. Switching back with File → Document Color Mode → RGB Color converts the CMYK colors again and does not restore the original RGB values.
For more on the color mode of new documents, see Choose the color mode.
Convert single objects or embedded images
Section titled “Convert single objects or embedded images”To convert only some objects, for example art pasted from an RGB document into a CMYK one, use Convert to CMYK.
- Select the objects. A selected group converts everything inside it.
- Choose Edit → Edit Colors → Convert to CMYK. The command is dimmed when nothing is selected.
The command converts fills, strokes, gradient stops, type, gradient meshes and pattern fills. An embedded image is replaced with a converted copy. Linked images and colorized images keep their RGB pixels; to convert a linked image, embed it first with Embed Image(s) in the Links panel menu (see Work with placed images). A pattern fill gets a new pattern swatch while the original pattern stays. A color linked to a global swatch is unlinked when it changes.
For the other commands in Edit → Edit Colors, see Change the colors of finished art.
Limit total ink and fix overprints
Section titled “Limit total ink and fix overprints”The total ink of a color is the sum of its cyan, magenta, yellow and black percentages. Print shops give a maximum total ink for their press and paper. Print Ink Fixes lowers every color above that limit and fixes the overprint settings of white and black, in one undo step named Print Ink Fixes.
- Make sure the document is in CMYK Color. In an RGB document the command does not run and reports that it works on CMYK documents only.
- Select the objects to fix, or select nothing to fix the whole document.
- Choose Object → Plug-ins → Color Effects → Print Ink Fixes…. The Print Ink Fixes… button in the Inks section of the Color Effects panel opens the same dialog.
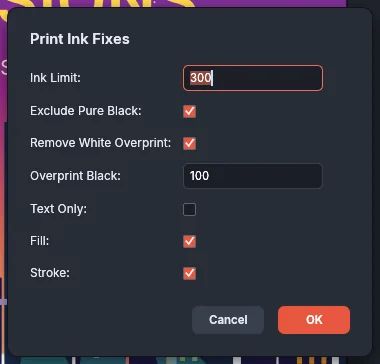
- Set Ink Limit to the total ink your print shop allows. The dialog starts at 300, and the highest value is 400.
- Check the other options from the following table, then press OK.
| Option | What it does | Value when the dialog opens |
|---|---|---|
| Ink Limit | Scales down each fill and stroke color whose total ink is above this percentage. Spot colors and Registration keep their ink, and embedded images and pattern fills are not changed. 0 leaves the total ink as it is. | 300 |
| Exclude Pure Black | Leaves colors that use black ink only out of the ink limit. | On |
| Remove White Overprint | Turns overprint off for white fills and strokes. | On |
| Overprint Black | Sets black fills and strokes with at least this percentage of black to overprint. 0 leaves overprint as it is. | 100 |
| Text Only | Sets black overprint on type only. | Off |
| Fill and Stroke | Choose whether the fixes change fills, strokes or both. | On |
For the full description of the plug-in, see Print Ink Fixes.
Set black to overprint
Section titled “Set black to overprint”Black type and thin black lines that overprint print on top of the colors under them, so a slight shift of the plates leaves no white gap around them. Print Ink Fixes sets this with Overprint Black. To set black overprint on its own and choose which blacks count:
- Select the art.
- Choose Edit → Edit Colors → Overprint Black….
- Leave Percentage at 100 to change only solid black, or lower it to include dark grays. Turn on Include Blacks with CMY to include rich blacks that also contain cyan, magenta or yellow.
- Press OK.
To see the result, choose View → Overprint Preview (Ctrl+Alt+Shift+Y, or Cmd+Option+Shift+Y on macOS). For the full option table, see Overprint black.
Before you print, check each ink plate in the Separations Preview panel. See Preview each ink with Separations Preview.