
Set up artboards for video
This page shows how to start a document at a video frame size, show the safe areas and center marks on its artboards, measure the artboard in video pixels, and export the frame for a video editor.
Start a video document
Section titled “Start a video document”- Choose File → New… (Ctrl+N, or Cmd+N on macOS).
- Click the Film & Video tab.
- Click the preset card for your frame size. The table after these steps lists each preset and its size.
- Under PRESET DETAILS, type a Document Name.
- Leave the orientation on landscape and Artboards on 1, or add an artboard for each shot or card you plan to make.
- Click Create.
The Film & Video tab has six presets:
| Preset | Size in pixels | Use it for |
|---|---|---|
| HDTV 1080p | 1920 × 1080 | Full HD video |
| HDTV 720p | 1280 × 720 | HD video |
| 4K UHD | 3840 × 2160 | Ultra HD video |
| 8K UHD | 7680 × 4320 | 8K video |
| 2K Cinema | 2048 × 1080 | 2K digital cinema |
| 4K Cinema | 4096 × 2160 | 4K digital cinema |
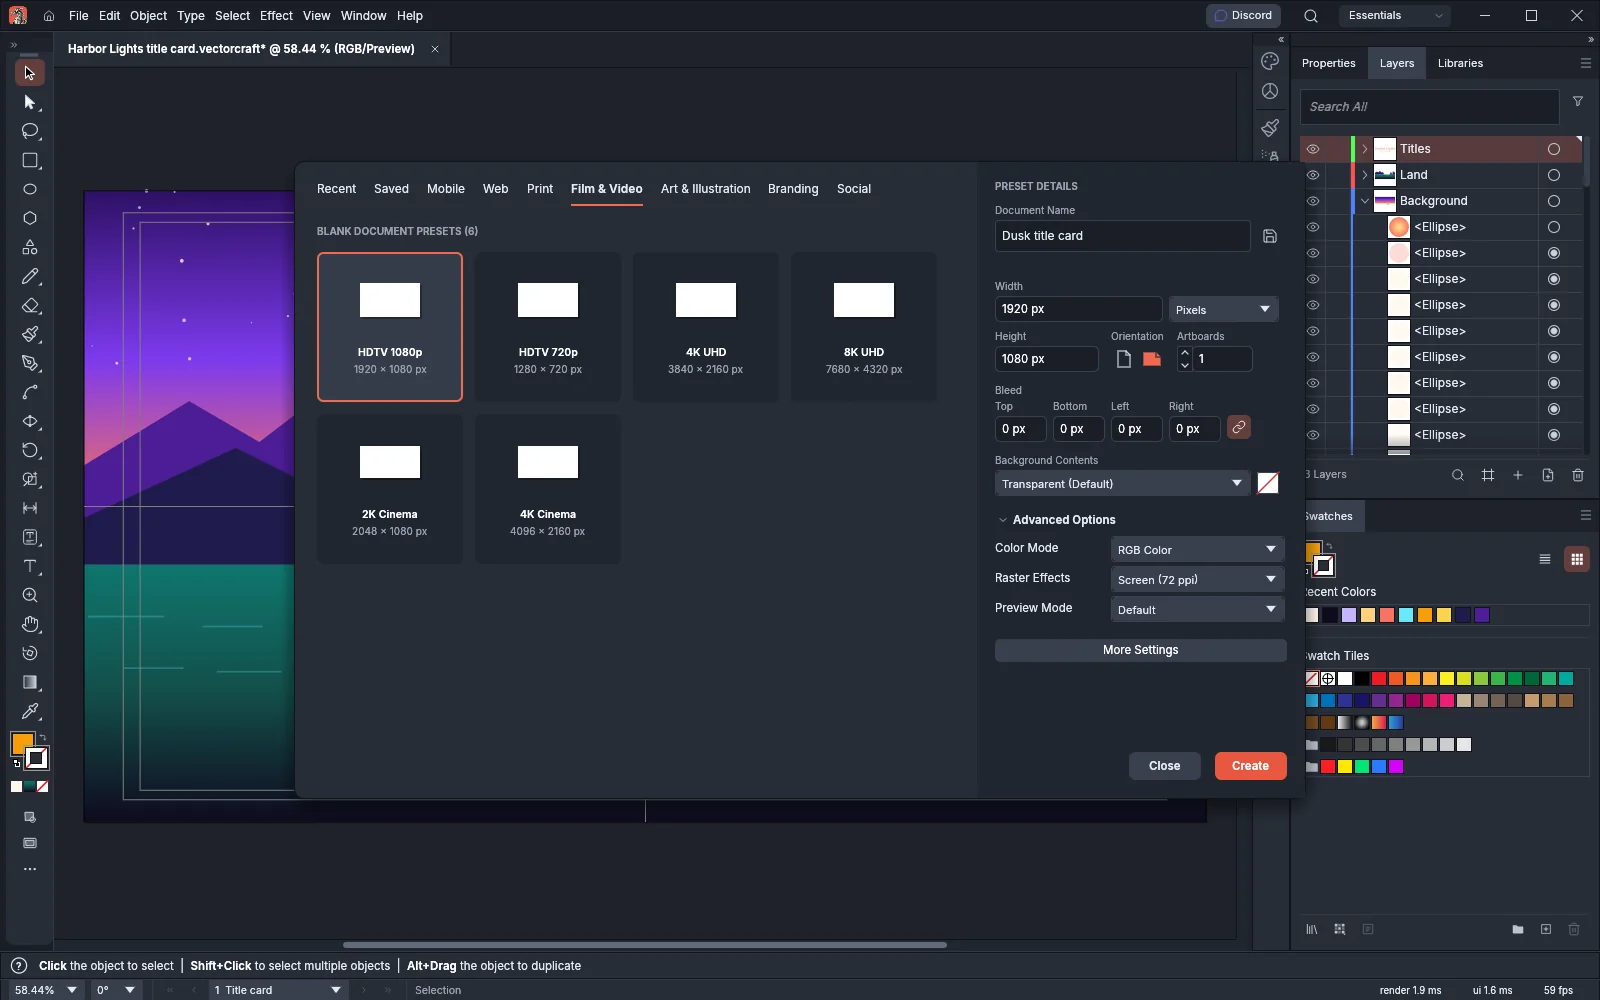
The Film & Video presets use pixels as the unit and set Advanced Options to RGB Color and Screen (72 ppi) for raster effects. At 72 ppi, one pixel of the document is one pixel of the exported frame. If you change the units in PRESET DETAILS, the preset cards on the tab show their sizes in those units.
Show the safe areas and center marks
Section titled “Show the safe areas and center marks”Each artboard has its own marks and safe areas, so set them on every artboard that needs them.
- Choose the Artboard tool (Shift+O) and click the artboard.
- Double-click the Artboard tool in the Tools panel to open Artboard Options. Set artboard options lists the other ways to open the dialog.
- Turn on Show Center Mark, Show Cross Hairs and Show Video Safe Areas, as the following table describes.
- Click OK. The marks appear on the canvas when the dialog closes.
- Keep titles and other text inside the inner rectangle, the title-safe area. Keep the rest of the important action inside the outer rectangle, the action-safe area.
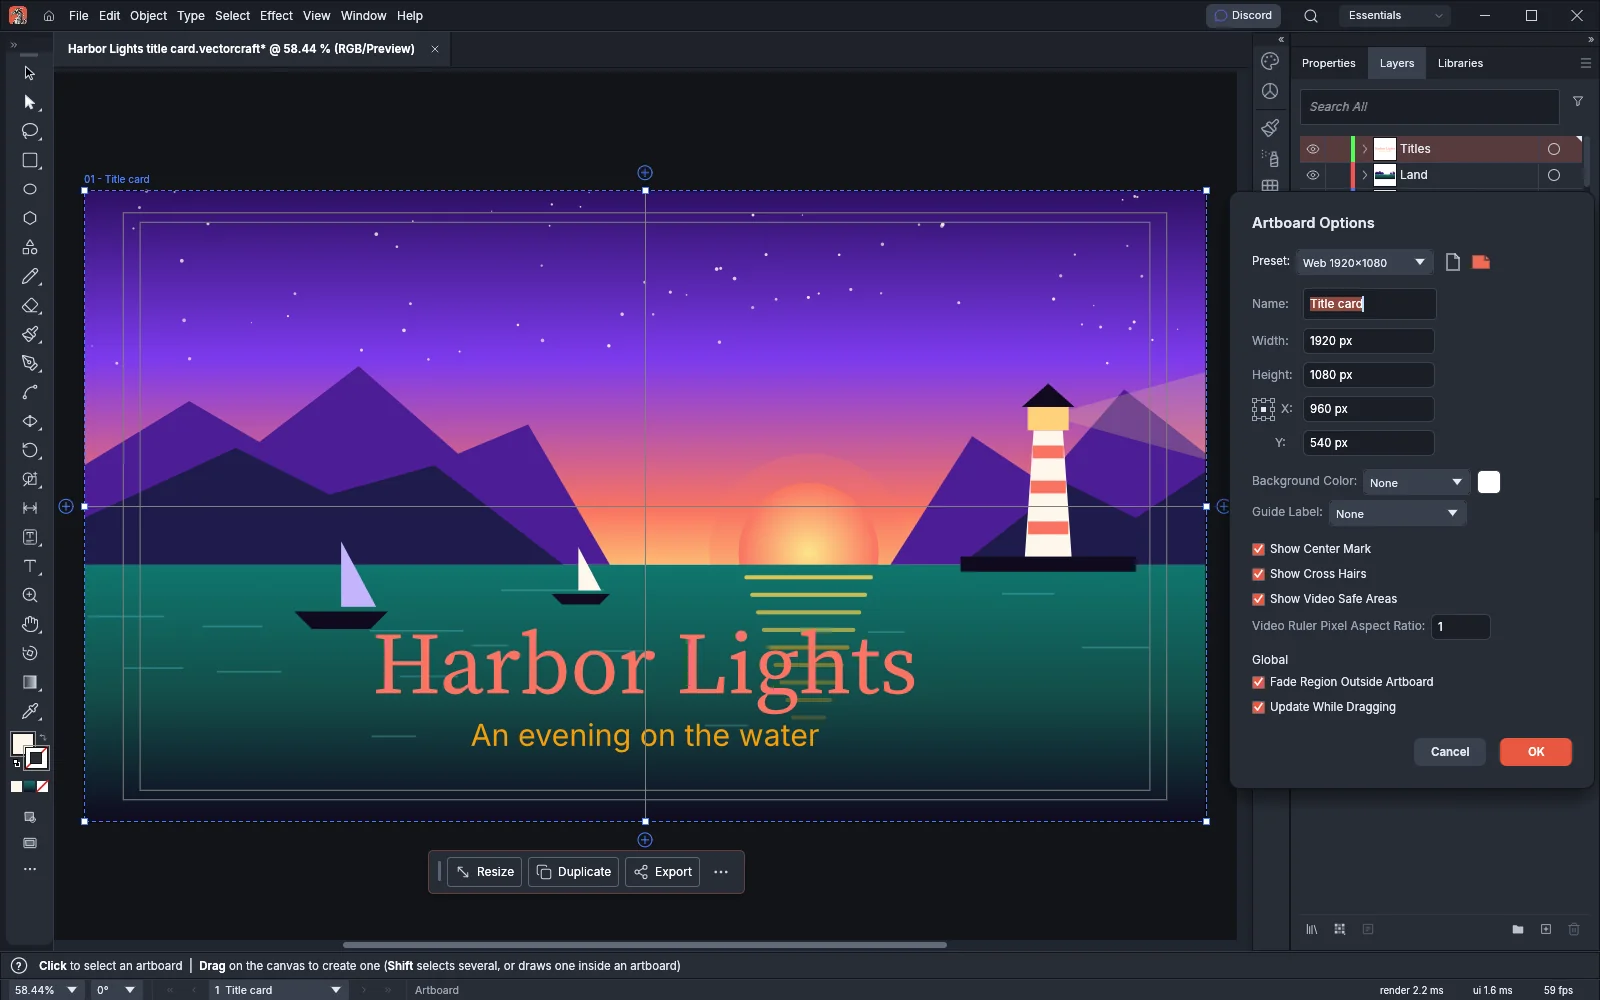
| Option | What it shows | Default |
|---|---|---|
| Show Center Mark | A small cross at the center of the artboard. It keeps the same size on screen at any zoom | Off |
| Show Cross Hairs | A line from the middle of each side through the center to the opposite side | Off |
| Show Video Safe Areas | Two rectangles. The action-safe area lies 3.5% of the width in from the left and right edges and 3.5% of the height in from the top and bottom. The title-safe area lies 5% in on the same terms | Off |
| Video Ruler Pixel Aspect Ratio | The width of one video pixel compared with its height, which the video rulers count in. The range is 0.1 to 10 | 1 |
On a 1920 × 1080 artboard, the action-safe area starts 67.2 pixels in from the left and right edges and 37.8 pixels in from the top and bottom. The title-safe area starts 96 pixels in from the left and right and 54 pixels in from the top and bottom.
Measure in video pixels
Section titled “Measure in video pixels”View → Rulers → Show Video Rulers sets the rulers to count the active artboard in video pixels, starting at 0 at its top-left corner. It also shows the rulers if they are hidden.
- Click the artboard with the Artboard tool to make it the active artboard. The video rulers count from the active artboard’s top-left corner.
- In Artboard Options, set Video Ruler Pixel Aspect Ratio to the pixel shape of the video format. Square pixels, which HD, Ultra HD and cinema frames use, have a ratio of 1. The field sets a value below 0.1 to 0.1 and a value above 10 to 10.
- Choose View → Rulers → Show Video Rulers. The menu item now reads Hide Video Rulers.
- Drag art with the Selection tool. With View → Smart Guides on (Ctrl+U, or Cmd+U on macOS), a label next to the pointer shows how far the art has moved, and the rulers show where it sits on the frame.
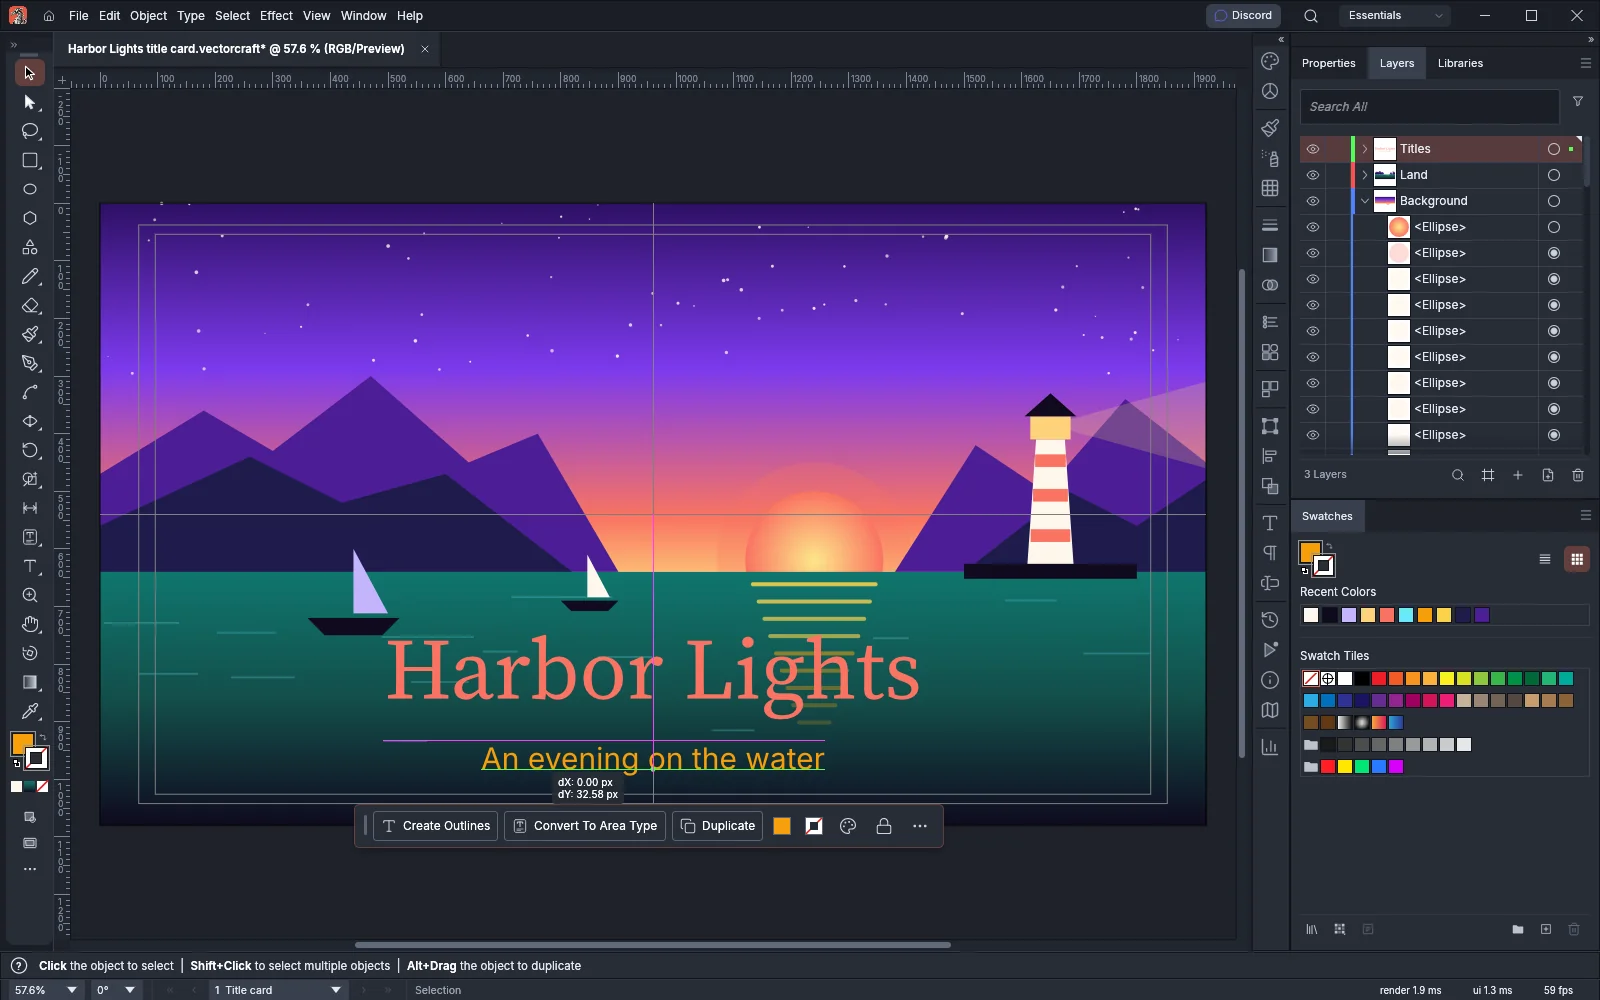
Each video pixel is as many points wide as the ratio and one point tall. With a ratio of 0.5, a 400-point-wide artboard reads 800 at its right edge. With a ratio of 2, the same artboard reads 200.
To go back to the ordinary rulers, choose View → Rulers → Hide Video Rulers. The rulers stay on and count from the ruler origin again. View → Rulers → Hide Rulers (Ctrl+R, or Cmd+R on macOS) hides them.
Check what exports
Section titled “Check what exports”The center mark, cross hairs and safe areas show on the canvas only and are not included in exports or prints, so you can keep them on while you work.
- Choose File → Export → Export As….
- Pick PNG as the Format and turn on Use Artboards.
- Click Export… and choose a file name. PNG Options opens.
- Leave Resolution at Screen (72 ppi). The Size row shows the frame size, for example 1920 × 1080 px.
- Set Background Color to Transparent for a title that sits over video, or to a color for a full frame.
- Click Export.
Export for screens and the web describes every format and its options.