Set right-to-left and Indic type
This guide shows how to set Arabic, Hebrew and Indic type with the Indic options of the Paragraph and Character panels: the direction of paragraphs and characters, the numerals that digits are drawn in, and kashidas in justified Arabic text.
Turn on the Indic options
Section titled “Turn on the Indic options”The commands for right-to-left and Indic type are hidden until you turn them on.
- On Windows and Linux, choose Edit → Preferences… (Ctrl+K). On macOS, choose VectorCraft → Settings → Type….
- On the Type page, under Language Options, turn on Show Indic Options. The option is off by default.
- Open the Paragraph panel with Window → Type → Paragraph (Ctrl+Alt+T, or Cmd+Option+T on macOS).
- Open the Character panel with Window → Type → Character (Ctrl+T, or Cmd+T on macOS).
The option adds these commands:
| Where | What appears |
|---|---|
| Paragraph panel | The Left-to-Right Paragraph Direction and Right-to-Left Paragraph Direction buttons after the alignment buttons, and the Insert Kashidas menu below Hyphenate |
| Character panel menu | Digits, Character Direction and Kashidas |
If you do not see the Insert Kashidas menu, choose Show Options in the Paragraph panel menu.
To set type in Arabic script, choose a font that has Arabic letters, such as Noto Sans Arabic. The Script filter of the font menu has no Arabic choice, and it lists Arabic families under All Scripts and Latin. Choose fonts describes the filters. Hindi, Marathi, Gujarati, Bengali, Punjabi, Tamil, Telugu, Kannada, Malayalam, Odia and Assamese text hyphenates with its own patterns when you set its language and turn on Hyphenate in the Paragraph panel. Hyphenate is off by default. Set the language of type describes how to set the language.
Set the direction of a paragraph
Section titled “Set the direction of a paragraph”The paragraph direction sets the side that each line starts from and the order of the words in mixed text.
- Select the type object, or click in the paragraph with the Type tool.
- In the Paragraph panel, click Right-to-Left Paragraph Direction or Left-to-Right Paragraph Direction.
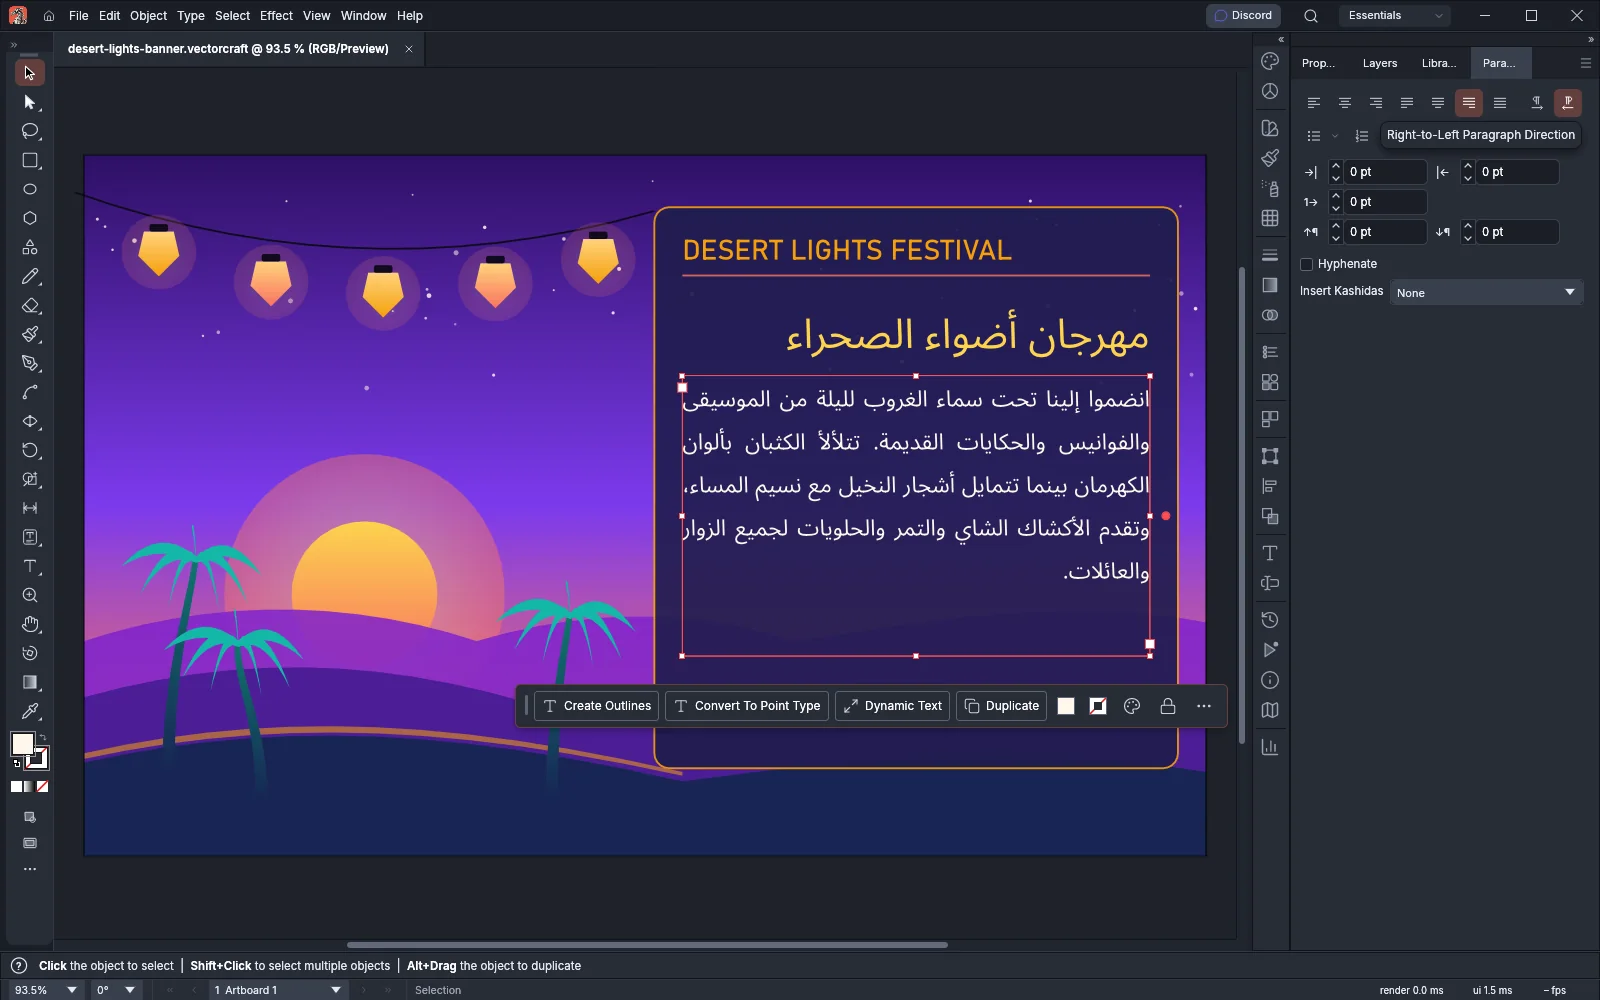
Until you click a button, each paragraph takes its direction from its first letter: a paragraph that starts with a Hebrew or Arabic letter runs right to left, and any other paragraph runs left to right. Digits and punctuation at the start of a paragraph do not decide its direction. The button for the direction that the paragraphs run in is on. When the selected paragraphs run in different directions, neither button is on.
New type uses the Auto alignment, which aligns each paragraph to the side its lines start from: left for left-to-right paragraphs and right for right-to-left paragraphs. With Auto, the Paragraph panel shows Align left or Align right on. When you click one of the seven alignment buttons, the paragraph keeps that alignment whatever its direction. For justified right-to-left text, click Justify with last line aligned right.
Reset Panel in the Paragraph panel menu sets the paragraphs back to the Auto alignment and to the direction of their first letter, along with the panel’s other defaults. Set paragraph options describes the rest of the Paragraph panel.
Set the direction of characters
Section titled “Set the direction of characters”Character Direction sets selected characters to run left to right or right to left inside their paragraph, for example a part number with dashes and slashes inside an Arabic sentence.
- With the Type tool, select the characters, or select the type object to set all of its text.
- Open the Character panel menu and choose Character Direction, then choose a direction.
| Character Direction | What it does |
|---|---|
| Default | The characters run in the direction that their letters and the paragraph give them. This is the default. |
| Left to Right | The characters run left to right, as one block in the paragraph. |
| Right to Left | The characters run right to left, as one block in the paragraph. |
The direction of the paragraph does not change. When the selected characters have different directions, no item is checked. The items are unavailable while the Type tool’s caret is in the text with no characters selected. Reset Panel in the Character panel menu sets the characters back to Default.
Choose the digits
Section titled “Choose the digits”Digits sets the numerals that VectorCraft draws for the digits of the selected characters. The text keeps the digits you typed, and only the drawn numerals change.
- With the Type tool, select the characters, or select the type object to set all of its text.
- Open the Character panel menu and choose Digits, then choose a numeral system. The current one has a check mark.
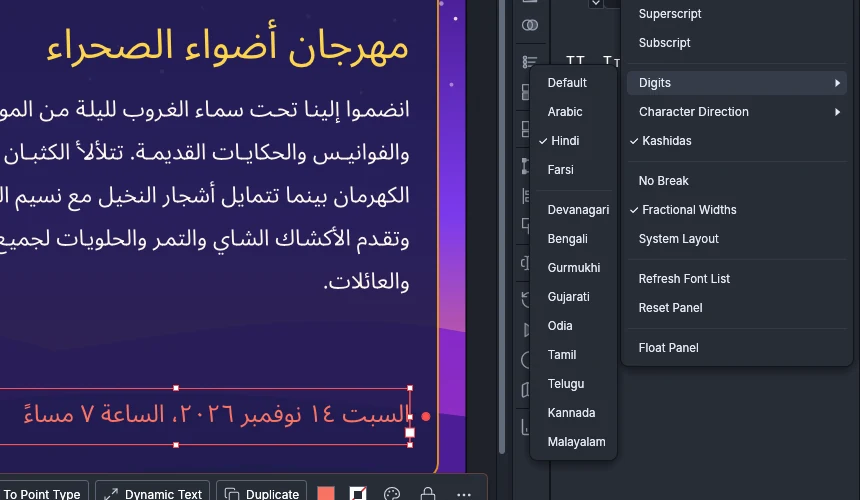
| Digits | Numerals drawn |
|---|---|
| Default | Each digit as you typed it. This is the default. |
| Arabic | The Western digits 0 to 9 |
| Hindi | The Arabic-Indic digits ٠ to ٩, used in Arabic text |
| Farsi | The Eastern Arabic-Indic digits ۰ to ۹, used in Persian and Urdu text |
| Devanagari | ० to ९, used in Hindi, Marathi, Nepali and Sanskrit text |
| Bengali | ০ to ৯, used in Bengali and Assamese text |
| Gurmukhi | ੦ to ੯, used in Punjabi text |
| Gujarati | ૦ to ૯ |
| Odia | ୦ to ୯ |
| Tamil | ௦ to ௯ |
| Telugu | ౦ to ౯ |
| Kannada | ೦ to ೯ |
| Malayalam | ൦ to ൯ |
Digits changes the Western digits 0 to 9, the Arabic-Indic digits and the Eastern Arabic-Indic digits that you typed. It does not change digits typed in an Indic script. When the selected characters use different numeral systems, no item is checked. Reset Panel in the Character panel menu sets the characters back to Default.
Justify Arabic text with kashidas
Section titled “Justify Arabic text with kashidas”A kashida lengthens the stroke that joins two Arabic letters. When kashidas are on, justified lines lengthen their Arabic words before they widen the spaces between words.
- Select the type object, or click in the paragraph with the Type tool. Kashidas work in area type.
- In the Paragraph panel, click one of the justify buttons, for example Justify with last line aligned right.
- Choose a length from the Insert Kashidas menu.
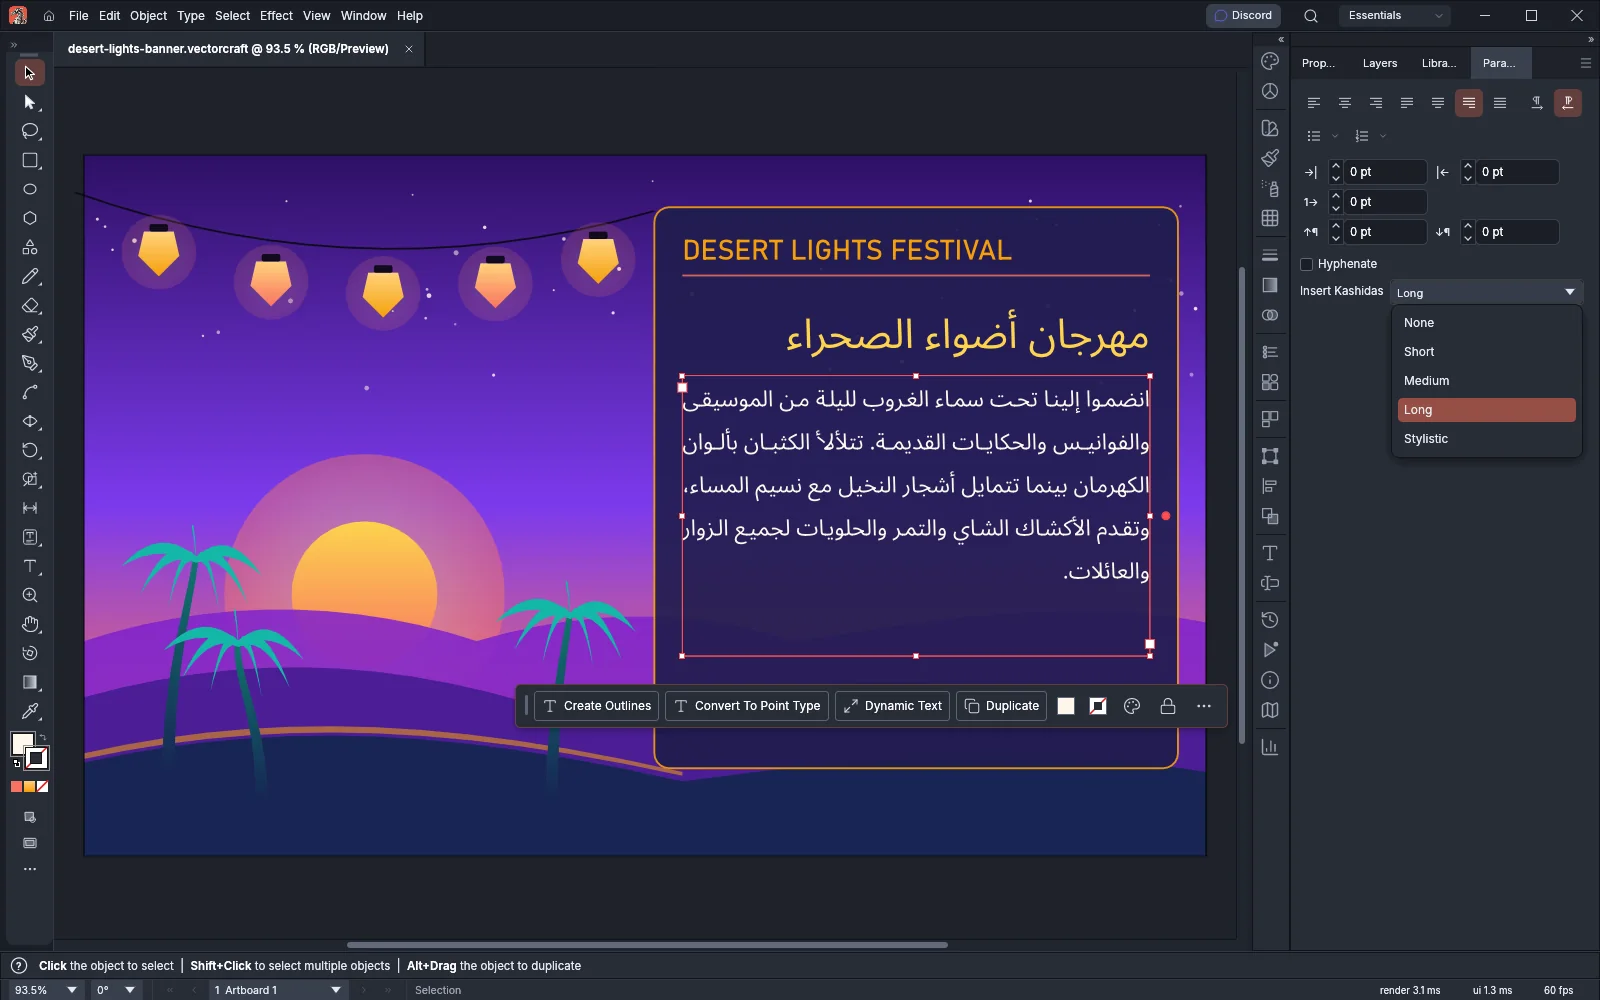
| Insert Kashidas | What it does |
|---|---|
| None | Justified lines widen only the spaces between words. This is the default. |
| Short | Each kashida is at most a quarter of an em long. |
| Medium | Each kashida is at most half an em long. |
| Long | Each kashida is at most an em long. |
| Stylistic | Each kashida is a row of whole kashida characters as the font draws them, at most an em long. |
VectorCraft puts at most one kashida in each Arabic word, between its last two joined letters, and shares the room on the line equally among the words. The spaces between words take the room that the kashidas leave. A word whose letters do not join gets no kashida, and neither does a word set in a font that has no kashida character. With Stylistic, a word whose share is shorter than one kashida character gets none. Kashidas apply to the justified lines of horizontal type and not to vertical type.
To keep kashidas out of some words, select their characters with the Type tool, open the Character panel menu and choose Kashidas to remove its check mark. Kashidas is on by default. A kashida goes between two joined letters only when both letters have Kashidas on. When the selected characters have different settings, the item has no check mark, and choosing it turns Kashidas on for all of them.
Fine-tune justification and hyphenation describes the word and letter spacing that justified lines use.